One of the tasks that require extensive time and attention from the operations team is the process of assigning licenses when moving users to Microsoft’s cloud — especially because there are a lot of licenses and services involved. While I have seen some companies offering this as managed services, Microsoft Azure offers a great feature that allows any company to automate Azure licenses based on Active Directory groups. If that is your case, you can save some money by just enabling the feature. In this article, we are going to cover a couple of ways to assign permissions manually, and then we are going through the few steps required to do it using an automated way.
Managing Azure licenses manually
There are a couple of ways to assign Azure licenses in Azure and Office 365 by using web console, mobile applications, and command line interfaces.
An easy way is using Microsoft Azure, so let’s do it that way. Logged on the Azure Portal, click on Azure Active Directory, click on Users and Groups, click All users and a list of all users will be displayed on the right side. Click on the desired user.
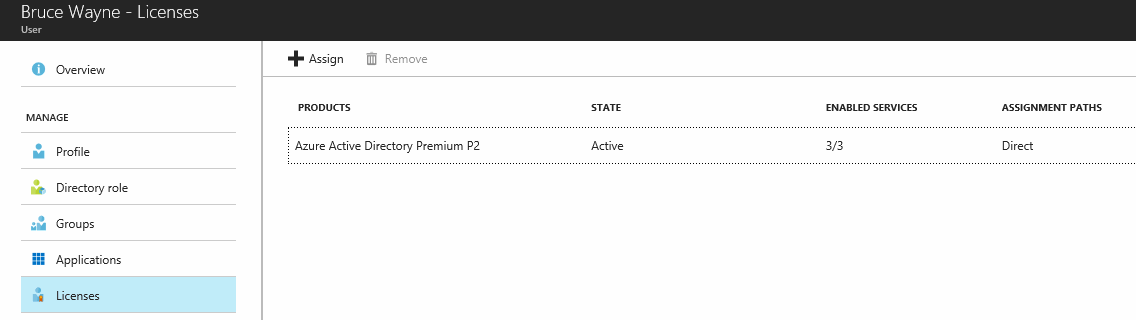
In the new blade, all items on the left will be related to the user that we selected. We see the name of the user on the top-left corner of the current blade. Click on Licenses.
A list of all licenses assigned to this user will be listed. A license can have one or more services within it. In the current user’s case, all services (three out of three) are enabled.
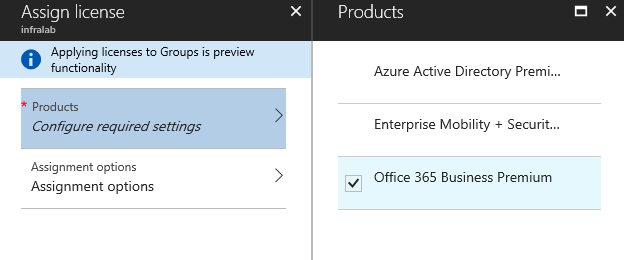
If we want to add a new license to the user using Azure Portal, click on + Assign. You will see a new blade requiring two pieces of information: Products and Assignment Options will be displayed. In the Products blade, a list of all products assigned to your subscription (purchased or trial) will be listed. Select one or more and click Select.
In the License Options blade: Enable all services that will be part of this assignment and click on Select and Save.
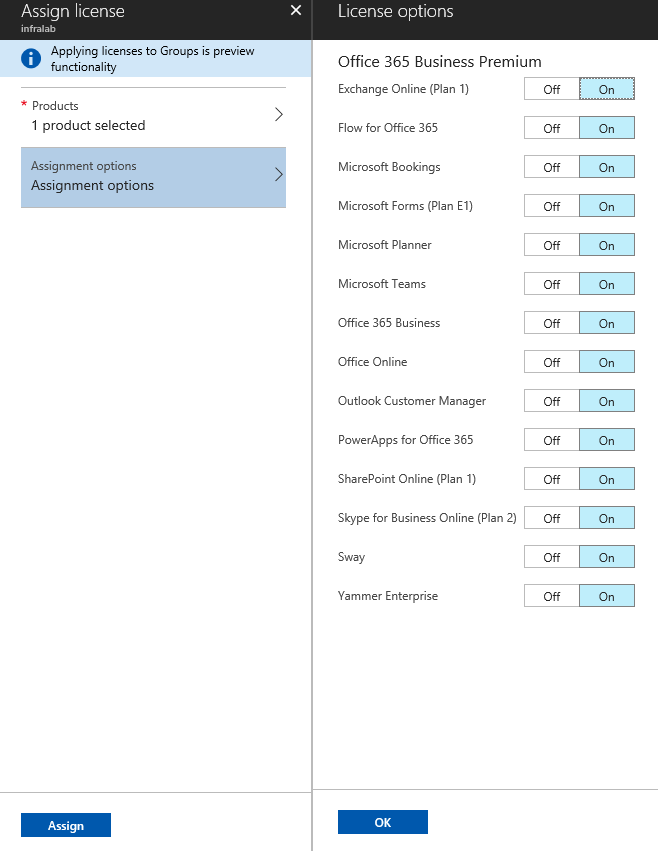
If we want to know which services are part of an already assigned license, just double-click on it from the list. A new blade listing all services for that specific user will be listed. We can modify services by using On and Off buttons at any time. To save the information for that specific user, click on Save.

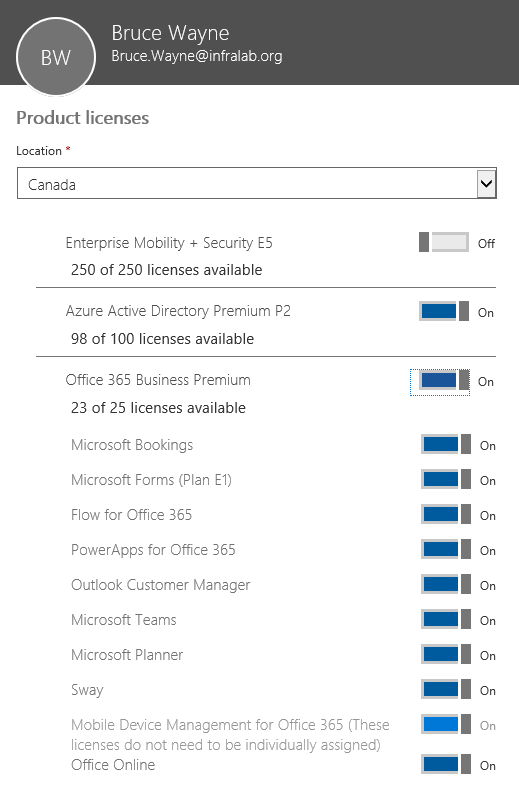
If you have Office 365 as part of your subscription, the license can be managed from the Office 365 Admin Center as well. Click on Users, Active Users, double-click on the desired user, and then click on Edit located on the Product licenses section.
Use the on/off switches to manage the licenses, as depicted in the image below. All services underneath any given License can also be managed the same way.
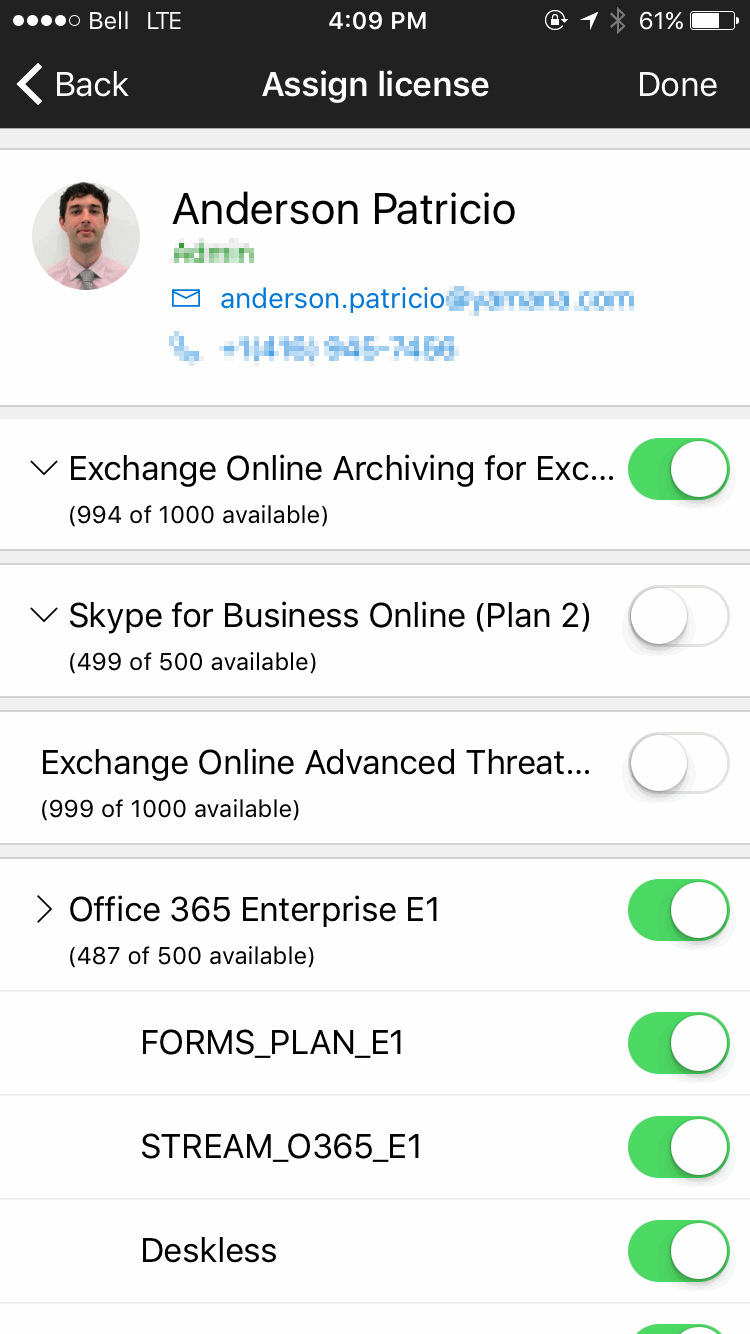
If you don’t feel like using a web or even a command line interface, Office 365 also allows mobile management, and we would like to point out that you can assign licenses on the fly, which is a great feature.
To assign licenses using the mobile app, download and authenticate on Office 365 Admin app. On the Home page, click on Users, select the user from the list, and then click on Assign License. In the new page, enable the license and services that you want for the user, and click Done when complete. If you change any license, you will see a dialog box informing the status of the change (successful or not).
Automating the license process
When we start planning a process automation, the first thing is to be consistent and create a bulletproof (or the closest that we can get) design for our new solution. It could be a simple solution like the topic of this article, or a full-blown service.
Our first goal is to create Active Directory groups to support the licensing — we need to make it easier on the operations team, where they should be able just to assign any given user to a group and our process will assign the licenses automatically.
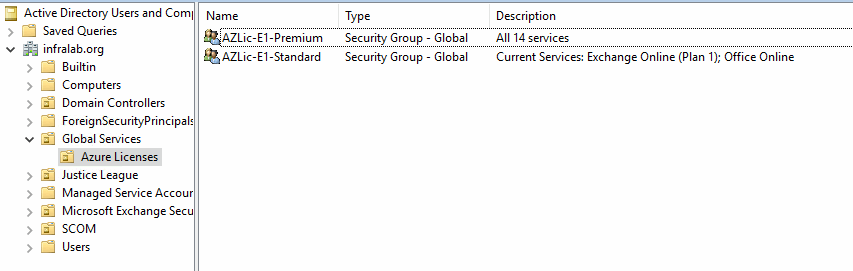
The initial step is to create a naming convention. In this article, we are going to create a prefix for all groups related to Azure AD license, and we will name it as AZLic. After that we will use a string to define the License Package (which could be E1, E3, ADPremium, EOP, ATP, and so forth), and the third portion of the name will be one of these initial options: Standard, Premium, or Basic. The goal of this last group is group together services of a specific license package.
Here are some examples of my naming convention logic. Please feel free to apply yours on your environment, and you are more than welcome to leave a comment with some ideas to share with the rest of the community.
- AZLic-E1-Standard: This group will assign just a few services for the E1 license. Let’s assume that we define that is just Exchange Online, Flow, and Planner as part of the Standard package
- AZLic-E1-Premium: This group will assign all services from the E1 License (around 14 services).
In the proposed naming convention, we can have a group for each License. In some companies that may be not a good idea, because they may want to group several licenses on a single group. For this kind of scenario, a simple group name, such as AZLic-Basic, could assign services from different Azure licenses to a group.
Our second step is to create the Active Directory structure and create the initial groups. We are going to create a root OU called Global Services and we will create a sub-OU called Azure Licenses. All groups related to this license will be stored in this location.
Note: If you are filtering OUs to synchronize with Azure AD, make sure that this new OU location is added to the synchronization process.
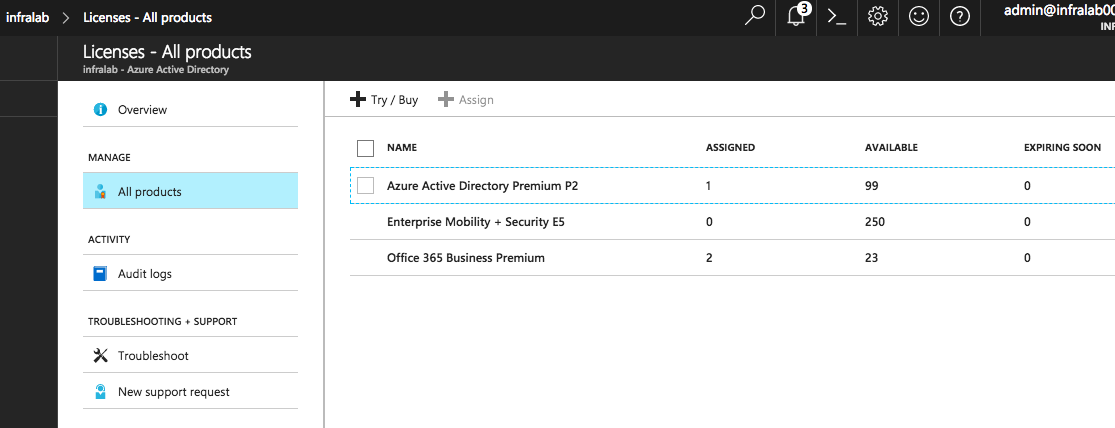
After the synchronization process takes place, we can go to the Azure Portal. Click on Azure Active Directory item on the left side. On the new blade, click on Licenses, and then click on All Products. A list containing all licenses available on the current subscription will be displayed. We have three columns that can help the administrator control the distribution: Assigned, Available, and Expiring soon.
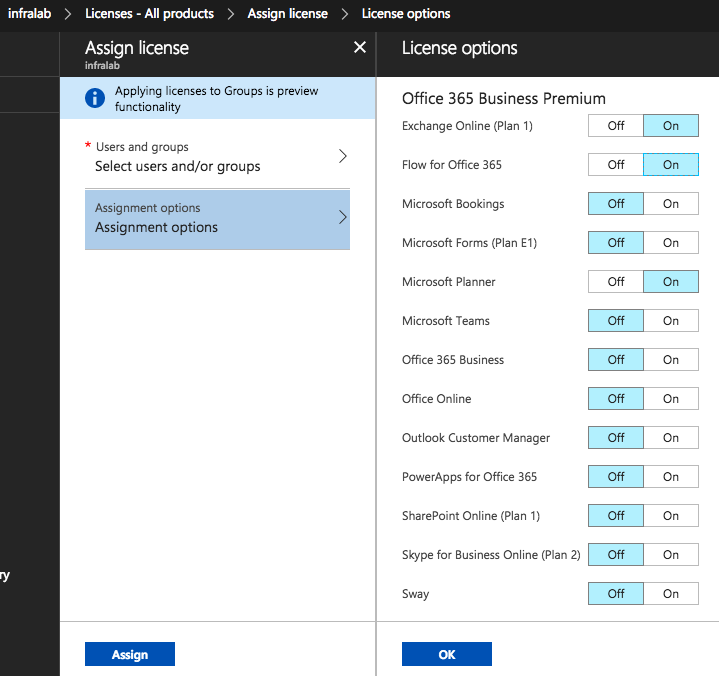
Let’s create the automatic assignment for our AZLic-E1-Standard group. Select the Office 365 Business Premium checkbox and click on Assign. In the new blade, select the group that by now is synchronized, and on Assignment options we will leave only the basic services that we defined previously (Exchange Online, Flow, and Planner). Click on Apply and wait a few minutes for the process to take place.
Go back to the License area at the Azure AD level. (There is a license at the user level, but that is not the one that we are looking for at this moment.) We can click on any License being listed, and we will have two options: Licensed Users, which will show all the users that have the current license assigned, and Assignment Paths, where we can see where the license is coming from.
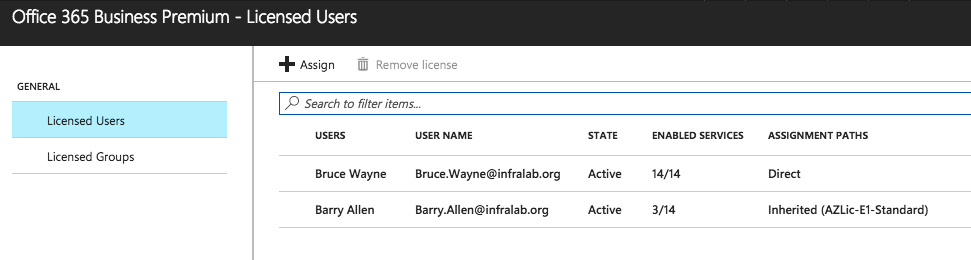
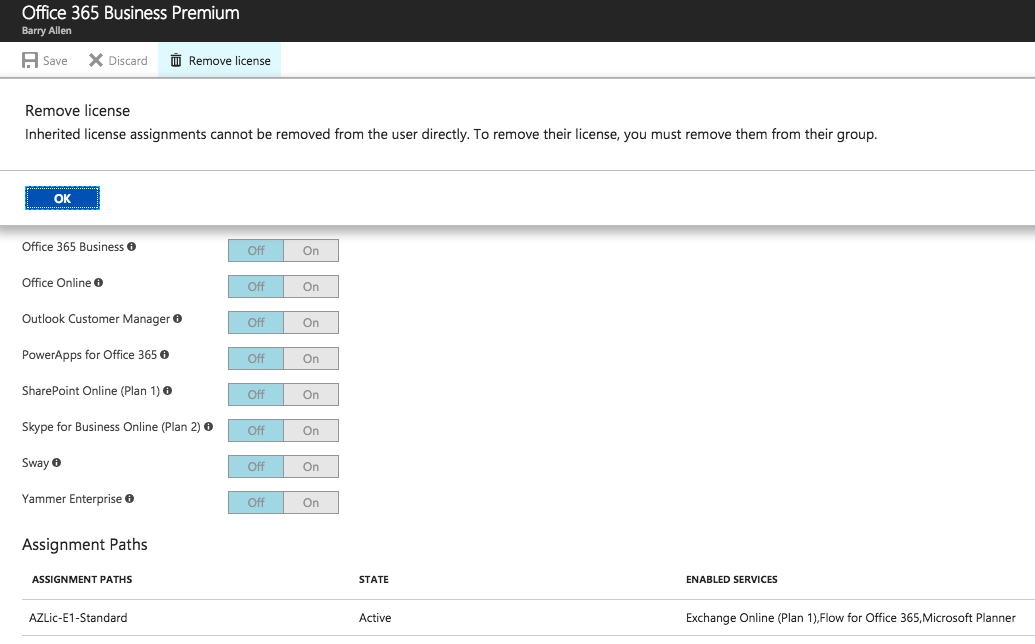
If you try to remove or manage a license at the user level that was assigned by a group, you won’t be able to. This makes the process consistent to manage larger numbers of users that should be relying on the group membership to receive the proper license assignment.
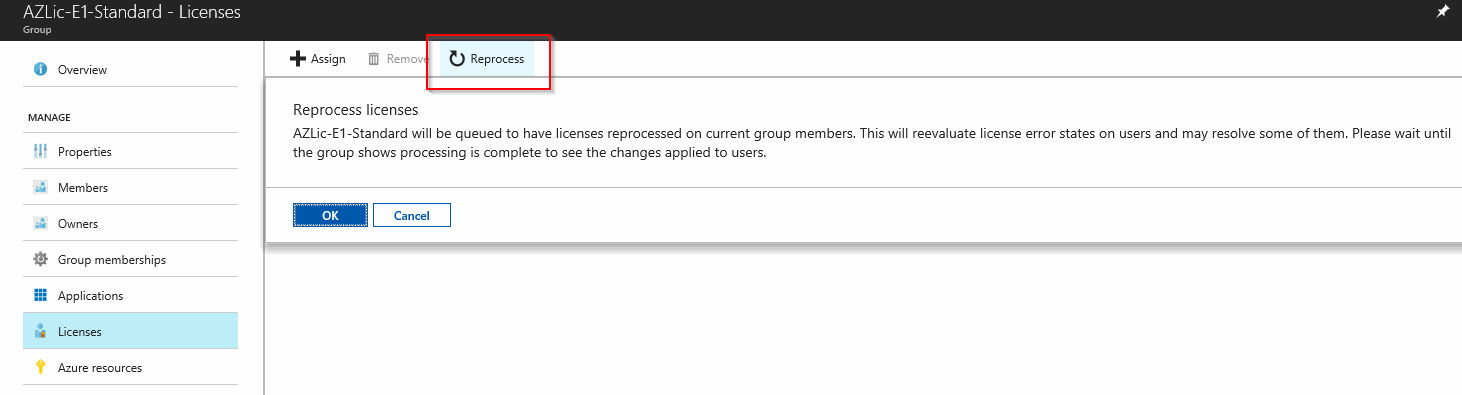
If we make some changes to the license/services on a specific group, we can always get properties of the Group. On License, we will have a button called Reprocess, and that will fix any license issues you may have with your end users.
After configuring and associating the groups with the required Azure licenses available, the operations team can assign Active Directory users to a group and the license will be automatically applied.
Photo credit: Shutterstock


