Amazon Web Services has a cloud service called AWS Route 53 that starts as a DNS service but offers way more than just DNS. It has features such as routing policy, traffic management, monitoring, and even domain registration, allowing an enterprise to consolidate all public DNS management in a single location. It is also easy to manage.
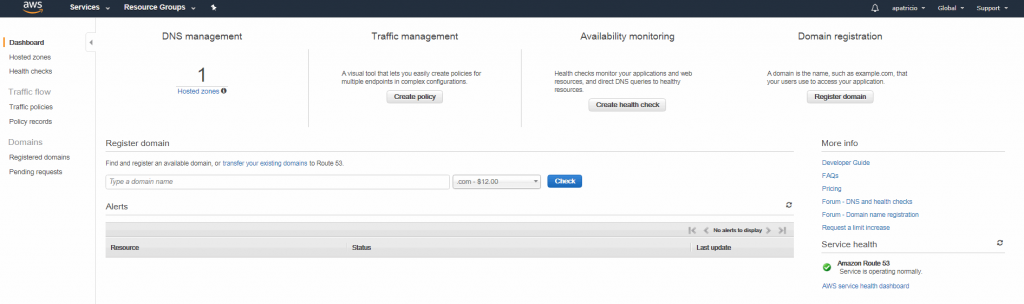
AWS Route 53 has traffic management where we can use a web tool to control the traffic to a specific service/workload. The availability monitoring service is able to check the health and performance of any given application/webserver, and, when combined with Routing Policy, can redirect the traffic to another resource and domain registration, where the administrator is able to register domains from the same platform.
To start working with the service, log on to the AWS Console, click on Services, and then Route 53. The service dashboard (available after creating the first hosted zone) will be a single page with all DNS information. It is worth mentioning that this service is not hosted on any specific region but it is global.
Managing DNS zones
The process to create a new public DNS is just a few clicks away. Logged on the AWS Console, click on Services, Route 53,. In the Dashboard page, click on Hosted zones, and click on Create Hosted Zone.
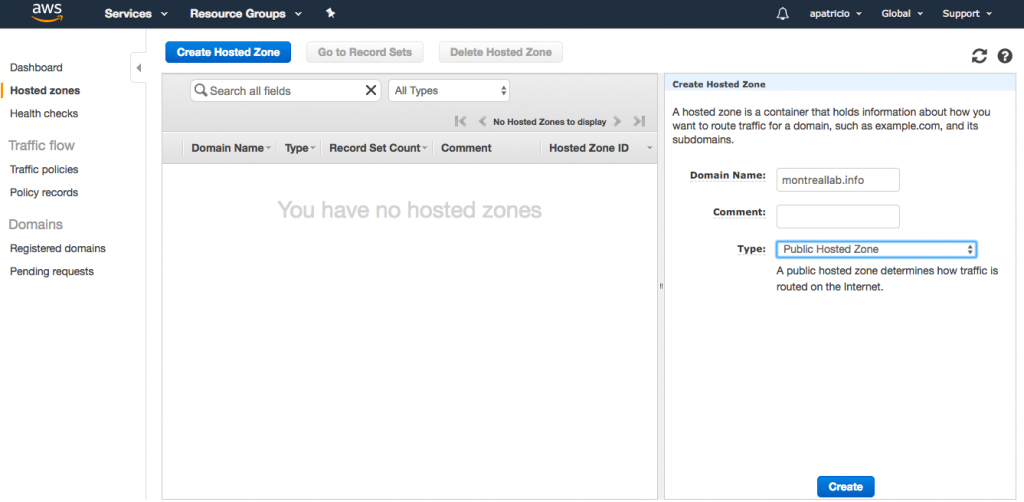
There are two types of zones in Amazon Route 53: public hosted zone, which is the traditional public DNS that is used to retrieve public information of your domain, and private hosted zone for Amazon VPC.
We are going to create the montreallab.info zone, and we will configure that as public hosted zone. After that, click on Create.
Moving DNS domain resolution to AWS Route 53
The transition process to move a DNS zone from any DNS provider to Amazon Route 53 is simple, but these key points should be validated before moving forward:
- Get access to your current public DNS zone.
- Make sure that you create a backup of all your current zone information.
- Plan to do the changes after hours so the impact on the end users will be minimum.
- Double-check all records before switching over.
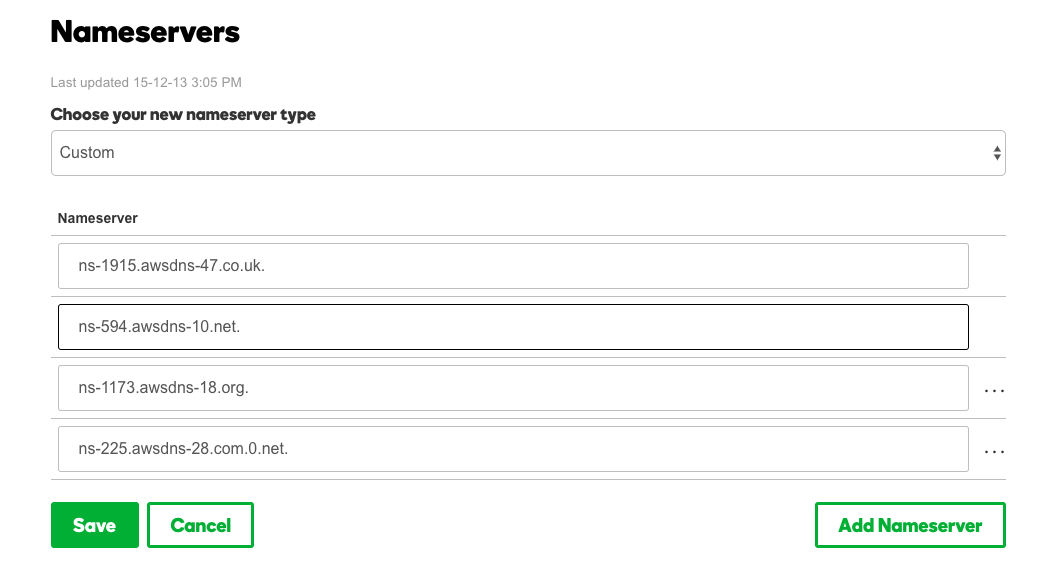
After creating the public hosted zone, the administrator should check the current NS value, which is the servers in AWS that will be able to answer for that zone when asked for. We need that information to transfer all DNS queries from the current registrar to the Route 53 service.

The zone montreallab.info was purchased and hosted in a DNS registrar in the United States. Each DNS provider will have a different DNS management interface. What we should do is to change the NS (name servers) of our zone file/domain to point out to the new ones listed on the previous picture. After this step is complete, all DNS resolution for that domain will be performed on the Route 53 service.
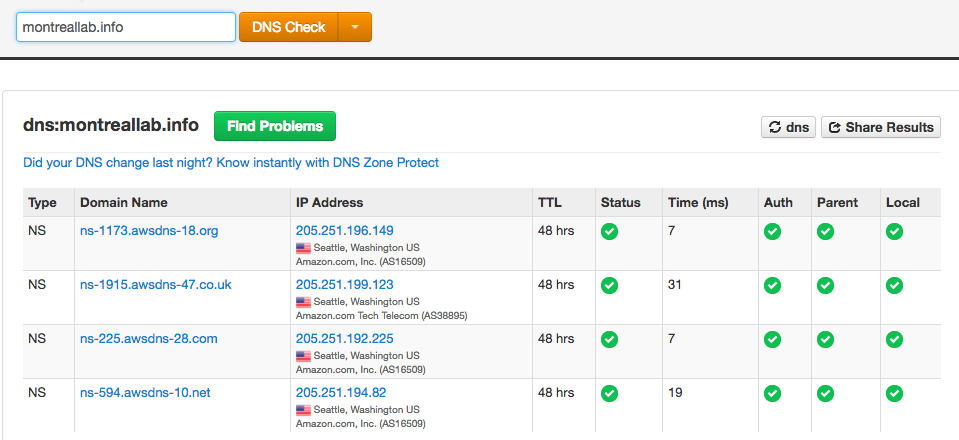
Nowadays, DNS replication on the Internet is fast and reliable. Give it a few minutes and check the NS servers using a site to check DNS — something like MXToolbox.com. The result should be the new NS servers that we configured for the zone.
Using failover capabilities and health checks
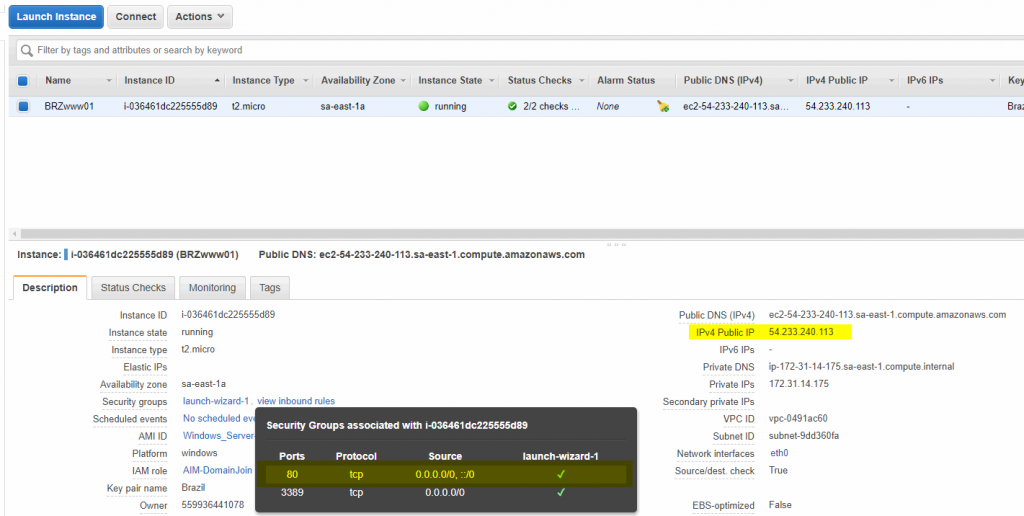
Let’s take advantage of AWS’s global scale and create two servers on different locations. In our case, we will create one in the South America Region (Brazil) and another one in Canada. We will configure the Security Groups associated with those servers to allow HTTP traffic.
Just for the sake of simplicity, we will install the web server role, and after installation, we will edit the iisstart.html of each server. And we will add an HTML tag before the IIS logo with the name of the datacenter region where the webserver is located, which will be useful during the testing.
Before moving forward, we will get the public IP of the server. We will need that information during the DNS configuration on the AWS Route 53 service.
The first step is to create a health check for any given IP that we will use as failover. In order to create the first one, click on Health Checks, and then click on the Create health check blue button.
Configure health check page: Assign a name that we are going to monitor by IP Address. We will provide the information on the IP address and hostname. Click on Next. The second page allows us to create an alarm when the health check fails. We can notify one or more users, but we will skip the notification for now. Repeat the same step for the second IP before continuing.

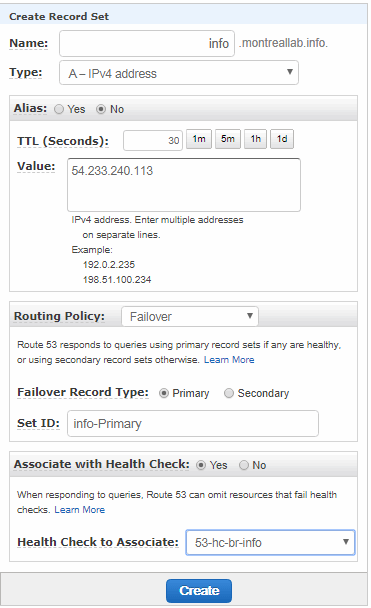
Now, we need to create two entries for info.montreallab.info. The first one is depicted in the image below. We will change the TTL to 30 seconds, add the public IP that we gathered previously, and we will configure the routing policy as Failover . The first one we will assign as primary and we will associate the health check for that IP.
We need to repeat that step for the second IP. It will use the same name info.montreallab.info, but it will have a different IP and it will be configured as secondary.
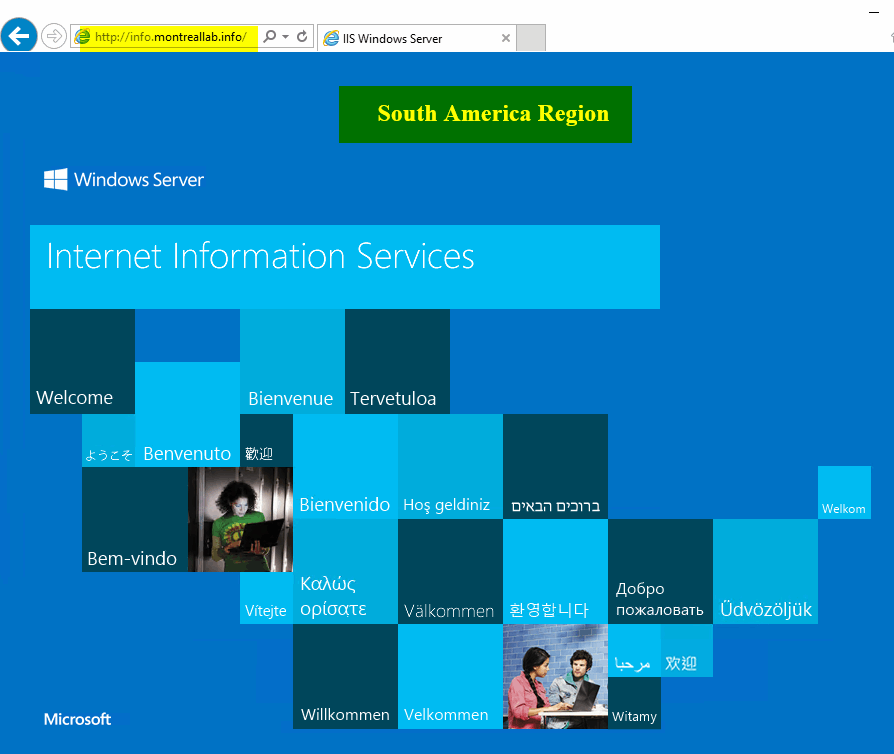
After that, we can test by stopping the IIS service of one of the servers, and try to access the service. The result should be the remaining server answering for the info.montreallab.info. After a few seconds (by default the health monitor is a 30-second interval) change the order to make sure that the failover works on both sites.
The administrator can check the overall status of any given health check using the health checks item on the left side. A list of all existent health checks and the status helps administrators find in a single glance how long any given service has been running.

Some cool features of AWS Route 53
Most of the time when managing public DNS on standard providers, we have the interface to create the zones, and that is it! However, Route 53 has some neat features that can help on the day-to-day operations.
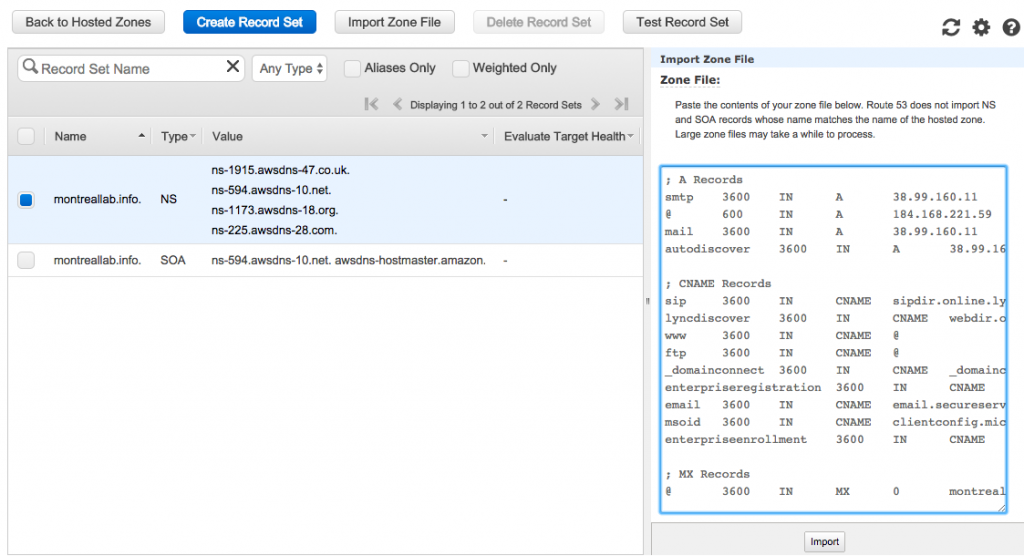
If you are migrating DNS to AWS Route 53, the import zone file feature will help a lot. Just paste your zone that you exported from your provider and all those records will be added automatically.
Note: The import process does not import NS or SOA information.
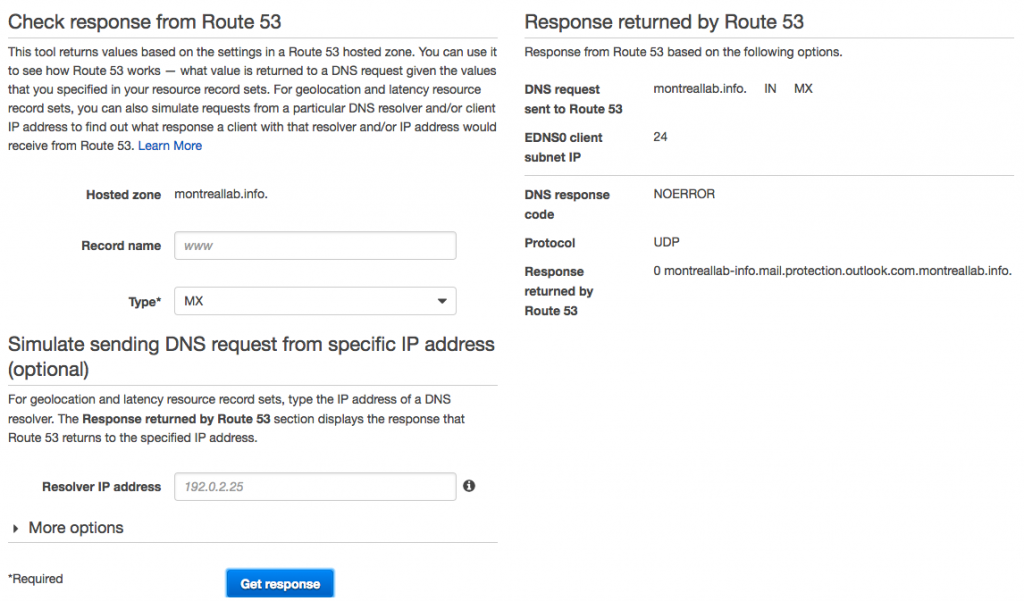
Another feature that is worth mentioning is the test record set where in the new page the administrator can query the response from the Amazon Route 53 service. You can enter an IP of a DNS resolver (the most famous one is 8.8.8.8 from Google) and the response from that server will be displayed on the right side. That saves a lot of time going back and forth on sites such as MXToolbox.com.
Managing traffic policies
Using routing policies as described in the previous section, the administrator has great flexibility to control traffic combined with DNS resolution. However, in more complex scenarios where multiple resources spread all around the planet/datacenters, it may be hard to keep control of the data flow.
For this kind of scenarios we can take advantage of traffic policies, which combine previous work with health checks and DNS routing in a web tool that allows even more flexibility — and all combined in a single glass of pane.

Managing domain registration
Although the price is slightly higher than some DNS registrars on the Internet, we can take advantage of managing all public DNS in a single place.
Logged on the Route 53 service, click on Registered Domains, and from that page on the right side we can register a new domain, transfer an existent domain (there is a fee associated to it) from another DNS registrar, and after using the service we can download a billing report (in CSV format).

That’s it. Enjoy your drive on Route 53.


Hi Anderson,
Thank for the useful tutorial. I was just searching for new tools to manage DNS and I guess I found one!