We recently looked at how to manage the Change Tracking feature in Azure Automation. In this article, we are going over the process of managing the Azure Inventory and Change Tracking services. Although most of the complexity of deploying the Change Tracking service is removed when using a cloud approach, administrators must understand how the service works to take advantage of all functionalities available.
Onboarding VMs
The first thing that we need to understand is that Inventory and Change Tracking use the same agent, which means that the process to add a VM is the same on either of the solutions. They also share the same Log Analytics solution and share the same experience to add VMs.
The second important item to remember is that Inventory and Change Tracking require the VMs to be located in the same subscription and region of the Automation Account.
Using either Inventory or Change Tracking options, click on Add Azure VMs. A new blade with useful information will be displayed. In Items 1, 2, and 3 in the image below we can check the Subscription, Location and Resource Groups that we will be using to list the VM list at the bottom.
The configuration of the feature can be checked on item 4, where the Log Analytics and Automation Account that is currently in use will be displayed.
A brief summary of the current status of the service is displayed in item 5, where we can check the number of VMs that are ready to be enabled, the ones that are already configured, and a number of VMs that cannot be enabled.
Toward to the bottom, we will have a list of all VMs and they will tell the story of the summary above. The ones that cannot be enabled will have detailed information. In my experience, the most common error is that they are assigned to a different Log Analytics/Workspace, but the description will help you fix the issue. The detailed information even provided tasks. For example, if the VM is stopped, a link to start the VM will be available right there, so no need to cancel the current wizard to find the VM and then start it.

There are several methods to enable a service to any given VM. One of them is using the Virtual Machines option. Select one or more VMs from the list and click on Services, which is going to be enabled after the first selection, then click on the service that you want to activate: Change Tracking, Inventoryd or Update Management.

Another method is directly from the VM itself. Click on either Change Tracking or Inventory under Operations section, and from there we can enable the service.

The main difference between using the Virtual Machines and the Change Tracking feature is that the last will list all available VMs and we can narrow down using the filters at the top. Select the VMs that you want to enable and click on Enable. The process will take some time and may take up to 15 minutes for the service to start working on a new agent and to see some data flowing.
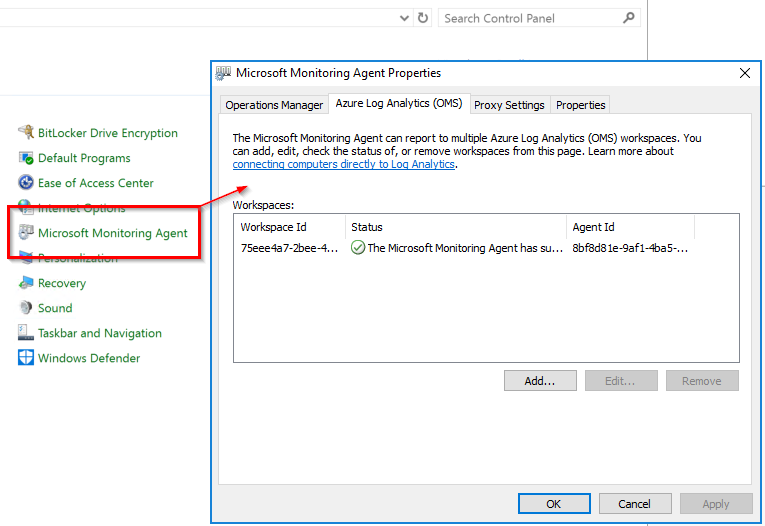
What does it change on the VM? A new extension will be added to the VM, and a new agent called Microsoft Monitoring Agent (MMA) will be installed on the VM, and that agent will be responsible for the communication. We can check that by exploring the Microsoft Monitoring Agent icon in the server’s control panel.
Enabling Change Tracking service on all VMs
When using the Change Tracking option inside of the Automation Account, the administrator has an option called Manage machines, and that button allows for the control of how existent and future VMs will receive the service. We have these following options:
- Enable on all available machines: The feature will be available to all existent VMs.
- Enable on all available and future machines: The feature will be automatically enabled on new provisioned VMs moving forward.
- Enable on selected machines: This one is the simpler one. Just select the desired VMs and the service will be enabled on them when you complete the wizard.

Tracking Windows services
When troubleshooting or analyzing security changes on your environment, the Windows services is one of the first stops for any administrator in charge of this task. If we know the specific service that we are looking for, we can type in the Search field. Keep in mind that the list below is for all VMs that are part of the solution.
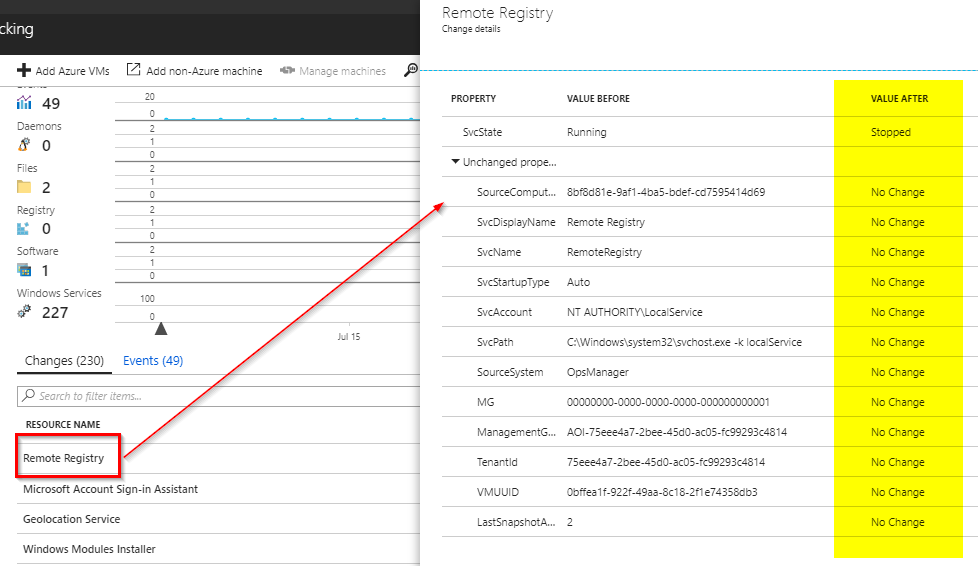
We can select the service from the list and click on it. A new blade with useful information will be displayed, and we can start our analysis from those results.
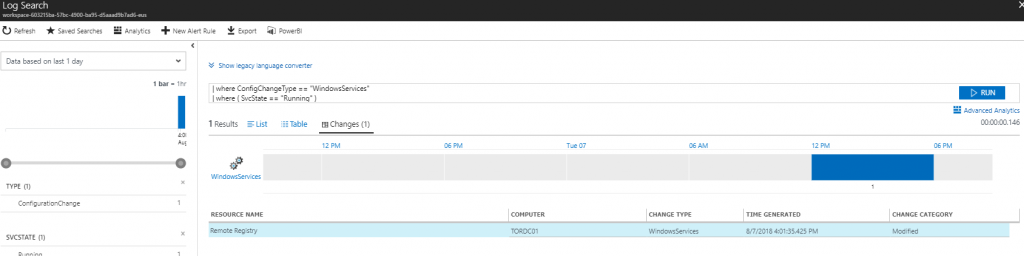
Another option is to take advantage of the Log Analytics and start drilling down on the data being gathered by the agent to find the information. A simple query using the data already gathered helps us to find out at what time the service changed its status. Don’t worry if you don’t know the query language, you just need to click from the fields available and all options will be displayed on the left side. Just click on them and apply and the query will be updated automatically.
Tracking file changes
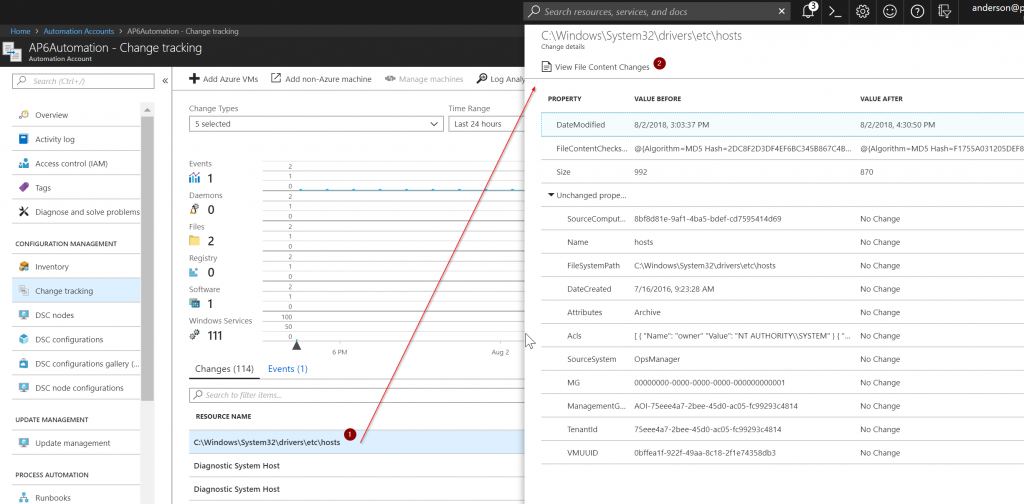
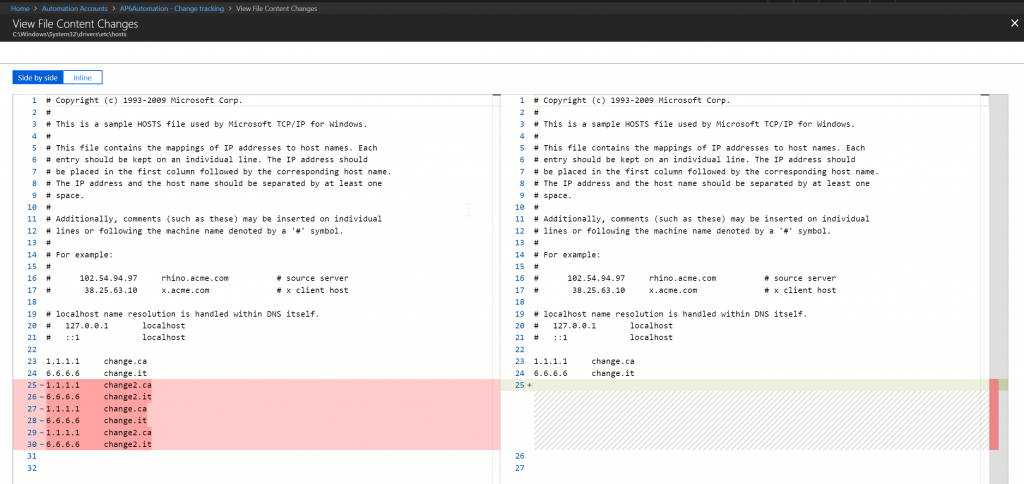
That is my favorite feature of this solution. Let’s say that we created a file tracking for the hosts file, which I highly recommend in any production environment. When the file is changed, we can see an entry on the list and on the graph of the Change Tracking feature. Click on it and a summary of the changes metadata will be shown. It is cool to see the size of the file and the hash, although it does not give us a good idea what has changed.
Click on View File Content Changes. (Note: A Storage Account must be configured prior to use this feature, and we covered how to enable that in our previous article).
In the new blade, we will be able to see both files (the previous and the actual file), and we will have a highlight of all changes between the versions. Pretty cool, eh?
Tracking software
We can track changes in software (including updates), which is vital when trying to figure out if a new patch caused an outage on any given server, using Change Tracking, which will list the software on the list of Changes.
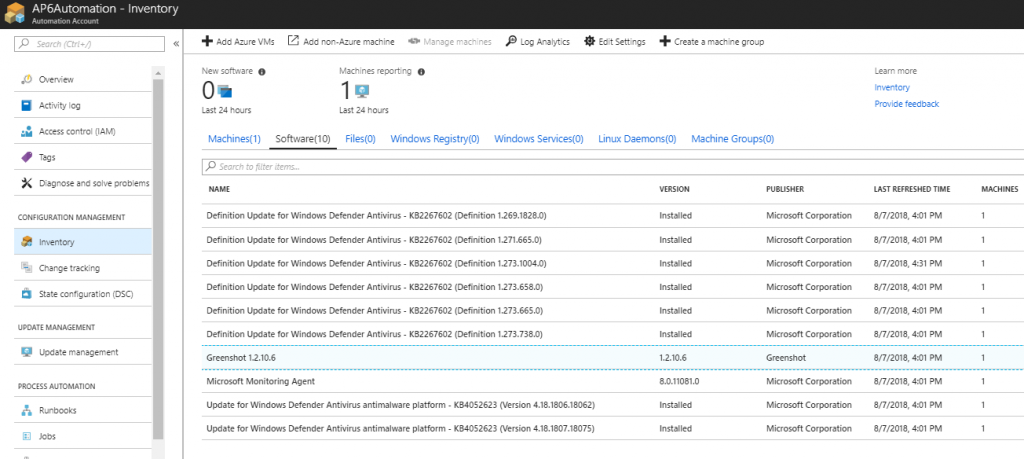
However, when looking for software, in general, we can use the Inventory item, where a list of all software will be listed, and when we click on one of them we will have a list of all VMs that have that software.
We can take advantage of Log Analytics and create queries to find specific software that was installed on the VMs, and that can be used when malware or undesired software is being installed on the VMs and we need to track it down.
Keep in mind that Inventory has everything: VMs, software, files, registry for Windows, Windows and Linux services and machine groups.
Featured image: Shutterstock


