Automation is a key component for any enterprise that wants to keep its servers’ fleet consistent and organized throughout their lifecycle. Companies using Microsoft Azure can take advantage of PowerShell Desired State Configuration, which is a declarative platform based on PowerShell using IaC (Infrastructure as a Code), and it is in the same category of more well-known configuration tools such as Puppet and Chef.
There are several advantages when choosing Desired State Configuration (DSC) as the main tool for the Infrastructure as a Code in your organization. Here are some of the key items:
- It is based on PowerShell and it uses a declarative platform, which means less code than traditional PowerShell scripts.
- It is supported by Microsoft operating systems (since Windows Server 2008 R2).
- It is supported on Linux, including all major distributions (Red Hat, SUSE, Oracle, Debian, CentOS, and Ubuntu Server).
- Azure automation provides all the building blocks for Desired State Configuration. Basically, you just need to create/import the configuration and assign it to the VMs.
- It works with Azure VMs, on-premises serves, and other cloud compute resources.
- Using Azure DSC we have the pull mode.
There are two ways to configure Desired State Configuration using push and pull. Using push, the action starts from the client, which automatically applies the configuration. When using Azure automation DSC, we have a pull architecture, where the client is managed from a central location (pull server).
Each DSC node has an LCM (local configuration manager), and this service is responsible for associating the node with the pull server, refreshing settings, and so forth.
Creating an automation account
The first step toward a Desired State Configuration is creating an automation account. There are a couple of methods to create such an account where we can deploy just the automation account. In other scenarios we can take advantage of OMS and use the same process to create change tracking and update management (for Windows and Linux).
In this article, we will keep it easy; we are going to create a simple automation account. Let’s start: Logged on to the Azure Portal, click Create a Resource, type in Automation and select the first entry that is provided by Microsoft A new blade will appear on the right side. Click on Create.
Note: You can use the same automation account later to integrate with OMS.
The creation process is straightforward. Define a name (we will use a resource group called RG-OMS) to store that automation account and a region. Click on Create when ready.
By default, two authentication entries are created automatically: Run As and Classic Run As account, and they create the required permission to manage ARM (Azure Resource Manager) resources using runbooks. Keep in mind that automation accounts are used for several components, such as DSC, inventory, update management, change tracking, and runbooks.

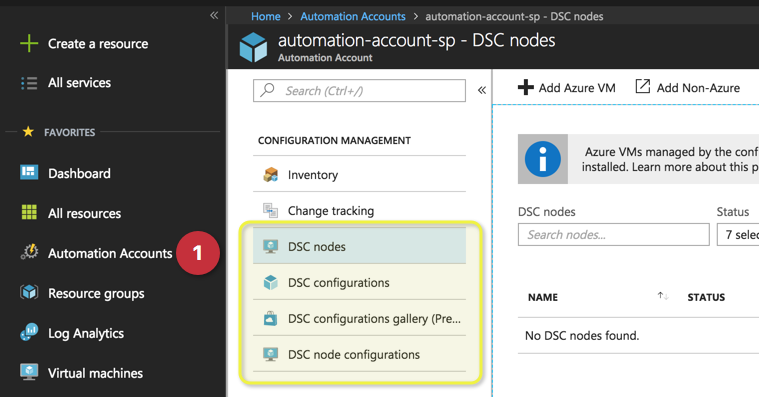
Having the automation account created, the cloud administrator can check all existent accounts using automation accounts in Azure Portal (Item 1 in the image below). Inside of each automation account, we will have four items designated to manage the Desired State Configuration, which are DSC nodes, DSC configurations, DSC configurations gallery and DSC node configurations.
Managing Desired State Configuration and DSC nodes
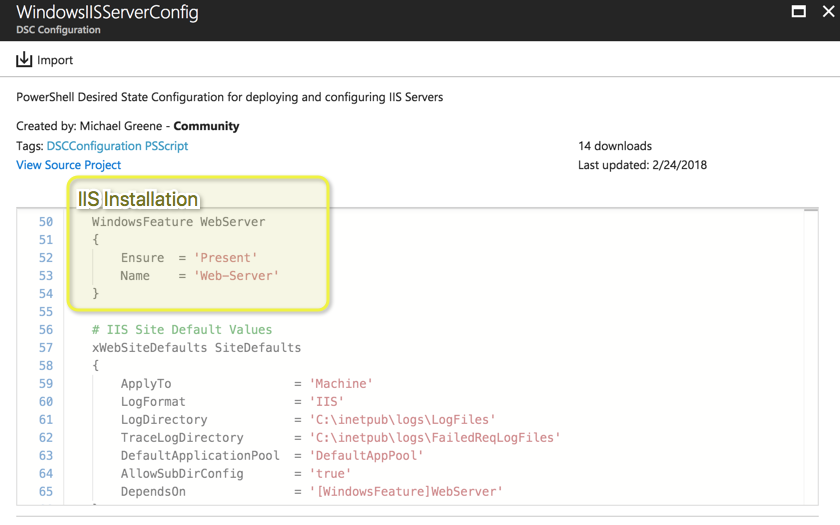
Although the logic says to start by defining some nodes for DSC, the proper method is first defining the DSC configurations. Click on DSC configurations, and click on browse gallery. A list of all existent DSC available on the community will be listed. We are going to select WindowsIISServerConfig from the list.
A new blade with the code will be displayed. Pay attention to the yellow square — that is all that is needed on DSC to install the web server role on a Windows Server. The following section defines some specific settings of the website. Click on import to bring this DSC configuration to our automation account. A new blade containing the name and a field to provide a description will appear. Click on OK.
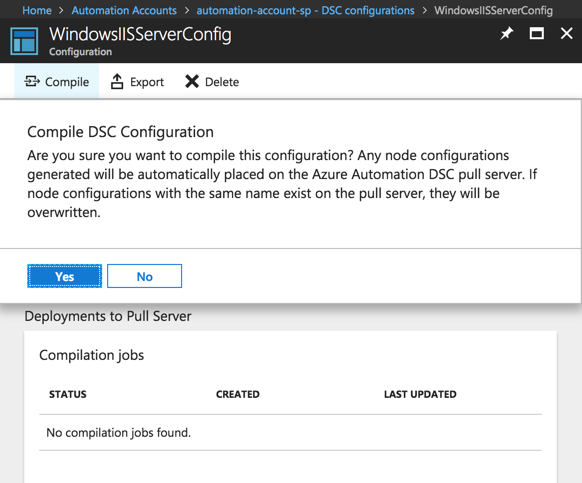
Click on DSC configurations item, and the DSC configuration that we have just imported will be listed. Click on it, and click on compile, and on the dialogue box, click on yes.
Note: That is our first configuration and there aren’t nodes in our environment. However, if the current configuration is in use by nodes and we compile changes, those changes will affect the nodes.
The process may take a few moments depending on the size of the configuration file. Before going further, make sure that the process is flawless. In our example below, we can see an error when loading a module called xWebAdministration. That is common when using DSC configuration from the gallery.
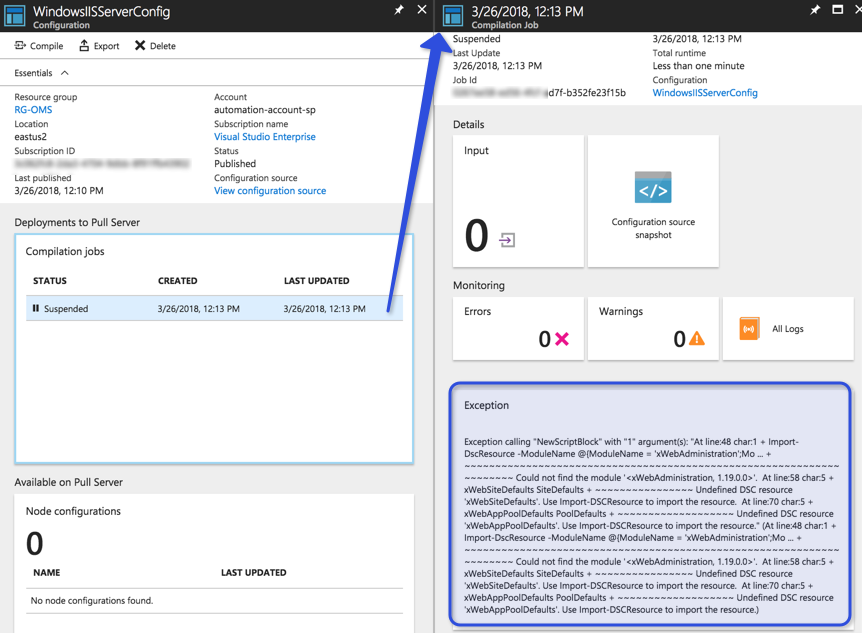
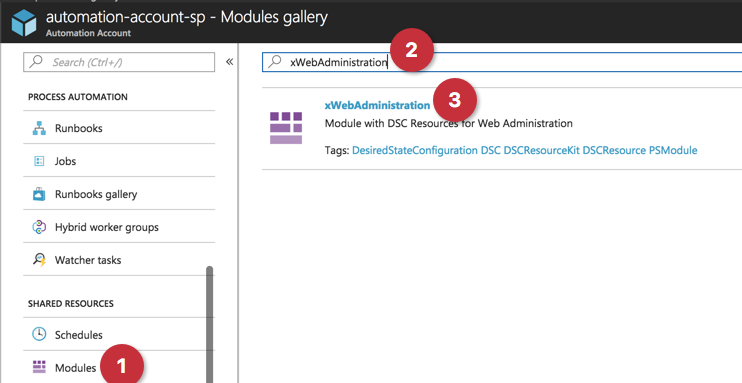
We installed a DSC configuration, which requires a module that we do not have in our automation account. In order to install a new module, go back to the automation account, and click on modules gallery, type in the module being loaded in the DSC configuration, and import it.
Note: If you have a custom module, you can click on modules and load the file for the module manually.
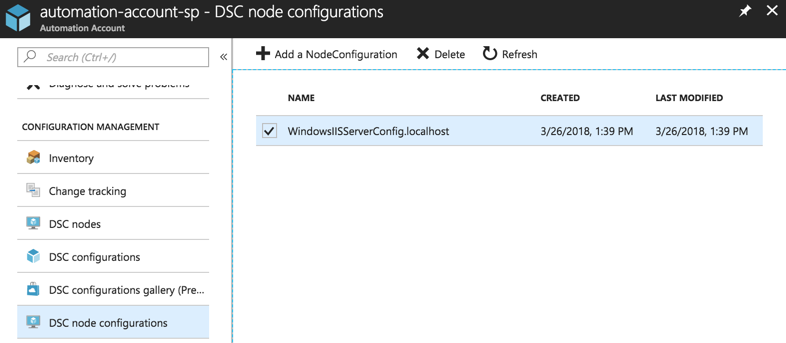
After installing the required modules, go back to the DSC configuration item and compile again the DSC configuration. When you get the status completed, then we can check the DSC node configurations item and we will have a node configuration for that specific DSC configuration.
Managing DSC nodes
After adding the DSC configuration and compiling the DSC node configuration, our final step is to associate the DSC node configurations to the VMs.
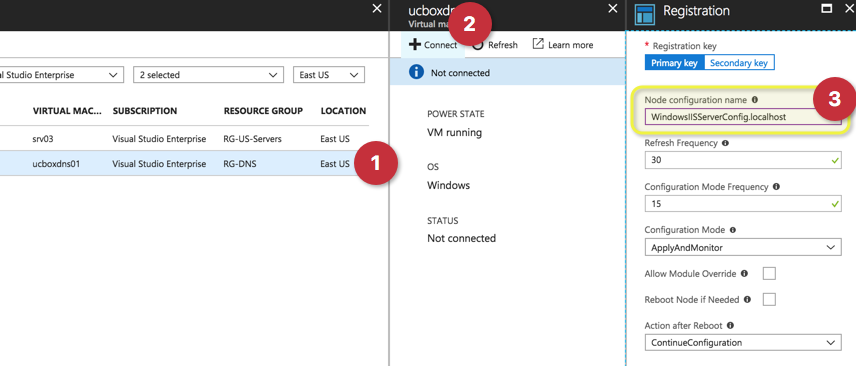
To associate a VM, click on DSC nodes, then click on Add Azure VM. In the new blade, select the desired VM (Item 1), in the next blade click on connect (Item 2), and in the last blade select the DSC configuration node that we generated in the last step. Click OK.
Wait for the process to add the new server As part of the process an extension will be added to the selected VM.
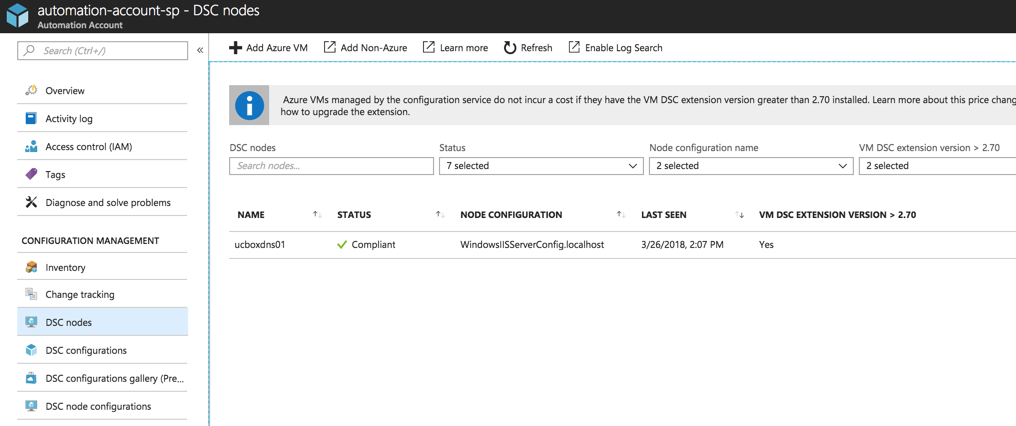
In the list of DSC nodes, we will have a list of all DSC nodes and their status. In the image below, we can see that the server ucboxdns01 is compliant, which means that all settings that we defined in the DSC configuration were applied and are in place on that current server.
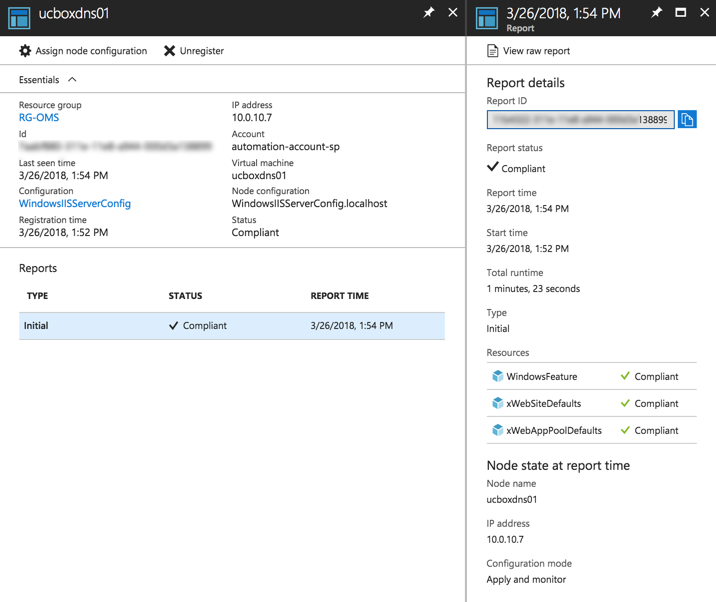
If we want more details, click on the desired node and detailed information can be validated. When selecting one of the reports (left side) the report shows details such as which subcomponent is in compliance (in our case we have IIS feature, website settings. and app pools settings).
If we check the servers that have that DSC node assigned, they will have IIS installed and the settings that we defined in the DSC configuration.


