Creating a domain on the Internet and then leveraging it by using Azure DNS service to provide a high available and resilient service to that new domain is a very common topic — which is exactly what we are going to cover here. If you are studying for Microsoft Azure certifications, I’m pretty sure that you have one or two questions about the procedure that we will show you how to perform in this article. But first things first!
Purchasing your domain
That is an important step, and if you are planning to get certified in Azure, there may be an exam question around this topic. You can’t buy domains in Azure, you can manage them.
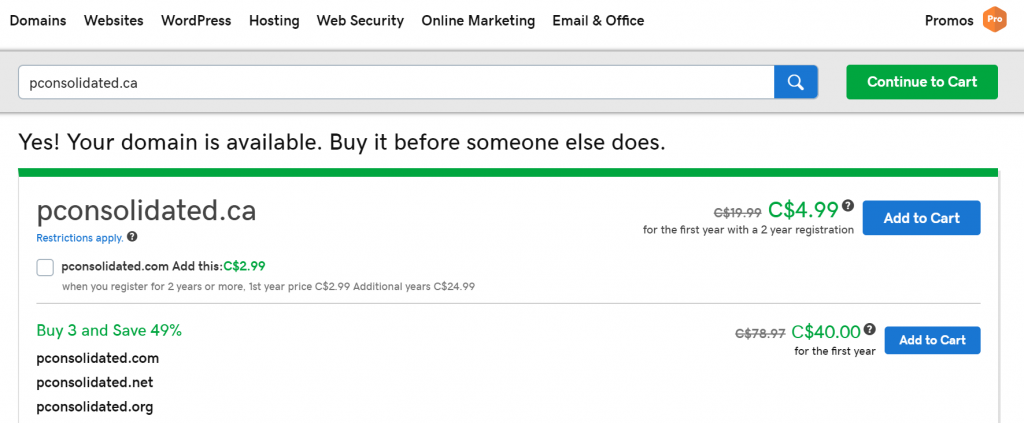
To get your new domain up-and-running in Azure, the first step is to go to your favorite registrar (in my case, I’m going to use a common one on the Internet, namely GoDaddy. But it seems that even our favorite web search engine is also doing this kind of service nowadays, and I’m not talking about Bing!). Go through the process to purchase your domain. You will have to find an available domain, escape from the 300 extra items that you don’t need that they will try to sell you, and finally enter your credit card and address information. The process usually takes just a few minutes. In our example below, I’m purchasing the domain pconsolidated.ca.
When the process is complete, the domain will take some time to propagate and be available for queries, but that gives us enough time to transfer it right away over to Microsoft Azure.
Creating the new domain in Microsoft Azure DNS service
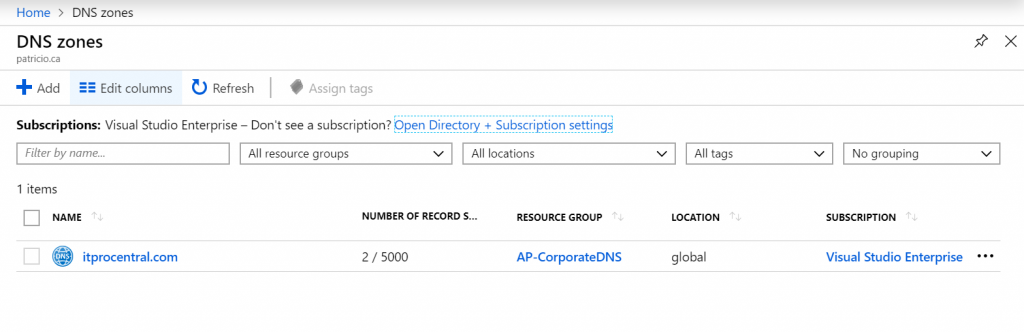
The second step is to log on to the Microsoft Azure portal. Now, search for DNS in the Search box, and click on DNS Zones. The initial blade will list all existent domains that you have in Microsoft Azure. Click on Add to add our brand-new domain.
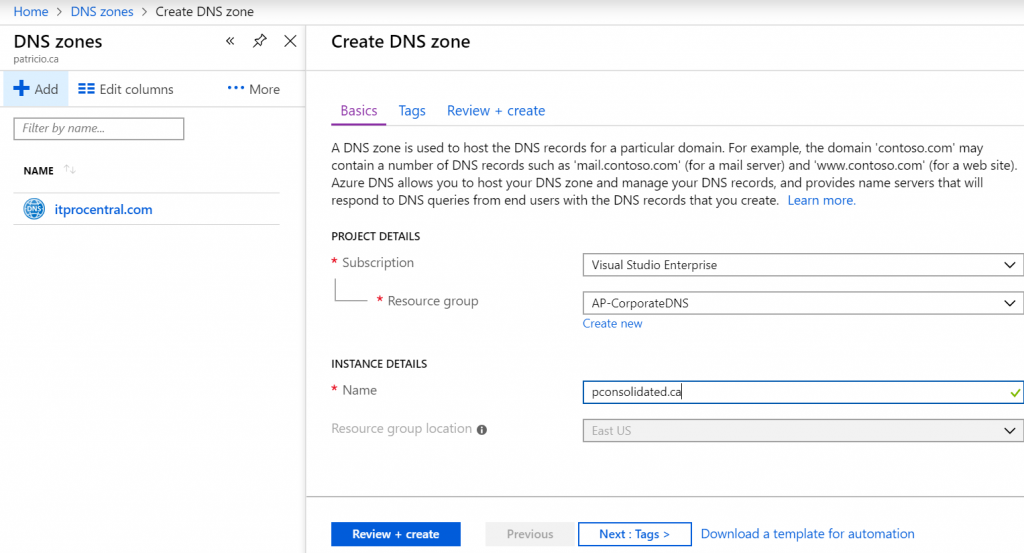
In the Create DNS Zone blade, select a Resource Group. I recommend you have a Resource Group just for the DNS zones, but if you do billing per Resource Group and you have several zones, you may want to place them separately. The most important thing in this section is the name, which is the actual domain name. In our example it will be pconsolidated.ca. Click on Review + create, a validation process will occur in the following blade. If everything went okay, click on Create.
We should wait for the deployment to be completed, and that takes a few seconds. When ready a button Go to resource will be displayed, click on it, and that will take us directly to the new zone.
At this point, if we perform any query on the Internet, something like www.pconsolidated.ca, who would be answering that request? Keep in mind that we have never created a record for www. The answer is if the record is valid or not it will be the same. It would be the registrar because so far we registered the domain and they host our pconsolidated.ca zone there. The Azure one that we have just created (we can see in the image below is not being used.
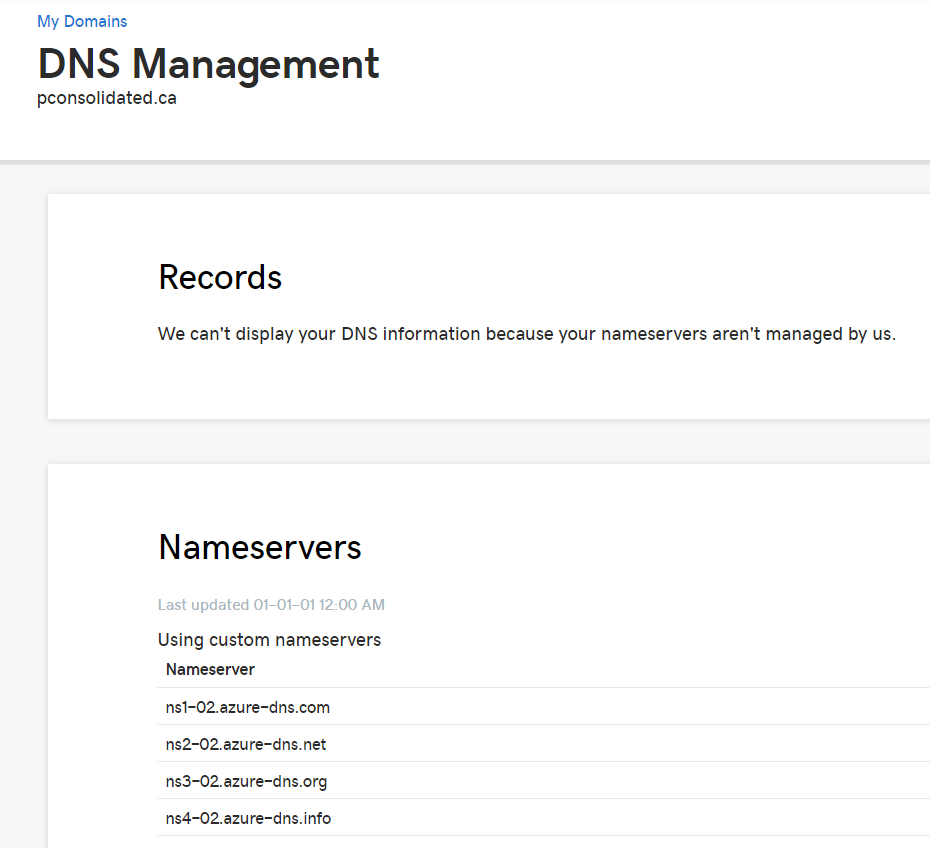
How do we make the Azure DNS Zone be authoritative for that given domain? That is easy — the first step is to copy the names of the Azure Name Servers (in our case the names listed below) and that information is provided in the Overview blade, and also in the NS records of the zone.
- ns1-02.azure-dns.com
- ns2-02.azure-dns.net
- ns3-02.azure-dns.org
- ns4-02.azure-dns.info

Performing the switch
At this point we have created the basic infrastructure in Azure and we know which Name Server in Azure is responsible for our brand-new zone. We need to inform the registrar we bought the domain from that although they are really nice guys, we want to have our DNS being managed in a world-class cloud provider like Azure.
Go to your registrar and change the Name Servers to use the names that we gathered in the previous section. Most of your registrars won’t like the period “.” that can be found at the end of the Azure information when you copy (you can safely remove it). Add all four Name Servers that you gathered from Azure console.

After performing the change, you will notice that your ability to change records at your registrar will be disabled (as depicted in the image below) and the main reason for that is that we delegated all that to Microsoft Azure.
How about any query to our pconsolidated.ca domain at this point? Given the right time to propagate, the answer now has changed, and the Azure DNS Zone is the one responsible to answer all queries about that new domain.
Testing the new domain
Give some time for the propagation to take place. The first test is to check the actual zone that we have created. I like to use mxtoolbox.com and on the first query (although the default is MX record query), you can type dns:<yourdomain> and the result should be similar to the one depicted in the image below. That is a really good sign — everything is green and Microsoft Azure Name Server are the ones responding to the initial query.

The second test is to validate the test record that we created, and again we can use a:www.pconsolidated.ca. The results are good! We can see that it is pointing out to 1.1.1.1 like the record that we created at the beginning of this article.

In this article, in just a few steps we went of being a domainless IT professional to having our own domain, creating a DNS Zone in Microsoft Azure, and delegating the domain to Microsoft Azure.
We focused on the technical steps required from getting from point A to point B, but having your DNS in Microsoft Azure has several advantages. For example, you have integrated authentication with your Active Directory, you can delegate permissions based on your Active Directory instead of trying to remember the password of your registrar, you have auditing capabilities of who is performing changes, and, of course, your domain is managed by a world-class cloud provider with several layers of high availability and resiliency. If you have VMs/services running in Azure you can create Alias entries that take advantage of that synergies to update the DNS records based on the actual information from the Azure resources.
Featured image: Shutterstock


