Azure Key Vault is a key component of Azure security and helps developers, and security and cloud administrators manage keys in a secure way.
The goal of this article is to take advantage of Azure Key Vault to encrypt disks on VMs running in Microsoft Azure. The encryption process on Windows VMs uses the BitLocker feature. Linux VMs use DM-Crypt.
While we can use a single Key Vault for all your needs, some companies prefer to use a single Key Vault for each workload. In this article, we will reserve a Key Vault just for disk encryption.
We will cover the required steps to achieve data at rest using Microsoft Azure Key Vault. To complete the disk encryption of any given VM, these following steps are required. Keep in mind that the first three are required just once, and after that is just matter of encrypting VMs during provisioning (using ARM Templates) or PowerShell.

Understanding Azure Storage Service Encryption
Before going to the disk encryption for OS and data disks on a VM, it is important to mention that all Storage Accounts created since June 2017 have Azure Storage Service Encryption enabled.
By default, all data written to Azure Storage uses an AES 256-bit encryption for all data in the platform. An encryption process occurs for new data being written and decryption for retrieving data. The storage account is encrypted by default and the customer is not able to disable it. The only option is to use your own encryption key instead of Microsoft-managed encryption keys.
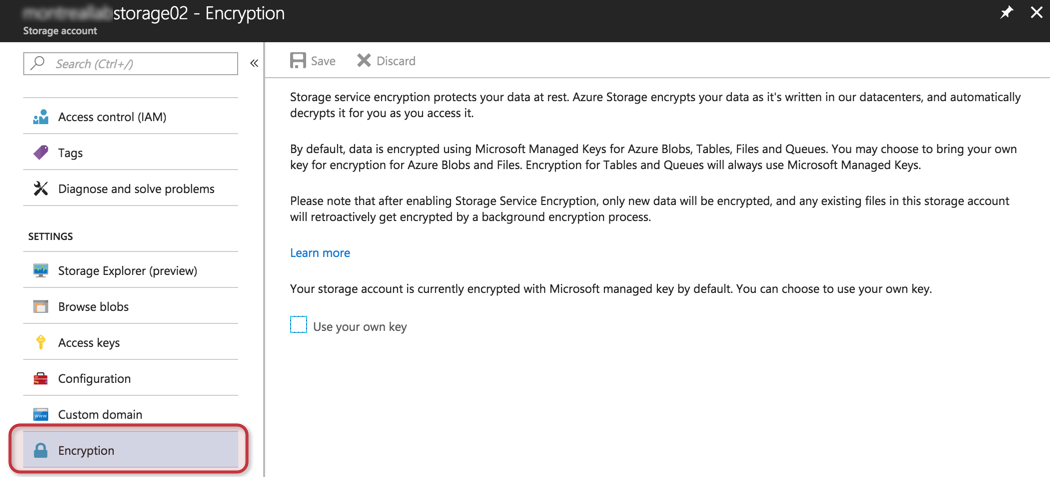
This service is offered for free, and available on all Azure regions. If you want to see if it is enabled at the storage level, click on the desired storage account, and click on the Encryption item on the right side. A brief description of the feature will be displayed, and we have the only option to configure (decide the source of the encryption keys).
Is there enough security? Definitely, it will protect your data at rest, but some organizations may have a more restricted security requirement and encryption of the VM itself may be required and that is what we are going to cover in the next section.
We can combine both data at rest protection for any given VM. We know for a fact that SSE is enabled and operational in your current storage accounts, and we will go one step further and encrypt the OS and data disks using Azure Key Vault and the BitLocker feature on a Windows VM.
Creating the Azure Key Vault
The first step is to build the Azure Key Vault, which can be created using CLI, PowerShell, or Azure Portal. We are going to use the most orthodox way, which is using Azure Portal. Click on Create a Resource, type in Key Vault, and select the first option from the list.
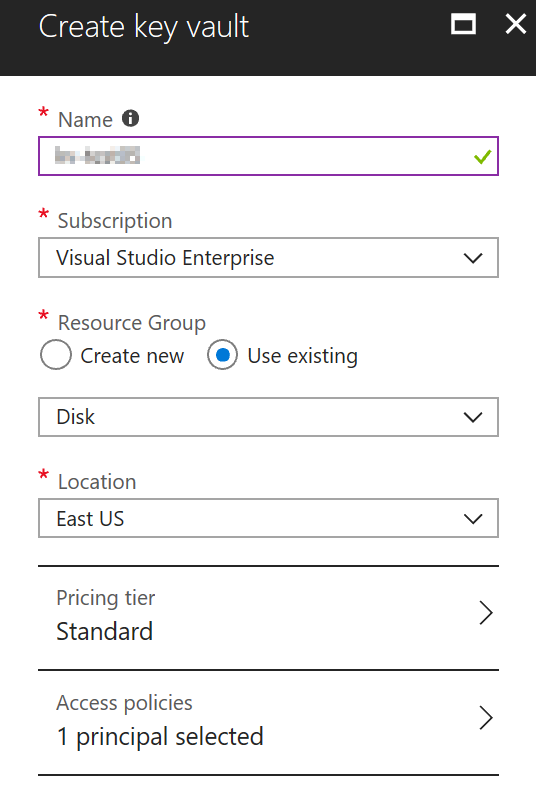
In the new blade, a brief overview of the service will be displayed. Click on Create. In the new blade, define the Key Vault name (we will label it kv-test06) — any name you use must be unique because it will generate a URL to access the information. The current key vault is going to use the URL https://kv-test05.vault.azure.net. Select the Subscription, Resource Group, location, and Pricing Tier (Standard or Premium, the difference is the HSM support), and Access Policies where the current user will be assigned with some permissions at Key, Secret, and Certificate level.
After creating the Key Vault, we can manage the Access Policies of the Key Vault, and since we will touch ARM Templates down the road, it is nice to enable all three advanced policies, which allow Azure Key Vault to be used during VM provisioning, disk encryption for volumes, and ARM for template deployment.

Checking the VM disk encryption before starting the process
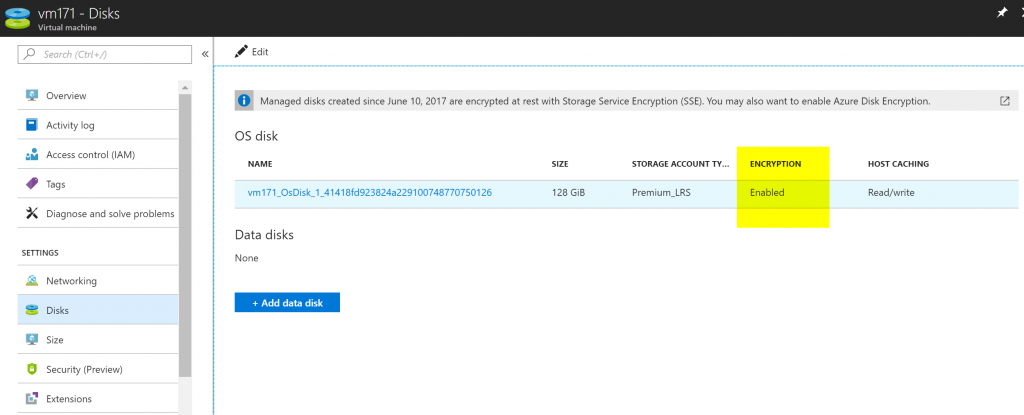
Time to check the current encryption in the VM that we are going to use in this article. Logged in the Azure Portal, select the desired VM, and click on Disks item located on the left menu. A list of all disks associated with the given VM will be listed, and we can see on the image below that the Encryption is not enabled at the VM level.
In order to start the encryption using BitLocker, we must make sure that the VM is not from the basic tier. Always check the Azure Portal to validate that the current tier supports encryption before creating the VM. (During the creation of this article, the following standard tiers were supported: A, D, DS, G, GS, and F.)

Creating a Key to store the disk encryption
When encrypting disks, the administrator must be aware of two terms: Data Encryption Key (DEK) and Key Encryption Key (KEK). The DEK is asymmetric (AES 256) used to encrypt the disk itself, and the KEK is an asymmetric encryption key used to encrypt the DEK, which creates another layer of security.
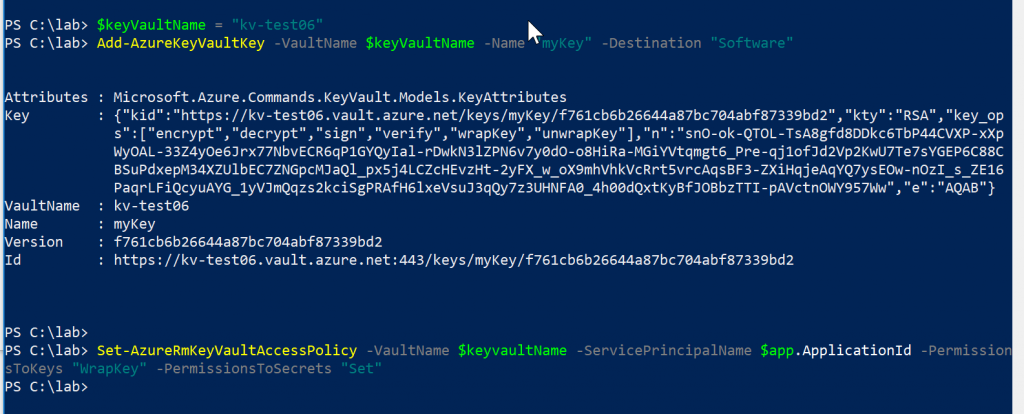
In this section we are going to create the KEK (Key Encryption Key), using the PowerShell cmdlet listed below. In addition to adding a key to the Azure Key Vault, we will assign permission to the Service Principal to wrapkeys (insert data into the vault during a new key creation process) in the Keys, and set on the Secrets.
Add-AzureKeyVaultKey -VaultName “kv-test06” -Name “mykey” -Destination “Software”
Set-AzureRMKeyVaultAccessPolicy -VaultName “kv-test06” -ServicePrincipalName <Application ID> -PermissionsToKeys “wrapKey” -PermissionsToSecrets “Set”
Creating an Azure Active Directory service principal
To encrypt the VMs, we must configure a service principal account and associate permissions to this account to interact with the Key Vault. This account will be responsible, and it will act on behalf of the VM to exchange cryptographic keys. The result of the script can be seen in the image below.
$AppName = “sp.diskencryption”
$SecurePassword = ConvertTo-SecureString -String “YourP@ssw0rd” -AsPlainText -Force
$App = New-AzureRMADApplication -DisplayName $AppName -HomePage “https://localhost” -IdentifierUris “https://localhost/diskencryption666” -Password $SecurePassword
New-AzureRMADServicePrincipal -ApplicationID $App.ApplicationID

Encrypting an existent VM
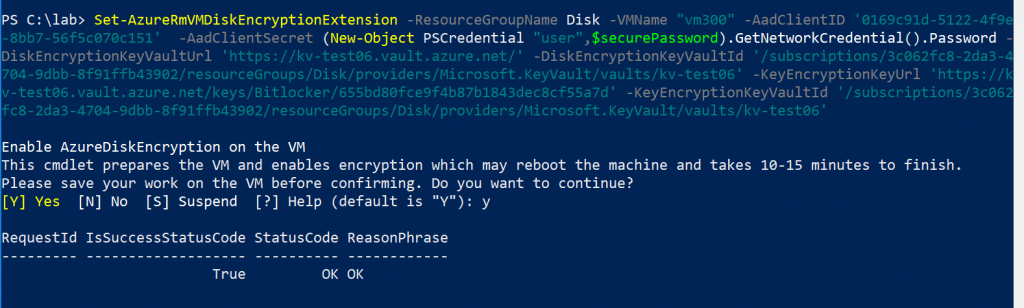
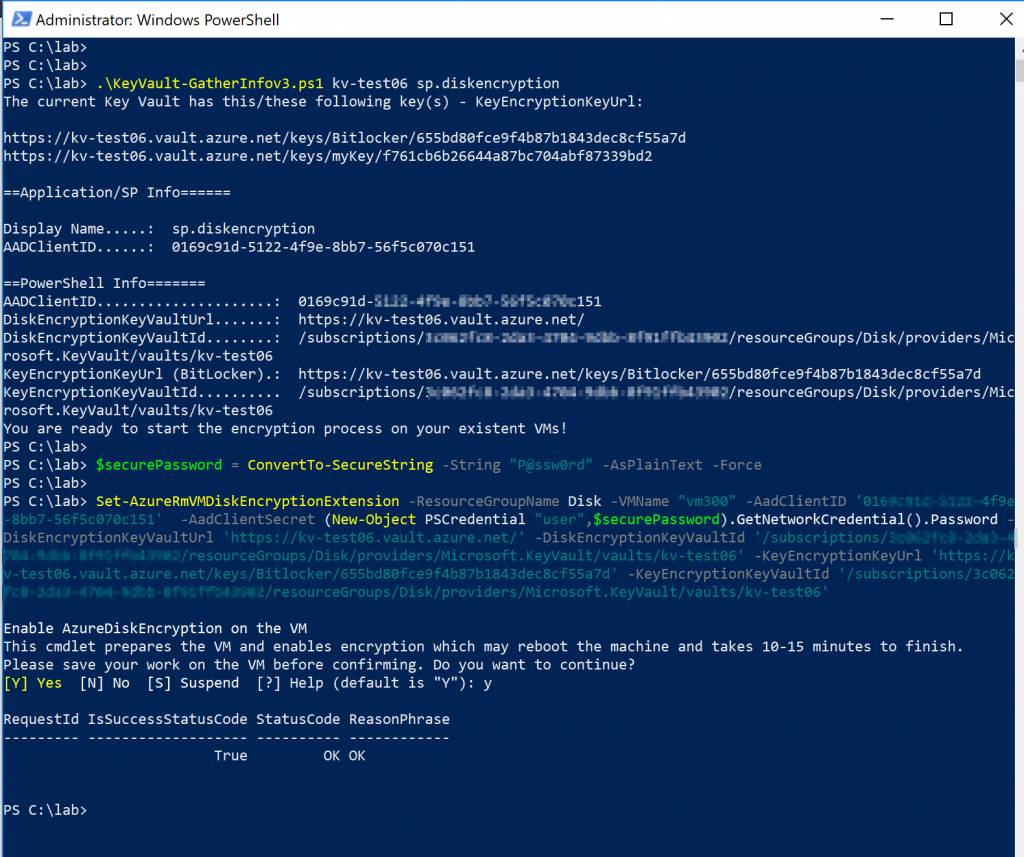
Now that we have the Azure Key Vault configured and ready to go, the final step is to run the following cmdlet to start the encryption process, which may take a little while (give or take 10 to 15 minutes).
Set-AzureRMVMDiskEncryptionExtension -ResourceGroupName <RGName> -VMName “VMTEst01” -AADClientID <App-ID> -AADClientSecret (New-Object PSCredential “user”,$securepassword).GetNetworkCredential().Password –DiskEncryptionKeyVaultURL <Disk-URL> -DiskEncryptionVaultID <Key-Vault-ResourceID> -KeyEncryptionKeyURL <KEK-URL> -KeyEncryptionKeyVaultID <Key-Vault-ResourceID>
We can go back to the Disks option of the VM that we have just run the encryption cmdlet. The value on the Encryption column should be Enabled.
Logged on the server, we can see the BitLocker icon on the C:\ drive, which means that the protection is enabled on the server.
Important note: The Bek Volume is the placeholder for the encryption keys — do not change files or play with that drive.

Wrapping up
That is the process to encrypt an existent Windows VM using PowerShell. Keep in mind that Azure ARM Templates can be used to encrypt new provisioned and existent VMs as well.
As you may have noticed, there are a lot of required parameters when running the Set-AzureRMVMDiskEncryptionExtension cmdlet, and to make things easier I created a simple script that generates the value required for the cmdlet. The only two parameters that must be passed are the Key Vault Name and the AD Service Principal.
The script can be found on GitHub by clicking here.
Photo credit: Shutterstock


