The Microsoft Azure locks feature is often overlooked, but it can help organizations of any size protect against accidental deletions and help keep the environment secure against changes being done in the heat of the moment.
If your organization uses change management process and there is a scheduled meeting to go over the changes, a maintenance window to perform such changes, and after that, no changes shouldn’t be applied into production, then Azure ;ocks could play nicely within your strategy.
The locks feature is everywhere in Azure — you can apply at Subscription, Resource Group, and Resource level and there is a hierarchy. They are not bound to RBAC permissions, so even if you have all the permissions in the Azure world, you will not bypass the locks. Pretty good, eh?
The locks come in two flavors, which are Read-Only and Delete. Where Read-Only locks do not allow you to perform any changes at all when they are applied. Using Delete locks, we can perform changes and even add to the resources covered by the locks, however, no deletion operation is allowed.
Understanding Azure locks
As I said, the locks feature is everywhere. You may not have noticed, but it is there when you open every single blade in Azure Portal.
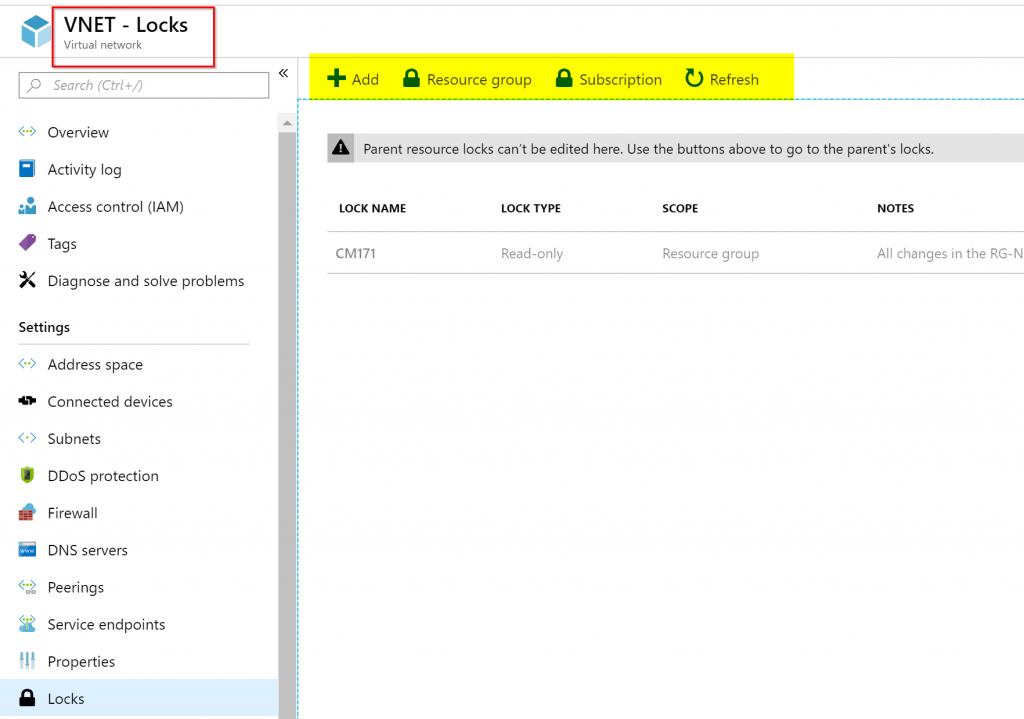
Let’s say that you went to a virtual network resource and checked the locks, you will see any existent locks performed at the parent’s level, and a list of all locks that are being applied to this specific resources will be listed. If they are grayed out, that means that they were defined at a higher level, in our example at the Resource Group level. At this point, the top menu becomes crucial, because we are able to go to higher levels to check locks, and in our case, we can check at Resource Group and Subscription levels.
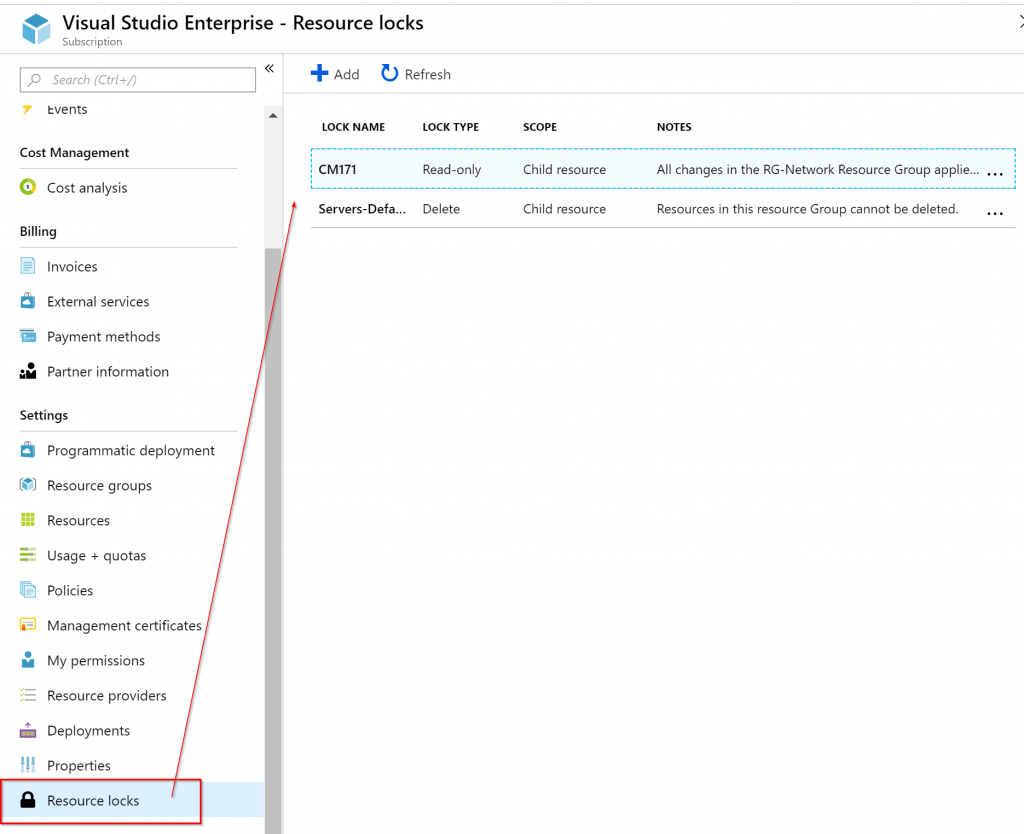
Another useful resource when managing locks is checking at the subscription level. Using Azure Portal, click on Subscriptions item, and then Resource Locks. A list of all existent locks will be listed. Unfortunately, we don’t have the same ability to navigate directly to the resource where the lock is being applied and the information being provided says child resource and doesn’t give us additional details. It would be nice to know if the lock is at the Resource Group or Resource level.
Using Azure locks in a simple scenario
We can use a simple scenario to illustrate how the locks feature is able to help the organization. Let us say that we have a resource group called RG-Network and after the deployment, we have it all sorted out, all settings are in place, and all other Resource Groups of our subscription use this Resource Group to rely on their network piece.
This scenario works best for companies that have distributed teams or use change management process, where any change should be approved, and no administrator could go rogue and perform a change out of the change management window.
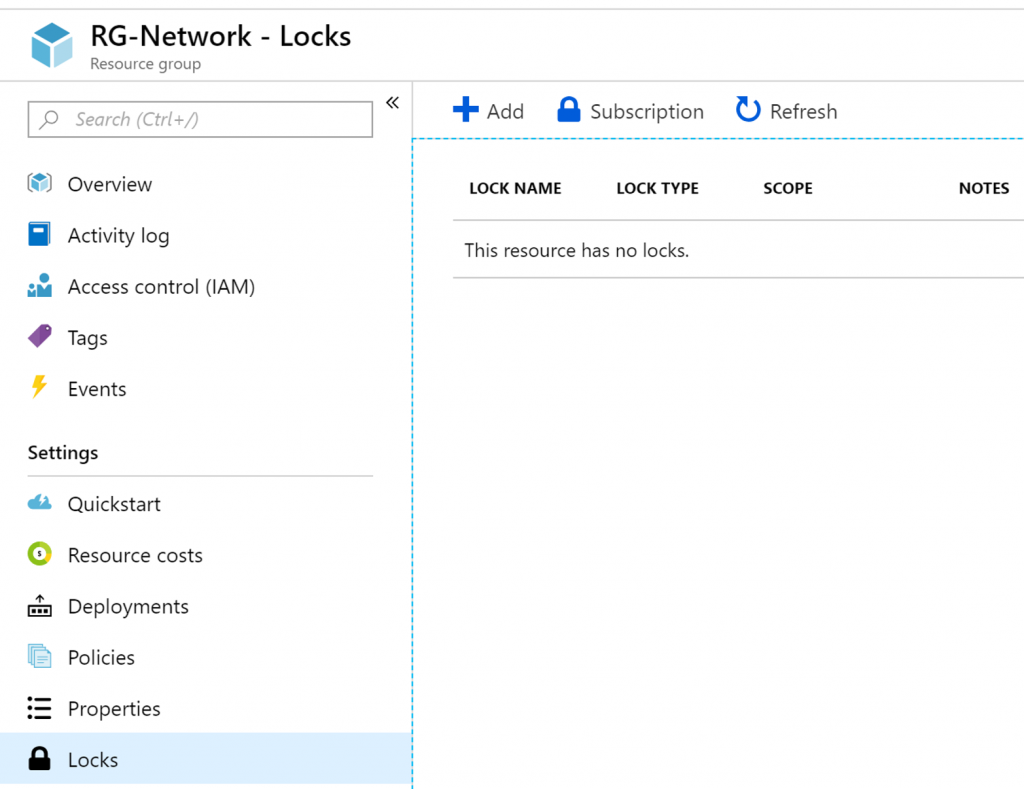
As we saw in the first part of this article, locks can be defined by two types: Read-Only and Delete. Using Azure Portal, click on Resource Groups item, and then click on the desired resource group, in our case RG-Network, and then click on locks.
A new blade listing any locks at this level or higher will be listed. To create a new one, click on Add.
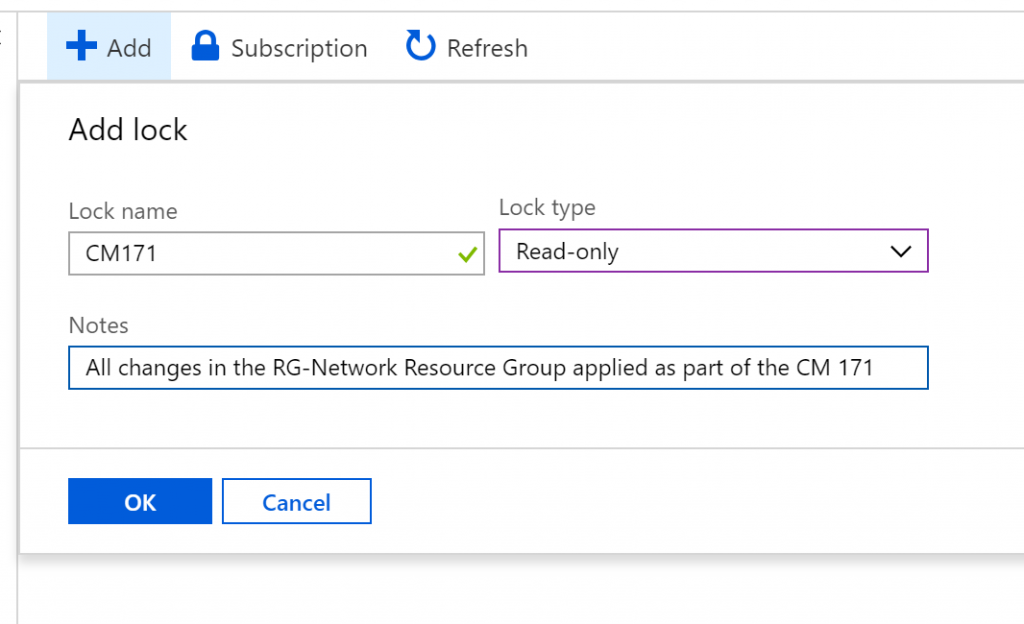
In the new window that is displayed, label the lock, define the type, and add some notes for later reference. In this scenario, we are locking this Resource Group due the change management 171, and then click OK.
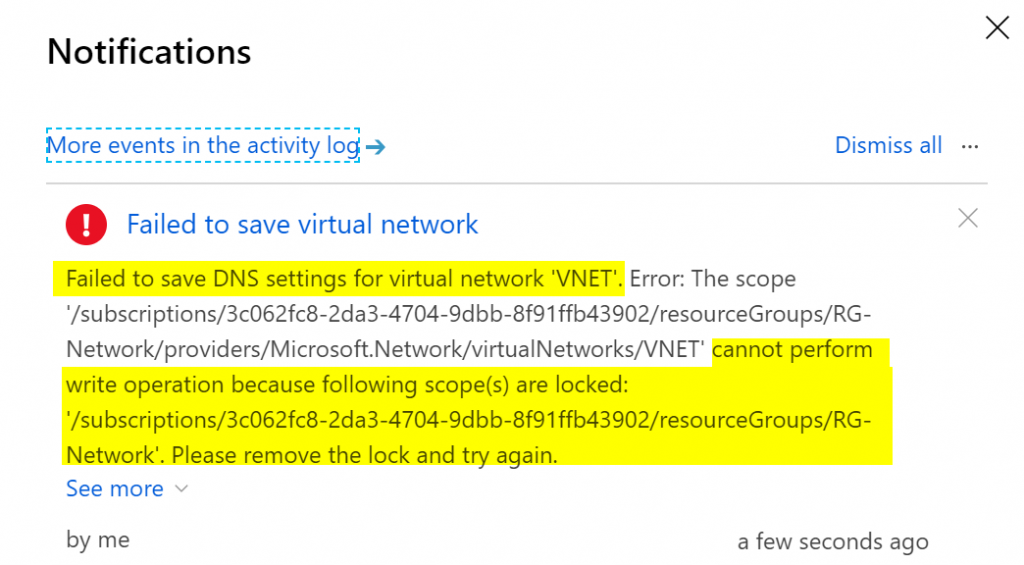
Now that we have a lock in place, it’s time to perform a change in any resource that belongs to that group. Let’s say that an administrator thought a creation of a subnet during workhours wouldn’t hurt and try to change the settings. The error message that he will get would be like this one. Amazing, eh?
Using monitor and alerting with locks
If we are taking advantage of the lock feature, we can use other Microsoft Azure features to improve our operational process. A couple of them to give you some ideas are activity logs and alerting.
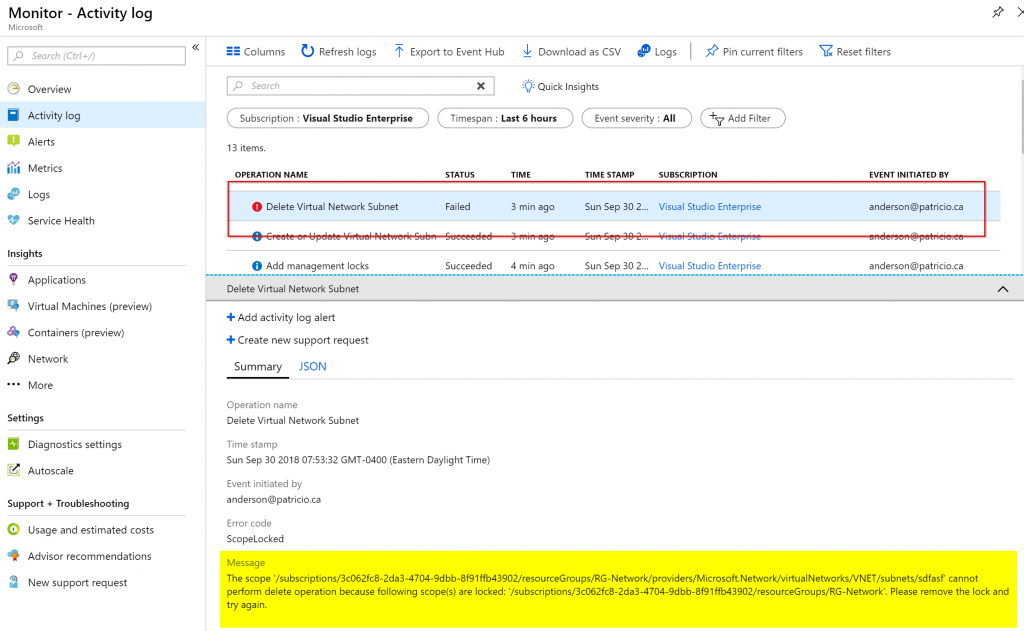
All activity including the locks errors are logged in the Activity log and we can use that information to perform auditing of administrators trying to change the environment out of the maintenance window.
Using RBAC custom role
If you have delegation in your Microsoft Azure environment and use RBAC to control and apply the least privilege principle, you could create an RBAC role for the person responsible for the change management process to create and release locks, this way you know that your environment is not being changed out of your process. Keep in mind that is just a hypothetical scenario to demonstrate some features of locks and Microsoft Azure in general — if it fits all or portions of it in your organization, go for it!
Our first step is to create a new Custom RBAC Role and we are going to label as Lock Administrator, and instead of creating from scratch we will use an existent role. By default, only Owner and User Access Administrator built-in roles are the ones able to manage locks.
The first PowerShell cmdlet will export the User Access Administrator built-in role to a JSON file, that we named LockAdmin.json, and the second cmdlet is just to show the current actions which that role is able to perform (Read everything defined by */read, manage authorization defined by Authorization/*, and be able to play with support tickets defined by Microsoft.Support/*).
Get-AzureRMRoleDefinition -Name “User Access Administrator” | ConvertTo-Json | out-file LockAdmin.json
Get-AzureRMRoleDefinition -Name “User Access Administrator” | fl

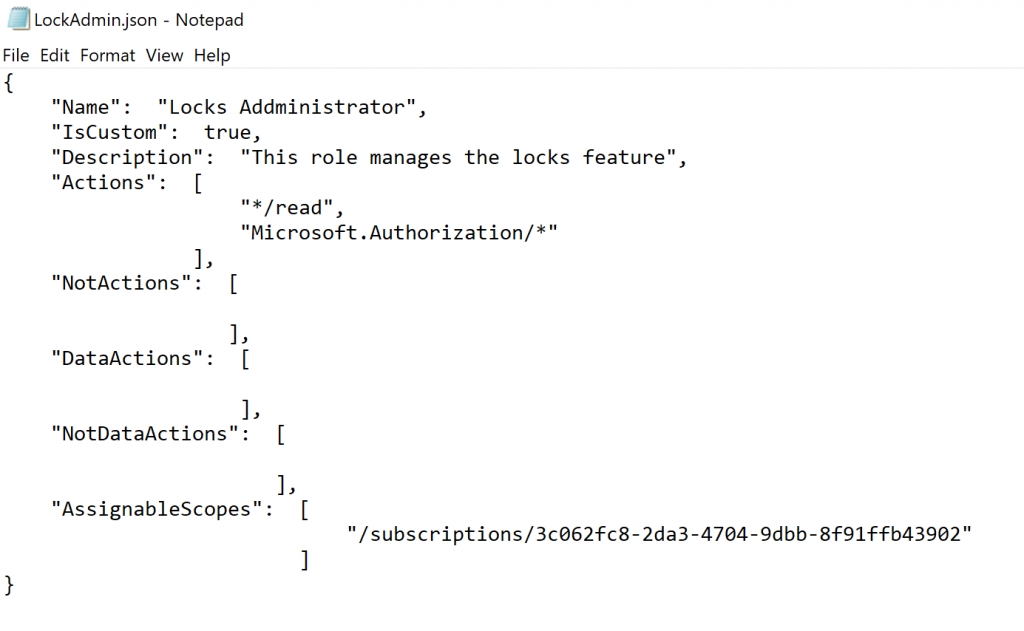
We want to allow the Lock Administrator just to see resources and manage locks. We are going to open the JSON file and perform a few changes, as follows:
- Remove the ID line
- Change the Name value to a name that fits our new custom role
- Change the Description value
- Remove Support/* from the Actions
- Add the /subscriptions/<subscription-id> to the AssignableScopes section
Note: You can retrieve that information using Get-AzureRMSubscription
Save the file, and run the following cmdlet to create the new RBAC custom role. (The JSON file was on the same folder where I was running the cmdlet, you can always specify the path, eg: C:\Temp\file.json.)
New-AzureRmRoleDefinition -InputFile .\LockAdmin.json
The next step is to assign a user at the Subscription level (you can be more restrictive and add at the Resource Group or Resource level). In our example, we will be adding our user Daniel Dreiberg as Locks Administrator role (Yes, Night Owl will be our Lock Administrator! We need superhero powers to maintain the order in the production environment 😊)
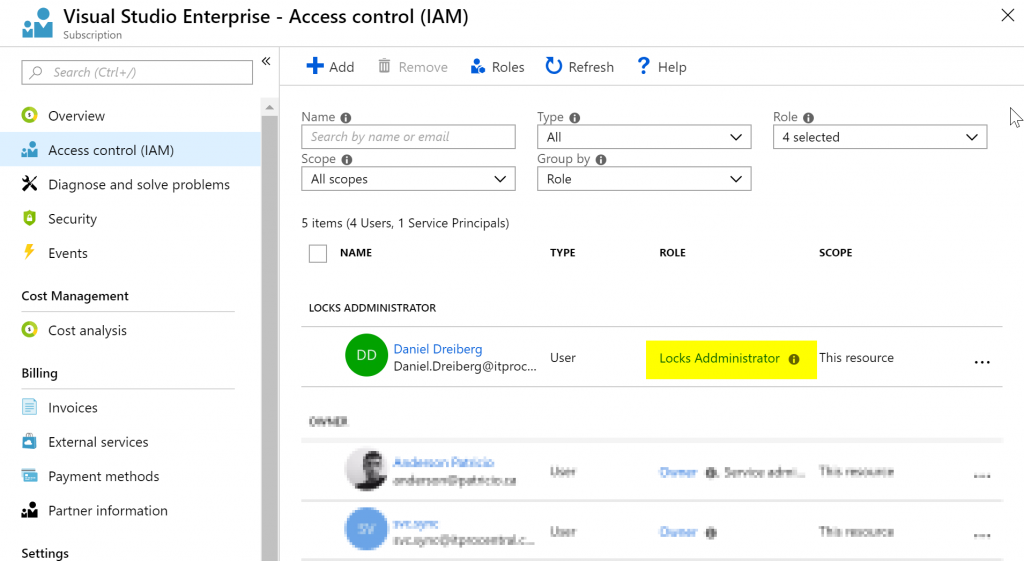
The final test is logged in as Lock Administrator (Item 01), we can see that we cannot do one single change in our environment but manage locks at all levels. In the example below, we are checking the locks at the Resource Group level (Item 2), and we can see the locks in place (Item 4) and we can create new ones (Item 3).
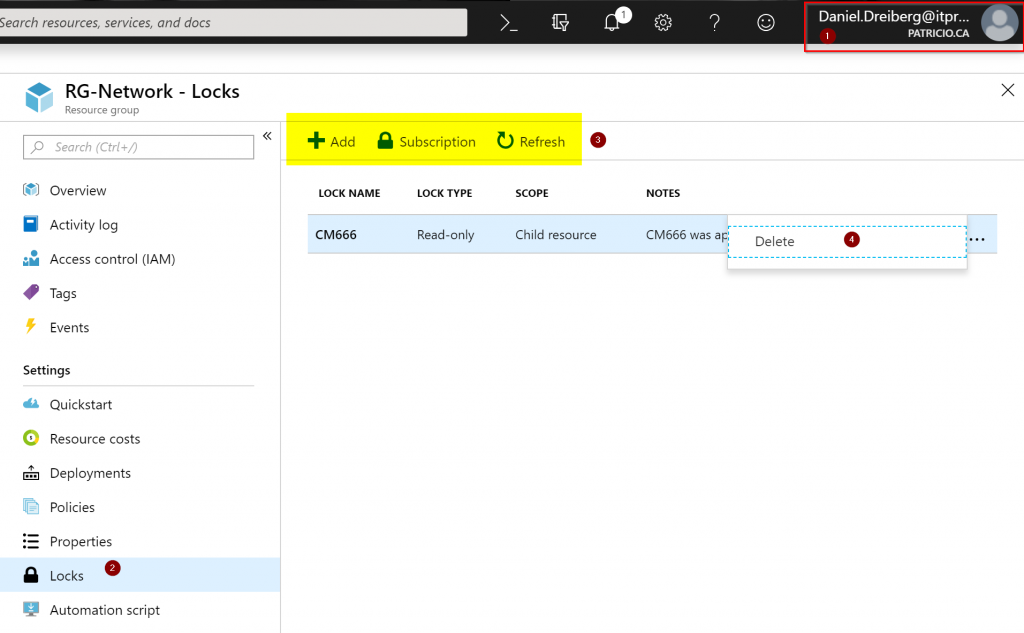
Pretty neat, right?
Featured image: Shutterstock


