The Azure management groups feature, which is part of the Azure governance, is critical for any larger organization that deals with several subscriptions from different areas of the business. In a medium to larger environments where more than a couple of subscriptions are required, the use of management groups becomes crucial. Using Azure management groups, one can apply RBAC (role-based access control) and policies to the management groups, and after that, the management portion is just a matter of assigning subscriptions to the groups. After that step, all global permissions and policies will be in place without any manual intervention from administrators.
Before diving into the management group tasks, I would like to point out a few key points that we need to understand about management groups, as follows:
- A single structure is created to support management group per organization.
- All management groups are organized under the tenant root group.
- We can have up to six levels of management groups (the tenant root does not count).
- A subscription can be assigned to a management group, and there is a relationship of 1:1.
- A management group can have several child management groups, however just a single parent. Like a regular folder in NTFS, simple as that.
- Management group name is vital, and some points that I would like to highlight:
- Management groups names are unique.
- When creating a management group, we have two fields: management group ID and display name. The first cannot be changed and cannot contain spaces; the latter may contain spaces and it can be renamed.
- Use of Production, QA, and Dev shouldn’t be used since we can use just once per tenant.
Managing Azure management groups
In this section, we will cover the basics to manage management groups using Azure Portal, including creation, changes, and exclusions, how to assign subscriptions, and understand where we put all pieces together. In order to manage management groups, we can use PowerShell, Azure CLI, and Azure Portal. Since that is more a global configuration that will be used by the entire organization, I prefer to use Azure Portal, which gives better visibility of what we are defining. Let’s go!
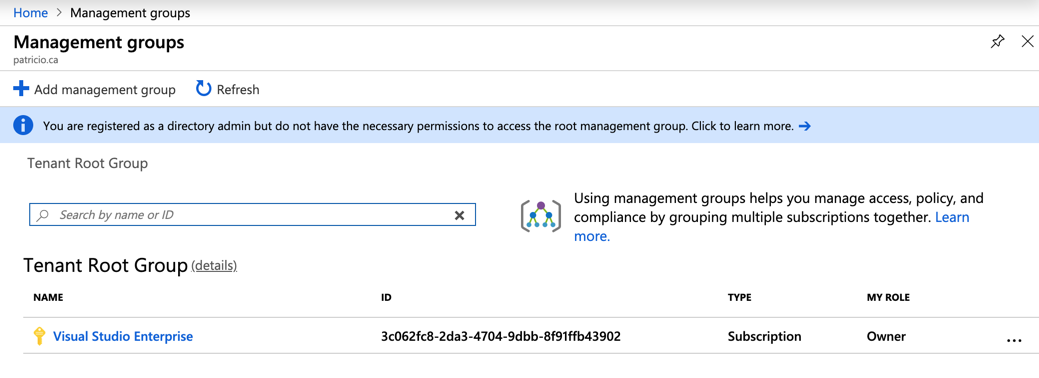
Logged on the Azure Portal, search for management groups and the new blade will have a list of the first level of management groups (if they do exist, which is not the case in the image depicted below) and the existent subscriptions.
To create a new one, click on Add management group button. In the new blade we need to provide the management group ID, and that information cannot be changed, and display name, which can be changed at any time. Click on save and refresh the previous blade to see the new management group.

When creating a child management group, the wizard helps you provide information about the parent, as depicted in the image below. If you have created in the wrong parent, no worries, we can always move management groups around.

Since I mentioned moving management groups, although it is a simple step to perform, it requires some planning and validation of the environment before completing the process. For example: When moving a management group, it will move the desired management group and its child management groups and subscriptions. Also, the new permissions and policies from the new parent management group will be applied to the recently moved subscriptions, so make sure that you evaluate what is being implemented in the target management group before moving it.
There are a couple of ways to move a management group using Azure Portal, and the easier one is to hit … button, and select the destination, as shown in the image below.

Since we are managing, the last topic is to delete a management group, and it can be done quickly, if the management group is empty, which means no child management groups and/or subscriptions. To perform the exclusion, click on … button and click on Delete. If it is unavailable, then you probably still have objects in that management group.
The next step is to be able to move subscriptions to organize them into the management groups, and that can be easily achieved by clicking on … and then Move, the new blade will ask the target management group, click on Save and that’s it!

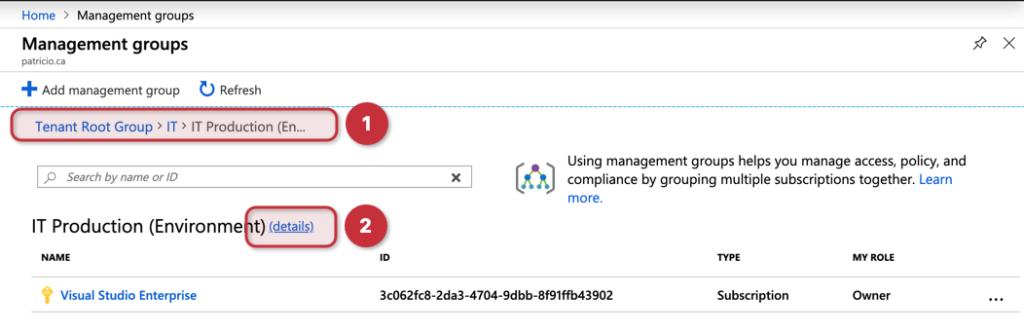
There is one last stop before going to the management group dashboard, where all the magic happens. In the management groups, we have just moved a subscription to this IT Production group, which is a child of IT. Using Item 1, depicted in the image below, we have a breadcrumb that helps us to navigate among our management groups. Last but not least, we have the details (Item 2) link where it will show us the dashboard for the given management group.
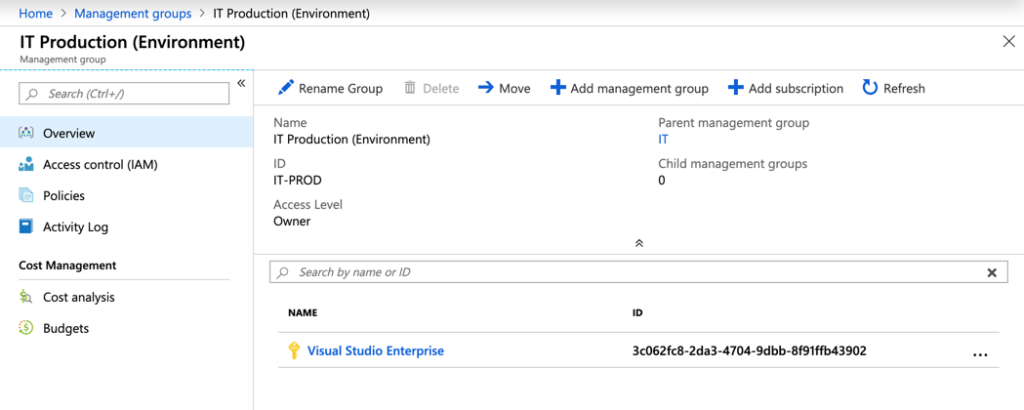
The dashboard for the management group is the central location where we can see all subscriptions assigned, policies, logs, access control, and even cost for that specific management group. Most of the options that we used to manage a management group is available here as well. However, you can’t see all the landscape of management groups using just the dashboard, and that’s why I showed you the more manual process to create the structure.
Assigning Azure Policies
When creating Azure Policies, in the Scope area we can target a management group (as depicted in the image below), and that brings the benefit of centralized management where any subscription being added to this management group will receive this Azure Policy.

In order to double check if the management groups changes are being applied to the subscription, we can always go straight to the desired subscription, then click on Compliance, and on the right side, we should see the Azure Policy that was created at the management group level.
If we look at the Scope column, we can identify that policy came from a management group, which is what precisely what we are looking for.

Assigning role-based access control
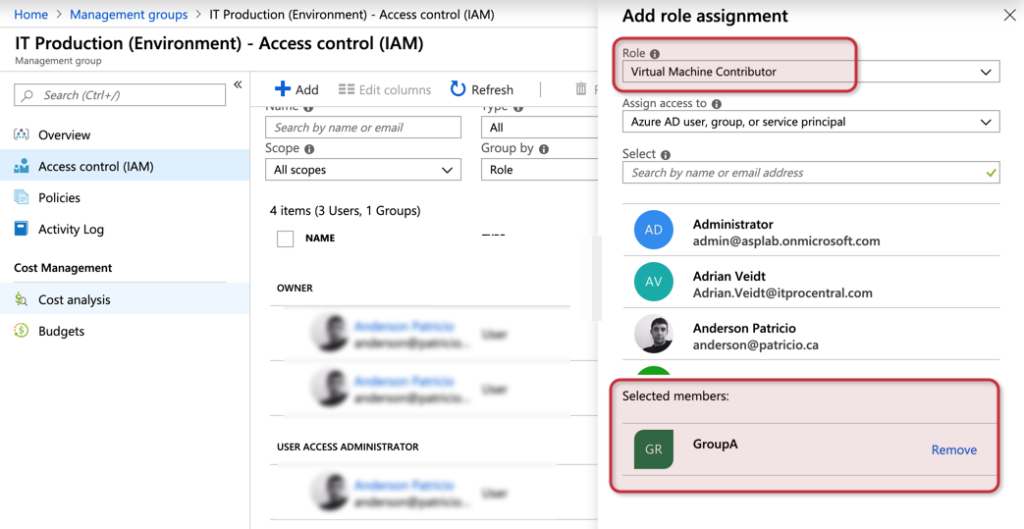
This feature is fantastic when managing access control. Let’s say that we want to add the GroupA as Virtual Machine Contributor to all my IT Production environment. Keep in mind, if I do have new subscriptions being added, that same permission will be assigned as well.
In the IT Production management group blade, click on Access Control (IAM), and then click on Add, then select add role assignment, select the Role and to whom we will assign the privilege and click on save.
If we want to double-check, we can always go directly to the subscription (Access Control) and check the current permissions, and we will see the group that we assigned at the management group level being displayed there. The last column shows that specific permission was inherited from a management group.

Azure management groups: Wrapping it all up
If you require more control of your subscriptions, this feature is for you! Having all your global access controls and policies in a central location without worrying about chasing down new subscriptions and assigning manually is a game-changer. Another beauty of this feature is that we have audit information of everything that is going on. For example, when I created the permissions that were propagated to my IT Production management group entry of that activity was logged. So rest assured, you can analyze all changes performed to your environment.

Featured image: Freerange Stock


