This is the third in a series of Azure portal articles and videos. Part 1 covers Azure portal resource groups while Part 2 walked you through Azure portal dashboards.
It may seem odd that an article on the CLI (command line interface) appears in a portal-focused tutorial, but indeed it does make sense with Microsoft’s introduction of the Azure Cloud Shell. Cloud Shell is essentially a browser-based CLI that you run from directly within the Azure portal. In this article and the video, I walk you through the process of setting up and using the CLI.
[tg_youtube video_id=”bUNijsf1OFY”]
What is the Cloud Shell?
Developers and IT administrators alike know that fidgeting around with user interfaces, waiting for screens to refresh, and remembering all the steps to create or manage an app is time consuming and fraught with human error. That is why CLIs are so invaluable; you can define a standard set of steps and then repeat them consistently with a text-based editor. Even when you are not working with large scripts and configuration files, it can just be easier to quickly type a command in a CLI rather than going to a website, logging in, clicking on three links, and finally performing one simple task.
Traditionally, managing Microsoft Azure means using the portal or using a command line shell that you install on your personal computer. Microsoft supports using PowerShell or Bash, but even that takes some time to set up and configure.
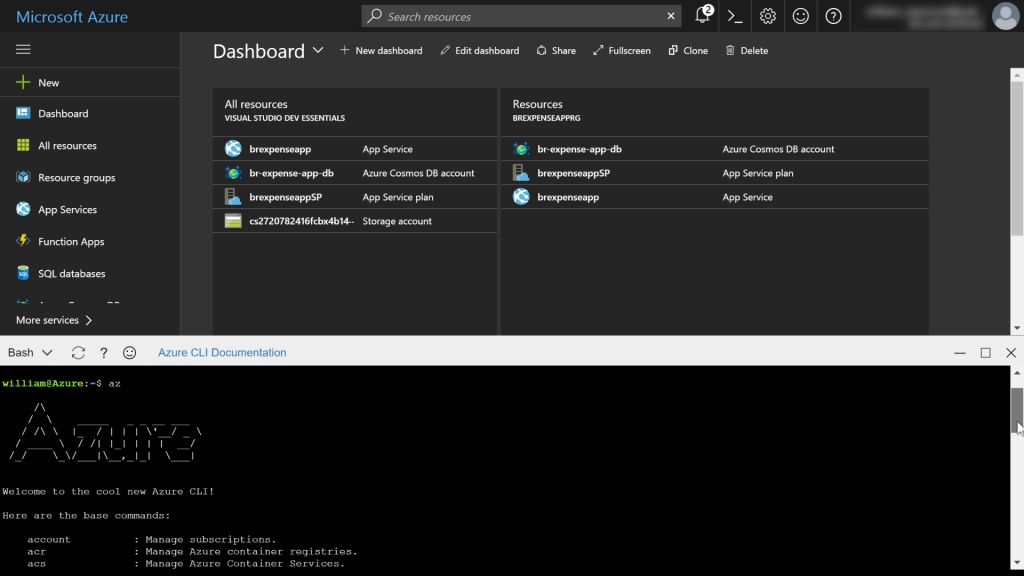
Enter Azure Cloud Shell. Cloud Shell is essentially a Bash CLI that allows you to perform nearly any task you could in your browser and directly from the Azure portal. As you can see in the image below, the browser displays the Azure portal at the top of the screen and then shows the Cloud Shell (CLI) at the bottom of the screen.
Note: The Unix-based Bash scripting language is the default CLI, but Microsoft’s PowerShell is coming soon.

To use Cloud Shell, you need to enable it and then run it directly from the web browser.
Enable Cloud Shell
In most cases, you cannot just click the Cloud Shell icon and start using it. Rather, you may need to walk through some configuration steps to get it up and running. In this section, I will explain the basics for preparing your Azure portal environment to use the Cloud Shell.
Click the >_ icon, located at the top right of the Azure portal. When you do so, the browser will display a new frame at the bottom of the window.
If the new Cloud Shell frame shows a blinking cursor, then the Cloud Shell is active, so you can skip ahead to the using the using Cloud Shell section of this page and skip to 17:07:00 in the video. If your Cloud Shell frame displays a Persist account files item as shown in the following image, then please continue reading.
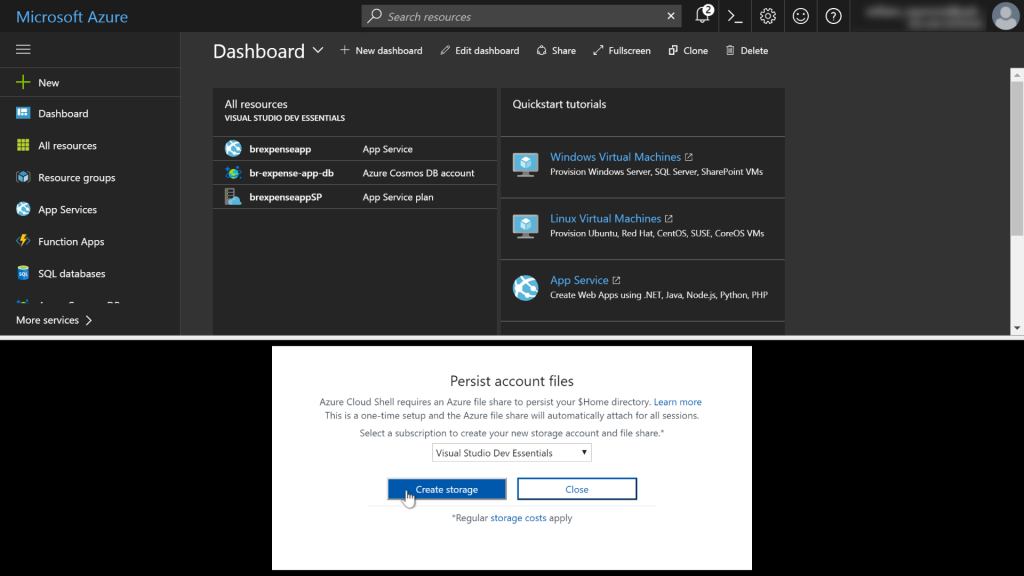
Since the Cloud Shell hosts scripting languages, you will likely want to package those scripts into files. You can create those files on your computer and upload them to Azure or vice-versa. Before you can use the Cloud Shell, Azure requires you set up persistent storage, so click the Create Storage button.
After you click that create storage button, you may get see some text along with a blinking cursor, which means your Cloud Shell is all set. You can skip ahead to the using the Cloud Shell section of this article and skip to 17:07:00 in the video. If you receive an error message, read on.
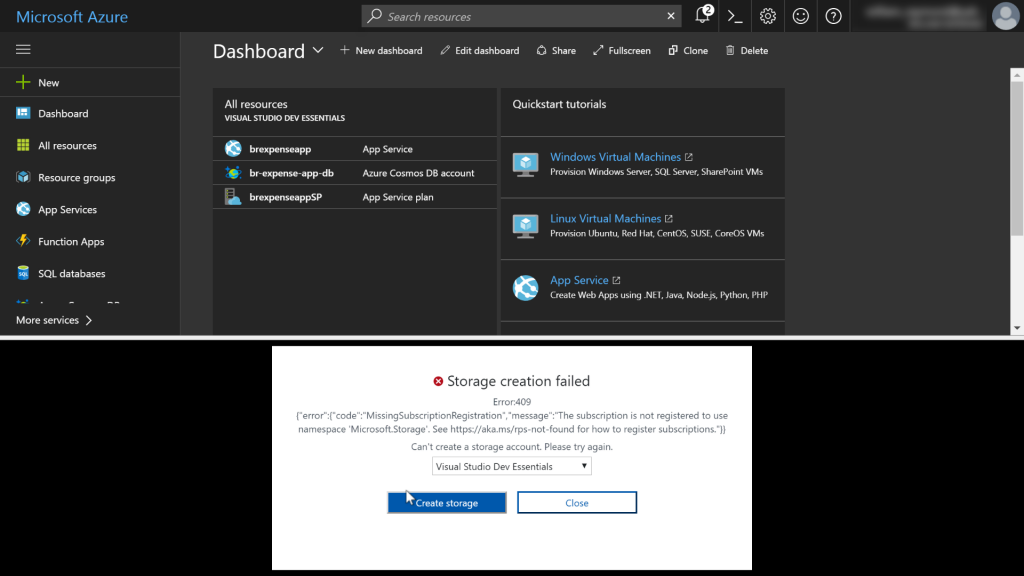
You may receive an error like the one shown in the image below.
Note: Even if you get a different error message, read the following steps as it will help you understand how better to read the message.
In this typical example, you receive a Storage creation failed dialog. As the previous image shows, the error code is MissingSubscriptionRegistration. Next to that error code is a URL. Copy that URL and paste it into a new browser window. Microsoft writes up all the common errors, and you will have to follow the instructions to fix the issue.
In the previous image, you will see my error also states “The subscription is not registered to use name Microsoft.Storage.” Watch the video accompanying this article to see how exactly I debug this, but the key here is to pay particular attention to the words the error is telling you. These words include subscription, registered, and namespace.
Armed with those keywords, the first thing to do is go to the Search bar at the top of the portal and type Subscriptions. A subscriptions item appears, so click that, and you will see a page similar to the following image.
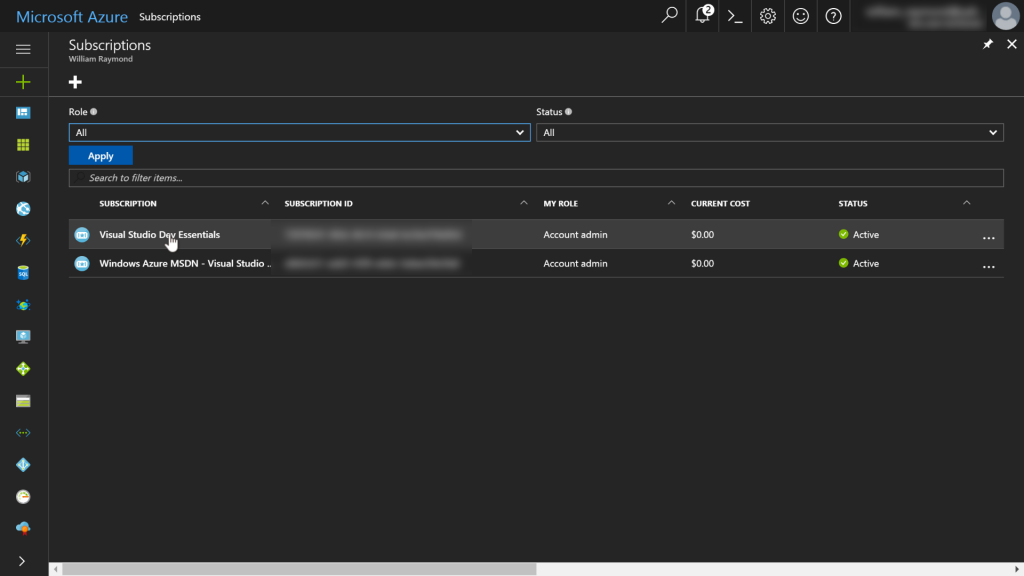
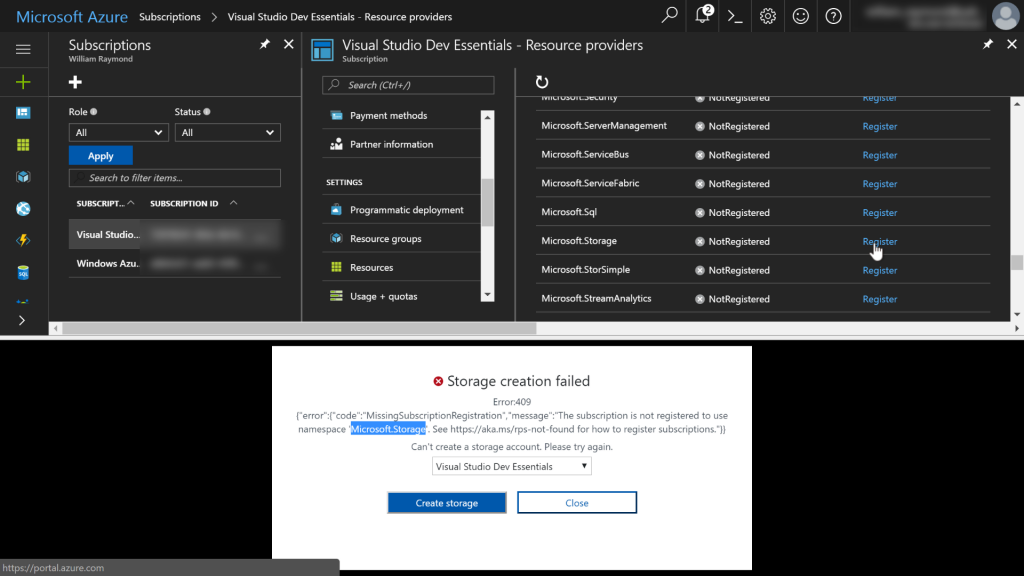
If you have multiple subscriptions, Click the one you plan to use with Cloud Shell (you can always select another subscription later). Next, you will see a screen that looks like the following image. Scroll down the resource providers list, click Resources, locate the Microsoft.Storage item, and then click the Register link.
Note: Click the refresh icon at the top of the resource providers, and you should see the service registered after a few seconds or minutes.
With the Microsoft.Storage service properly registered, I recommend you refresh the browser to start from scratch, click the >_ icon, and then click the Create storage button again.
If you receive a different error message, then follow the links provided to fix them.
Using the cloud shell
The video that accompanies this article covers many more details than I do in this article, but here are the basics.
In the Cloud Shell, type the following command and then press the enter key on your keyboard:
az
The Cloud Shell will fill up with a list of various commands. As you can see in the following image, I scroll to the top of the page to verify Azure is running (signified by the text-based Azure logo).
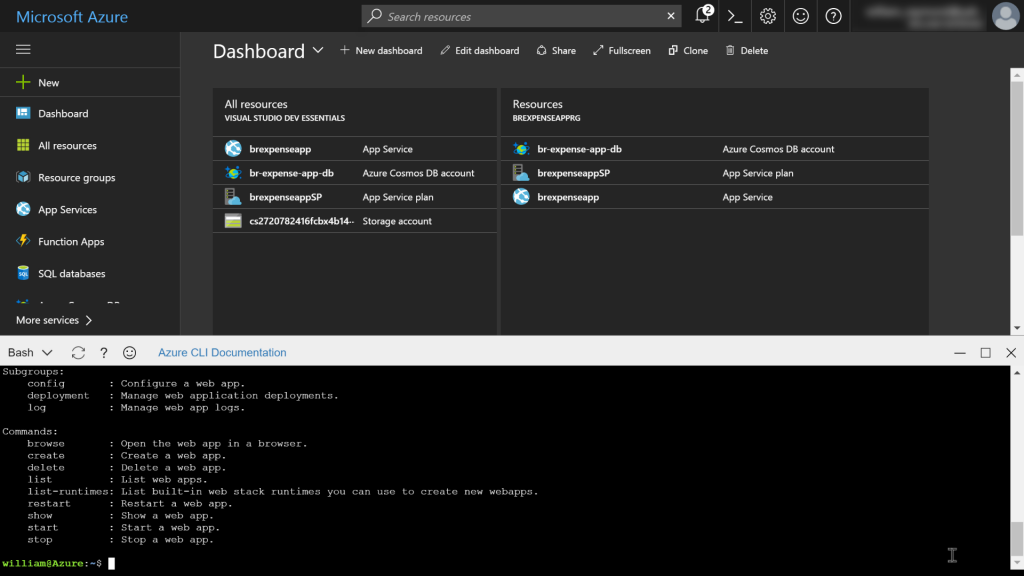
Scroll down to the bottom of the Cloud Shell, and you will see a blinking cursor. You can type az and then any command you like. However, if you are not sure how to use the commands, Microsoft provides help. For example, let’s say your Azure instance has one or more web apps. You want to see all the web apps, but you are not sure how to do that. You can start with:
az webapp -h
Using -h at the end of any command will give you help text. As you can see in the following image, help displays some commands, like browse, create, delete, list, and more.
Since you want to see a list of all the web apps, but want a nice clean view of them, you have options, so type:
az webapp list -h
The help text says you can ask for the list in various output formats like json and many others. One option is table, so use that by typing:
az webapp list -o table
As you can see in the following image, I have two web apps on my Azure subscription, and display in a nice clean table format.
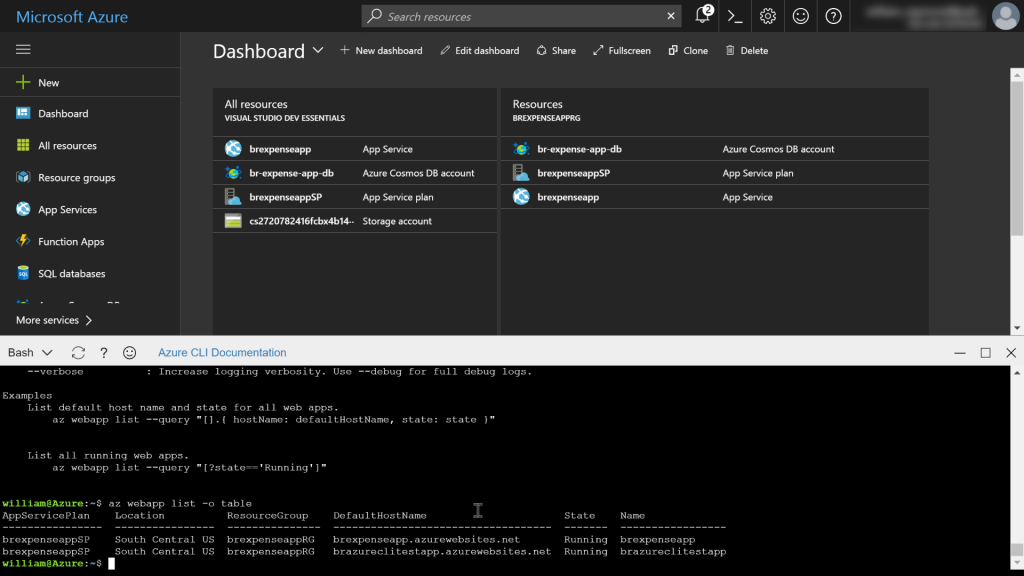
Note: If I were to have typed az webapp list -o json (or just az webapp list, since json is the default), then I would receive a very detailed response with all the properties associated with that web app, rather than just a few columns of text.
This article covers the basics of getting up and running with the Azure Cloud Shell. There is much more you can learn by watching the accompanying video at the top of the page. For example, I cover other topics like:
- How to create a web app.
- How to read some of the more confusing help text.
- How to delete a resource.
- Cloud shell tips-and-tricks.
- Get started working the cloud drive so you can share script files between your computer and the cloud shell.
If working with the Cloud Shell is not your thing, and you want to install it on your computer, then I recommend you follow this tutorial:
If you just want to get up to speed working with the CLI in general (on your computer or in the Cloud Shell), try the following article. Note that the previous article focuses on bash, so the following article is particularly useful if you want to use the Azure CLI with PowerShell.


Nice Article Bill, Would be great if you can post most commands that are used by Azure command shell. Many Thanks…