This is the second in a three-part series of Azure portal articles and videos. Part 1 covers Azure portal resource groups. Part 3 will take a look at Azure portal Cloud Shell.
Once you start using Azure, the list of resource groups, resources, and services will grow exponentially. In this article and the accompanying video, I walk you through all the major elements of the out-of-box dashboard. Then I will show you how to create, modify, share, and, of course, delete dashboards within Azure. To check out Part 1 of this series, go here.
[tg_youtube video_id=”wiuEVRlJTb4″]
What is a dashboard?
The dashboard is a prime piece of real estate on your Azure portal. It allows you to drag-and-drop various services, health meters, and other relevant information onto a single web page. You can even create multiple dashboards.
For example, let’s say you are an IT administrator. You might create a dashboard that shows the overall health of your Azure services and current billing. Another example is a development team working on an app, so they have a dashboard that focuses just on the services that make up the app, showing errors, consoles, and logs.
Note: By default, Microsoft Azure ships with a single dashboard, with the title Dashboard.
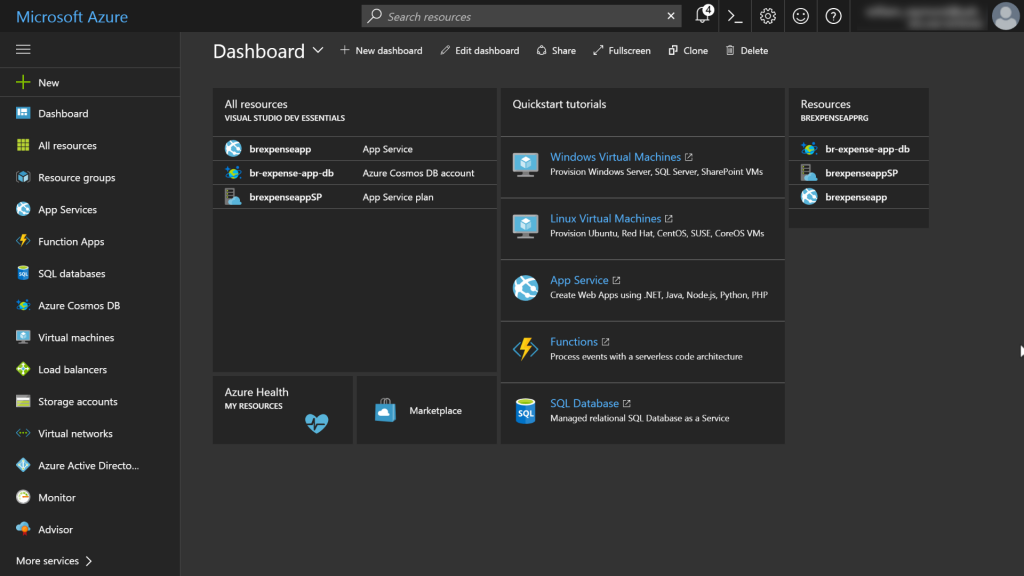
As you can see in the image below, a dashboard can contain a range of information, including Azure resources, access to tutorials, links to the Azure Marketplace, and drill-downs to view Azure Health.
Tiles (or web parts)
Note: I tend to use the term tiles and web parts interchangeably as they are similar to both Windows tiles and SharePoint web parts.
The Azure dashboard takes many queues from the Windows 8 Metro user interface, where you can add tiles to a page. Those tiles are web parts that have a fixed size or can span across larger blocks on the page. You can move the web parts around, so the layout is useful to the people viewing the dashboard.
As you can see in the following image, I am editing the dashboard to remove the Quickstart tutorials tile. On the left side of the screen is a gallery of other tiles (web parts) I can drag-and-drop onto the dashboard.
Creating dashboards
Rather than modify the default dashboard, you can create new dashboards.
To create a dashboard, go to the Azure portal and click the New Dashboard link. The new dashboard appears, and you can give it a name and start adding various tiles to the page.
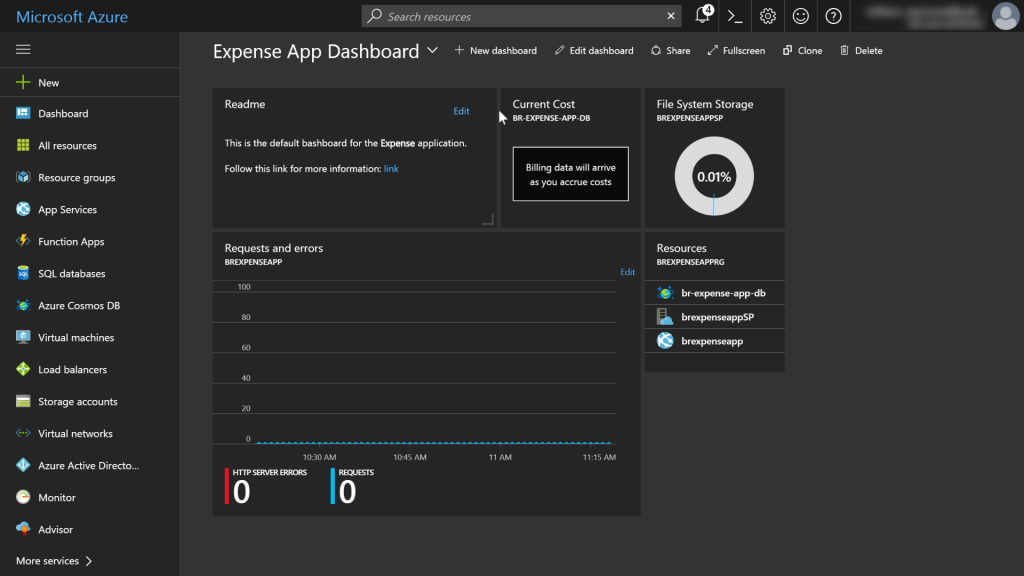
As you can see in the image below, my new dashboard looks nothing like the default that Azure provides. In this particular example, a fictitious company is building an expense-tracking application, so they add the essential elements of the project to the dashboard. For example, there is a readme tile for linking to the project’s homepage, a cost tile to understand the cost the app will incur, and much more.
Personal and shared dashboards
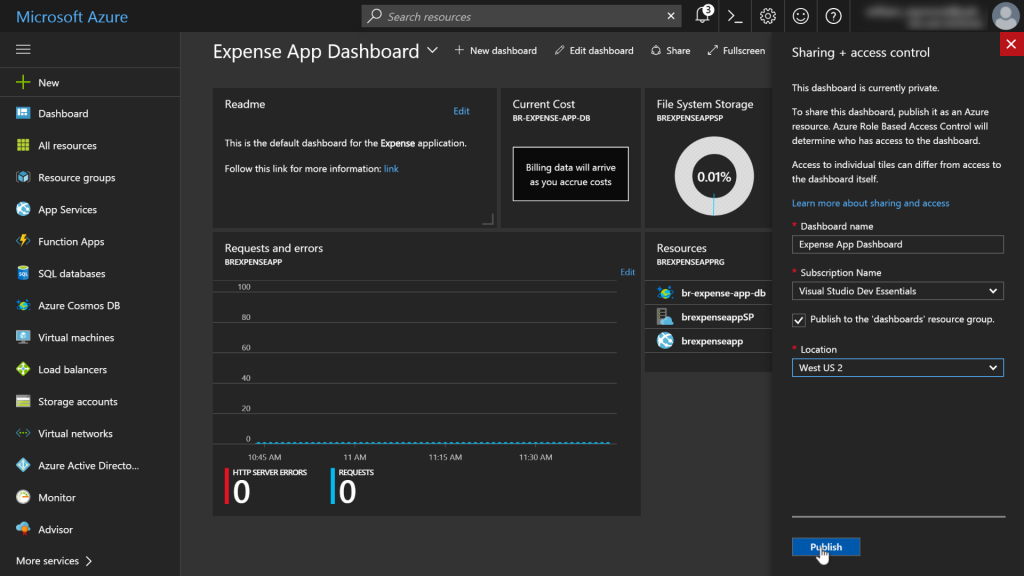
While it is fine to create personal dashboards, it might be worth sharing them so others can see the same information. To share a dashboard, go to the Azure portal and click the Share link. As you can see in the following image, a side pane appears to the right of the dashboard. In that pane, you fill out some information and click the Publish button.
As you can see in the following image, Azure will prompt you to manage user access to the shared dashboard. By managing the users, you can limit access so only those requiring the dashboard will have access.
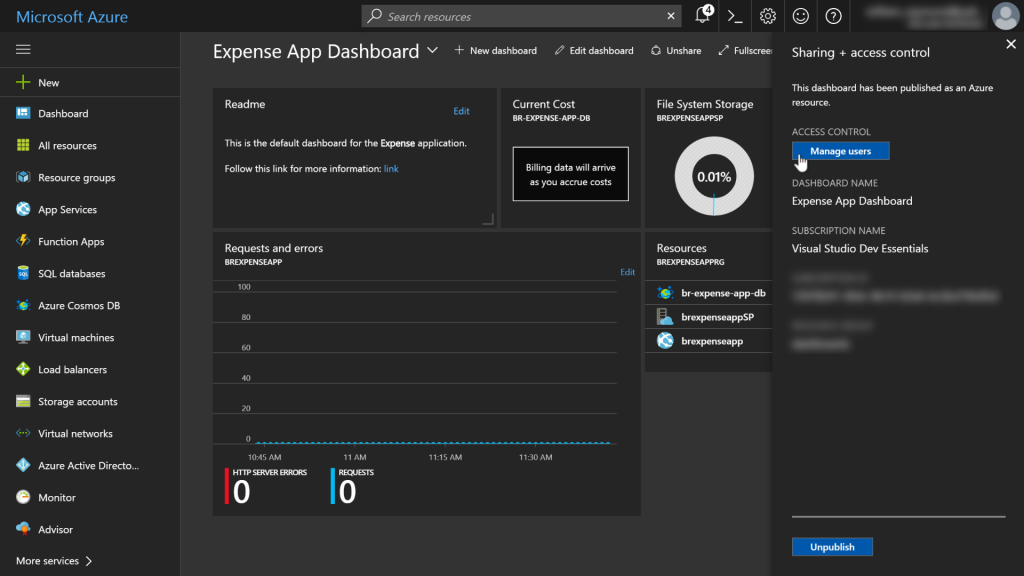
Before you share a dashboard, consider the security rights that others have. For example, the dashboard in the previous image has a Current Cost tile. If individual users do not have access to see billing information in Azure, then the tile will be of no value to them.
Adding resources
Very often, you will want to add resources or resource groups to your dashboard. You will not necessarily find them in the tile gallery. Instead, you will have to locate the resource group you want to share, select the context menu (…), and then choose the pin to dashboard item.
As you can see in the following image, I add the brexpenseappRG (resource group) to the dashboard. Now, whenever I create a new resource in that group, it will automatically display as an item in the dashboard.

Deleting dashboards
This is hardly worth a standalone section, but I will point out you can delete dashboards. Select the dashboard you want to remove, then simply click the Delete icon at the top of the page and follow the instructions.
Changing colors
You can change the colors the portal displays. Those portal color changes are most notable in the dashboard, which is why I mention it in this article.
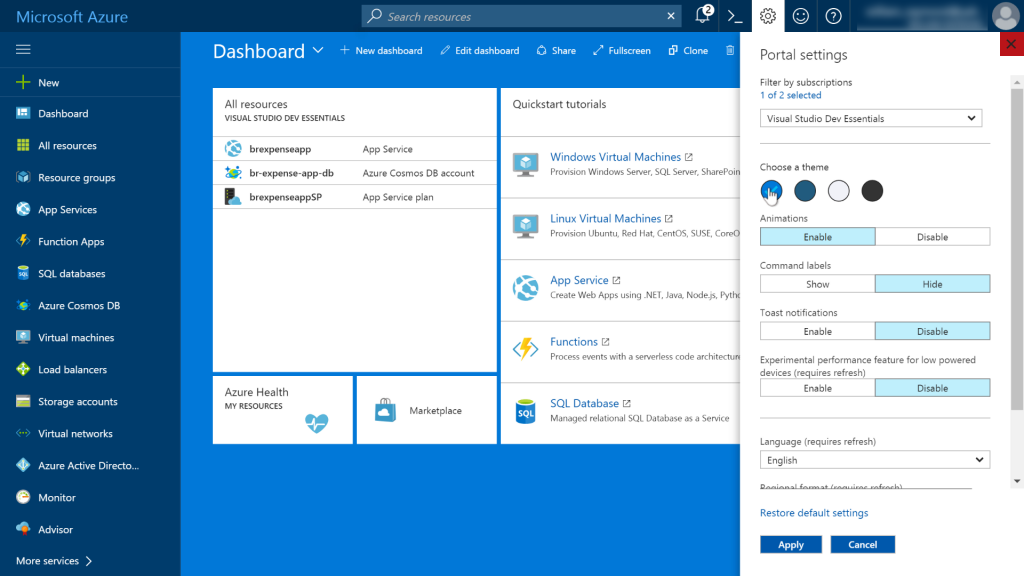
To change your personal color preferences, double-click a blank area on the dashboard. You can keep double-clicking and the portal will display various theme colors. Also, you can click the Gear icon at the top of the page and sample the colors, as shown in the following image.
Note: The theme color is separate from the dashboard itself. If you are using the bright blue theme and share a dashboard with someone using the dark gray theme, then the dashboard will display with their dark gray preference.
The dashboard is ideal for giving you quick access to information that is pertinent to you. However, there are times when clicking on various dashboards and links can be onerous. As you will see, the next article in this series covers using the command line interface (or CLI) to perform various tasks.


hi,
Can you please let me know how to add cost tile to the dashboard? We have created resource groups based on the environments like app1-dev, app1-UAT, app1-Prod…etc. We would like to customize the dashboard show how much is the cost for each environment. Can you give us any idea how we can accomplish this.
-Ajay