Ever think about using Microsoft Azure to perform a series of management tasks on a server located on-premise? You can by using a preview feature called Server Management Tools (SMT). This feature allows remote management of Windows Server 2012, Windows Server 2012 R2 and Windows Server 2016 using a graphical user interface through a web browser. And the cherry on top of the sundae? Once we configure SMT, we can use the PowerShell command line!
This feature can help in several areas: delegation of server administration, outsourcing of some management tasks, and a “single pane of glass” to manage servers instead of having RDP connections all over the place.
The architecture is simple. It consists in a single role — the gateway server that is deployed in Microsoft Azure (and this server requires an Internet connection). The gateway is a key role in the SMT architecture because it acts as a proxy between Azure and the target servers located on-premise or even in Microsoft Azure.
The feature is in preview, which means that some features may be added/removed/changed. These following functionalities are enabled on the current preview as of today. (We will explore those features in-depth in our next article):
- System Info
- Computer identification
- Certificate Manager
- Device Manager
- Event Viewer
- File Explorer
- Firewall Rules
- Hyper-V
- Local Administration
- Network Settings
- PowerShell
- Processes
- Registry Editor
- Roles and Features
- Services
- Storage
- Windows Update
Preparing a Resource Group, Virtual Machine and adding SMT preview
Although it is not a requirement, the creation of a Resource Group for the Server Management Tool component is a best practice to keep all items related to this feature contained and organized in a single location. We will be creating one to accommodate all configurations related to this server in our article.
Logged on the Microsoft Azure portal, create a new Resource Group. In this article we are going to name it AZNA-RG-ServerMGMT, and then click on Create.

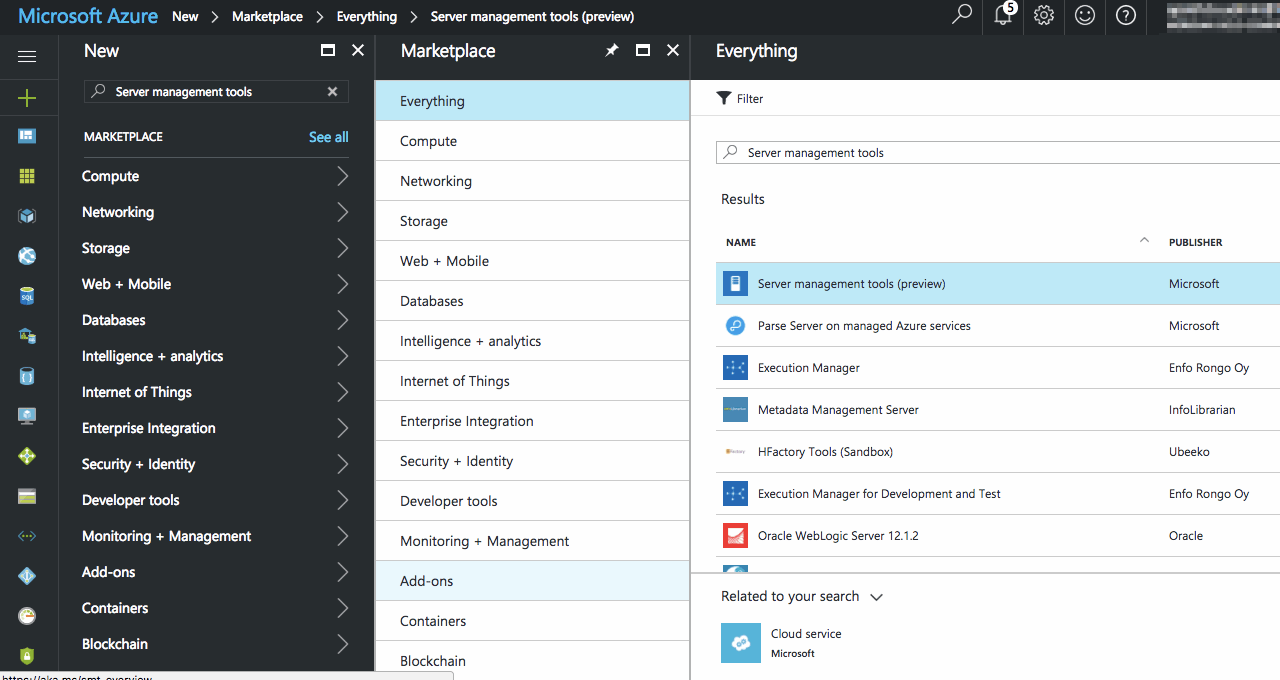
Now that we have a Resource Group created for the feature, we will click on New and we will type in Server management tools in the search box. From the list that is displayed, click on Server Management Tools (Preview). A welcome page with information about the feature will be displayed on a new blade. Just click on Create.
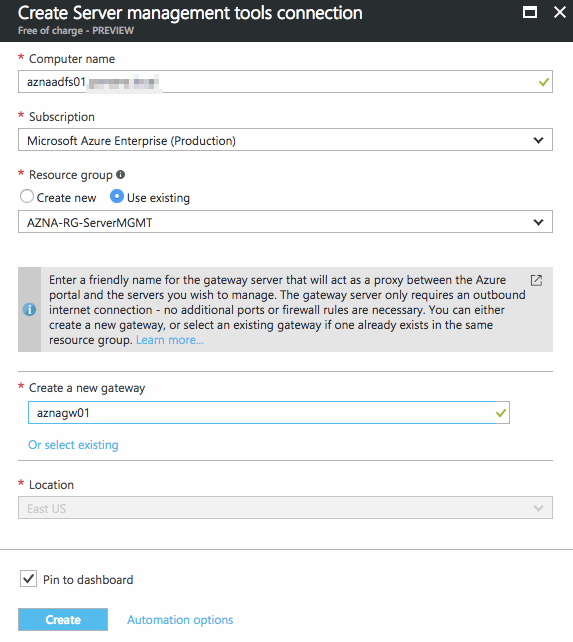
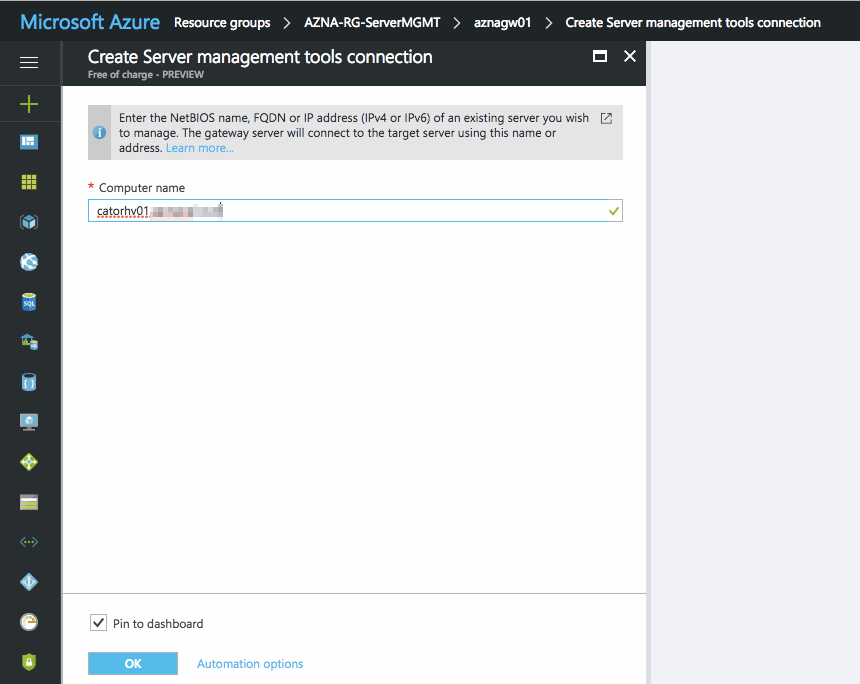
In the Create Server management tools connection page, be aware that the wizard is kind of weird (at least in my opinion), and a little bit misleading because the computer name object is the name of the first server that will be managed by the SMT, nothing else.
After defining the first computer to be available for management, we need to decide the subscription and resource group.
The gateway server comes at the end, and we will create a server called aznagw01 (which, by the way, hasn’t been created so far). After filling out all required fields, click on Finish and wait for the completion of the process.
Our final step is the creation of a Virtual Machine running Windows Server 2016, and we will name this machine aznagw01 as we defined in the SMT Wizard in the previous step. Please make sure to add this new VM on the same Resource Group created at the beginning of this section (AZNA-RG-ServerMGMT). After installing the VM, we will join that server to the Active Directory domain. Note: For this article, we are using a DS11_V2, which has two cores and 14GB of RAM.

Gateway configuration
At this point, we have a new VM joined to the domain (the AZNAGW01 server), and we have the SMT feature added to the Resource Group. Let’s open the Resource Group.
Logged on to Microsoft Azure, click on Resource Groups, double-click on AZNA-RG-ServerMGMT and on the list of objects, click on aznagw01 and on the Overview tab, we will see a summary of the settings related to the server, click on the orange bar that should have a description like this: “Configuration required. Click here to configure this gateway.”

A new blade will be displayed with a summary of the gateway configuration. Basically, the gateway server requires some software installed to communicate and register with Microsoft Azure.
In this new blade, we should enable the automatic updates of the gateway software by selecting Automatic, and we need to click on the Generate a package link button, which will create a URL that we need to copy and access that information on the gateway server.

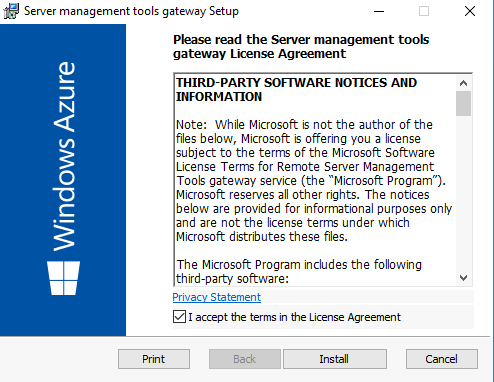
The next step is to log on the gateway server and access the URL created on the previous step. Download the package and install using default values (including the Generate a self-signed certificate option in the Create or choose a certificate page).
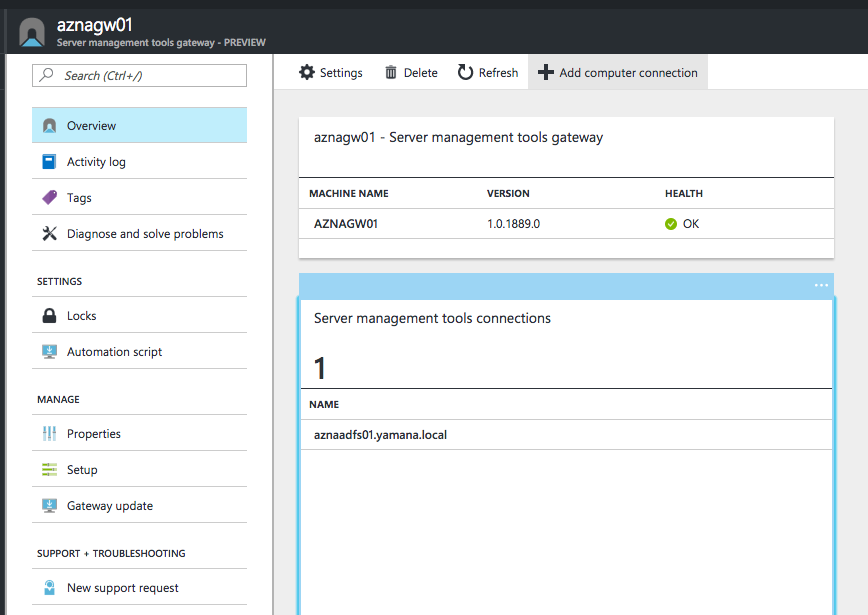
After the software installation, we can go back to the Azure Portal, and now the gateway will show up in a health state, as depicted in the image below. If we scroll down a little bit on the same page we will have all managed computers. For now, we have just the one that we defined when we were adding the SMT feature. Double click on that server.

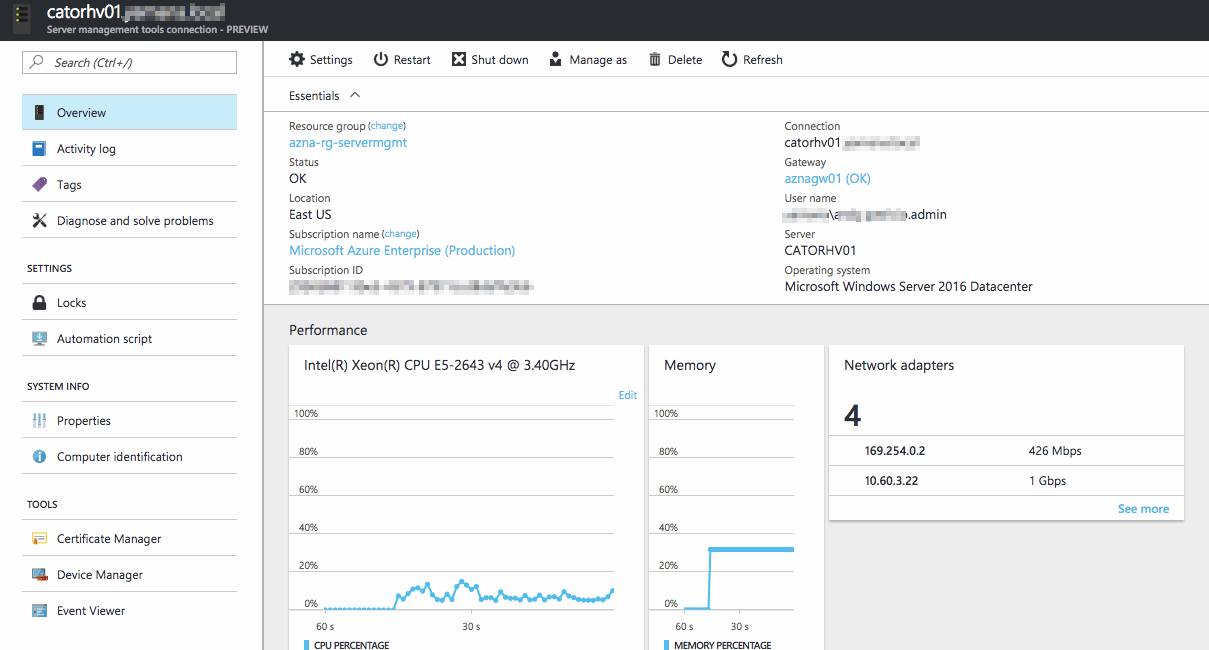
The new blade is focused on the managed server, but as we can see all Tools, System Info and Performance information is unavailable because we haven’t configured the credentials yet. In order to do that, click on the Manage as button.
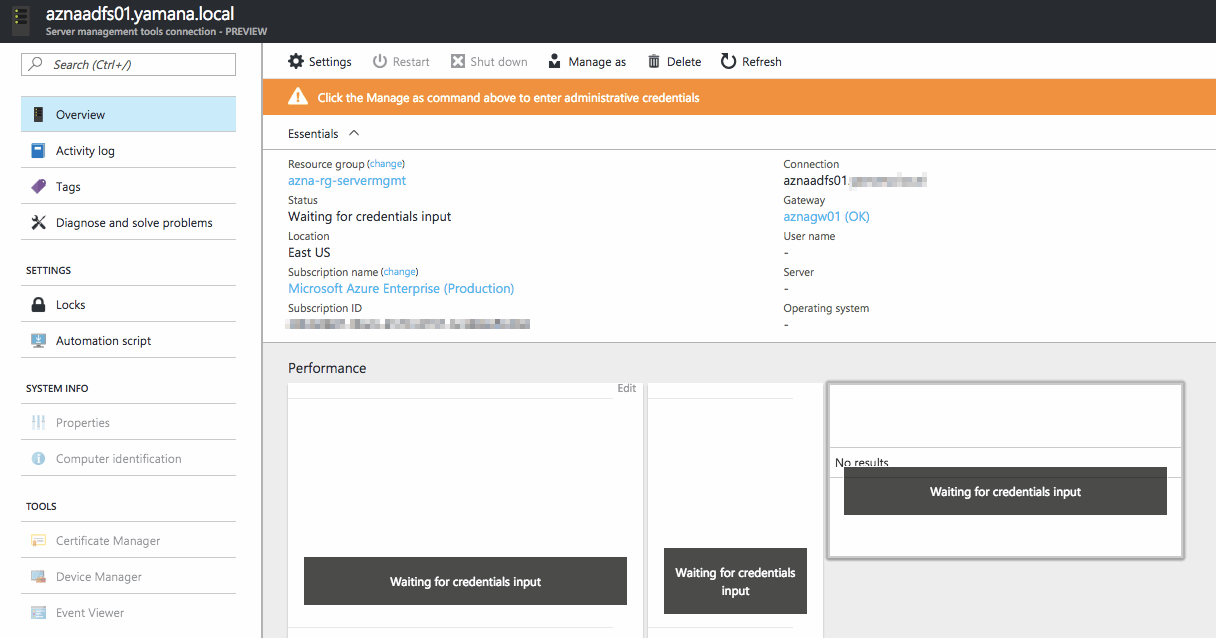
Fill out the information. You can use either the UPN ([email protected]) or NetBIOS (DOMAIN\username) format, we can save the credentials in Azure, and then click OK.

Having the authentication properly configured is the most challenging task. After getting that one done we can check on the Overview tab, and we can see that some details of the server on the right side, such as Operating System, status of the gateway, CPU performance, memory, and network adapters are being displayed already.
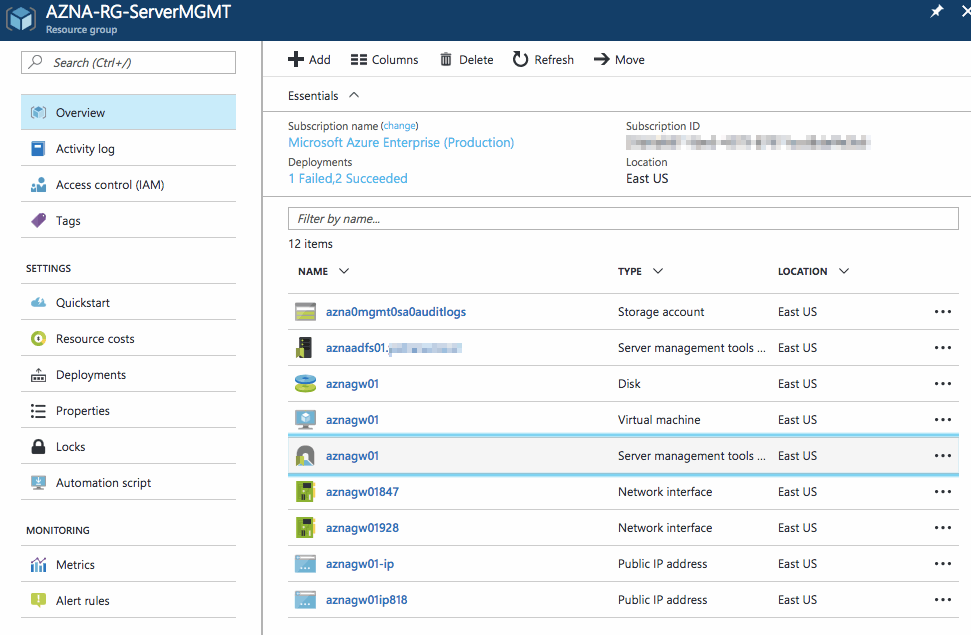
One last thing before moving to the next stage, which is adding managed servers to the Server Management Tools, is to check the items that are part of the Resource Group that we created. We will notice that the gateway is an object, and for each connection (managed server) a new object will be created.
Adding more managed computers
Another topic that sometimes generates some questions — and puzzles some administrators who are testing the new feature — is the process to add additional managed computers. Basically, a single gateway supports several managed computers associations, which means that the process to add a new computer is simple and easy and does not require as many steps as the first time.
To add a managed computer to the SMT feature, go back to the Overview tab of SMT, and then click on Add computer connection located on the right side.
In the new blade, type in the computer that we want to manage. The gateway server will connect to this computer defined here using the information provided. Click on OK.
When adding a Windows Server 2012 or Windows Server 2012 R2, the administrator may receive a message that some required software is missing (a message in a banner saying Required Software not detected. Click here to Configure.). If that is the case, click on it, and on the new blade click on Install and the installation process will start automatically. Wait a few minutes for the confirmation that the process was completed on the server that we have just added.

After adding a new server, the administrator/operator must configure the credentials regarding that new server.


Should be on-premises, premise is an idea 🙂