Based on the laws of mathematics, there is an infinite number to get from point A to point B, no doubt it. When talking about technology and, more specifically, cloud, the options of getting from point A to point B are more limited, mainly because the vendor provides the boundaries and the available paths that we can choose based on the supportability, security, and so forth. In the first part of this series, we saw how to create a dacpac file of our SQL database and leverage Azure integration with SQL to restore that same set of data into a brand new SQL database. However, there are many other options available, and we will explore the Data Migration Assistant in our next article. But for this article, we will focus on the creation of Azure Migrate related to databases, and get all the tools required to perform the assessment and further migration.
Starting the Azure Migrate project
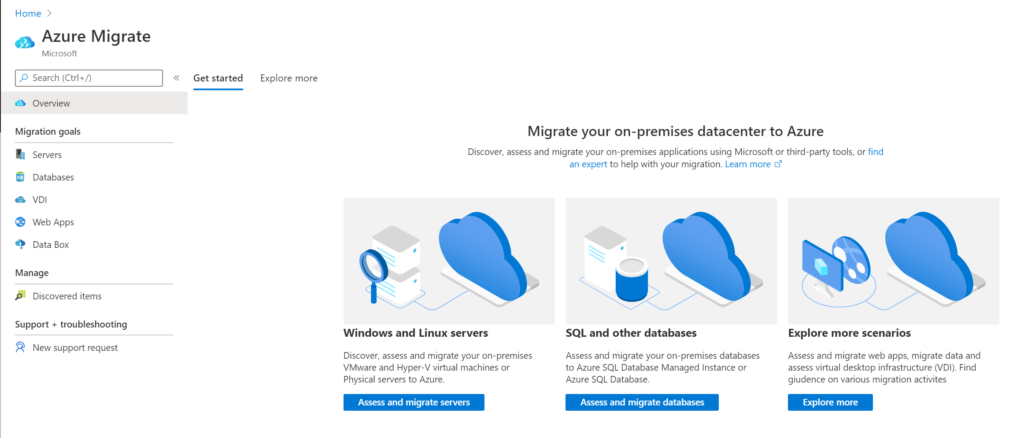
The first step is to create the Azure Migrate plan. Logged on the Azure Portal, search for Azure Migrate. In the Overview page, click on Assess and migrate databases button located in the center of the right blade.
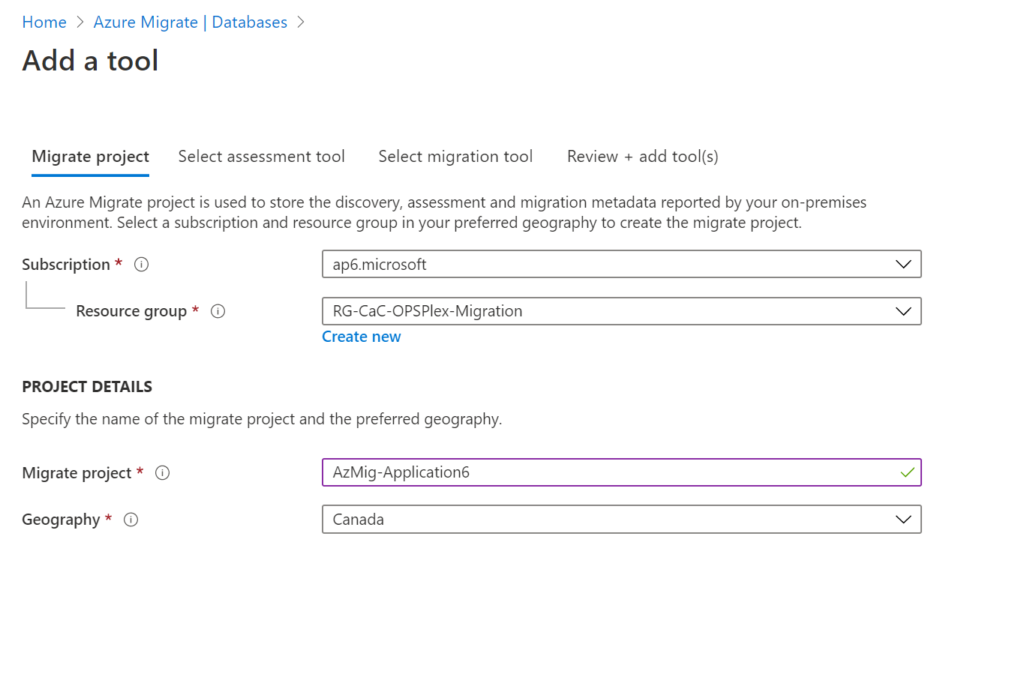
The Databases item on the left side will be selected, and the button Add Tool(s) will be available. Click on it to start the wizard to configure the tools that we are going to use to perform the migration.
In the Add a Tool wizard, the first step is to define the subscription and the resource group that we are going to use to store the Azure Migrate project. After that, set a name and the geography (not the Azure Region). When complete, click on Next.
In the Select assessment tool page, select Azure Migrate: Database Assessment and click Next. We can use third-party tools from the selection as well.

In the Select migration tool page, we are going to select Skip adding a migration tool for now because it can be added later on based on our requirements.
Let’s move on to the Review + add tool(s) page. Review all settings defined so far, and click on Create to start the creation of the first Azure Migration Project.
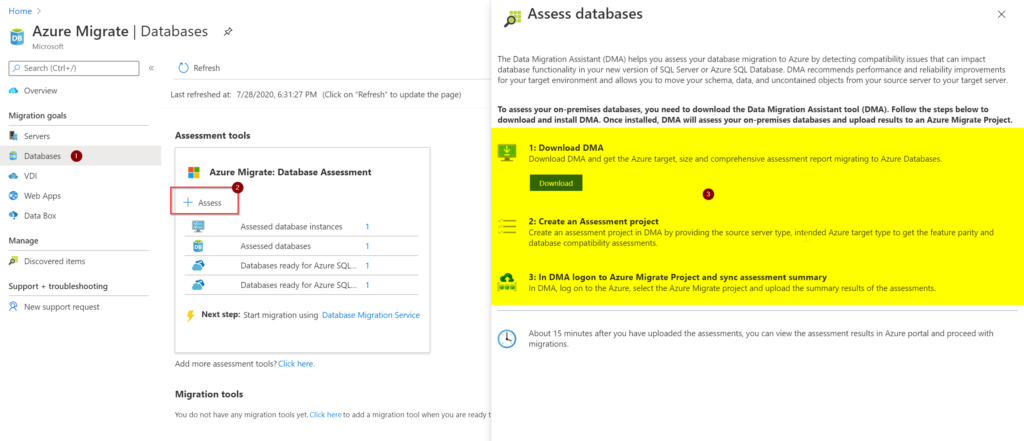
The result will be a new area in the Databases item. We can click on + Assess, and a new blade will be displayed on the right side.
The new blade will contain a summary of the steps that we are going to follow to complete the assessment of the database that we are planning to migrate and how to store that information in Azure Migrate.
Click on Download and install the Database Migration Assistant (DMA) on the workstation that we are going to use to assess your on-premises environment.
Creating the first SQL server
Time to create our SQL server. There are a lot of important design questions that need to be addressed when deploying a SQL server, such as security, performance, availability, and so forth.
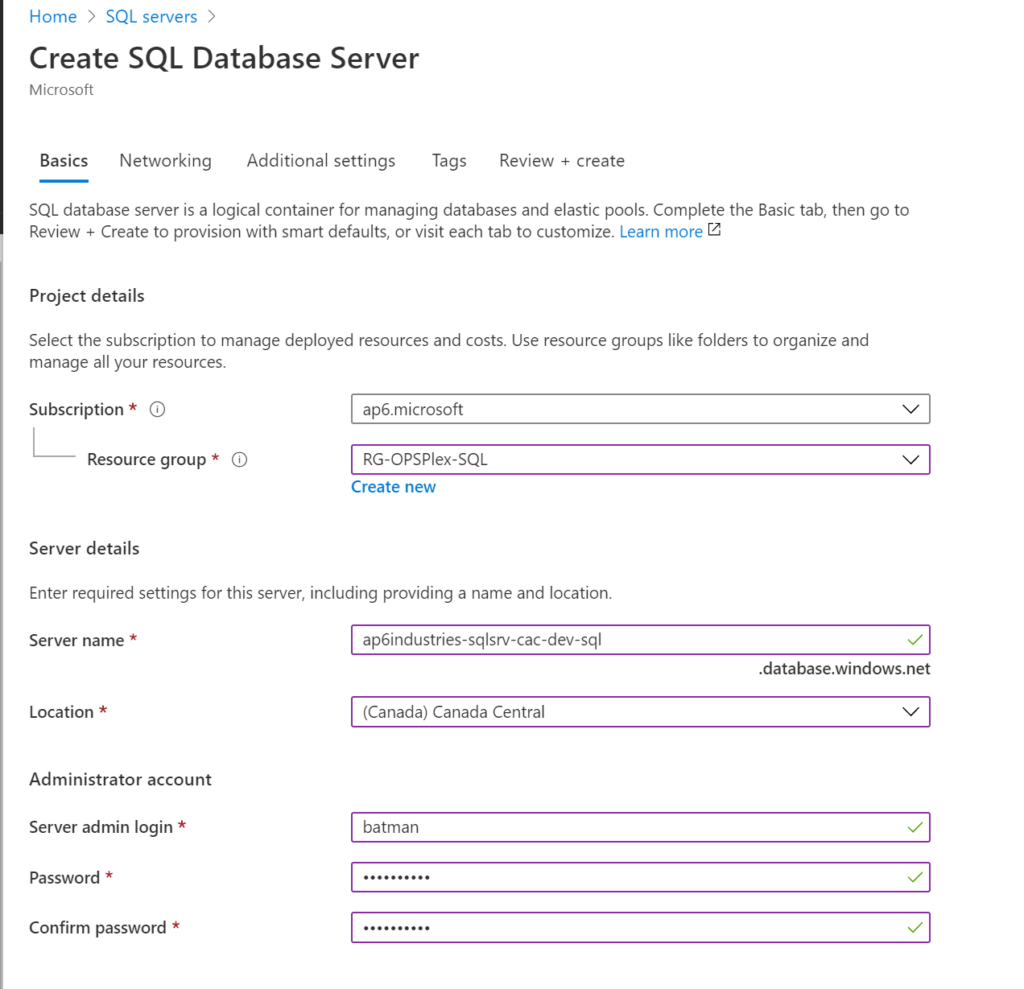
In this article, our goal is to have a SQL server to receive a database that is hosted in a SQL server on-premises. To create the Azure SQL server, open the Azure Portal, and search for SQL servers. In the new blade, click on Add.
In the Basics page of the Create SQL database server wizard: Define the resource group, SQL server name, and the SQL administrator account that will be used during the provision of the resource. Click Next.
On the Networking page: Leave default settings (which is No). If you want VMs to access this database, click on yes. Click Next.
On the Additional settings page: We have the option to subscribe to advanced data security features as a trial. After making your decision, click on Next.
On the Tags page: Add any required tags by your business, and click Review + Create.
On the Review + Create page: Last chance before creating the new SQL server, please validate if all settings are correct and click on Create, and the provisioning process will start.
When creating the SQL databases, the cloud administrator will have the option to use elastic pools or compute + storage. There is no right or wrong, and it is more about your budget and the performance level that you are expecting.
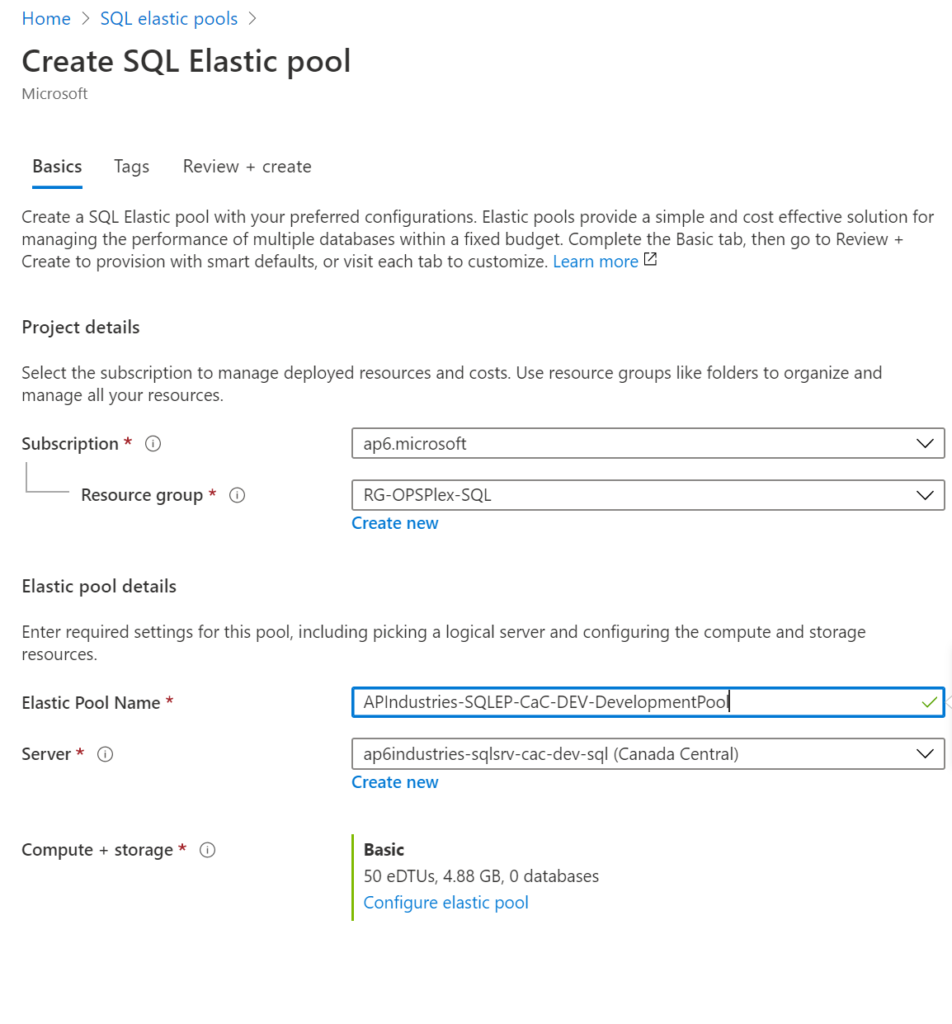
In this article series, we decided to use elastic pool, and we are going to create that before creating our first SQL database. Logged in to the Azure Portal, search for SQL elastic pool, and on the new blade, click on Add.
The wizard is simple. We need to define a resource group, elastic pool name, and how much eDTUs we will be going to use in this new elastic pool.
The final piece is the SQL database. Let’s create a new one by clicking on Create database from the SQL server Overview blade.

On the SQL database creation page, we need to define the resource group and the name of the database and select the SQL elastic pool.
Note: The SQL server has to be unique. The SQL database can use the current name that you use on-premises, and it doesn’t need to be unique from the Azure platform perspective.

To complete the creation of the SQL database, click on Review + create to skip the Networking, Additional Settings, and Tags tabs.
If you are connecting for a non-secure location (Internet), then we should tweak the security a little bit to allow the connection from the SQL Management Studio running on your computer. In the SQL server, go to Firewalls and Virtual Networks. Confirm that that Deny public network access is set to No and add your public IP address to the Client IP Address section — there is a shortcut at the top bar (Add Client IP button), which will fill out automatically with your public IP.
Note: When using Add client IP, make sure that the machine that you are using the Azure Portal is the same that you have SQL Management Studio.
Note 2: When connecting with SQL Management Studio, after authenticating to Azure, the interface provides the firewall rule creation automatically.

Next up: Using Data Migration Assistant
We completed all the key components to deploy the infrastructure to support our upcoming Azure SQL migration. Our next step is going to be using the Data Migration Assistant to perform the assessment and migration of a SQL database.
Featured image: Shutterstock


Awesome. This is a go to market piece of intellectual asset.
Keep on keeping on sharing your gift to the consuming public.