Because of the COVID-19 pandemic, most of the world’s knowledge workers find themselves working from home for the foreseeable future. In many cases, these users are also being forced to work from personal devices. Needless to say, this poses several logistical and security challenges. One such challenge is that of data protection. A user who is working from home may be saving their data to their own personal device rather than saving it to a file server on a corporate network or to cloud storage. So how do you prevent that data from being lost if something happens to the user’s device? Unfortunately, there aren’t any easy answers to this question. One option is to walk the user through the process of installing backup software onto their Windows PCs. Even if you manage to get the software installed, you still have to configure it to back up the user’s Windows PCs to a safe location. This creates an additional set of challenges. If you were to set up a cloud-based backup target, for instance, how do you keep it secure since every user will need write access to the location?
One possible solution to this challenge is to give the user a way to backup and protect all of the Windows PCs in their home, using what they already have (or can get inexpensively).
It’s probably safe to assume that most users have a wireless router in their home. Although the capabilities of these routers can vary considerably based on make and model, most newer wireless routers have a built-in USB port. The USB port can be used for a variety of purposes (such as attaching a printer), but oftentimes it is possible to connect a USB hard disk directly to the router and use the hard disk as a makeshift NAS device. You can then configure Windows 10 to create automatic backups and to write those backups to the available NAS storage. I will show you how this works.
Setting up the router
The exact method used to make a storage device available directly through a router varies from one router to the next, but I will show you an example of how the configuration process works. For the sake of demonstration, I have attached a 1TB USB hard disk to one of the USB ports on my wireless router. Incidentally, not every USB storage device works with every router. I initially tried to use a 5TB USB device, but my router did not support it.
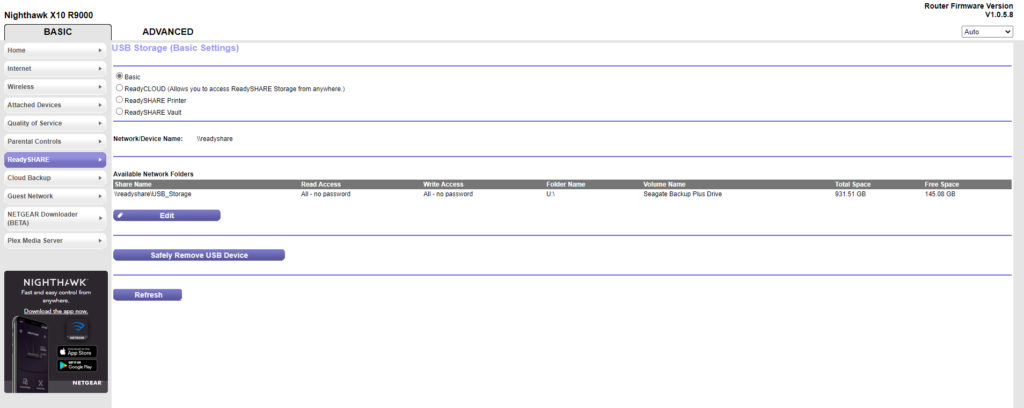
The wireless router that I am using is a Netgear Nighthawk X10 R9000. This particular router exposes the USB drive through a feature called Netgear ReadyShare. The figure below shows the router interface’s ReadyShare tab. The router automatically detected my storage device and set up an SMB share that is accessible to the devices on my network.
Attaching Windows to the share
The next step in the process is to connect Windows 10 to the shared storage. Again, this is going to work a little bit differently depending on the devices being used, but if you look back at the previous figure, you will notice that the storage device has been assigned a share name. Make note of your share name, because you will need it to access the storage from Windows.
Now, open File Explorer on your Windows device and then enter the share name that you noted a moment ago. Upon doing so, you should see the storage contents displayed, although there is a chance that some routers may prompt you to enter a password.

The next step in the process is to map a network drive to the USB storage device. To do so, locate the Network option in the tree view that is displayed on the left side of the File Explorer window. Right-click on the Network container and then select the Map Network Drive command from the resulting shortcut menu. Upon doing so, Windows will display the Map Network Drive window. Here you must choose a drive letter (one that is not already in use) and then enter the share name that is associated with your USB storage. You can see an example in the next screenshot.

Backing up Windows PCs
The last step in the process is to configure Windows to automatically back up your files. To do so, click on the Settings icon and then click on Update and Security. When the Update and Security screen appears, click on the Backup tab. You can see what this tab looks like in the screenshot below.
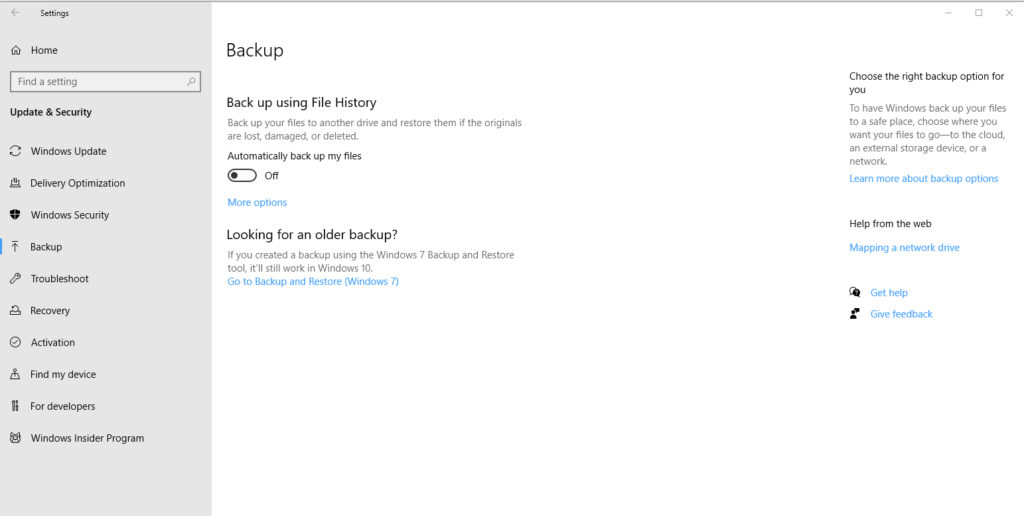
As you can see in the screenshot above, this screen gives you an option to enable File History backup. Keep in mind that File History only backs up files in specific locations. If you want to perform a more comprehensive backup, it’s a good idea to use a third-party backup application.
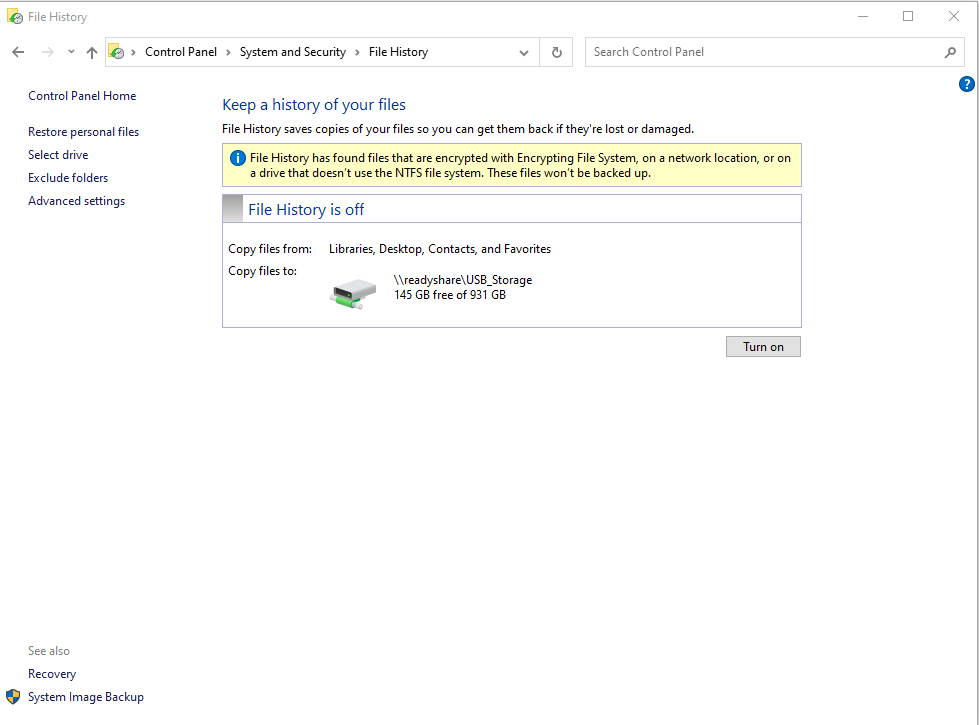
Turn on the Automatically Back Up My Files option and then click More Options, followed by See Advanced Settings. This will open the File History Control Panel applet. Click on the Select Drive option, followed by Add Network Location. Enter your mapped network drive into the space provided and then click on the Select Folder button, shown in the image below.

Enter your drive letter and then click the Select Folder button. You should now see your USB disk listed as a file history drive.

Click OK and you will be returned to the main File History screen. All you have to do now is click the Turn On button, shown below.
Backup Windows PCs: Customize with Advanced Settings
The advantage of using this technique, as opposed to simply connecting a USB hard disk directly to your PC, is that it allows you to backup all of the Windows PCs in your home to centralized storage. One more important thing to consider before you use this technique is that by default, file history backups only protect your computer’s library folders. However, the Advanced Settings provide an option for including additional folders in your File History backups.
Featured image: Pixabay


