A few years ago, I published an article on this site that was intended to be a total beginner’s guide to Hyper-V. As several people have pointed out over the years, however, that article focuses more on what you can do with Hyper-V rather than how to actually use it. That being the case, I wanted to revisit the topic of Hyper-V for beginners and talk about how to perform some common tasks.
Installation
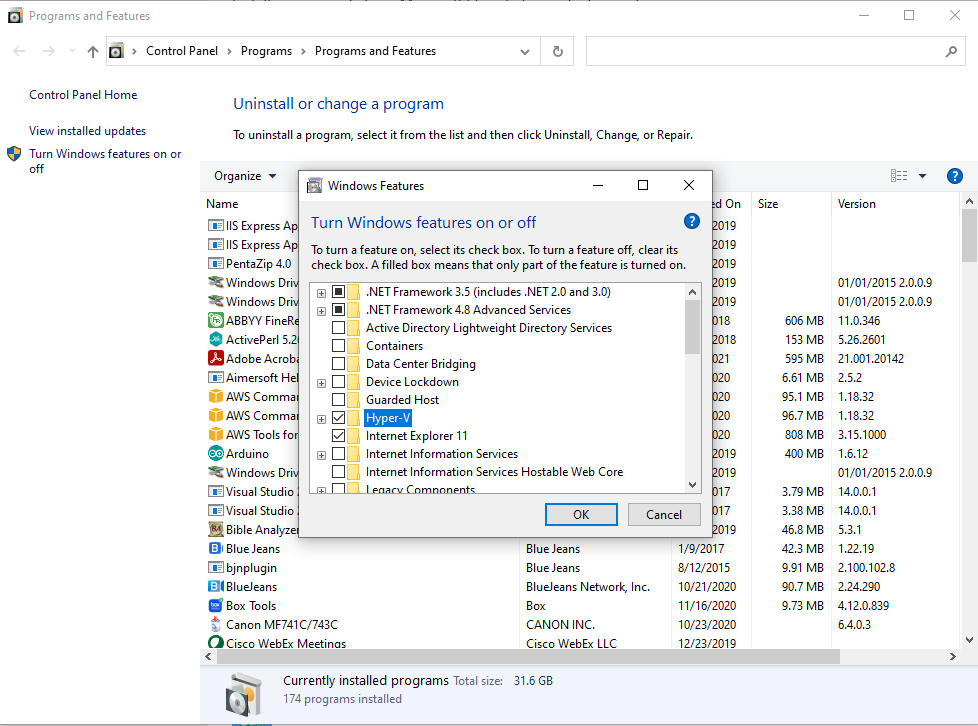
Installing Hyper-V works a little bit differently depending on whether you are installing it onto Windows 10 or Windows Server. In Windows 10, go to Services and then click on Apps and Features. From there, click on the Programs and Features link, and then click on Turn Windows Features On or Off. Now, choose the Hyper-V option, as shown below, and click OK. If you don’t see the option to enable Hyper-V, then it may not be included with your version of Windows. Only some of the Windows 10 editions (such as Windows 10 Pro) include Hyper-V.
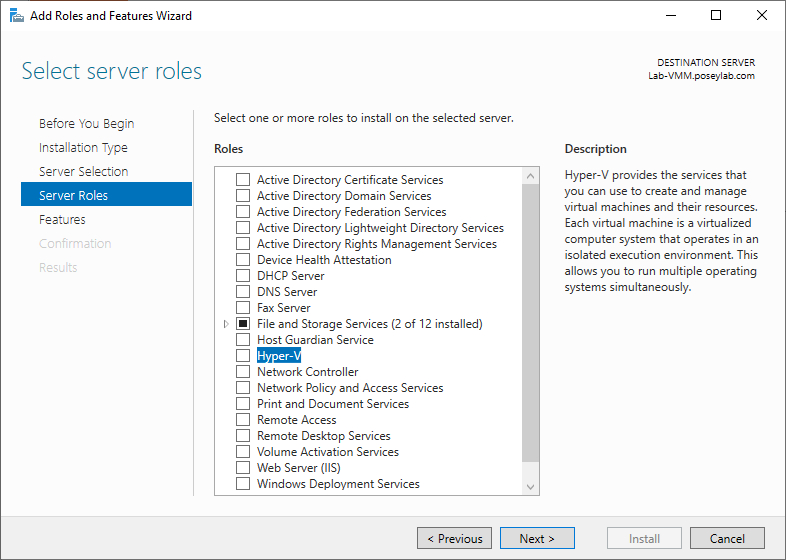
You can install Hyper-V in Windows Server by launching Server Manager and then selecting the Add Roles and Features command from the Manage menu. This will cause Windows to launch the Add Roles and Features Wizard. The wizard is relatively simple to use. It asks you to choose which server you want to install roles or features onto and then asks you want to install. You can find the option to install Hyper-V on the wizard’s Server Roles screen, as shown below. When you select the Hyper-V role, be sure to allow Windows to install the various supporting features.
Regardless of whether you are installing Hyper-V onto Windows Server or Windows 10, your hardware will need to support virtualization. Nearly all modern hardware supports virtualization, but there is a chance that you will have to enable it through your system’s UEFI. The steps vary by manufacturer, so you may have to consult your computer manufacturer’s website if you need help.
It is also worth noting that installing Hyper-V will require you to reboot.
The Hyper-V Manager
The Hyper-V Manager is the primary tool for creating and managing Hyper-V virtual machines. It is installed by default when you install Hyper-V (although it is only installed on Windows Server if you have the Desktop Experience enabled). You can access the Hyper-V Manager in Windows 10 by clicking the Start button and then navigating through the Start menu to Windows Administrative Tools. The Hyper-V Manager shortcut is located inside of the Windows Administrative Tools folder.
You can access the Hyper-V Manager in Windows Server by launching Server Manager and selecting the Hyper-V Manager option from the Tools menu.
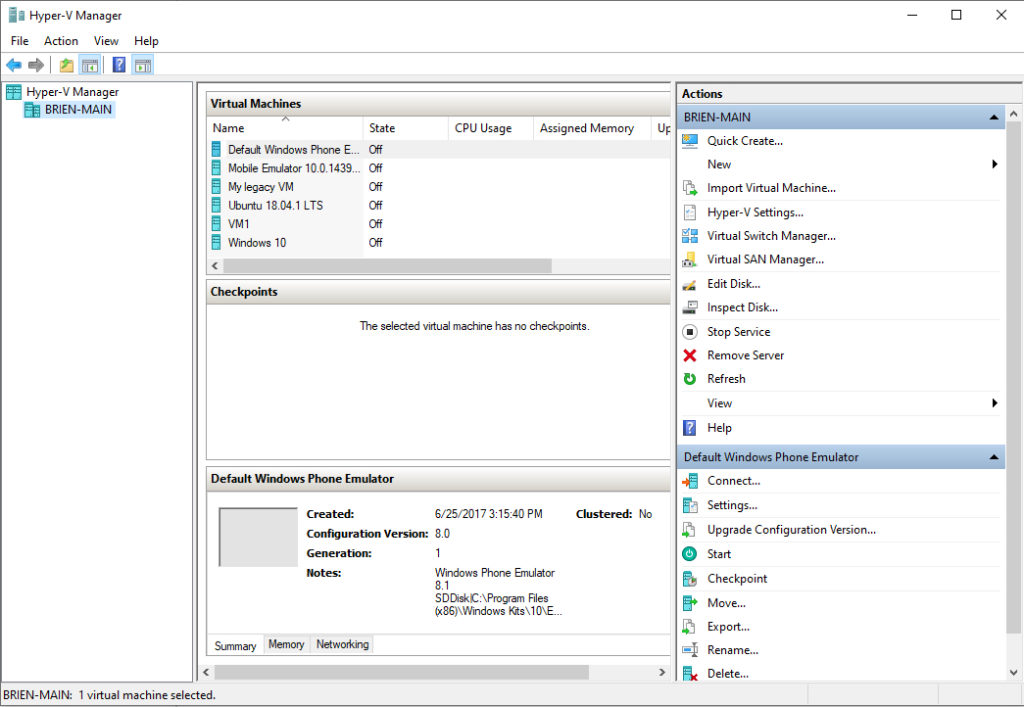
The Windows 10 version of the Hyper-V Manager, which you can see below, is nearly identical to the version that is included with Windows Server. The Windows Server version of the Hyper-V Manager includes a few advanced features that aren’t included with Windows 10 (such as replication and live migration). Likewise, Windows 10’s version of Hyper-V Manager includes a Quick Create feature that is not included with Windows Server. Quick Create simplifies the process of creating a virtual machine. Aside from these differences, however, the Hyper-V Manager works the same way regardless of which platform you are using.
Creating a virtual machine
To create a new virtual machine, click on New (which is found in the upper-right portion of the Hyper-V Manager), and then choose the Virtual Machine option. This will launch the New Virtual Machine Wizard.
The first thing that you will need to do when creating a virtual machine is to provide a name for it. You also have the option of storing the virtual machine in a non-default location. Keep in mind that the name that you give your virtual machine is not automatically assigned to the operating system that you install. If you want the names to match, you will need to rename your virtual machine’s Windows operating system once Windows is installed.

The next screen asks if you want to create a Generation 1 or a Generation 2 virtual machine. As a general rule, if you are installing a newer Windows operating system, you should pick Generation 2 option.
Next, you will be prompted to choose how much memory you want to assign to the virtual machine. You can assign a static amount of memory to the VM, but you also have the option of using dynamic memory. Dynamic memory can be useful if you have several virtual machines running at the same time and need to stretch the machine’s physical memory. You have to be careful using dynamic memory, however, so that you don’t end up in a situation where virtual machines have too little memory.
The next two screens are used to connect to a virtual network and to create the virtual machine’s virtual hard disk. After that, you will come to a screen that asks you how you want to install an operating system onto the virtual machine. Since most computers today do not have DVD drives, the most common option is to install from an image file (an ISO file), as shown below, or to use a network installation server. After making your selection, click Next, followed by Finish to create the virtual machine.

Installing an operating system
The new virtual machine will appear within the Hyper-V Manager, but it will be powered off, and there is not yet an operating system installed on the virtual machine. To install the operating system, double-click on the virtual machine to open its console. You can see what this looks like below.
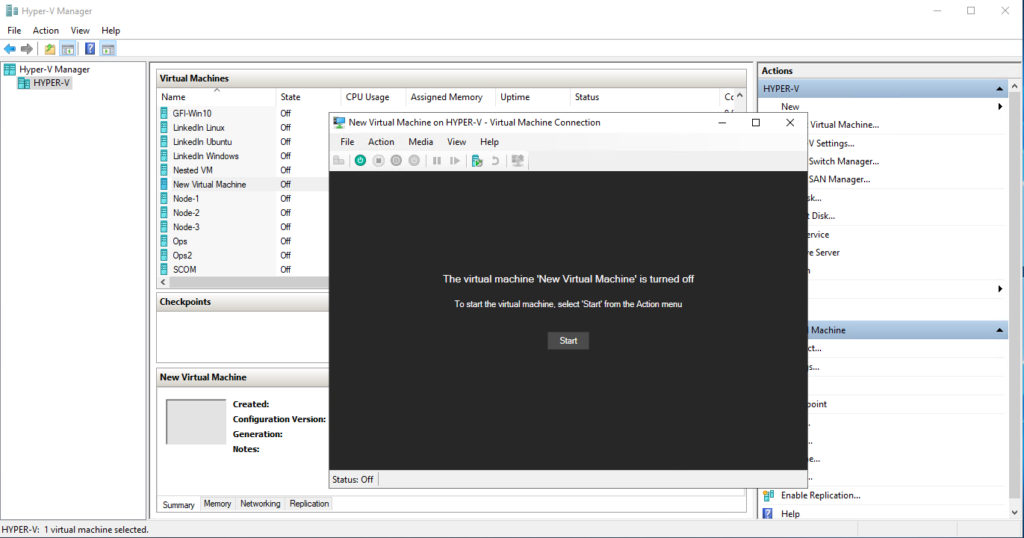
Now, click the Start button shown in the figure above to power on the virtual machine. When you do, you should see a prompt asking you to press a key to boot from the installation media (assuming that you are installing an operating system from an ISO file). You can now begin installing an operating system into the virtual machine, as shown below.

Hyper-V for beginners: Just scratching the surface
I have only just scratched the surface of how to getting started with Hyper-V for beginners. If you find yourself wondering how to do something with a virtual machine, however, try clicking on it. The window on the right side of the Hyper-V Manager will offer various options for the virtual machine, such as options for turning the virtual machine on or off.
Featured image: Shutterstock


Hi Brien, your post helped me get started with Hyper-V and I’m using it regularly.
One issue I’m having is that I have to delete the virtual windows 10 I created in it’s entirety whenever I make any change in the autounayyend.xml file. A bit tiresome.
I would like to have the ability to choose to start from the ISO file and recreate the virtual Windows PC without have to delete everything and start from scratch. Are aware of a way to do this?
Thanks and regards, Gideon.