If you are managing a project that needs a detailed schedule, Microsoft Project is an excellent tool to use. In this tutorial, I am going to show you the Microsoft Project basics to build a project schedule. This tutorial works with Microsoft Project 2013 or 2016 (Standard, Pro or from Office 365).
What is Microsoft Project?
Microsoft Project is a desktop application you install on your computer. With Microsoft Project, you can build and track project schedules. As you can imagine, there are essential features for the beginner and more advanced features for broad and complex projects. Microsoft Project offers four core features as shown in the following figure.
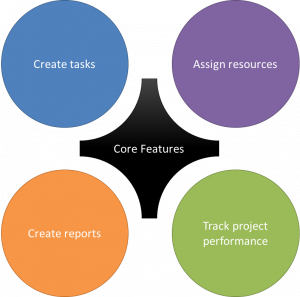
- Create tasks that represent the steps to complete the project.
- Assign resources such as the people, materials, or equipment needed to deliver the project.
- Track project performance by comparing the project’s current state of completion to the original baseline plan.
- Create reports to visualize the project’s progress and share them with your project team, stakeholders, and sponsors.
For this tutorial, I am going to show you how to create tasks and link them together using constraint-based scheduling.
Constraint-based scheduling
You could probably use a spreadsheet to list out a bunch of tasks and enter some dates. However, if you change the date of one task and want that to roll down and adjust the dates of other tasks, you are getting into some complicated math and scripting. Microsoft Project helps you automatically calculate the start and finish dates of tasks by using constraints called predecessors and successors, as shown in the following figure.
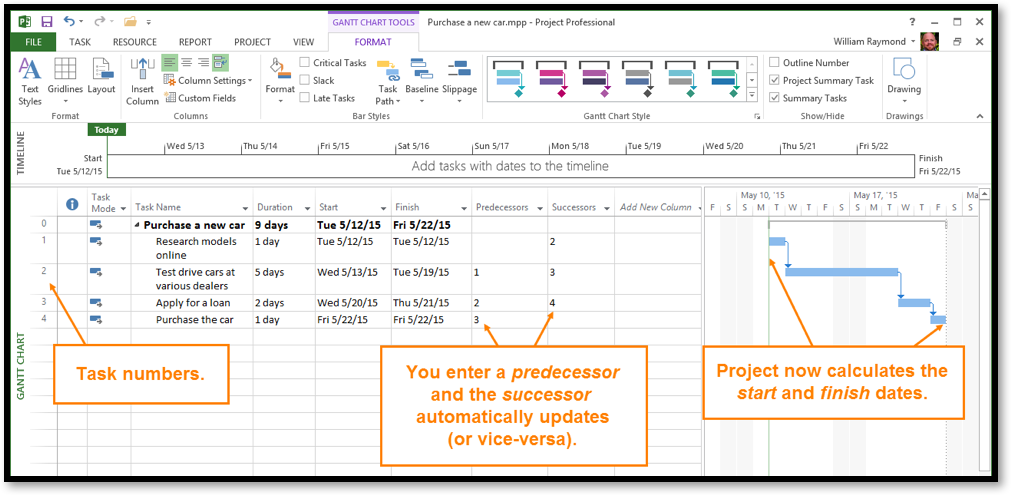
As you can see in that previous figure, task #1 (research models online) starts before task #2 (test drive cars at various dealers). You represent this by typing the number 1 in line 2’s predecessor column. The graphical chart on the right is called a Gantt chart. The Gantt chart shows how Microsoft Project is automatically calculating when one task should start and the other should finish.
This task-linking feature alone is what makes Microsoft Project so compelling to project managers.
Activity: Run and configure Microsoft Project for the first time
In this activity, you will configure settings based on my recommendations. Given that this tutorial is just to get you started, I am not going to explain each one of these settings, but rest assured these are generically the best practices that most project managers follow.
- Run Microsoft Project and open a blank project.
- Click the File tab and then select the Options menu item.
- The project options dialog appears as shown in the figure below.
- Select the Schedule item.
- Locate the scheduling options for this project section and then select the All New Projects item from the pick list.
- New tasks created: Auto Scheduled.
- Auto scheduled tasks scheduled on: Project Start Date.
- Duration is entered in: Days.
- Work is entered in: Hours.
- Default task type: Fixed Duration.
- New tasks are effort driven: deselect.
- Autolink inserted or moved tasks: deselect.
- Keep task on nearest working day when changing to Automatically Scheduled mode: deselect.
- All other checkboxes in the scheduling options section: select.
- Click the OK button.

Activity: Enable the project summary task
A common mistake people make in Microsoft Project is to create a task with the project name at the very top of their project plan. Microsoft Project will do this for you automatically by displaying the project summary task.
Since the project summary task is not a default option, you need to enable it. Follow these steps to display the project summary task at the top of your project:
- Click the File tab and then select the Options menu item.
- The project options dialog appears as shown in the following figure.
- Select the Advanced item.
- Locate the Display options for this project section and select All New projects from the pick list.
- Select the Show project summary task.
- Click the OK button.

From now on, when you create a project, the project summary task will display (task zero).
Activity: Verify you are ready to create a project
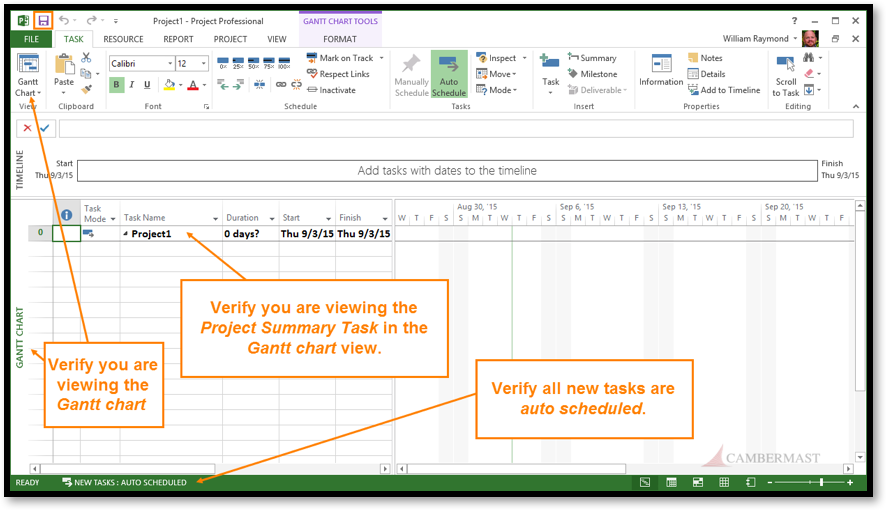
At this point, you should be looking at an empty project plan. Follow these steps to make sure Microsoft Project is ready, so you can create a project:
- The blank project should be open as shown in the following figure (the project name might be different for you).
- Click the Task tab and then click the Gantt chart icon.
- Verify you can view the project summary task.
- Verify all new tasks are auto scheduled by viewing the status bar at the bottom-left side of the application window.
Activity: Save your project
Before you start typing tasks, save your project:
- Click the File tab, select the Save As item, and save the file to a location of your choosing.
- Name the file My New House.
Activity: Add some tasks
Using Microsoft Project is very similar to using Microsoft Excel. Click in the first task name cell and start typing.
- Add the tasks in the following figure:
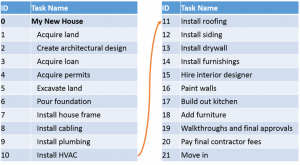
Your project should look similar the following figure:

Activity: Estimate task durations
After you define the tasks in your project, you will estimate the durations. You can estimate durations in seconds, minutes, days, weeks, months, quarters, and years. I recommend you always use days. This way, it is easy for anyone to scan the project without mistaking a 2m (months) for 2d (days).
- Locate the duration field and type the durations as shown in the following figures.
- Note: You do not have to type out the duration completely. You can just type 30, 20, 10, etc. and Microsoft Project will automatically add the days text. If there is a problem, type 30d, 20d, 10d, etc.


Now your project plan should look something like the figure below:
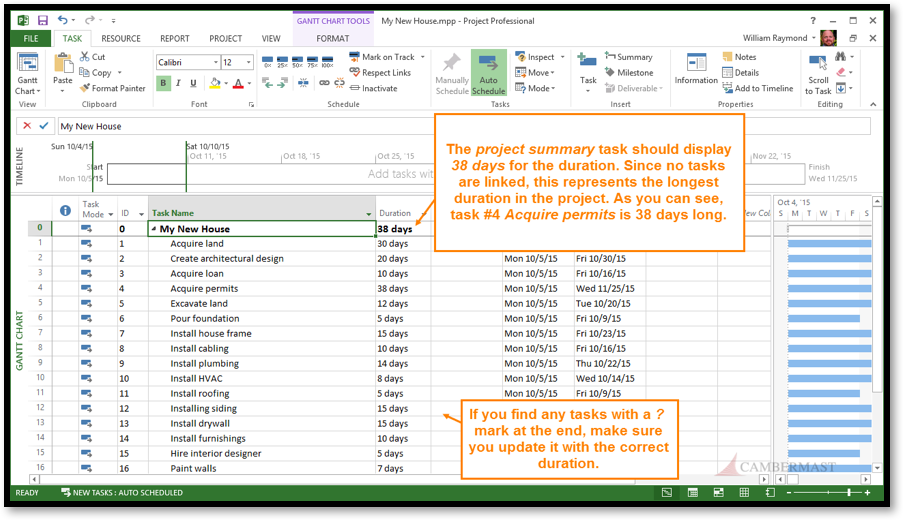
Activity: Link your tasks with predecessors
At this point, your project only shows a duration of 38 days. That is because all the tasks start on the same date, so Microsoft Project is calculating the longest task (38 days). Follow the steps below to link all the tasks together and allow Microsoft Project to figure out the start and end date for each task:
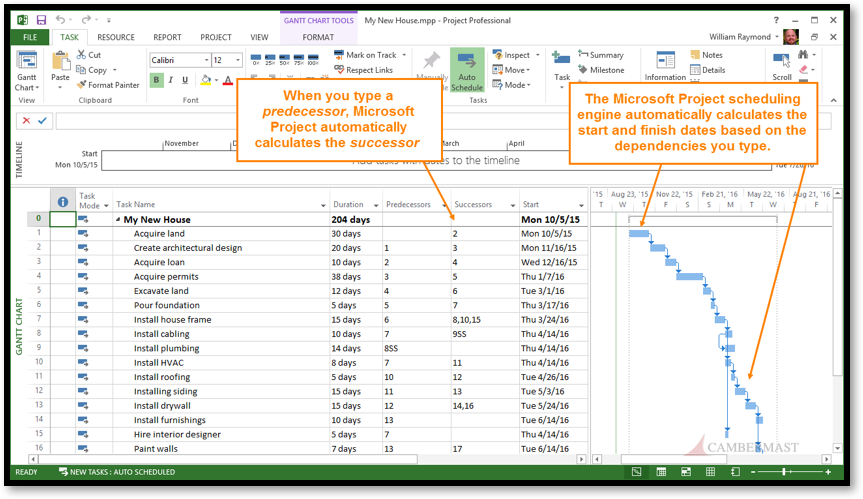
- Locate the Predecessors column and enter the numbers shown in the figures below.
- Note: You can link one task to multiple tasks by separating each number with a comma.


As you type predecessors, Microsoft Project automatically fills in the successor column. If you want to see the successors column, follow these steps:
- Right-click the heading of the start column.
- A menu appears. Select Insert Column.
- A list of available fields appears. Type the word Successor and then press the Enter key on your keyboard.
Your final project should look like the figure below:
What’s next
In this tutorial, I showed you the basics for configuring scheduling options, adding tasks, and linking them with predecessors. These are just the first steps in creating and managing a project schedule.
If a certain task gets delayed, change the duration field, not the start or finish date. To show task progression, you can insert the % complete field and type in any percentages. (I recommend you start with 0, 25, 50, 75 and 100%.)
Microsoft Project has many more features, such as the ability to add resources, create milestones, build reports and much more. If you find this article interesting and would like to learn more, let us know in the comments.
Photo credit: Cambermast LLC, from Bill Raymond’s upcoming eBook, Microsoft Project Fundamentals


This is amazing way for self study stdents.
Hi Bill,
This is great info and very insightful.
Can I get the next part?
Thank you
Thanks, Bill. Great Tutorial.
Thanks Bill.
This tutorial has assisted me.
I wish to get more of this
Thank you all and I will begin posting more starting at the top of the new year.
Hello,
I will be utilizing Microsoft Project in my next role as a planner. I found your tutorial very useful. Any other information you would be able to provide me to help me gain a better understanding is much appreciated.
Thank you
Scott
I will plan to post more in the future. You might want to check out the training course I released here: https://www.goskills.com/Course/Microsoft-Project
A new version will get published this quarter with 2019 and Project Online.
Hey Bill,
I am new to MS Project and trying to learn it. Your step by step instructions are very clear. Waiting for the next part.
Thanks
I have several projects which have specific team members tied to those projects. I’d like to have a master schedule that tracks all my projects and want to be able to track the team members on the master schedule so i can know when their projects are ending (in the master schedule) and know when they will be available for a new project. In the master schedule, it does not allow me to assign a ‘resource’ to the entire subschedule. Is there a work around for this?
Master scheduling is an advanced topic. When you open a master you are actually opening many each individual project. You can link across schedules and you can add resources but only one project at a time.