Container technology allows for a fast-paced environment where applications can move between stages (development, test/QA, and production) quickly. In this two-part series, we will give you a glimpse of how to manage images in Docker for an IT professional. Our goal is to show how is the process to create Docker images, including the manual steps required to understand your requirements/processes. (You can read Part 2 of this series here.)
In the second article, we will use all the experience acquired in this article and make things easier using Dockerfile, which saves a lot of time and keeps consistency over time.
When we start getting more professional with Docker, there is more complexity ahead. For example, we can use multistage builds, use volumes outside of the containers to persist data, scale the application using Swarm/Kubernetes, application stack using compose file, and more.
Understanding the scenario
Our scenario is simple: Our company wants to use containers to improve several areas of a new application that they are creating. Their goals:
- Faster release time into test and production.
- Avoid repetitive tasks.
- Small footprint and scalable (no room for VMs and keeping OS patches).
The application is simple. It is a static HTML page, and the idea is to illustrate how to use Docker and create images. The concept can be used if you are planning to write code in NodeJS, Java, Phyton, you name it.
Make sure that everything works with manual steps
If you have never made a cake, it would be hard to come up with a recipe without some trial and error (let’s assume a world without Internet!). In this section, we will be doing the trial and error at the container level to make sure that we know all the steps/ingredients to our final recipe/dockerfile.
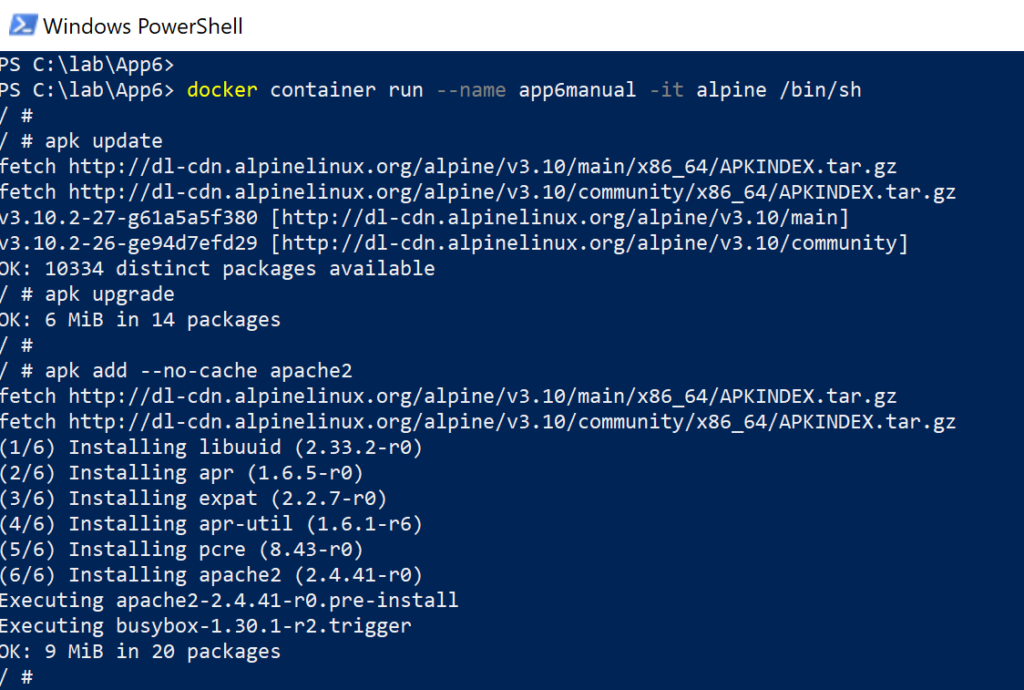
At the command prompt \PowerShell we will download a local copy of Linux Alpine, and we will run it in attached mode (interactive) using these two commands:
docker pull alpine
docker container run –name app6manual -it alpine /bin/sh
The next step will be inside of the container. We will update the container using the apk command. Our next step is to install the webserver component (apache2) using these commands (we can see the commands in action in the image below).
apk update
apk upgrade
apk add –no-cache apache2
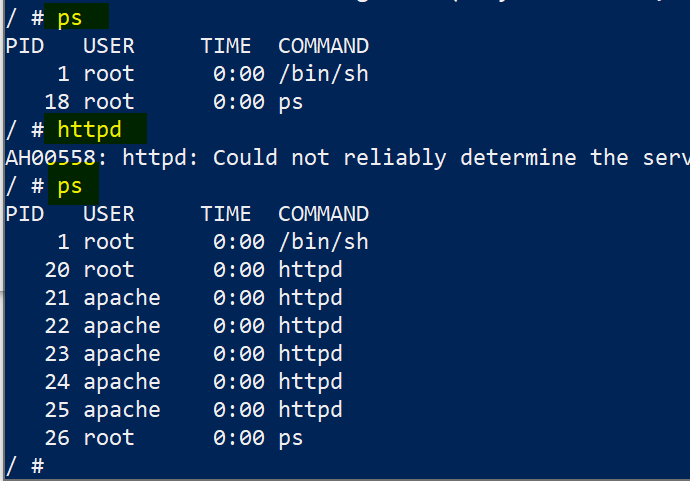
Now that we have all the software installed (webserver), we can check if the service is running (ps command). If not, then start the service (httpd command). We perform these steps, and they are also depicted in the image below.
ps
httpd
ps
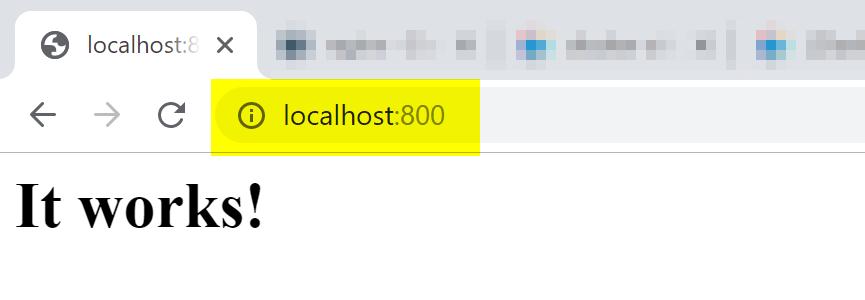
We are in a good place, and we are running a container and installed all the required software. However, that container is not exposing the 80 (HTTP) port to the outside world. The solution is to create a new container and repeat the steps that we vetted already, but this time we will expose the 80 port on the container to the 800 port in the host.
docker container run --name app6manualv3 -p 800:80 -it alpine /bin/sh
After running the container, installing the required software, we can test from our host machine the access in the 800 port, and the result should be similar to the image below. That is proof that the Apache2 (webserver) is running and the initial page is being displayed.
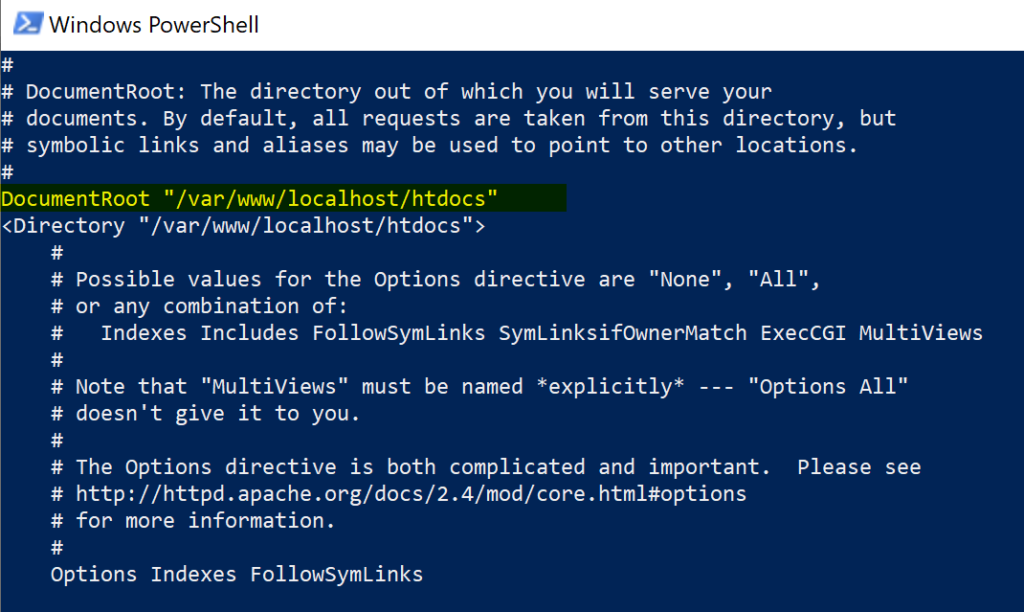
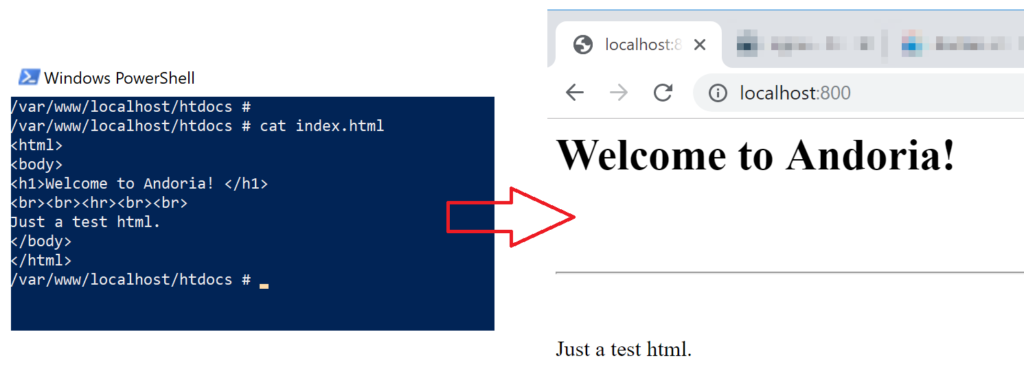
As part of our new application, we need to understand the location within the container where we will be hosting our future code. In the Apache service, the file that contains all the configuration in /etc/apache2/httpd.conf and we can retrieve that information using vi editor or cat command, to mention a few.
In our scenario, we know that all the HTML content is located by default in the /var/www/localhost/htdocs folder.
I like the philosophy of “measure twice and cut once.” So, we are going to the source of the HTML, and we will make a few changes and test on the host machine to see if we are hitting the right files. That is important because we want to make sure that we have the correct information to use in our upcoming dockerfile.
Creating Docker images: Manual process
Before starting this section, I want to make sure that it is not the ideal or recommended method to create Docker images, but it is sloppy and fast to test the process.
We can terminate the current container by typing exit in the shell, and since the container was started with the /bin/sh that will change the container to a stopped state.
We can create an image of the current stopped container by running the cmdlet below. The image we will create in the local repository and assign a tag called app6manual.
docker container commit <containerName> <repo>:<tag>
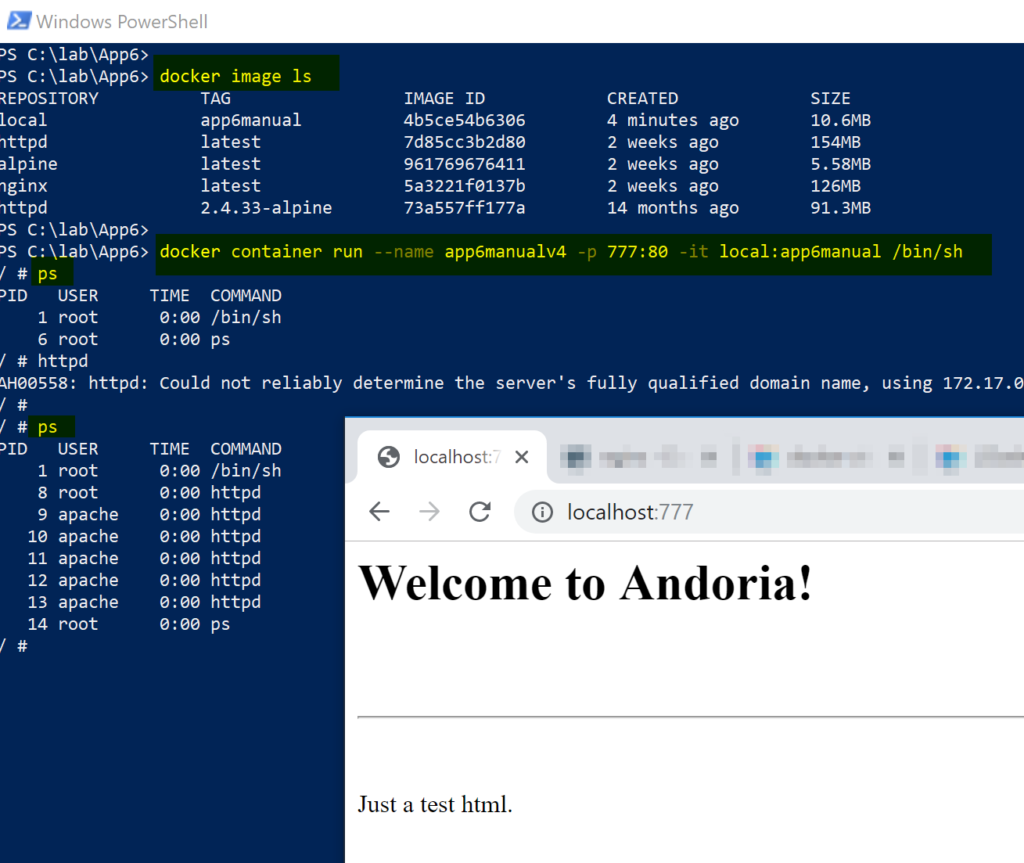
Now that we have an image, we can run a container based on such an image. First, we will list the existing images, and we will see our brand-new image. Then, we will create the container, and we are going to map the port 777 to the 80 port at the container.
The result of the new container will be a shell, we will check if the httpd service is running, and we will start it manually. The result will be the page that we changed before stopping the container in the previous step.
docker image ls
docker container run –name <NewContainerName> -p 777:80 -it local:app6manual /bin/sh
ps
httpd
ps
You may have noticed that we haven’t had to install anything or change the HTML content. The reason is simple — all changes were done in the previous container, and we created our image based on that original image. This process is helpful when troubleshooting a container, and we want a snapshot for further troubleshooting.
The problem with this method is that it is not flexible, and the support is terrible. Imagine the scenario where a new change is introduced, which could be a new page or just some text changes. It would require a new container, install everything, edit the files, generate an image, and deploy the image.
You could technically start from the existing image, but as time goes, it would be harder and harder to track changes. The whole concept of containers is to use clean, fast containers and not keep reusing them. And that’s where Part 2 of our series comes in.
Featured image: Shutterstock


