Azure AD is at the heart of the Microsoft 365 platform, and most Microsoft 365 admins find themselves having to go into the Azure AD admin center from time to time. While the existing Azure AD administrative interface will allow you to access all of the various Azure AD features, you can simplify things a bit by creating your own custom Azure AD dashboard. Having a custom dashboard can be especially helpful if there are specific features that you use regularly.
Creating a custom Azure AD dashboard: First step
To get started with creating a custom Azure AD dashboard, log in to Microsoft 365 using an account with administrative privileges. Next, open the Microsoft 365 admin center and then use the “all admin centers” option to access the Azure Active Directory admin center. As you can see in the figure below, the default Azure Active Directory dashboard is displayed upon opening the console.
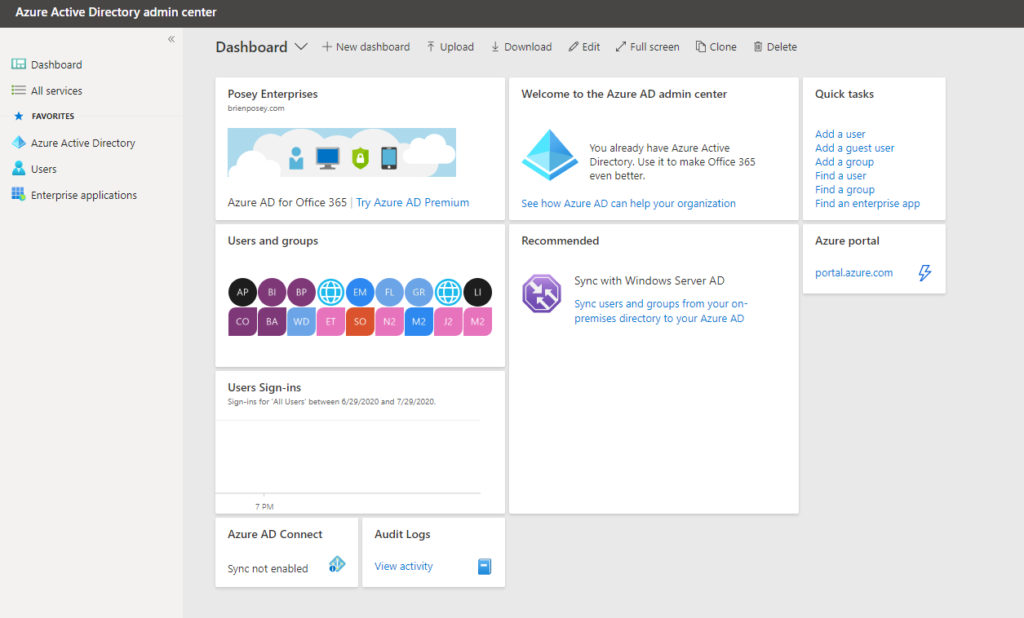
As you can see in the screen capture above, the default Azure AD dashboard is marginally helpful. It provides some links to various quick tasks, some introductory tutorials, and to the Azure Portal. Even so, there are ways of making the dashboard far more useful. If you have experience working with the Azure Active Directory, for example, then you probably don’t get any benefit from the Welcome to the Azure AD Admin Center tile. Likewise, I’m guessing that you could do without the advertisement for Azure AD Premium. If you build your own custom dashboard, you can easily do away with these items and replace them with things that are more useful to you.
To get started, click on the New Dashboard link located at the top of the screen. This will take you to the screen shown in the image below.
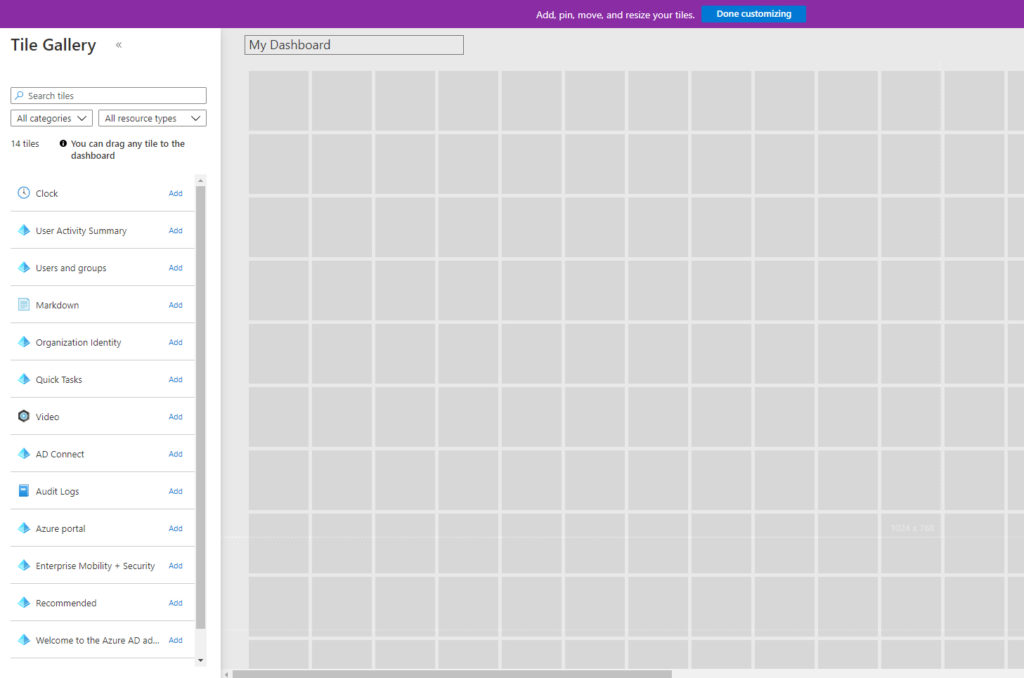
The first thing that I want to point out on this screen is the field that’s displayed just above all of the empty tiles. It currently says My Dashboard. You can click on this field and assign a more fitting name to your custom dashboard. Renaming your custom dashboard might seem like a trivial thing to do (and in some ways it is), but it’s a good idea to use a descriptive name for reasons that I will explain later on.
So with that said, take a look at the upper left portion of the screen. It contains a series of tiles that you can use the basis for your custom dashboard. For right now, there are a limited number of tiles, so scrolling through the list of available tiles shouldn’t be a problem. As time goes on, though, Microsoft will presumably add some more tiles to the collection, so it’s important to be familiar with the various available filters.
As you have probably already figured out, creating a custom dashboard is simply a matter of dragging items from the Tile Gallery (or the search results) to the main portion of the screen. Upon doing so, you will typically be presented with one or more configuration options. To give you a really simple example, take a look at the image below.

As you can see in the figure, I have added the clock to the dashboard. Upon doing so, however, I am prompted to specify my time zone and to choose whether I want to display the time in a 12-hour or 24-hour format.
Moving tiles
Even though Azure AD has initially placed the clock in the upper left portion of the dashboard, you aren’t stuck with the clock’s current position. You can move the clock (or any other tile) to any position that you want. Incidentally, the Edge browser currently seems to have trouble with moving tiles around the screen. If you find that you aren’t able to customize your dashboard in the way that you would like, you might try using another browser (or see if an update is available for your preferred browser).
You can further customize a tile by clicking the more icon (the … icon) in the upper, right corner of the tile. When you click on this icon, Azure AD will display some options for resizing the tile, refreshing the tile, or removing it from the dashboard. You can see what these options look like below.

Whenever you finish constructing your custom dashboard, click the Done Customizing button at the top of the screen. When you do, you will be taken to your custom dashboard, which you can see in the next image.

As you look at the figure above, you will notice that there is a menu bar just above the clock tile. This menu bar contains an Edit icon that you can use to make further changes to your dashboard. You also can do other things such as cloning the dashboard, and If you are so inclined, you can also download the dashboard in JSON format, modify the file, and then re-upload it.
One last thing that I want to be sure to mention is that your original Azure AD dashboard still exists. You can access it by clicking on the down arrow next to your dashboard’s name.
Custom Azure dashboard: Use your creativity
As you can see, creating a custom dashboard in Azure AD is a relatively easy process, and having a custom dashboard can go a long way toward making Microsoft 365 administration more efficient. Even so, there is one more thing that you can do to gain an additional benefit from having the ability to create a custom Azure AD dashboard.
As you might recall, one of the initial steps in creating a custom Azure AD dashboard is to supply a name for the dashboard that you are creating. The reason why you have to provide a name is because Azure AD lets you create multiple dashboards. That being the case, you could conceivably create different dashboards for different purposes. For example, you might consider creating a dashboard for each of your most commonly performed administrative tasks.
Featured image: Shutterstock / TechGenix photo-illustration


This is a go to market Knowledge Base.
Please keep on Keeping on this type of intellectual material
Thanks, I will!