Make no mistake — it’s quickly becoming a cloud-driven world. However, while many organizations move their email to O365, many others have reasons for maintaining more control over their email, meaning many still need (or want) to leverage Microsoft Exchange. By hosting email on Microsoft Exchange 2019, organizations retain complete control of their email environments. Doing so allows organizations to better control things like backup solutions, mailbox sizes, and mail flow. In cases where organizations already have messaging engineers on staff anyway, a move to O365 doesn’t always result in any sort of meaningful cost savings. As such, these organizations may also opt to host their email on Microsoft Exchange.
Enter Exchange Server 2019.
In this tutorial, we are going to work through the process of deploying a working Exchange organization by leveraging Exchange Server 2019, which will be installed on Windows core. We’ll leverage Microsoft Azure to host our Exchange environment. As such, this tutorial serves as a fantastic way to learn how to deploy a secure Exchange 2019-based messaging organization on Windows Server 2016 core.
Prerequisites
Before getting into the prep work for deploying Microsoft Exchange Server 2019 on Windows core in Azure, we need to first cover some assumptions and prerequisites that are already in place in the lab environment that we will use to perform the tasks in this tutorial.
In our lab environment for this tutorial, we already have an on-prem Active Directory forest deployed. The on-prem AD in our lab is called bluewidgets.local. In Microsoft Azure, we have a virtual network deployed and the DNS for the vNet has been configured to point to the on-prem DNS server (domain controller) for DNS resolution. We’ve also established a site-to-site VPN between the on-prem network and our Azure virtual network.
The email domain we will be using for our Exchange 2019 organization will be bluewidgets.org.
With the prerequisites and assumptions out of the way, let’s begin the deployment of Exchange Server 2019 on a virtual machine hosted in Azure.
Prepare Windows 2016 core Azure VM
The first step in the deployment of Exchange Server 2019 on a virtual machine in Azure is to deploy a Windows Server 2016 core virtual machine in the Azure tenant. Since this is a tutorial on deploying Exchange Server 2019, I’m not going to get into detail on deploying a VM in Azure. There are plenty of articles online that cover the deployment of a VM in Azure.
However, I DO want to point out that the virtual machine deployed in Azure should be configured with static IP addresses (both public and private). The network security group (NSG) that is assigned to the virtual machine should be configured to allow HTTP (port 80), HTTPs (port 443), and SMTP (port 25) from the internet. RDP (port 3389) should also be opened from the on-prem network so the virtual machine can be managed.
Once the virtual machine is deployed in Azure (and it meets these requirements), we can move into the meat of this tutorial — deploying a working Exchange 2019 organization on a virtual machine hosted in Azure.
For our lab in this tutorial, I’ve deployed a Windows Server 2016 core virtual machine in Azure. I’ve called the virtual machine EX01 (I know, not terribly original). This VM has a static private IP address of 10.0.4.5 and a static public IP address. The virtual machine is reachable from the internet via ports 80, 443, and 25. The VM is also accessible from my on-prem network via port 3389.
Prepare server for Exchange 2019
After deploying a Windows Server 2016 core virtual machine in Azure and preparing it per the instructions above, connect to it via RDP. Once connected, launch PowerShell from the command prompt by typing start powershell and hitting ENTER.

After launching PowerShell from within the RDP session on the Exchange virtual machine, confirm the private IP address of it by using the Get-NetIPAddress (as seen below).

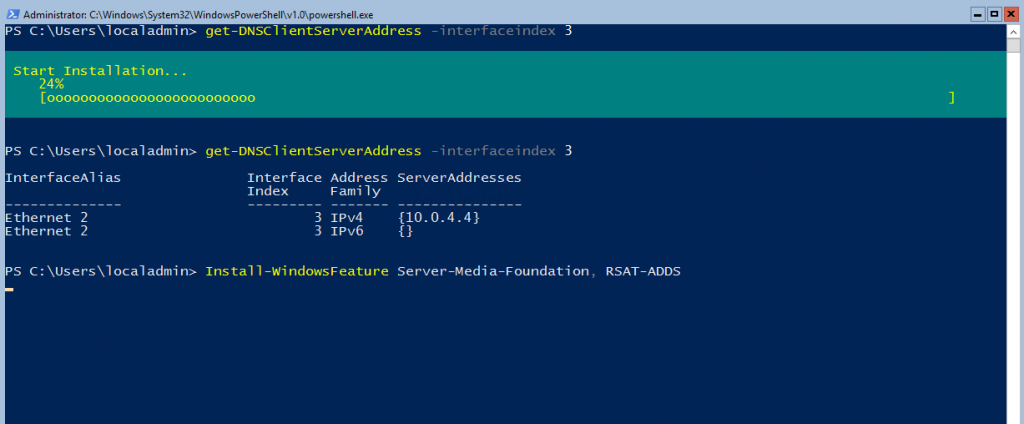
Confirm that the virtual machine points to the Active Directory DNS servers that are configured on the Azure virtual network to which the VM is connected. Do this by running the get-DNSClientServerAddress -interfaceindex 3 command. In this example, I used interfaceindex 3 because that’s the interface index of the NIC with the private IP address assigned to it. In your own environment, specify the InterfaceIndex that matches your virtual machine.

After confirming that the DNS is properly configured, set the time zone of the virtual machine by running the TZUTIL command below:
TZUTIL /s “Eastern Standard Time
With the time zone properly set, you can begin installing necessary windows features.
Install Windows features
Before beginning the installation of Exchange Server 2019, use the PowerShell command below to install the OS components required for Microsoft UCMA 4.0 and the OS components required for Active Directory Preparation:
Install-WindowsFeature Server-Media-Foundation, RSAT-ADDS
Installation will take a few minutes.
At the completion of the installation of the Windows Features, restart the machine by typing restart-computer -force and hitting ENTER.

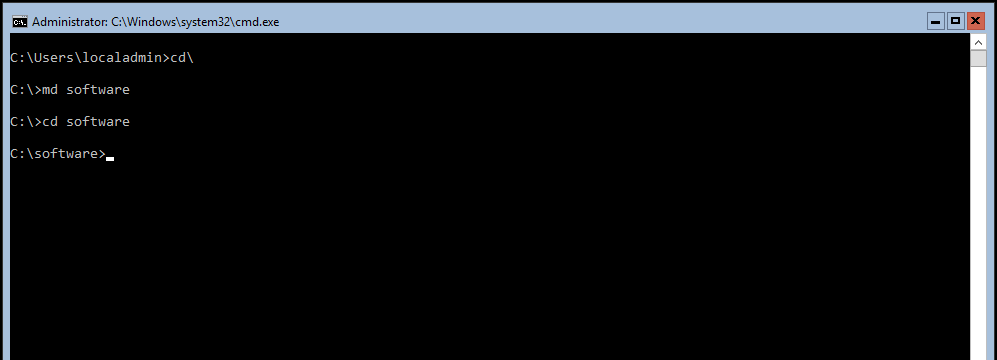
After the virtual machine reboots, reconnect to it via RDP and create a directory called c:\software, using the md software command at the command prompt:
After creating the software directory, relaunch PowerShell by typing start powershell and hitting ENTER.
Download the necessary software
From another machine, download the following software and copy it over to software directory on the virtual machine being prepared for the Exchange 2019 installation:
- Exchange Server 2019 Public Preview
- Visual C++ Redistributable Packages for Visual Studio 2013 (vcredist_x64.exe)
- .Net 4.7.1 offline installer (required only for Windows Server 2016)
If the Windows Firewall on Windows core blocks connection for file copy, disable it, using the PowerShell command below:

After copying the necessary software to the windows core server in Azure, you can begin installing the software.
Install Visual C++ 2013 Redistributable
Before installing the Visual C++ Redistributable, create a temp directory in the root of the C drive, if it doesn’t already exist.
Switch to the c:\software directory and run the installer by typing .\vcredist_x64.exe and hitting ENTER. Follow the wizard to complete the installation.

Install UCMA (Microsoft Unified Communications Managed API 4.0)
The UCMA installer is located on the Exchange Server 2019 media itself. Use the following PowerShell command to mount the Exchange Server media:
Mount-DiskImage c:\software\ExchangeServer2019-x64.iso

The UCMA installer is located under the UCMARedist folder on the Exchange Server 2019 .ISO.
Launch the UCMA installation by switching to the drive that was mounted (should be E or F, depending on the VM’s size) and running .\setup.exe from the ucmaredist folder.

Follow the wizard to complete the installation of UCMA.
Install .Net 4.7.1
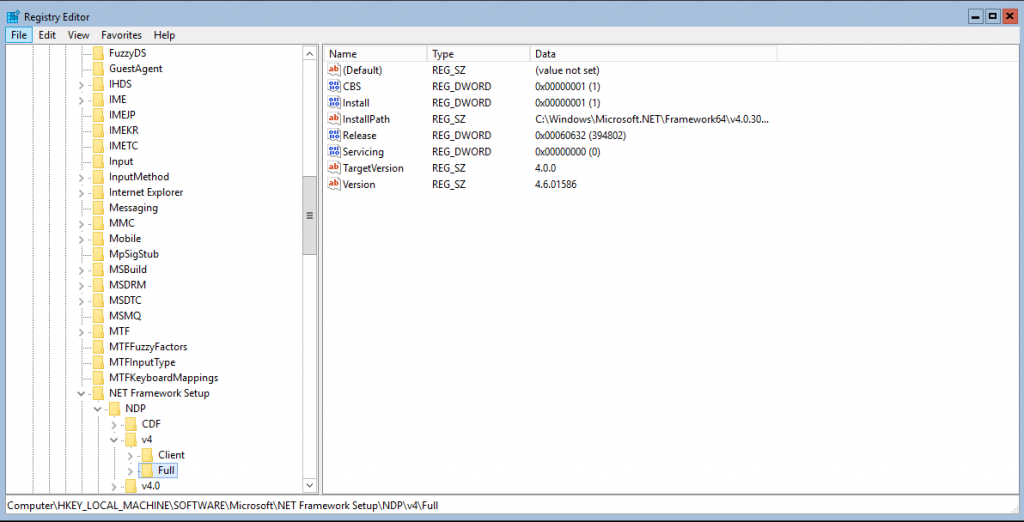
Exchange Server 2019 requires .Net 4.7.1. As such, you may or may not need to install it. However, before doing so, check the .Net version that’s already installed by following this link.
If you are not on .Net version 4.7.1 already, use the following command to install the .Net 4.7.1 (not required on Windows Server 2019 Server Core):
.\NDP471-KB4033342-x86-x64-AllOS-ENU.exe /q /log c:\temp\ndp.log
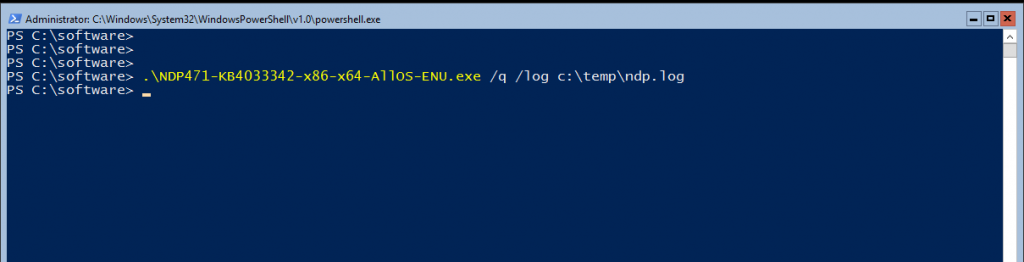
The .Net installation will continue in quiet mode; there will be no progress bar displayed. However, at the end of successful installation, the computer will restart.
Once the .Net installation completes, and the virtual machine restarts, you can join the machine to the Active Directory domain.
Join VM to Active Directory
To join the Azure virtual machine to the on-prem Active Directory, run the command below. In our case, here, we are joining the VM to the bluewidgets.local AD domain. Be sure to specify a domain admin account when joining the domain:
Add-Computer -DomainName bluewidgets.local -DomainCredential bluewidgets\administrator

After joining the virtual machine to the domain, restart it by running the command below:
Restart-Computer -Force
Once the machine has restarted, you can begin the installation of Exchange 2019.
Exchange 2019 installation
After rebooting, log in with an enterprise admin account that’s also a schema admin, launch PowerShell, and mount the Exchange .ISO image again using Mount-DiskImage as you did before.
Mount-DiskImage c:\software\ExchangeServer2019-x64.iso
Note the drive letter that the mount-diskimage command uses.

Run the PowerShell command below to launch the Exchange Server 2019 installation. The PowerShell command will also install the required OS components for Exchange 2019:
.\Setup.exe /m:install /roles:m /IAcceptExchangeServerLicenseTerms /OrganizationName:bluewidgets /InstallWindowsComponents
As you can see in the command above, the organization name for our lab org is “bluewidgets”.

The installation can take a considerable amount of time to complete. Once Exchange is installed, you can launch the Exchange Management Shell using LaunchEMS command from the command line:
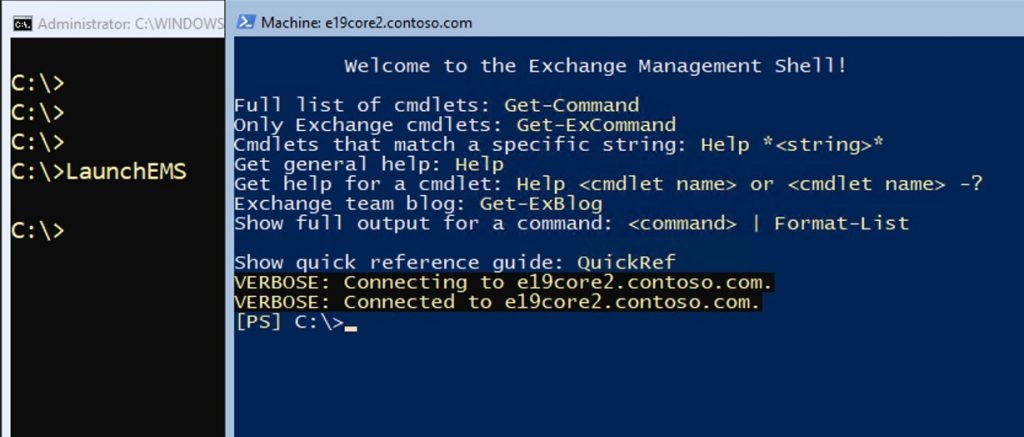
However, you can also use a web browser from an admin machine to access the Exchange Admin Center. In this lab here, we would browse to https://ex01.bluewidgets.local/ecp.

Until proper certs are installed, the EAC URL will display a cert error.
Configure Exchange 2019
With Exchange 2019 installed, it’s time to configure the application. You can start by adding an accepted domain. An accepted domain is an email domain that will be serviced by Exchange. In our case here, we are using bluewidgets.org.
To add an accepted domain, browse to Mail Flow and then Accepted Domains, in the Exchange EAC. Click the “+” sign and add the new domain as an Authoritative domain — and save the new settings.

After adding the new accepted domain, add an address policy for the new domain. The address policy will ensure new mailboxes receive an email address for the newly-added domain. In our lab environment, I’ve chosen to use the [email protected] format for new email addresses. Use whatever works for you.

Creating a policy doesn’t mean it’s applied. To apply the new policy, click Apply.

Next, create a send connector so users in the new Exchange organization can send emails to the internet. Do so by clicking Mail Flow in the left pane, and then Send Connectors in the top menu.
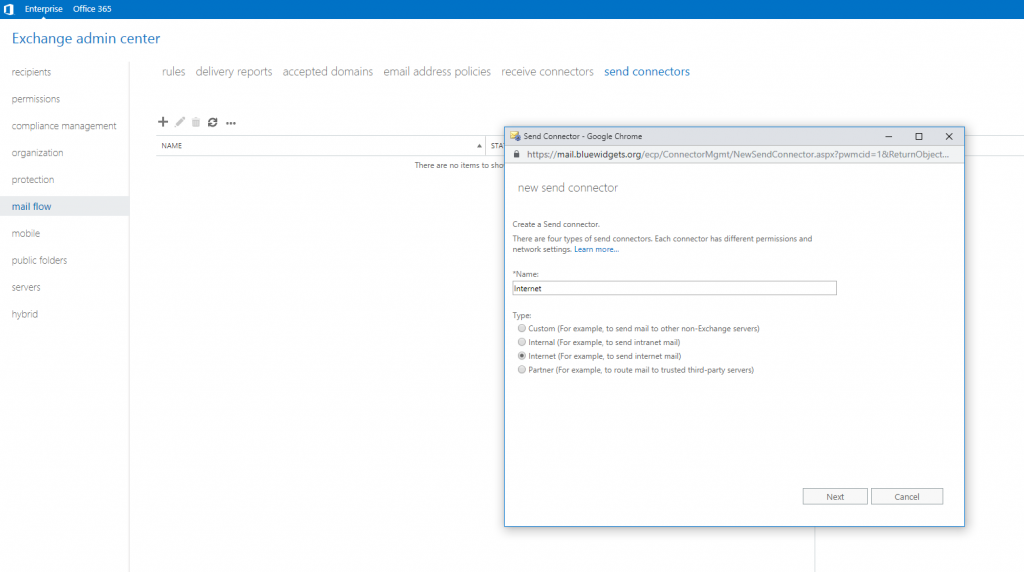
Provide a name for the new connector and select the Internet option. Click Next to continue. Leave the Network Settings at the default “MX” setting.

In the Add Domain screen, leave the Type at “SMTP” and the Cost at “1”. In the FQDN field, enter an asterisk (*). Doing so ensures outbound emails for all external domains are routed through the send connector.

Click Save and then select the new Exchange server as the “Source” server (as seen below).

Click Finish to complete the configuration of the Send Connector.
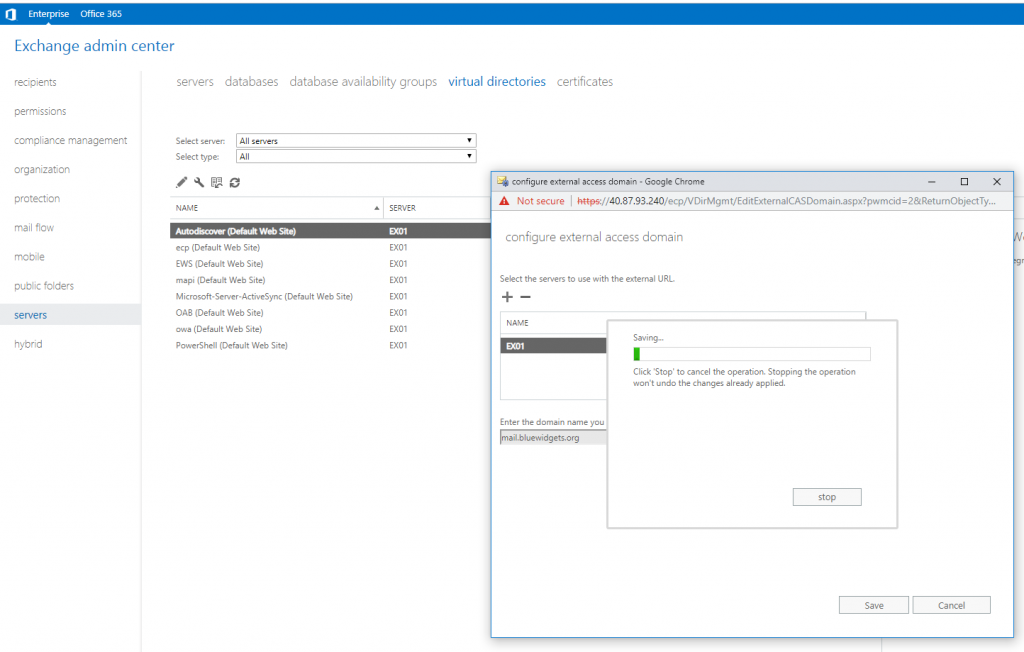
After configuring the Send Connector, move on to the configuration of the External access domain, which is essentially the FQDN by which the server will be referenced publicly (ie. mail.bluewidgets.org).
To configure the external access domain, browse to Servers in the left pane and then click Virtual Directories in the top menu.
Click the little wrench icon and provide the external FQDN that you wish to use to access the server. In our lab here, we are using mail.bluewidgets.org.
Click the “+” sign and add the Exchange server and then click Save.
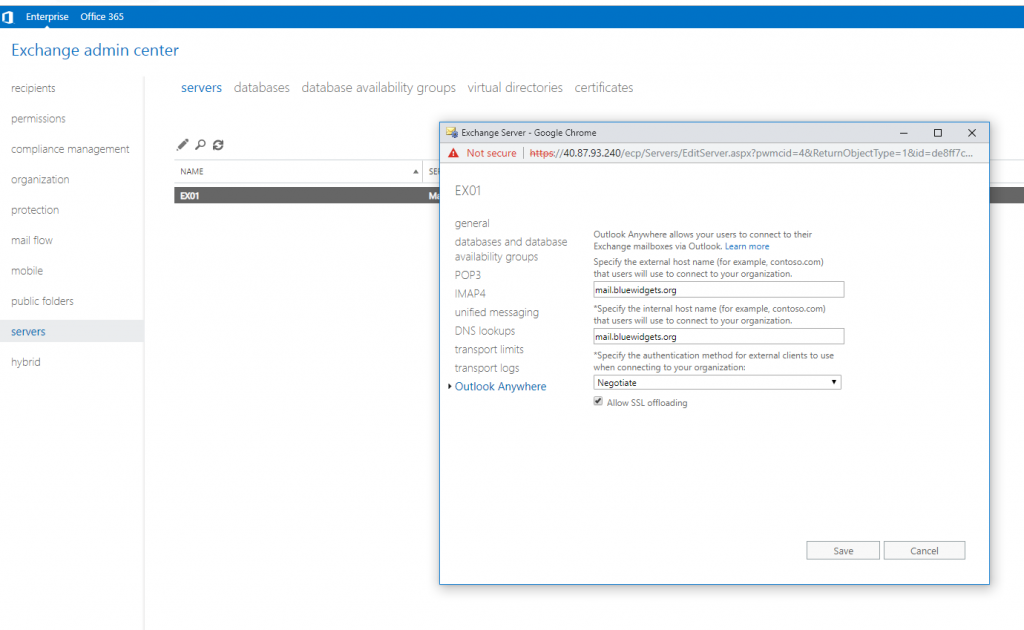
After configuring the external access domain, you can configure Outlook Anywhere. To do so, click Servers in the left pane, and then Servers in the top menu.
Highlight the new Exchange server and then click the “pencil” icon to edit it. Click Outlook Anywhere and provide a publicly accessible FQDN. In our case, we are using mail.bluewidgets.org.
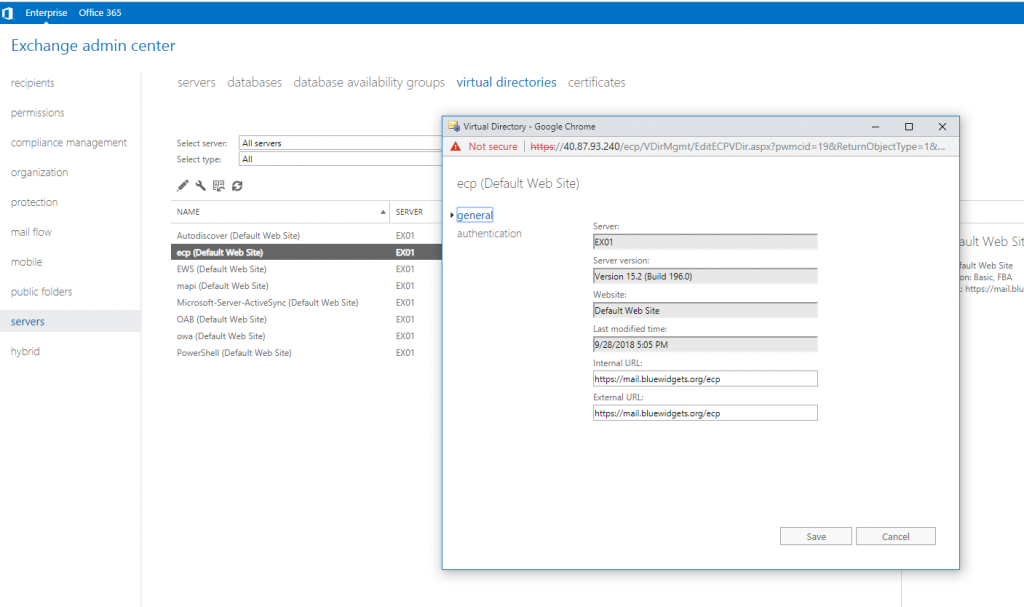
Click Save, and then move on to configuring the virtual directories. Do so by clicking Servers in the left pane, and then Virtual Directories in the top menu.

To make life easy on yourself (as far as certificates go), make sure internal URLs match the external URLs for each directory. Use the external FQDN that you used previously. For this lab, we used mail.bluewidgets.org.

Click on each virtual directory and set both internal and external URLs to point to the publicly accessible FQDN. By setting both the internal and external URLs to be the same public FQDN, it becomes much easier to set up the necessary certificate (since you’ll only need one because there is only one domain on it).
NOTE: There is no external URL to set for autodiscover.
To accommodate an internal URL that points to a domain other than the AD domain (bluewidgets.org vs bluewidgets.local in this case), you’ll need to create a DNS domain on your AD domain controller to match the external domain you used. In this case, I created a forward lookup zone on my AD DNS for bluewidgets.org and added a single “A” record for mail.bluewidgets.org and pointed it at the private IP address of the Exchange 2019 server. Doing so allows internal users (on the internal LAN) to access email without needing to go out to the Internet.
Configure certs
Once you’ve configured all of the virtual directory URLs, you can configure the certificate for the Exchange server. If you’ve followed the advice in this tutorial, you only need a single cert that includes three names: domain.com, mail.domain.com, and autodiscover.domain.com. In the case of my lab, the certificate required three names: bluewidgets.org, mail.bluewidgets.org, and autodiscover.bluewidgets.org.
Since everything falls under one domain name, I can use either wildcard cert or a typical UCC cert from virtually any public certificate provider.
For this lab, I opted to just use a typical UCC cert from GoDaddy.
To create a certificate request, click on Servers in the left pane and then Certificates from the top menu. Click the “+” icon and create a new certificate request.

Ensure that all domains listed are the same (in my case here, bluewidgets.org). If you’ve followed this tutorial, you should only require mail.yourdomain.com, autodiscover.yourdomain.com, and yourdomain.com.

Click Next

Complete the information for your new certificate request (company name, location, blah, blah, blah).

After clicking Next again, you are prompted to save your cert request somewhere (using a UNC path). I just saved the request to the C: drive of my Exchange 2019 server.
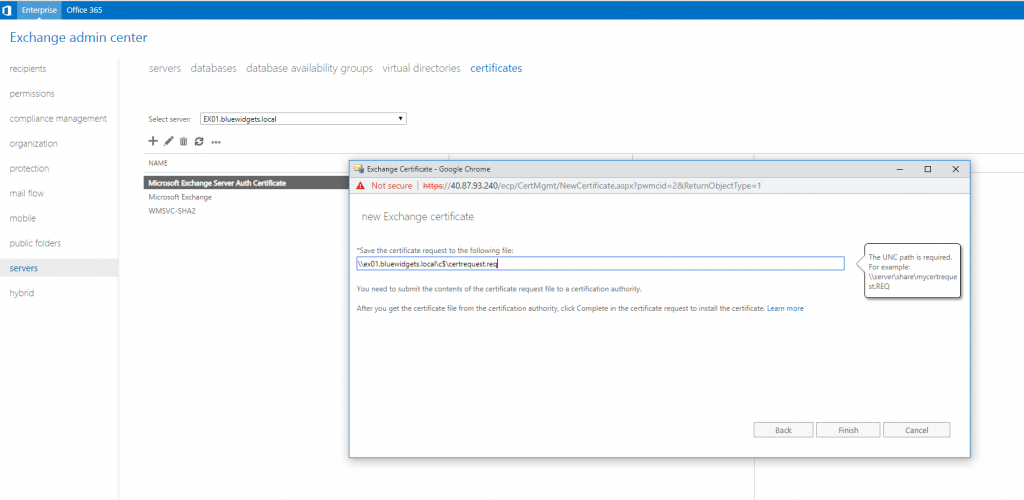
After clicking Finish, your certificate request is saved and created. Take the saved certificate request to your favorite certificate provider and request a UCC certificate. When you receive your shiny new cert, complete the request. To do so, open the EAC and click Servers in the left pane, and Certificates in the top menu.
Select the Exchange server, and then click on the pending certificate request from the list. You’ll see a “Complete” link in the details pane.
Click the “Complete” link. On the Complete Pending Request page that opens, in the File to import from field, enter the UNC path and filename for the certificate file that you downloaded from your cert provider and click OK.
With the new cert installed, you can assign the services to the cert. To do so, click on the newly-installed certificate and then click the pencil icon (edit). Select all four services (SMTP, IMAP, POP, IIS) and click Save.
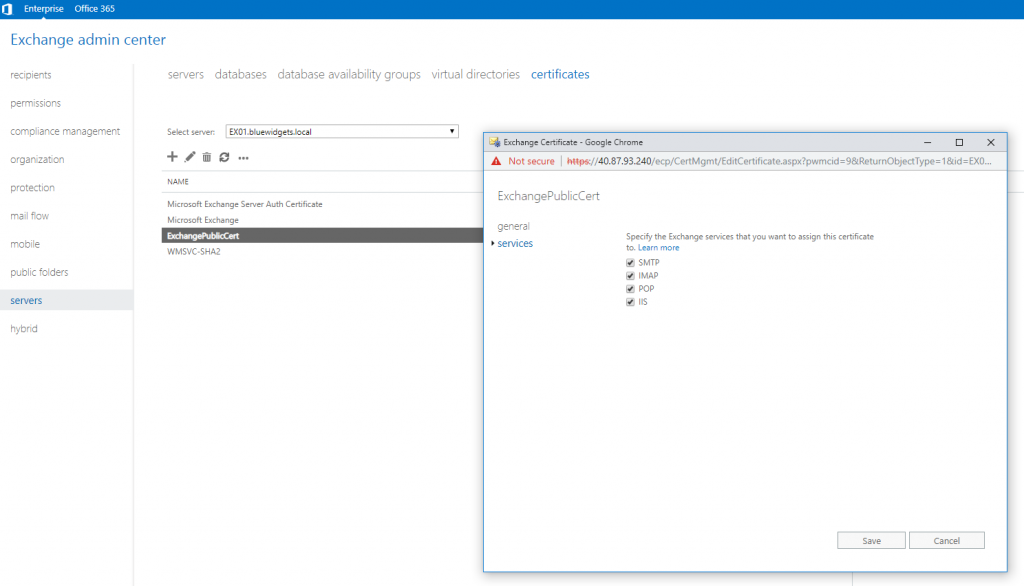
Doing so tells Exchange to use the new certificate to secure communications for all four services.

Configure DNS
With the certificate configured, you can now configure your Public and Internal DNS so that users can access email from outside and inside the local LAN.
To configure the internal AD-hosted DNS, make sure that you’ve created a forward lookup zone that matches the public domain name on the AD DNS server. Create the following records:
- “A” Record: mail.yourdomain.com (points to private IP address of the Exchange server)
- “CNAME” Record: autodiscover.yourdomain.com (points to mail.yourdomain.com)
Making the changes above in the AD-based DNS ensures users can access mail internally, without needing to traverse out to the internet, and then back in again.
To configure public DNS, browse to the DNS provider for your email domain. In my case in the lab, my DNS for bluewidgets.org is hosted by GoDaddy. Open the DNS management tool and create the following records:
- “A” Record: mail.yourdomain.com (points to public IP address of the Exchange server)
- “CNAME” Record: autodiscover.yourdomain.com (points to mail.yourdomain.com)
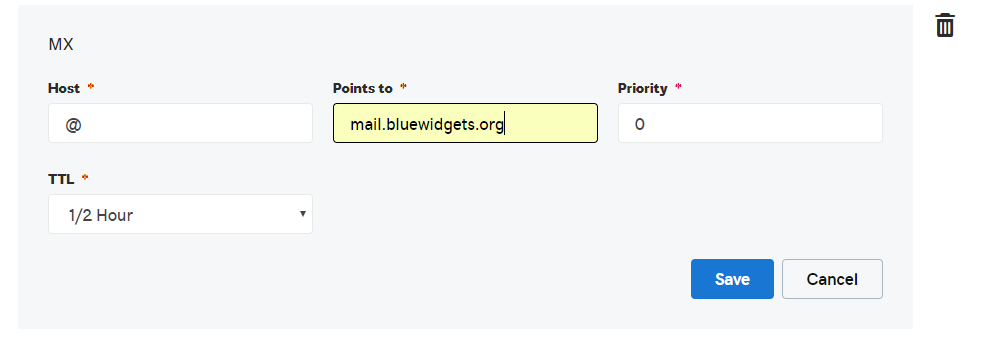
- “MX” Record: points @ to mail.yourdomain.com (set priority to 0)
- “SPF” Record: should look something like this v=spf1 mx ip4:40.87.93.240 ~all
After creating the necessary public DNS records, wait for them to propagate throughout the internet (usually an hour or two) before testing Exchange access from outside the local LAN.


Modify mx record
Modify SPF

Test Exchange 2019
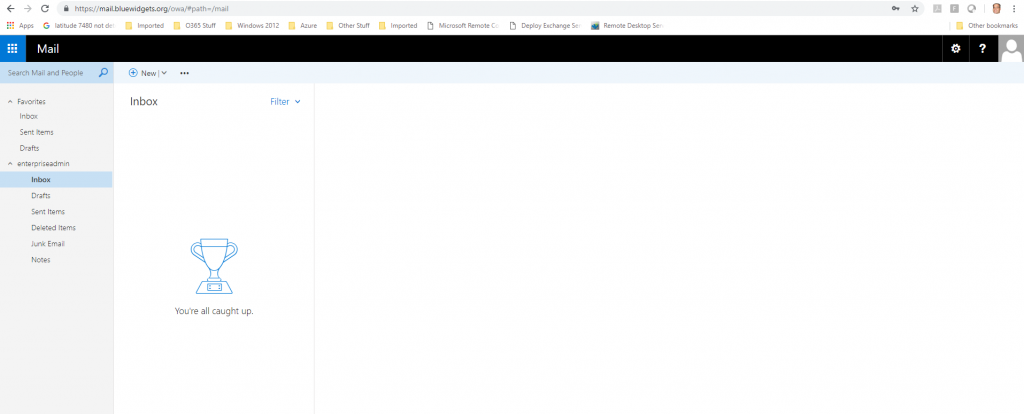
Once all DNS records (public and private) have been created, browse to OWA, using the Outlook Anywhere URL that you configured. For this lab, we used mail.bluewidgets.org so, to test, I would browse to https://mail.bluewidgets.org/owa.
Confirm that there are no cert errors and that you can access your mailbox. If you haven’t created any users yet, sign in with the account you used to install Exchange. There should be a mailbox already set up for it. Make sure you can send and receive emails.
Assuming there are no cert issues or mail delivery problems (there shouldn’t be), you should be good to go. Other tests that you can perform include accessing the Exchange Admin Center and running the Microsoft Remote Connectivity Analyzer tool. Ensure the tool runs clean and that there are no errors.
Lastly, confirm that Outlook works. Create a new Outlook profile and use autodiscover to create the profile. If autodiscover works as expected, you should just have to supply the email address for your account. Autodiscover should so the rest, and prompt you for your password.

Unless there are issues, your inbox will pop up and you will be ready to use your new Exchange 2019 server.


Hi, I just tried your document but can pass the installation
I keep getting the error that Exchange 2019 requires Windows Server 2019
Can you please clarified ?
Thank you
Really good article. I will try on AWS.
I have seven VMs all Hyper-V.
A central storage.
It used to work very well last year with old 2016 server.
Suddenly has stopped working in 2016 and 2019 server
How to permanent attach VDISK to Virtual Machine.
I have tried many principals and none have worked, such as Task Scheduler, GP and all start after login.
I need to make sure it is attached and right after start without login.
Any help would highly appreciated
Thanks
Jay