Readers interested in understanding how to perform image-based unattended installs of Windows Vista using Windows Automated Installation Kit (Windows AIK) tools such as Windows System Image Manager (Windows SIM), the Windows Preinstallation Environment (WinPE), the System Preparation Tool (Sysprep) and ImageX are referred to articles 1 through 13 of my Deploying Vista series here on WindowsNetworking.com.
Readers interested in understanding how to use Windows Deployment Services (Windows DS) for server-based unattended installs of Windows Vista are referred to articles 14 through 23 of my Deploying Vista series.
For more information on using Microsoft Deployment Toolkit for deploying Windows Vista, see the following articles in this series:

This present article continues our look at the Windows Deployment Services (Windows DS) server role by examining how to create and use Capture Images.
Note: Readers interested in understanding the basics of deploying Vista using the Windows Automated Installation Kit (Windows AIK) are referred to the first 13 articles of this series, which are listed on the author’s home page on WindowsNetworking.com.
In the previous article of this series we examined discover images, which are boot images you can use to deploy Windows Vista onto non-PXE systems or to allow users to select which Windows DS server to use for their installation. Another type of boot image you can create in Windows DS is the Capture Image, which you can use to capture an install image from a preconfigured master installation of Windows Vista so that you can then duplicate this installation onto multiple destination computers.
Recall from article 13 of this series that performing a basic image-based deployment of Windows Vista using the Windows Automated Installation Kit (Windows AIK) involves the following seven steps:
-
Install the reference computer.
-
Customize the reference computer.
-
Sysprep the reference computer.
-
Boot the reference computer using Windows PE.
-
Capture a base image from the reference computer.
-
Copy the base image to a network share.
-
Deploy the base image onto destination computers.
With a server-based deployment solution based on Windows DS however, these steps are reduced to the following:
-
Install the reference computer.
-
Customize the reference computer.
-
Sysprep the reference computer.
-
Create a capture boot image and add it to the store of your Windows DS server.
-
Boot the reference computer and select the capture image from the boot menu, then walk through the pages of the Capture Image Wizard to capture an image of your reference computer, upload the image to your Windows DS server, and add the image as an install image.
-
Use Windows DS to deploy the captured image of your reference computer onto destination computers.
Let us see how all this works. Note that because the first three steps are the same for both processes, we will not repeat them here.
Creating and Using Capture Images
Creating a capture image is even easier than creating a boot image. Begin by selecting the Boot Images folder of your Windows DS server. Then right-click on your default boot image and select Create Capture Boot Image from the shortcut menu as shown in Figure 1 below. Note that in this figure two Windows DS servers named SEA-WDS and SEA-WDS2 are being displayed. We will be working only with server SEA-WDS2 in this example, and to prevent our sysprepped reference computer from connecting with server SEA-WDS when the reference computer is booted, we have stopped the Windows DS service on server SEA-WDS. To do this, right-click on SEA-WDS.contoso.com in the console tree and select All Tasks | Stop. Note also that there are currently three boot images displayed in the Boot Images folder on SEA-WDS2:
-
Microsoft Windows Longhorn Setup (x86) – This is the default boot image (boot.wim)
-
Microsoft Windows Longhorn Setup (x86) – WDS – This is a discover image that connects booting clients with server SEA-WDS
-
Microsoft Windows Longhorn Setup (x86) – WDS2 – This is a discover image that connects booting clients with server SEA-WDS2

Figure 1: Creating a capture boot image
Selecting the Create Capture Boot Image option from the shortcut menu launches the Create Capture Image Wizard. As shown in Figure 2 below, we have entered a name, description, and location for saving the capture image we are creating. (The capture image will be named capture.WIM and will be saved in the CaptureImages folder on W: drive.)

Figure 2: Specifying a name, description, and location for saving the new capture image
When you have complete the wizard, your new capture image has been created, and the next step is to import this image into the image repository on your server. To do this, right-click on the Boot Images folder and select “Add Boot Image” to launch the Add Image Wizard. On the Image File page of this wizard, browse to select the capture image that you created earlier (Figure 3).

Figure 3: Adding the new capture image to the image store
Follow the remaining steps of the wizard until the capture image has been added to the store and is displayed in the Boot Images folder as shown in Figure 4 below. Note that this figure also shows that we have disabled all boot images on the server except for the capture image. That way we would not be prompted with a boot menu when we restart our sysprepped reference computer. Of course, you could leave the other boot images enabled and then select the capture image when the boot menu appears, but that would add an additional step.

Figure 4: The capture image is ready to capture an image of a sysprepped reference computer
Tip:
You can also create a new capture image using the WDSUTIL /New-CaptureImage command.
Now we are ready to capture an install image from a sysprepped reference computer on which Windows Vista has previously been installed and customized to create a master installation we want to clone to client systems on our network. Begin by configuring the master computer to boot from the network using a PXE-enabled network card. Turn the master computer on. As the master computer boots, it will acquire an IP address from the PXE server (server SEA-WDS2.contoso.com) and then it will prompt you to press F12 to continue. Pressing F12 will cause the master computer to download and install the capture boot image from server SEA-WDS2. (If you have additional boot images enabled on your Windows DS server, you will be presented with a Windows Boot Menu at this point and will have to select the capture image from the list of boot images displayed). Once the capture boot image has been downloaded, it will be loaded and run. Figure 5 shows this happening:

Figure 5: Loading the capture image
Once the capture image has initialized, the Image Capture Wizard launches within the Windows Preinstallation (WinPE) environment as shown in Figure 6:

Figure 6: The Image Capture Wizard
The next screen of the wizard prompts you to select the volume you wish to capture an install image from (usually C: drive) and a name and description you wish to have assigned to the captured image (Figure 7):

Figure 7: Specifying a name and description for the captured image and the disk volume you wish to capture
The next wizard screen prompts you to specify a location and filename for saving the captured image onto the master computer (Figure 8). Why save the captured image locally? In case the network goes down during the capture and the wizard is unable to upload the captured image to the image store on your Windows DS server. In this example we are capturing the image as the file cap3.wim and saving it in a folder named Capture Image on C: drive of the reference computer.
Also on this wizard screen is a checkbox you must select in order to upload the captured image to your Windows DS server. Select this checkbox, then type the FQDN of the Windows DS server you wish to upload the captured image to and click Connect. When a credentials dialog is displayed, type credentials for a user with administrator privileges for the domain. Once the wizard has successfully established a connection with your SEA-WDS2, the bottom list box displays a list of Image Groups on the server—select the Image Group you wish to upload the captured install image to.

Figure 8: Specifying the image name, local storage location, and uploading of the captured image to an Image Group on the specified Windows DS server
Clicking Finish begins the capture process (Figure 9):
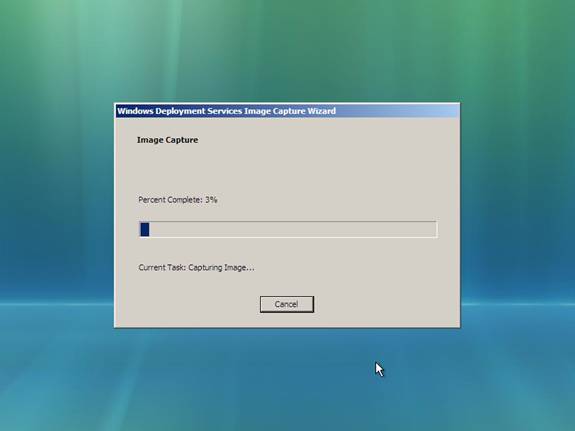
Figure 9: An install image is being captured from the reference computer
Once the image of the reference computer has been captured and saved locally, the saved image is automatically uploaded over the network to your Windows DS server (Figure 10):

Figure 10: Uploading the captured image to the Windows DS server
Once the upload is finished, click Close to end the wizard. Your reference computer will now reboot, and you will probably want to immediately shut it down as soon as it restarts so you can capture another image from it later if needed. If you let the reboot continue, Windows Setup will run and the machine OOBE (Windows Welcome) prompts will be displayed.
Finally, you should use the Windows Deployment Services console to verify that the captured install image has been successfully uploaded to your Windows DS server (Figure 11). (If the captured image isn’t displayed, close the Windows DS console and re-open it.) At this point you are ready to deploy the captured image onto bare-metal destination computers, which is the topic of the next article in this series.

Figure 11: The captured image has been added to the repository on your Windows DS server as an install image
Readers interested in understanding how to perform image-based unattended installs of Windows Vista using Windows Automated Installation Kit (Windows AIK) tools such as Windows System Image Manager (Windows SIM), the Windows Preinstallation Environment (WinPE), the System Preparation Tool (Sysprep) and ImageX are referred to articles 1 through 13 of my Deploying Vista series here on WindowsNetworking.com.
Readers interested in understanding how to use Windows Deployment Services (Windows DS) for server-based unattended installs of Windows Vista are referred to articles 14 through 23 of my Deploying Vista series.
For more information on using Microsoft Deployment Toolkit for deploying Windows Vista, see the following articles in this series:


