Introduction
Readers interested in understanding how to perform image-based unattended installs of Windows Vista using Windows Automated Installation Kit (Windows AIK) tools such as Windows System Image Manager (Windows SIM), the Windows Preinstallation Environment (WinPE), the System Preparation Tool (Sysprep) and ImageX are referred to articles 1 through 13 of my Deploying Vista series here on WindowsNetworking.com.
Readers interested in understanding how to use Windows Deployment Services (Windows DS) for server-based unattended installs of Windows Vista are referred to articles 14 through 23 of my Deploying Vista series.
For more information on using Microsoft Deployment Toolkit for deploying Windows Vista, see the following articles in this series:

This present article continues our look at the Windows Deployment Services (Windows DS) server role by walking you through an unattended image deployment onto bare-metal hardware using Windows Deployment Services.
Note:
Readers interested in understanding the basics of deploying Vista using the Windows Automated Installation Kit (Windows AIK) are referred to the first 13 articles of this series, which are listed on the author’s home page on WindowsNetworking.com.
In the previous article of this series we looked at how to use Windows DS to manually deploy a captured image of a preconfigured reference computer onto a PXE-enabled bare-metal destination computer. This present article examines how to automate this image deployment process by using answer files.
Windows Deployment Services and Answer Files
To perform an unattended image-based deployment using Windows DS, you must create and configure two answer files:
-
Unattend.xml – This answer file is used to suppress the user interface screens of the Windows DS client that are normally displayed at the beginning of the install process. These screens include specifying a locale/language, providing credentials to connect to the Windows DS server, choosing the install image you want to install on the system, and selecting a disk/partition for installation purposes.
-
ImageUnattend.xml – This answer file is used to suppress the machine out-of-box-experience (OOBE) or Windows Welcome screens that are normally displayed at the end of the install process. These screens include specifying a local/language, accepting the EULA, specifying a product key if required, specifying a computer name or autogenerating one, configuring firewall protection level, specifying a time zone, and configuring the network location (Home, Work or Public).
To create these two answer files, you should use Windows System Image Manager (Windows SIM). The sections that follow will demonstrate how to create and configure each of these answer files and then we’ll walk through the steps of performing our unattended install.
Creating and Configuring Unattend.xml
I’ll assume you are already familiar with using Windows SIM. If not, please refer back to article 6 and article 7 from this series. The simplest way to demonstrate how to create the Unattend.xml file for automating the Windows DS client experience is to show screenshots from Windows SIM as follows. First, add the Microsoft-Windows-International-Core-WinPE component for your architecture (x86 in this walkthrough) to the windowsPE configuration pass section of your answer file (refer back to article 3 in this series if you need a refresher on configuration passes). Then configure the settings for this component in your answer file as shown in Figure 1 if you are installing the U.S. English version of Windows Vista Enterprise as we are in this walkthrough deployment.

Figure 1: Configuring locale/language settings for the windowsPE configuration pass.
You also need to specify the language for the Microsoft-Windows-International-Core-WinPE\SetupUILanguage component as shown in Figure 2:

Figure 2: Configuring locale/language settings for the windowsPE configuration pass (continued).
Next, add the Microsoft-Windows-Setup\DiskConfiguration\Disk\CreatePartitions\CreatePartition and Microsoft-Windows-Setup\DiskConfiguration\Disk\ModifyPartitions\ModifyPartition components to the windowsPE configuration pass section of your answer file. Specify 0 for the DiskID setting and true for the WillWipeDisk setting as shown in Figure 3 below. This will wipe (delete all partitions from) the first disk on your system and install Vista on this disk using the partition info you provide next.

Figure 3: Wiping all partitions from disk 0.
Select the Microsoft-Windows-Setup\DiskConfiguration\Disk\CreatePartitions\CreatePartition node in your answer file and specify true for Extend, 1 for Order, and select Primary for Type as shown in Figure 4 below. This will create a new primary partition that fills disk 0.

Figure 4: Creating a primary partition that fills the disk.
Next, select the Microsoft-Windows-Setup\DiskConfiguration\Disk\ModifyPartitions\ModifyPartition node in your answer file and specify true for Active, select NTFS for Format, specify a label and drive letter, type 1 for Order, and specify 1 for the PartitionID setting as shown in Figure 5 below.

Figure 5: Creating and formatting the destination volume for your installation.
Next, add the Microsoft-Windows-Setup\WindowsDeploymentServices\ImageSelection\InstallImage and Microsoft-Windows-Setup\WindowsDeploymentServices\ImageSelection\InstallTo components to the windowsPE configuration pass of your answer file. Then select the Microsoft-Windows-Setup\WindowsDeploymentServices\ImageSelection\InstallImage node in your answer file and specify the filename of the install image you want to install, the name of the Image Group to which it belongs, and the name of the install image as displayed in the Windows Deployment Services console (see Figure 6):

Figure 6: Specifying which install image to deploy to the destination computer.
Now select the Microsoft-Windows-Setup\WindowsDeploymentServices\ImageSelection\InstallTo of your answer file and specify that the install image you specified earlier should be installed onto partition 1 of disk 0 as shown in Figure 7:

Figure 7: The image will install to partition 1 of disk 0.
Finally, add the Microsoft-Windows-Setup\WindowsDeploymentServices\Login\Credentials component to the windowsPE configuration pass of your answer file and specify domain user credentials for performing the install (Figure 8):

Figure 8: Specifying credentials for the destination computer to connect to the Windows DS server.
Validate your answer file and save it as Unattend.xml. Then copy your answer file to the \RemoteInstall\WdsClientUnattend folder on the image repository volume on your Windows DS server, which in this walkthrough is the W:\RemoteInstall\WdsClientUnattend folder on server SEA-WDS2. Then, using the Windows DS console, display the properties of the server, select the Client tab, select the Enable Unattended Installation checkbox, click the Browse button for your architecture, and browse to W:\RemoteInstall\WdsClientUnattend\Unattend.xml and click OK. This configures your Windows DS server to use your answer file to automate the first portion of the deployment process (see Figure 9):

Figure 9: Associating the Unattend.xml file with the Windows DS client.
Creating and Configuring ImageUnattend.xml
Now let us create and configure our second answer file, which will automate the Windows Welcome process. Start with a new (blank) answer file and add the Microsoft-Windows-Shell-Setup component to the specialize configuration pass section. Then configure the TimeZone setting, type “*” (asterisk) for ComputerName to autogenerate the computer name of the destination system, and (optionally) other settings as desired as shown in Figure 10:

Figure 10: Specifying the time zone and computer name.
Now add the Microsoft-Windows-International-Core component to the oobeSystem configuration pass and configure local/language settings as shown in Figure 11:

Figure 11: Specifying the local/language.
Next add the Microsoft-Windows-Shell-Setup\OOBE component to the oobeSystem configuration pass section of your answer file and configuring the settings for EULA, network location, and PC Protection as shown in Figure 12 below. (Note that the Network Location setting shown here doesn’t “take” when configured via an answer file and you’ll be prompted to select your network location when you first log on to your computer.)

Figure 12: Configuring OOBE settings for network location, EULA, and PC Protection.
Next, add the Microsoft-Windows-Shell-Setup\UserAccounts\LocalAccounts\LocalAccount\Password component to the oobeSystem configuration pass section of your answer file. Then select the Microsoft-Windows-Shell-Setup\UserAccounts\LocalAccounts\LocalAccount node and create a new local administrator account for the destination computer as shown in Figure 13:

Figure 13: Creating a local administrator account.
And do not forget to specify a password for your new account (Figure 14):

Figure 14: Specifying a password for the account.
Now validate and save your answer file as Unattend.xml and copy the file to your Windows DS server using removable media or some other method. In the Windows Deployment Services Console, right-click on the install image you want to deploy and select Properties, and on the General tab select the Allow Image To Install in Unattended Mode checkbox as shown in Figure 15:

Figure 15: Allowing an install image to install in unattended mode.
Click the Select File button and browse to the answer file you created above (Figure 16):

Figure 16: Select the answer file that will automate Windows Welcome.
Clicking OK creates a folder with the same name (cap3) as your install image file (cap3.wim) and a subfolder named Unattend beneath, and copies your Unattend.xml file to this Unattend folder, renaming the file as ImageUnattend.xml (Figure 17):

Figure 17: Copying the Windows Welcome answer file to the image repository.
Performing the Unattended Install
We’re now ready to perform our unattended install of Windows Vista Enterprise onto our bare-metal PXE-enabled destination computer. Configure your destination computer to boot from the network, turn it on, and press F12 when prompted (Figure 18):

Figure 18: Press F12 to begin the deployment process.
Then when the Windows Boot Manager menu is displayed, select server SEA-WDS2 as shown in Figure 19:

Figure 19: Select the Windows DS server you want to use for your deployment.
Go make some coffee now and have a piece of cake. When you come back, enter your user credentials at the Windows logon screen as shown in Figure 20 and enjoy your game of FreeCell.
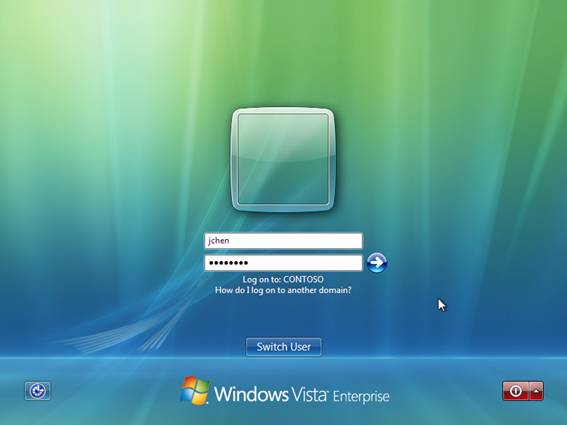
Figure 20: The deployment is complete—log on and enjoy your game of FreeCell.
Readers interested in understanding how to perform image-based unattended installs of Windows Vista using Windows Automated Installation Kit (Windows AIK) tools such as Windows System Image Manager (Windows SIM), the Windows Preinstallation Environment (WinPE), the System Preparation Tool (Sysprep) and ImageX are referred to articles 1 through 13 of my Deploying Vista series here on WindowsNetworking.com.
Readers interested in understanding how to use Windows Deployment Services (Windows DS) for server-based unattended installs of Windows Vista are referred to articles 14 through 23 of my Deploying Vista series.
For more information on using Microsoft Deployment Toolkit for deploying Windows Vista, see the following articles in this series:


