In June, Microsoft said its directory synchronization tool DirSync will reach end of support in April 2017. Microsoft is urging users to transition to its newest synchronization tool, Azure AD Connect (AAD Connect), long before the deadline arrives. This tutorial will help you make that transition.
Our scenario starts with a Windows Server 2008 R2 with the DirSync tool installed on it. Our target is a new Windows Server 2012 R2 running AAD Connect tool (Azure Active Directory Connect). There are a couple of ways to perform this transition. The simplest is the upgrade-in-place, but this has several drawbacks. It does not allow the administrator to rollback easily and it is not the best approach if you are also planning to upgrade the operating system. A better method is the parallel approach where AAD Connect (Azure Active Directory Connect tool) is installed on a new server and then all settings are transitioned from the old server to the new one.
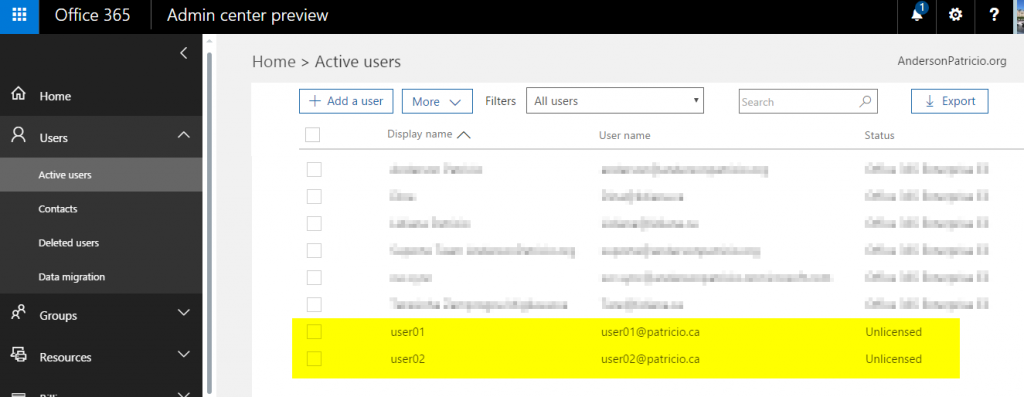
Before starting the process, the administrator must be aware where to find the objects that are being synchronized. Log on to Admin Center Preview and click Users and then Active Users. This brings up a list of all objects that have been synchronized between the on-premises environment and Azure Active directory/Office 365. In the image below, you can see the users listed on the right side. Any new user added to the on-premises environment will show up automatically in Office 365/Azure Active Directory.
Using Admin Center Preview, check the status of the synchronization by clicking Health and then Directory Sync Status. Another option is a frame on the Home page, which contains the status of the directory and password synchronization. When we click on either of these options, a new page with the Directory Sync Status will be displayed. This listing is important because it allows us to see at a single glance when the last replication took place and the overall status of this important service.

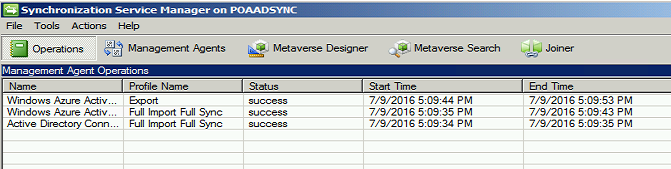
If you want to double-check the synchronization process on both sides of the fence, use the Synchronization Service Manager tool. It has updated logs of the latest synchronization processes between on-premises and Azure Active Directory.
Now that we understand the scenario and have checked the current synchronization, we will start the move from the current server to a new one.
Step 1 – Install Azure Active Directory
Install Azure Active Directory on the current server. (In this tutorial, we are talking about the server running Windows Server 2008 R2 and DirSync tool.) Unfortunately, most of the requirements needed to run the tool are not installed by default on a Windows Server 2008 R2 server, so the following software must be installed:
- Microsoft .NET Framework 4.5.1
- Windows Management Framework 3.0 (select version 6.1 from the list)
Next, install Microsoft Azure Active Directory Connect (AAD Connect). Run the installation but do not run the initial wizard at this time.
Step 2 – Export the configuration from the current server
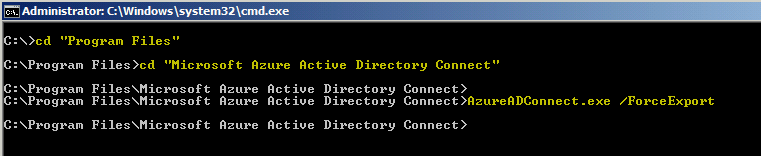
Now we must export the current configuration from the server that has DirSync installed on it, generating an XML file that will be used on the new server. Here is how you do it:
- Open command prompt as administrator
- Type in cd \
- Type in cd ”Program Files”
- Type in cd “Microsoft Azure Active Directory Connect”
Run exe /ForceExport
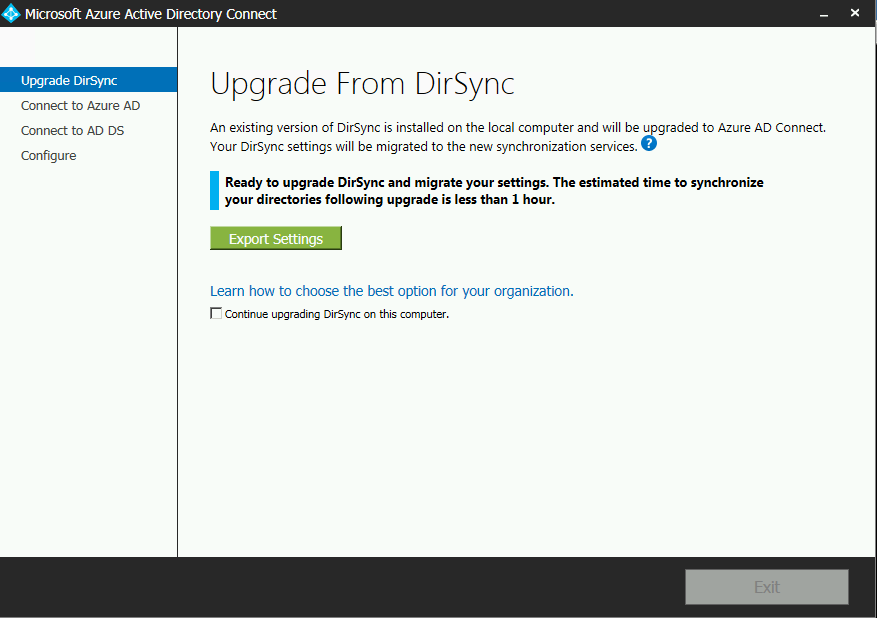
The first page of the wizard informs the administrator that there is a version of DirSync installed on the local computer. Click Export Settings and select a place to save the XML file. Copy the XML file to the new synchronization server.
Step 3 – Import the settings to the new synchronization server
First, install Azure Active Directory Connect on the new synchronization server. The installation process will open the Azure Active Directory Connect wizard after the installation is completed, but just close that initial page for now. Before running the wizard, the configuration must be imported:
- Open Command Prompt as administrator
- Type in cd “\Program Files”
- Type in cd “Microsoft Azure Active Directory Connect”
- Type in exe /migrate and hit enter

In the Welcome to Azure AD Connect page, click I accept the license terms and privacy notice, and then click Continue.
In the Upgrade From DirSync page, click browse and select the file that was copied from the current synchronization server (the Windows Server 2008 R2) and click Next, as shown in the image below.

In the Connect to Azure AD page, type in the credentials to connect in Microsoft Azure, and click Next.
In the Connect to AD DS page, type in the credentials from the on-premises Active Directory, and click Next.
In the Ready to Configure page, leave the default settings that include the option Start the synchronization process when configuration completes and click Install. This process may take a while because of the installation of the requirements such as SQL Server Express.
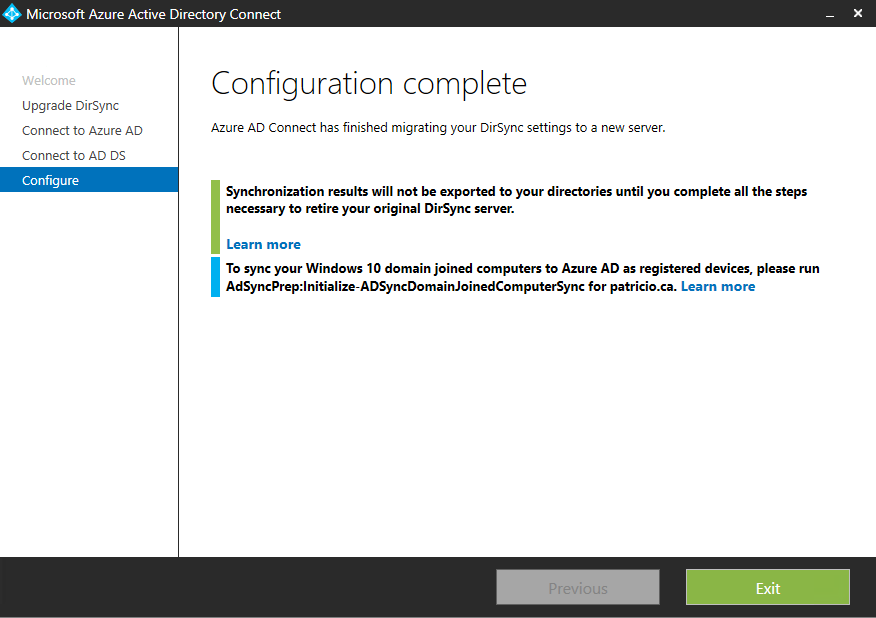
In the Configuration Complete page (image below), the wizard informs us that we are in staging mode, which means there is no synchronization taking place from this new server and the Azure Active Directory. Click Exit. Make sure to logoff from the current session and log back on before continuing to the next step.
Step 4 – Validate the synchronization on the new server
On the new synchronization server, open the miisclient.exe, which is located on C:\Program Files\Microsoft Azure AD Sync\UIShell path. In the Synchronization Service Manager make sure that success is shown on the Status column. If there are any issues, check the logs and fix those issues before moving to the next step.

If the synchronization is working properly and no errors are reported, we can move forward and start the transition by removing the old server and configuring the new one to synchronize with Azure Active Directory.
Step 5 – Remove DirSync from the old server
Log on to the old server (running Windows Server 2008 R2), open Programs and Features, select Windows Azure Active Directory Sync tool, and click Uninstall. A dialog box requiring confirmation will be displayed. Click on Yes to confirm.

After removing the Windows Azure Active Directory Sync tool, you will notice some SQL components and Forefront Identity Manager Synchronization Service programs will be removed automatically as part of the same process. The server itself can now be removed from the domain and decommissioned from the production environment.
Step 6 – Move the synchronization to the new server
The final step on our journey is to configure the new server to take over the synchronization process. So far, we have installed the Azure AD Connect tool, imported the configuration that came from the original server running Windows Server 2008 R2 and DirSync Tool.
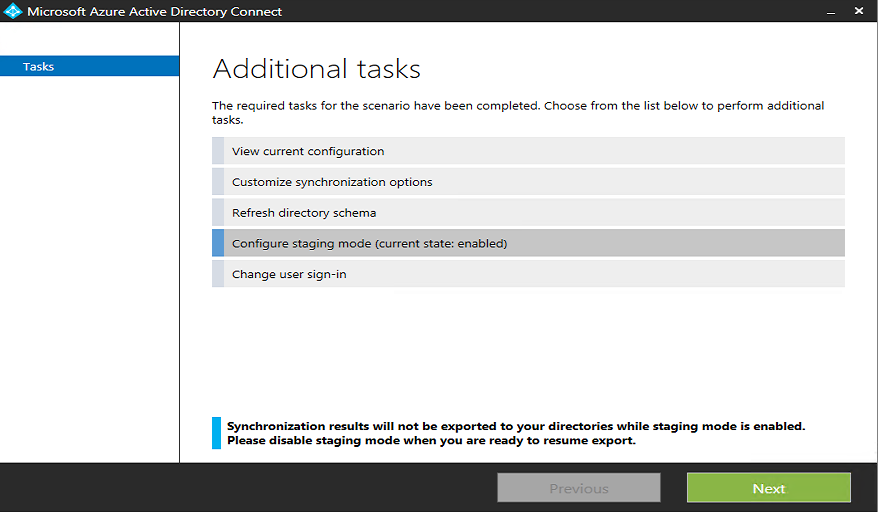
Log on to the new server. Open Azure AD Connect (located on the Desktop area). In the new page, select configure stating mode (current state: enabled) and click Next.
In the Connect to Azure AD page. Type in the credentials to connect in Azure Active Directory and click Next.
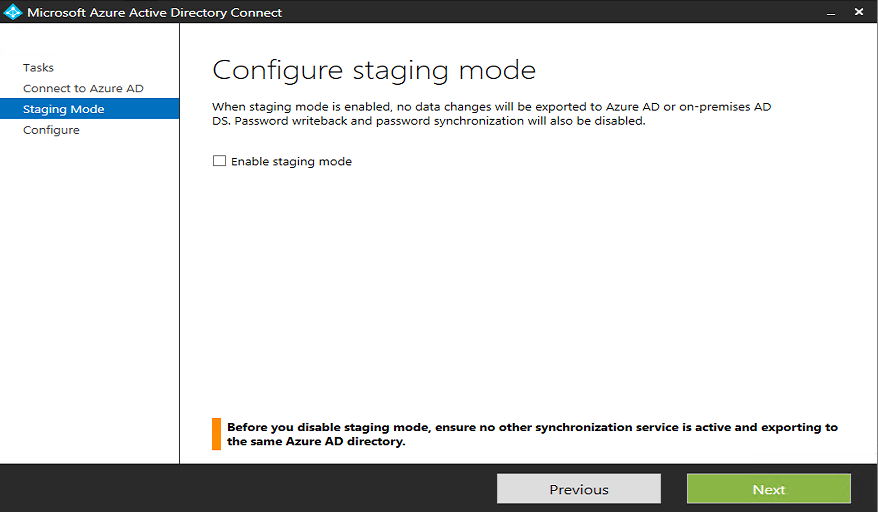
In the Configure staging mode page, make sure that Enable staging mode is NOT selected, as shown in the image below, and click Next.
In the Ready to configure page, leave the default settings and click Install.
In the Configuration complete page, you should see a message saying the staging mode was disabled on the final page. Click Exit. You are done!
If you are using Microsoft Azure IaaS (Infrastructure as a Service) this synchronization server is a good candidate to be installed on Microsoft Azure and it is highly recommended to have domain controllers close to that server.


This worked like a champ. Thank you very much for the instructions.
I’d like to suggest you mention or add the Enable-ADSyncExportDeletionThreshold feature.
In my case, I wanted to reduce the default threshold to something much smaller than the default value of 500. I lowered it to 10 for a small business as they did not have 500 objects and the value would never have triggered a halt in case of accidental deletion.
Excellent