In a previous article, we covered the steps required to test your application and understand what you need to do at the container level to get an application up and running. At the end of the last article, we learned that these were the steps to get our application up and running:
- Use Alpine Linux as the base image.
- Upgrade the container with the latest software available.
- Install Apache2.
- Add our code to the file system. (We tested that by changing the existing files.)
- Start the service.
- Allowing clients to access the application.
At the end of that article, we were ready to start several containers, and the application was available. Since the application was simple, and it uses only static content, the results were satisfactory for the time being.
What were the challenges that we faced so far in this journey? The problem lies when we must update the application. Let’s say the developer wants to add new content, or even add new pages to the current website. That becomes challenging because we would have to repeat all the steps, including editing files within the container, create an image, and then start running a container with the new image.
It is doable but not practical, and it would be painful on a larger scale. So, it is time to take it up a notch and introduce Dockerfile. Docker can create images automatically using a text document that contains all instructions to create an image without manual intervention.
The file has a specific format that we are going to explore in this article, but they are easy to follow and allow faster release of the software. We can change code and create a new image using DevOps, and we can automate the deployment of the solution.
Using Visual Studio code
The first step is to create a folder in your local disk. We are going to use that as our source folder to manage our application. For this article, I’m going to create a folder called App6 using Windows Explorer. Right-click on that new folder, and then click on Open with Code.
The result will be Visual Studio with a new area for us to work in our new application. Our first step is to create some more beautiful HTML code and add some images. I got the cutest Docker picture on the Internet that I could found. (Somehow reminded me of Sponge Bob scenery and I thought that was the one!)
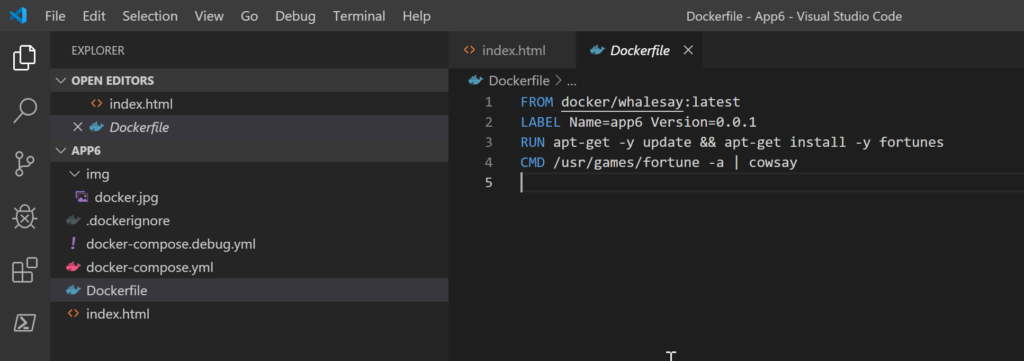
The first changes were only three small ones, as follows: created a new index.html file with some content, created a subfolder called img, and add the docker.jpg file to it. The entire infrastructure and the test of the code are depicted in the image below.
Note: I added the extension Open HTML in Default Browser in my VS code. When I was satisfied with my HTML code, I could click on the code and then Open in Default Browser to see the results.

Until this point, we have our application (the HTML code) in our workstation, but we haven’t touched containers. Let’s use the VS code to help us out. First type F1 and type docker, and from the list find Docker: Add Docker Files to Workspace…
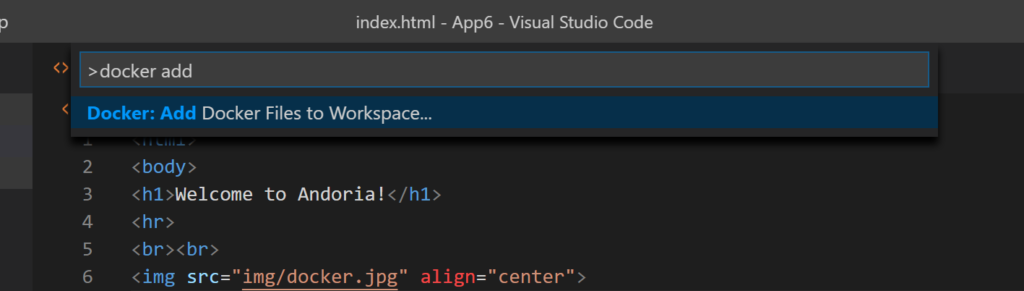
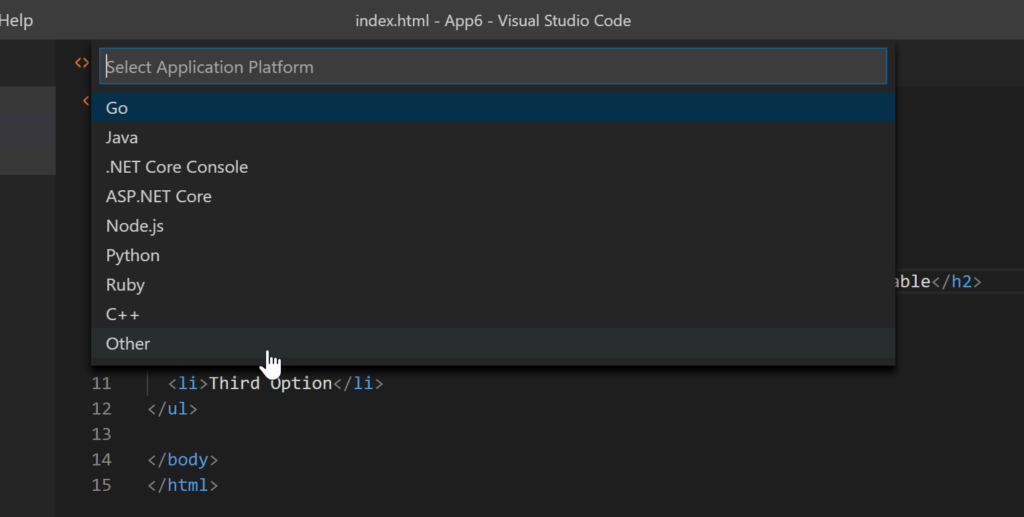
The command palette will ask which type of application we are creatin. Since it is basic HTML, select Other and hit <enter>.
The next question will be which port we want to expose in our new application, for lack of better imagination, we typed 80 and then <enter>.
The reason for all those questions can be seen in the image below. The VS Code was creating the files to support a docker image, including Dockerfile, docker-compose.yml, .dockerignore and docker-compose.debug.yml.
Making Dockerfile work for us
The Dockerfile came with a generic application, and the reason was our choice of Other in the Application Platform question. When doing that for a real application like NodeJS, Phyton, Java, to mention a few, then we will have a more realistic Dockerfile.
In the last article, we mapped out all the requirements, and now it is time to line them up in a Dockerfile. Here is a list of the commands that we are going to use in our new image with some usage examples.
- FROM: uses the image specified as the base layer of the new container.
- LABEL: adds metadata to the image. Like Jedis, they always come key=value pairs.
- RUN: executes commands on top of the base image layer and commit the data.
- EXPOSE: exposes the container port to the outside world, in our case 80 port.
- COPY: copy files from the source (our machine) to the container file system.
- ENTRYPOINT: we configure a container as executable, in our case the Apache2 service (httpd).
- CMD: in our example, it is passing parameters to the ENTRYPOINT. It makes default values for an executable container. Without CMD, the container would start and terminate right away.
FROM alpine:latest
LABEL Name=app6 Version=0.0.1 author="Anderson Patricio"
RUN apk update
RUN apk upgrade
RUN apk add --no-cache apache2
RUN mkdir /var/www/localhost/htdocs/img
EXPOSE 80/TCP
COPY * /var/www/localhost/htdocs/
COPY img/* /var/www/localhost/htdocs/img/
ENTRYPOINT ["httpd"]
CMD ["-D", "FOREGROUND"]
We need to create an image based on the current Dockerfile. Let’s start by hitting F1, and then type and find Docker Images: Build Image… In the new prompt, define a tag, in our example will be app6:latest and hit <enter>.
Note: My tagging was not the best. However, for this run it is acceptable.

In the terminal, we can see the entire process of creating a new image. The whole process should take a few seconds.
To validate the newly created image, we can use either the VS code or the commands listed below.
docker image ls
docker container run --name app6 -p 666:80 app6
docker container ls
The results can be checked on any local browser. Type in http://localhost:666, which was the port that we paired with the 80 that was being exposed at the container level.

Dockerfile: Too cool for school!
Have you noticed that we haven’t touched a single running container? We started from a web page on a local folder, define what we need in our Dockerfile, and suddenly, we have a container running our code. Pretty cool, eh?
You may be wondering about application updates? It is simple. Add new pages, images, and build a new image as we have done in the previous step, and then run your new containers.
Featured image: Shutterstock


