Microsoft Azure Active Directory Premium enables organizations to use the entitlement management feature. Using entitlement management, we allow users to request access to several types of applications (including Azure AD security groups, Office 365 Groups and Teams, Azure AD applications, and SharePoint Online sites). The request can have several attributes: role, the approval process with or without business justification, how long the request will be valid, and so forth.
When using this feature, the design is vital and reduces a lot of the operations work and can give responsibility to the business or application owner to control the access to the application/workload that they are responsible for. It helps to automate most of the steps required during a lifecycle of an application.
Understanding the entitlement management scenario
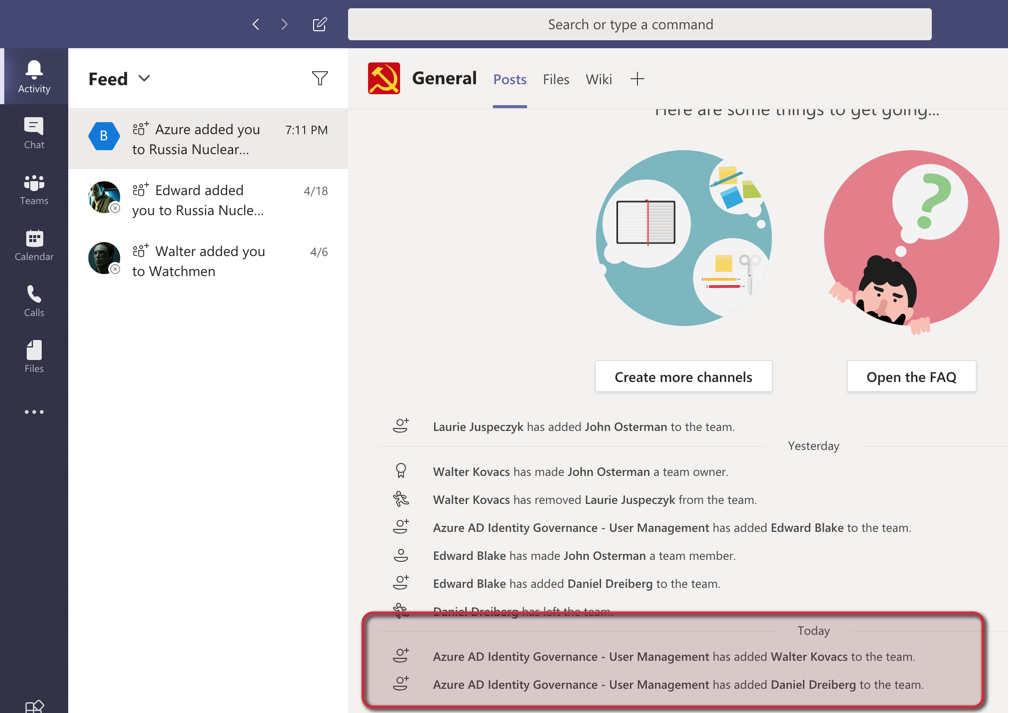
In this article, we have the Watchmen group in Microsoft Teams, which is a public group that all Watchmen superheroes can join (the theme of this article is going to be around Watchmen universe). However, the Watchmen group has a particular assignment — let’s assume that they have a new project to save the planet from the Armageddon. They created a new private Microsoft Team called Russia Nuclear Crisis, and the owner (for now) is Dr. Manhattan (John Ostermann).
We can see the Teams member in the image depicted below. We could use the traditional approach where any owner at the Team level can add members, or use the Team Code (we will explain that in a blog post here at TechGenix, stay tuned!).
We will use a more elegant approach using Azure Active Directory Premium, and we will be using the entitlement management feature. It all starts by creating an access package, which will encapsulate the applications, roles, and lifecycle first, and after that is just a matter of allowing users to use this process to gain access to any given application supported by the feature.

Creating access packages
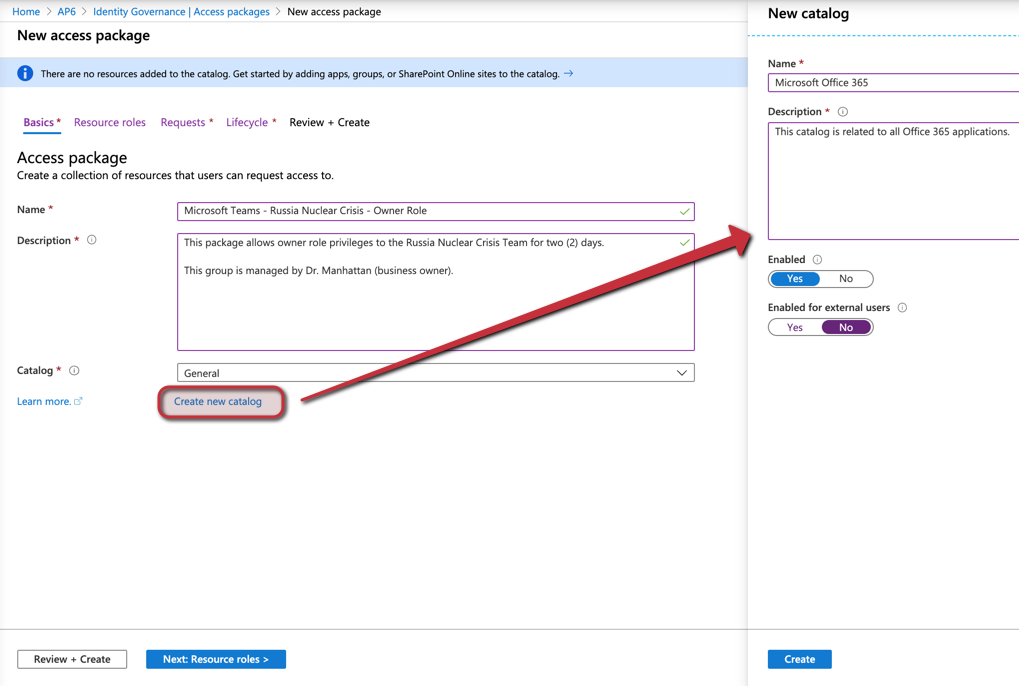
On the Basics page, we will start by defining a name and a good description. Next, we will click Create new catalog, and we will label the new catalog as Microsoft Office 365, as depicted in the image below. Click on Create and then Next: Resource roles.
On the Resource roles page, click on Groups and Teams (Item 1), and select the desired Team from the list. As soon as the item is added, select the Role (Item 2). In our case, we are creating the owner role. Click Next: Requests.

In the Requests page, select the first square: For users in your directory, and then select All members (excluding guests). We are going to request approval, force justification, and a single-stage (single approver).
On the same page, in the First Approver section, select Choose specific approvers and click on Add approvers. In our scenario, Dr. Manhattan (John Ostermann) is the business owner, so let’s select that user from the list. Besides the approver, we can define the number of days to wait for the decision. We will set two days, and the last setting requires the approver to justify.
In the last setting, select Yes on the Enable new requests and assignments. When complete with your selections, click on Next: Lifecycle.

In the Lifecycle page, we will select a number of days, and we will be using two days as defined in the subscription. We can tie this access package with the access review feature, but for now, we will select No. Click on Next: Review + Create.

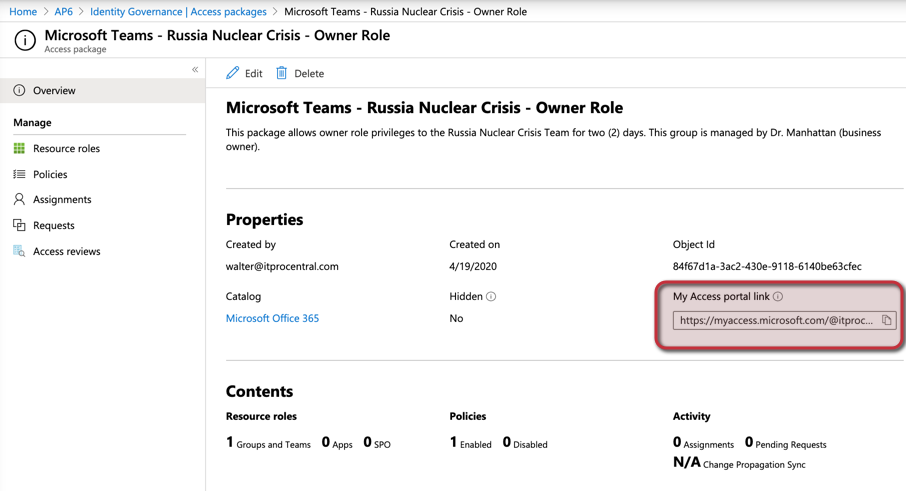
A summary of all settings defined so far in this wizard, click on Create to start the creation process. The result will be the Overview page of the Access Package. This page will provide all main settings on the initial page, and the cloud administrator can check policies, assignments, requests, and access reviews using the menu on the left.
An access package can be configured as hidden. If it is, then the My access portal link will be required to request access to the given application, by default, all new packages have hidden set as No.
We will repeat the same steps to create a new access package, but this time focusing on the Member role. Make sure to provide more time to a user role. We will keep it for six months.
Requesting access to an access package
The first step for any user that wants to be either owner or member of any given is to access the https://myaccess.microsoft.com and authenticate with its credentials.
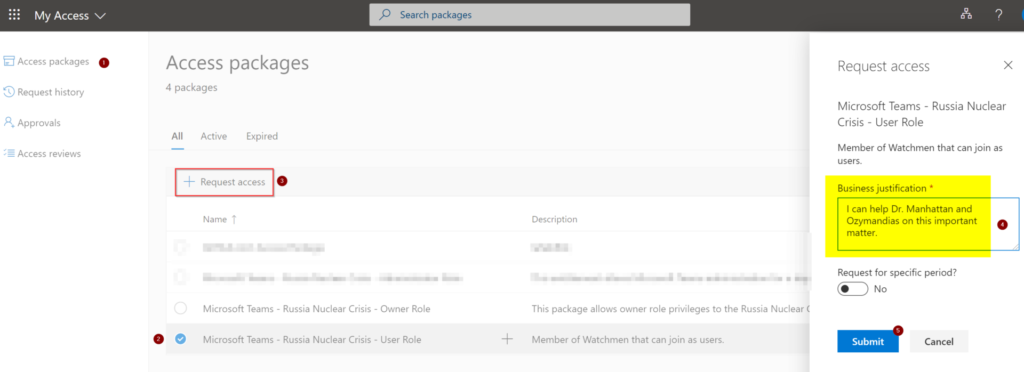
In the My Access portal, click on Access Packages (Item 1), select the desired access package (Item 2), and then click on Request Access (Item 3). A new blade will be displayed on the right side where the requestor has to provide a business justification. To complete the request, click on Submit.
The designated reviewer will receive a message informing about a pending review, as depicted in the image below. We can use that link Review user access> or go straight to https://myaccess.microsoft.com.

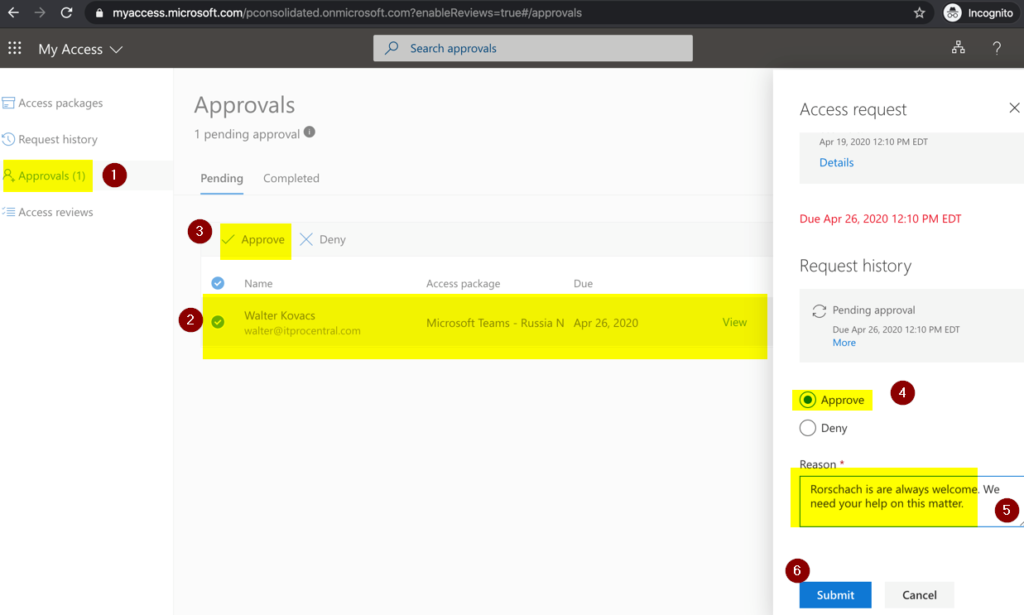
In the same portal as the requestor, click on Approvals (Item 1), select the desired request item (Item 2), and then click on Approve or Deny (Item 3). In the new blade, provide the business justification of why allowing/denying the user, and click on Submit.
As soon as the privilege is granted, the end-user will notice a new Microsoft Teams being added automatically and a pop-up message will be displayed on the client about the new Group. The user that is granted access also receives an email containing the access end date.
Reporting and improving security on the access packages
The first method to report the changes is looking at the Teams members, which will provide the current list of members and owners. There are other mechanisms that we can use to track down changes/requests and improve the security around access packages.
In the same area in the Azure Active Directory / Identity Governance, we will find an item called Reports under Entitlement management. It gives two ways to generate a report. In the Resource assignments for a user, for example, we need to define a user (Item 1). After selecting the user a list of all resources associated to that user, the policy applied, and the start and end date will be listed.

Another useful resource is to use access reviews, which will allow a user to review and take action about the members of any given access package. That will help the application/business owner to keep in check, which needs access to the given application/Teams/SharePoint sites.
Other entitlement management options
We used a specific Microsoft Teams to allow end-users and administrators to request access and be approved by the business owner. That gives excellent flexibility when allowing users and administrators to perform their job requirements. By using this feature, we don’t leave owners and members forever in our applications. The policies may be used to match the lifecycle of the entire application and free up IT resources to keep track of what is going on using manual tools. Keep in mind that we used Microsoft Teams as an example. We can use that for Azure AD applications and SharePoint as well. We can also combine more than one in a single access package. We could have one user to be the owner of several numbers of Microsoft Teams within the same access package, for example.
Featured image: Shutterstock


