Windows Server 2016 brings with it a wealth of new functionality, including new and upgraded features that make it easier for administrators to enable and manage High Availability on the DHCP service. The High Availability mode was possible in the past through the cluster services, but it wasn’t the best thing to place a network service on top a cluster (especially on legacy operating systems such as Windows 2000/2003 and so forth).
Introduced in Windows Server 2008, the DHCP Failover feature allows the High Availability of the service without using cluster services. My favorite scenario is for those customers who have two domain controllers per site, and those two servers are responsible for the authentication, time services (NTP), DNS, and now DHCP. We can provide High Availability with just two servers per location on all network services, where a simple network outage with the main site will not impact the local users.
This article was written using Windows Server 2016, and you may be wondering what has changed since the previous release on the DHCP service. Well, the biggest change is the removal support for NAP in this new release. The DHCP servers running Windows Server 2016 will no longer enforce NAP policies, and the DHCP scopes cannot be configured as NAP enabled.
Installing the DHCP Service
The installation process is simple and usually does not require a restart. We can install using graphical user interface using these following steps.
- Open Server Manager.
- Click on Add Roles and Features.
- In the Before you Begin , a welcome page will be displayed. Just click on Next.
- In the Select Installation Type, leave the default setting, which is Role-based or feature-based installation, and click Next.
- In the Select destination server, the local server should be listed, and click Next.
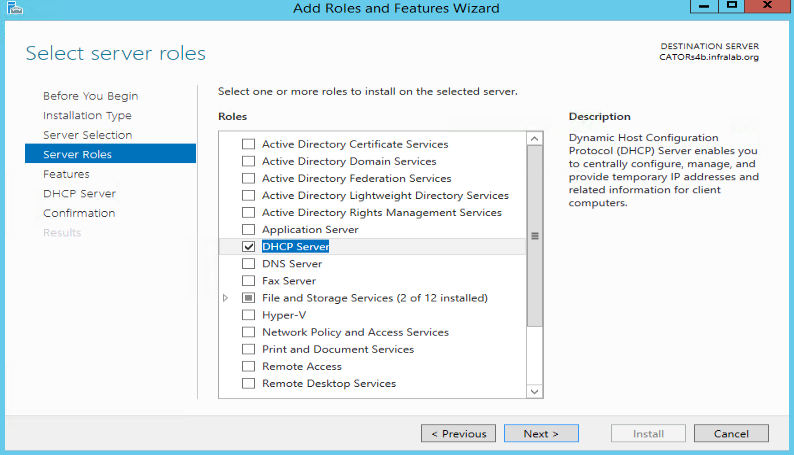
- In the Server Roles, select DHCP Server. A new dialog box will be displayed. Click on Add Features. Back to the wizard, just click Next.
- In the Features, click Next.
- In the DHCP Server, a brief description of the DHPC service will be shown. Just click Next.
- In the Confirmation, a summary of what is going to be deployed will be listed. Click on Install and wait for the completion, and then click Close.
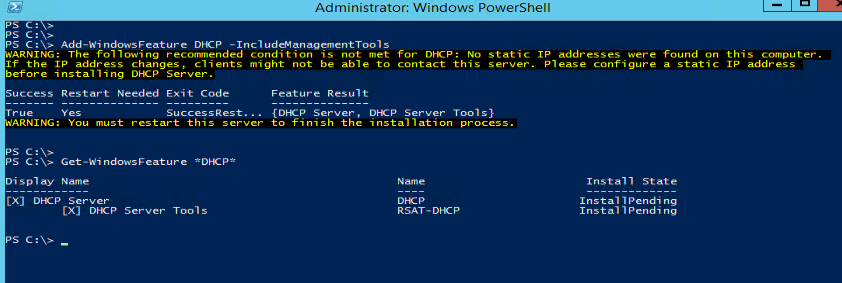
If you are a PowerShell fan, just open the PowerShell prompt as administrator and type in the command below, and we can save all the steps described in the previous section.
Add-WindowsFeature DHCP –IncludeManagementTools
If a restart is required here, you will be informed by a message box. If not, let’s keep going. After deploying the role, the administrator must configure one or more scopes, which basically will define the lease time, IP range to distribute to the devices, exclusion list, and so forth.
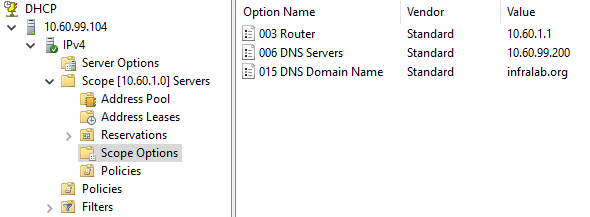
For this article, we are going to create a single scope called Servers on the first DHCP Server and we will define Router, DNS Server, DNS Domain Name at the scope level, and we will define the range from 10.60.1.100 to 10.60.1.150 for the sake of simplicity.
Configuring the DHCP Failover
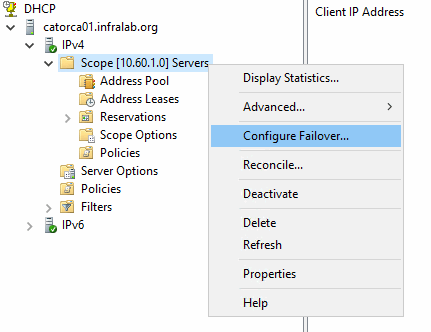
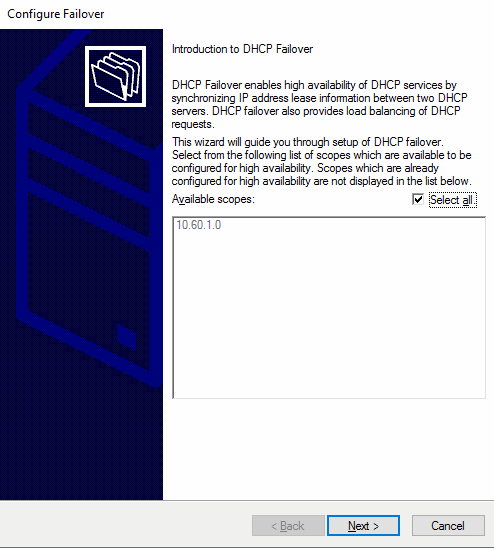
The DHCP failover is configured through a wizard that can be started by right-clicking on any given existent scope and then Configure Failover…
The first page of the DHCP Failover wizard allows the administrator to select all scopes configured on the existent server (default setting) or select a specific scope. We will leave the default settings and then click Next.
In the Specify the partner server to use for failover page, add or search for the second server that will be part of the DHCP Failover feature, and click Next.
In the Create a new failover relationship page, here is the most important configuration: This is where the administrator can define the Relationship name, load balance mode, maximum client lead time, and State Switchover Interval. Click Next.

A summary of all changes that are about to be applied will be displayed. Click on Finish, and a new dialog box with the status of each task will be displayed.
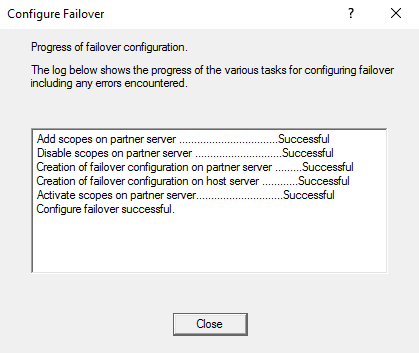
That’s it! The replicated scope can now be seen on the second DHCP Server.
Some hints from the field
There are a few hints that can save the administrator a lot of time when dealing with a new DHCP Failover configuration. I tried to list the key points that I had to go over in my last deployment to get you acquainted with them, and as soon as a new issue arises in your environment you can take action.
- Your network devices may use IP Helpers at VLAN level to point out to the DHCP requests to specific servers. If that is the case, make sure to add both DHCP servers on that network configuration.
- Using ipconfig /all on the client side shows the DHCP Server from where the client IP was leased. This is an important hint when performing troubleshooting.
- DHCP scopes only replicate at scope level. If you configure DNS and zone names at server level (which is a good thing), make sure that you repeat the process on both DHCP Servers to avoid discrepancy on the configuration being applied to the clients.
- If you are connected remotely on a workstation and an ipconfig /release is required, use the following syntax:
ipconfig /release && ipconfig /renew
This way, you will be able to release and renew the adapter even when connection is dropped.
Photo credit: Microsoft


Great tip! Thanks!
DHCP Failover is intruduced in Win 2k12 server.