Intrduction
I used a vSphere VM as my primary Windows desktop (when I use Windows, that is). It is there that I run Outlook 2010, run the vSphere Client (as it only runs in Windows, and any other Windows apps I need to run (as my new primary desktop is a Macbook Pro laptop connected to a Thunderbolt display). Recently that Windows VM, used as my desktop (which was brought over from VMware Fusion and Workstation before that) ran out of disk space. I believe it was Workstation that initially created a 40GB disk partition for the VM when I created it and it had stuck ever since. Well, 40GB just wasn’t enough anymore (with all the software I have installed and because I recently installed Dropbox and synced most of my 50GB quote down to the VM).
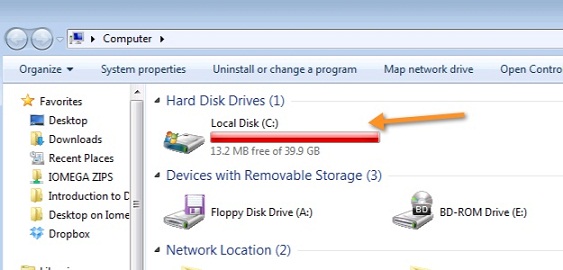
Figure 1: Virtual machine disk out of space (13MB free of 40GB)
The only drive, and the drive out of space, was the C: drive on the VM and I really didn’t want to have to add a new virtual machine disk (although that would have been very easy to do). For a few seconds I was surprised that my VM was out of disk space and I pondered what I should do. Then, it came to me – can’t I just extend the virtual machine disk file and then expand out the Windows partition, without ever even shutting down the OS? The answer, as you’ll see at the end of this article, is YES. But how?
vSphere VM Resource Expansion Overview
vSphere really gives us a ton of flexibility when it comes to the ability to dynamically modify the CPU, memory, disk, and network resources of a VM, without ever having to shut down that VM. The real limitation is whether the OS, running inside the VM, will support adding or (even worse) removing resources – without having to power off the OS.
Before I jump into extending a virtual disk (and solving my space issue, that you see above), here is some information on adding CPU and memory to a running VM… I did some research on this and created a video (here at this post, Using vSphere Hot-Add to Dynamically Add CPU and RAM) I preparation for one of my vSphere training courses. While researching, I also found Jason Boche’s article, vSphere Memory Hot Add / CPU Hot Plug, to be helpful.
What I found was that there’s no version of Window Server, today, that will allow you to remove the CPU or RAM from a running VM. There are very few versions of Windows Server that allow you to BOTH hot add memory and hot plug a vCPU. Those are Windows Server 2008 64-bit Standard, Enterprise, and Datacenter (and standard and enterprise require the OS to be restarted for CPU hot plug).
When it comes to expanding a VM’s virtual disk, vSphere allows you to expand it as long as 1) you have a SCSI virtual disk (not IDE) and 2) as long as you don’t have any snapshots for the VM. Now, whether or not your version of Windows will automatically recognize the new size of the virtual disk is a different question. However, I can tell you that the latest version of Windows Server 2008 R2 and Windows 7 640bit WILL support this (as that is what I used below).
Extending a vSphere VM Virtual Disk
With my virtual desktop totally out of disk space and me unable to use it, I am dead in the water until I can resolve it. Fortunately, the with the version of Windows I am running and with the features of vSphere, extending the virtual disk won’t be hard…
To got started, open the vSphere Client and click on the VM that you want to extend. Click to Edit Properties on the VM to be extended. On the Hardware tab and then on the virtual disk you want to extend (such as “Hard Disk” 1 (shown in figure 2).

Figure 2
On the right side of the window, you’ll see the current size and, assuming you have met the requirements, you’ll be able to resize this up to the maximum size that the datastore has available. You can make this change with the virtual machine up and running, causing no harm to the OS or the running applications. In fact, the OS doesn’t immediately recognize the larger (virtual) disk until you tell it about it (which we are about to do, below).
Using the Extended vSphere VM Virtual Disk in the Windows OS
With the virtual disk expanded now you need to tell Windows about it and make use of it. To do this, first go into Computer Management, under Start -> Administrative Tools. Here, under Storage, click on Disk Management.

Figure 3
Assuming you just have 1 disk, click on that disk (likely “Disk 0”) and you should see that there is now “unallocated” disk space.
Right-click on the allocated piece of the disk and click Extend Volume, as you see in Figure 4.

Figure 4
This will bring up the “Extend Volume Wizard”, shown in Figure 5.

Figure 5
You’ll use the Extend Volume Wizard to first select the disk that you want to extend (on the left) and then clicking Add to move it to the right (the selected side). Click Next.

Figure 6
Likely it should only take a few seconds and you’ll see that the disk has been extended to the full size of the vSphere virtual machine disk, shown in Figure 7.

Figure 7
Now if you go to My Computer, you should also see there that the C:\ disk (the root drive) has now been extended to the maximum size of the virtual disk. Keep in mind that this disk may still be a thinly provisioned disk (as it was in the example above) and may not be filling up the full amount of space in the VMware VMFS file system as is shown in the Windows OS.

Figure 8
Congratulations! You expanded a Windows VM primary system disk (running in vSphere) without any downtime to the end users or applications). There are other ways to expand a VM’s virtual disk, especially if you are using other operating systems or other versions of Windows. Here are some links that may help:
Also, keep in mind that extending a virtual disk is much easier than shrinking a virtual disk. For help with shrinking a virtual disk you could 1) user VMware Converter, manually or 2) try Quest vOptimizer Pro that can analyze virtual machine disks, enmass, and automatically resize them (smaller or larger).


How do you do all of the above using only powershell/powercli and remotely?