When you create a new VM or a new virtual hard disk in Hyper-V, Hyper-V’s default behavior is to use thin provisioning. That’s great if your goal is to conserve storage space, but one of the down sides is that you can easily end up over provisioning your physical storage. On occasion I have found myself about to perform some sort of action within a VM, but wondering if there is enough physical space available to allow the action to be completed.
One obvious solution to this problem is to take a look at the host server or the storage array and see how much space is remaining. However, it is also possible to check the available storage without ever leaving the virtual machine. Doing so consists of several steps.
Step 1: Determine which host is being used
In the interest of making things a little bit simpler, I am going to assume that an organization’s virtual machines are residing on internal storage within a series of hosts. Of course that isn’t always going to be the case in real life, but the technique that I am about to show you can be easily adapted to other situations.
So with that said, the first step is to figure out which host the VM is running on. When you install a Windows OS on a Hyper-V virtual machine, Hyper-V embeds the host name into the guest operating system’s registry. The location that is used is: HKLM\SOFTWARE\Microsoft\Virtual Machine\Guest\Parameters
One way of acquiring this host name is to write it to a PowerShell variable. Here are some commands for doing so:
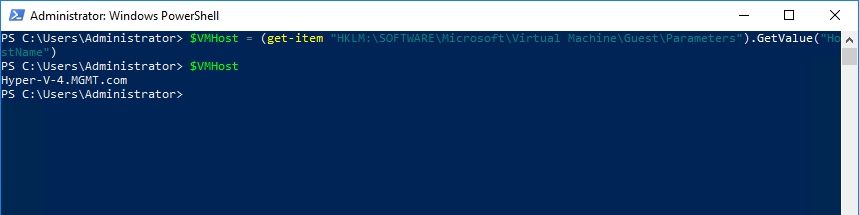
$VMHost = (get-item "HKLM:\SOFTWARE\Microsoft\Virtual Machine\Guest\Parameters").GetValue("HostName")
If you look at the figure below, you can see that the variable $VMHost now contains the name of the host on which the virtual machine resides.
Step 2: Connect to the host
The second step in the process is to connect to the host. In order to do that, you are going to need to have a valid set of credentials for the host. You can map those credentials to a variable by using the following command:
$Cred=Get-Credential
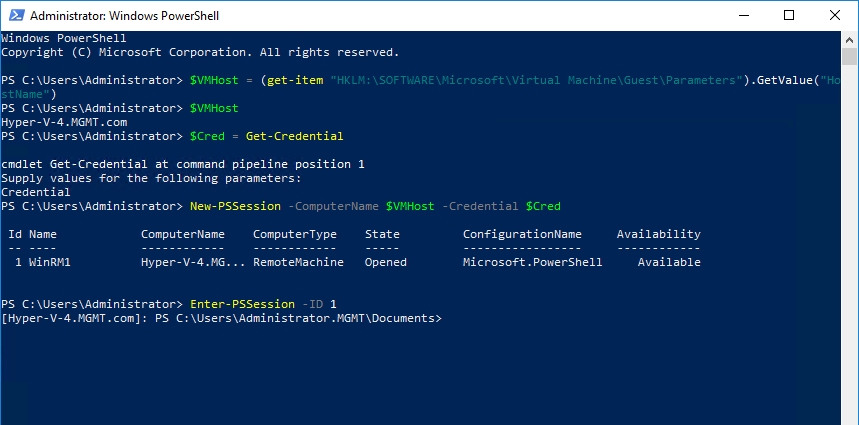
Connecting to the host is a matter of using the New-PSSession cmdlet to create the session, and then using the Enter-PSSession cmdlet to enter the session. In doing so, you can use the $Cred variable and the $VMHost variable that was created in the previous step. Here are the commands:
New-PSSession -ComputerName $VMHost -Credential $Cred
Enter-PSSession -ID <session ID number>
If these commands fail, make sure that WinRM is enabled on the host, and that the VM is attached to a DNS server that can resolve the host’s domain name. You can see what the connectivity process looks like in the next figure.
Step 3: Find the VM storage path
The third step in the process is to figure out the path to the virtual machine’s virtual hard disk. Because we have established a session with the Hyper-V host, we can use host-level cmdlets. There are quite a few different ways in which you can determine the virtual machine’s storage path, but I will show you the technique that I like using.
This particular technique consists of two commands. The only thing that you will need to know is the name of the virtual machine. In my case, the VM is named Win10-1803, so you will see a reference to the VM in the screen capture.
So with that said, here are the commands:
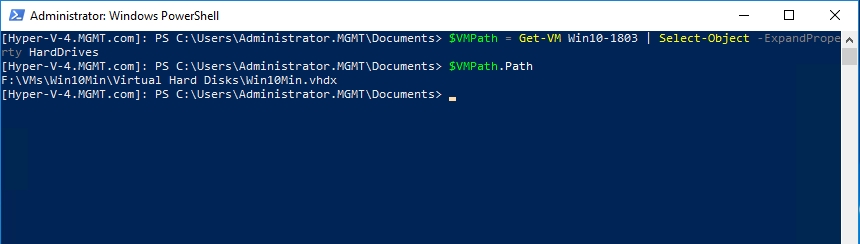
$VMPath = Get-VM <virtual machine name> | Select-Object -ExpandProperty HardDrives
$VMPath.Path
You can see the command’s output in the next figure.
Step 4: Determine the available space
The next step in the process is to simply check the available space. Unfortunately, you can’t just enter Get-ChildItem and expect it to show a directory and the space remaining like the old DIR command used to. Instead, you can use these commands:
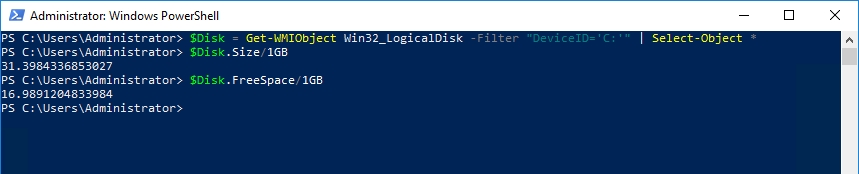
$disk = Get-WmiObject Win32_LogicalDisk -Filter "DeviceID=‘F:’" |
Select-Object *
$disk.Size/1GB
$disk.FreeSpace/1GB
This command maps the physical disk (F: in this case) to the variable $Disk. We can then view the disk’s total size and the amount of free space remaining. Notice that I have appended /1GB to the last two commands. This causes the disk space to be displayed in gigabytes rather than bytes. You can see what this looks like in the next figure:

Step 5: Make the comparison
If you are curious about how the host’s physical space compares to the virtual machine’s free space, then all you have to do is to exit the PowerShell session (by using the Exit-PSSession cmdlet), and then repeat the commands shown in the previous section. Be sure to substitute the drive letter that you referenced earlier for the drive letters used within your VM. If you look at the next figure for instance, you can see that because I am working within the VM, I am using C: as the drive letter.
So in this case, my VM is not even coming close to using the storage space that is available on the host. The VM has been allocated about 32GB of storage and has about 17 GB remaining. On the other hand, the host has a total of 2469 GB of disk space on the volume where the VM is residing, and has 1556GB free. Hence, this VM is not in any danger of depleting the host’s disk space.
Hyper-V VM storage space: Several ways to check
As previously mentioned, it is sometimes a lot more practical to simply check the host’s console or perhaps use a monitoring tool to see how much storage space is remaining on a host. If you are working within a VM, however, it is possible to check the underlying physical disk space without ever leaving the VM.
Featured image: Pixabay


