In a previous story, we saw what the Active Directory Migration Tool (ADMT) is and how you can use it for intraforest migration. Now let’s use the Active Directory Migration Tool to do and an interforest migration.
What is interforest migration
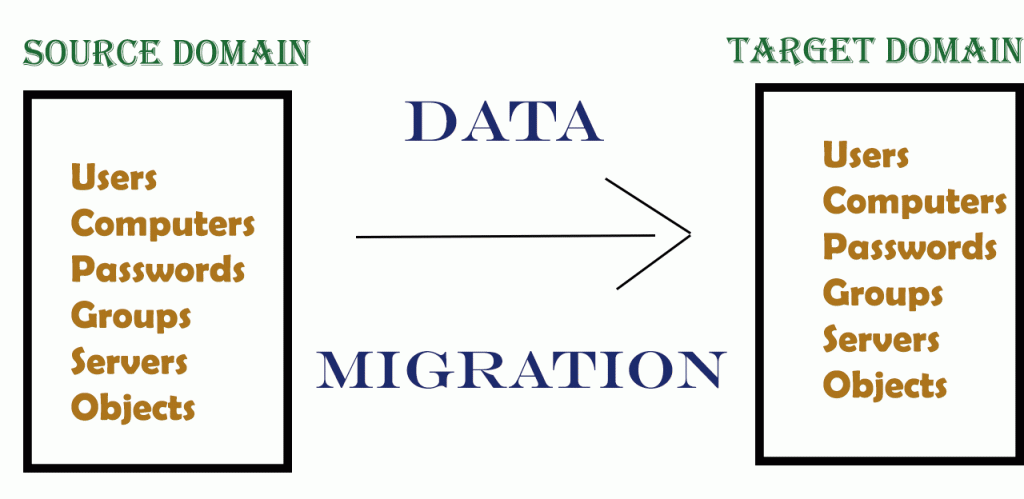
As the name suggests, interforest migration is relocating your objects from your existing or old forest to a new one. You’ll do this interforest migration when one company is acquired by another and all the resources have to be moved to the new company, when you want to consolidate IT infrastructure among two entities, or when you move your test environment to production.
There are three key differences between intraforest and interforest migration, and they are:
Interforest migration |
Intraforest migration |
| Objects migrated to the target domain no longer exist in the source domain | Objects copied to the target domain continue to exist in the source domain too. |
| SID history is maintained for users, objects, and computers | SID history is optional |
| Passwords are always copied to the target domain | Copying passwords is optional. |
Now that you understand the difference, let’s now jump into the interforest migration process.
Preparing Active Directory
Prepare your Active Directory for the migration process. This involves a few small but important steps.
Install ADMT in the target domain
Install ADMT in the target domain. (Refer to Part 1 of this series for detailed installation instructions.) Along with ADMT, remember to install an instance of SQL server as well.
If you plan to use agent deployment, check if the Windows firewall is enabled. Sometimes, the firewall doesn’t allow migrations, so you can either enable the “file and printer sharing exception” or disable the firewall temporarily until the migration is complete.
Create administrator accounts
As a first step, create an account with administrative privileges on both the source and target domains, and use this account throughout the migration process. Also, it’s a good idea to add this account to the “domain administrators group” in the target domain and to the “built-in administrators group” in the source domain.
Also, create a global group in the target domain’s organizational unit for all the site administrators who would be involved in the migration process. In addition, the account you use for migration should have administration rights in the source domain as well.
Along with creating administrator accounts, make sure you also assign object roles and locations, to have better control over your migration process.
DNS forwarder
One of the first things you should do is help both the domains to resolve their conflict through DNS. You can achieve this with stub zones or forwarders, though the latter is preferred because it’s easy to setup. One downside with forwarders is that you have to manually populate the IP addresses, which means, you’ll have to go back and change the IP address if needed in the future.
Here’s how you can set up a forwarder.
- Open the DNS MMC console, expand the “DNS” folder, and look for a folder called “conditional forwarders.” Right-click on this folder and select “new conditional forwarder.”
- In the next screen, give the DNS source name in the field “DNS domain.” Navigate down to the table, and click where it says, “click here to add.” Enter the IP address of your destination’s domain servers. If you have multiple domains, it’s best to store the conditional forwarder in AD, and replicate it on a need basis.
Please note that the above steps are for a Windows 2008 server. If you’re using other versions, the interface may be different, but the basic process remains the same.
Domain trust
Setting up domain trust is important, as it helps to manage trust between the two forests, raise domain functional level, and add UPN suffixes.
To set up the domain trust,
- Open “active directory domains and trusts” and navigate to “target.local.” Right-click and select “properties.”
- Navigate to “trusts” tab and click on “new trust” button.
- In the dialog box, enter the DNS domain of your source, and select the trust type as “external” if you want the trust to be a permanent one, and “forest” if you only want to have a transitive trust between the two domains.
- Select “two-way” option for trust direction, and “both the domains” for sides of trust.
- In the next dialog box, enter the username and password of the DNS domain name you specified earlier. These credentials should have administrative privileges in the specified domain.
- Next, choose “forest-wide authentication” in the outgoing trust authentication level for both the local and target forest.
- Finally, check your selections, confirm them, and click “finish.”
With this in place, clients from both the domains should be able to resolve their FQDNs.
To check if the trust is established between the two domains, go to ADDT, right-click, and select properties, navigate to the trusts tab, and see if the target domain controller name is listed.
In some versions, you also have to validate this trust. To do that:
- Right-click on ADDT, select properties, and navigate to the “general” tab.
- Click on the “validate” button and this should open a dialog box.
- Select “yes, validate the incoming trust” option and click “ok.”
With this, the trust is validated.
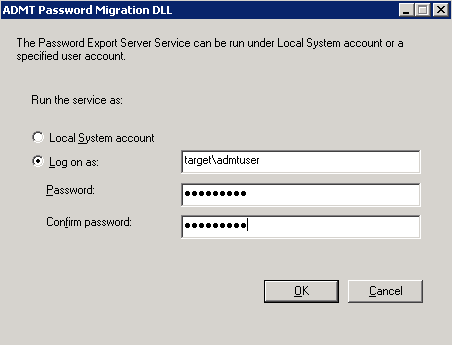
Password export server
Password export server, or PES for short, is essential to migrate passwords between different active directory environments. Before downloading the PES, create an encryption key for this server. You can create it with this command in PowerShell.
admt key/option:create /sourcedomain: <DNS or NetBIOS name of source domain> /keyfile: <the path where you want to store the encrypted key file> /keypassword: {< password >}
Next, download PES from Microsoft, and follow these steps to install it.
- Double-click en-US_pwdmig.msi file. This should open the ADMT password migration DLL setup wizard. Click “next.”
- Accept the terms and conditions of the license.
- Next, you’ll get a prompt for the encryption key file. Browse and upload it.
- Enter the password you used while creating the key.
- Click “install.” This process can take a few minutes.
Once the installation is done, the PES server will start running. Active Directory Migration Tool gives the option to run PES under a local system account or an authenticated account in the target domain. It’s recommended to run PES under an authenticated account.
Finally, restart your PES and your domain controller.
Remember, you should start PES only when you’re running through the user account migration. Once you’re done with the migration, stop this service.
Migration process
With all this in place, you can now start migrating the objects from your source to target domain using the Active Directory Migration Tool. This process is exactly the same as doing an intraforest migration. Use the ADMT tool’s wizards to migrate different objects such as users, accounts, and computers. Alternately, you can also use command line to migrate between forests.
Post-migration
There are a couple things you need to do after the migration.
Translate security on your member servers
After the objects are migrated, make sure you give the appropriate permission for each object. For example, if you’re using security identifier (SID) history to provide access to different resources, use the security translation wizard to replace the source domain SIDs with the target domain SIDs.
Here’s how the wizard works.
- Open the security translation wizard.
- Select the source and target domains.
- In the next screen, select computers or even add computers for which you want to translate security, and click “next.”
- Clear the “user profiles” checkbox and select all other options.
- In the next screen, click “replace.”
Review your choices and click “finish.” In the “view migration” log, you can check if the migration was successful.
Decommission the source domain
Once you’re done migrating objects, decommission the source domain. To do that:
- Remove all trust relationships between the source and domain.
- Repurpose the domain controllers that you did not migrate from the source domain.
- Disable all the accounts you migrated during the migration process, including the ones for which you assigned administrative privileges.
Before you decommission, take a full backup of the source domain, so you can bring it back up online any time you want.
These steps should help you migrate objects from your source to target domain using the active directory migration tool. Please share any errors, problems, and solutions you encounter during the process, so it can benefit the entire community.
Photo credit: Shutterstock


Hello,
I would like to know, when i’ve migrated a user from a domain to another, can the user still connect with his old user ?
About, the ressources on the fileserver or kind of other group ( we have an RBAC architecture ) do we have all the stuff avalaible, if the server is on the old domain ?
thank you,
Andrew
Lavanya,
Great article, but I would like to point out that your interforest/intraforest comparisons at the beginning are backwards according to the Microsoft documentation for 3.2.
Thanks!