This is the first in a series of articles on how to perform Microsoft 365 administration with tips on configuration, policies, and settings.
For this series on Microsoft 365 administration, our base license will be Microsoft 365 E5, but any of the Microsoft 365 licenses or others in the Office Enterprise licensing structure will also find it useful with enough similarities that the step-by-step instructions will still be helpful. In this series, we’re going to start at the point after you’ve performed your initial migration, have your domains and users in place, and probably have migrated and are at least using email. From here we begin our admin adventures. As we go along, we’ll deep-dive into each of the portals and demonstrate configuration, policy, and settings. Since Microsoft 365 is wide and complex, some of these can be quite buried. But we’ll be digging in deep.
Most admin generalists continue to use the portal as they advance their skills, perhaps adding a small amount of PowerShell here and there. Administrators who are focused on specific subject matters within Microsoft 365 tend to use more PowerShell. Where appropriate, I’ll point out the GitHub locations where you can find accompanying PowerShell scripts to explore. I find it useful to start from the admin portals and for a deeper understanding of the feature set then move into PowerShell for routine or repetitive activities.
Customize the Microsoft 365 administration portal
The very first thing I’m going to tell you is that you need to save the URLs for the various consoles in Microsoft 365. There are too many of them to be wading through the menu structure to find. Throughout this tutorial, I will mention the URL. Save those, pin them, make them easy to get back into later.
When you first log into the admin portal, you are confronted with a pretty boring screen that contains things you don’t need to see and is missing things that might make your experience a bit better. So, the first task is to set up our portal. We are going to click on the configuration parts next to each red dot I’ve placed in the figure below.

First, let’s clean up what’s on this screen. To get rid of the big banner that wants us to install Office click on the … next to the words Go to setup and choose Do not remind me again.
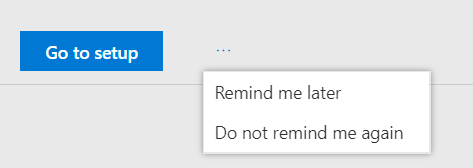
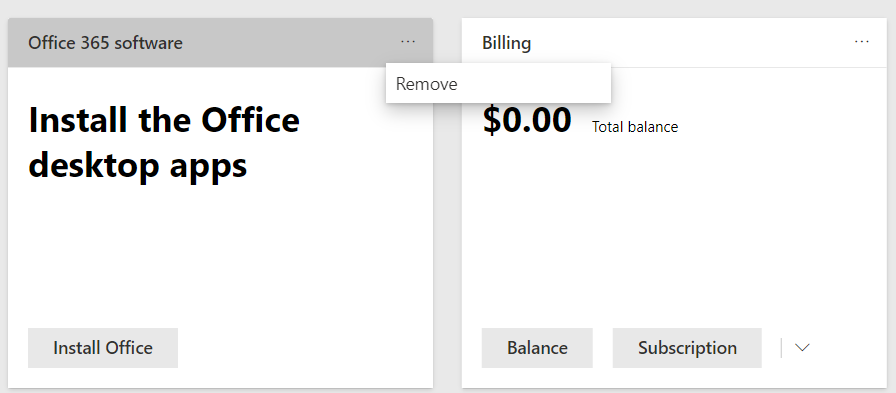
That immediately removes the big banner! As an administrator we don’t need to be reminded to install Office. Now let’s do the same for the cards titled “Office 365 software and billing.” Again, click the … and this time select Remove. If keeping track of billing is part of your job, then go ahead and keep it.
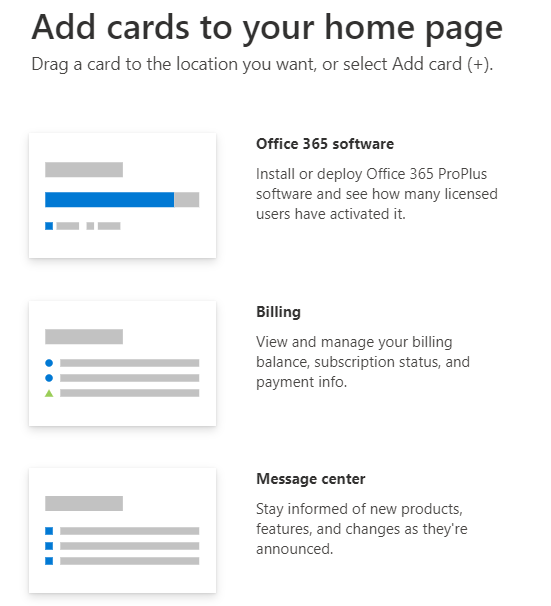
Now we want to add some cards that will contain useful information or shortcuts for us. Click the Add card option at the top right of the window. There are quite a few cards to choose from. Choose the ones that represent your role best. I recommend adding the Message Center and Service Status at the very least. These two cards will keep you informed of what is coming up and what is happening now.
Now drag them to rearrange them to your liking. Once you’ve done that, you now have a custom configured admin console that represents your job role. What a difference just a few clicks can make!

Select new admin center?
The most common question I get about the admin portal is whether or not you should select new admin center. I always do because the latest updates are coming to the admin center whether you think you want it to change or not. I figure that I may as well have the most time possible to get used to the changes so I keep it on. I hate surprises that just show up. If a change isn’t working for you or you can’t find where something went to, you can flip that back and forth without harming anything.
There’s one last red dot from the first figure that we haven’t clicked on yet — the gear icon. Click that one now and select notification settings. Oddly, we aren’t going to get an option to deal with notification settings but we are going to find the PIN code that we’ll need should we decide to call support in the future. I find that it’s not obvious where to find this. So perhaps add this to your documentation so you aren’t struggling to find it during your hour of need.

Get service health notifications
Above, we’ve added the card for service health. Microsoft sends out alerts from the datacenter to let you know if anything is happening regarding their ability to provide any of the applications or services. Those notifications will now show up on the front page of your admin console. But let’s face it, we’re not staring at that page too often. We might be doing our job in PowerShell or working in a different portal. So, we need those notifications to be delivered to us not just here but also where we are more likely to see them.
In the service health card, click on one of the notifications. This will take you into the service health portion of the admin console. (We could have also clicked on the service health menu item in the left column to get to this same place.)
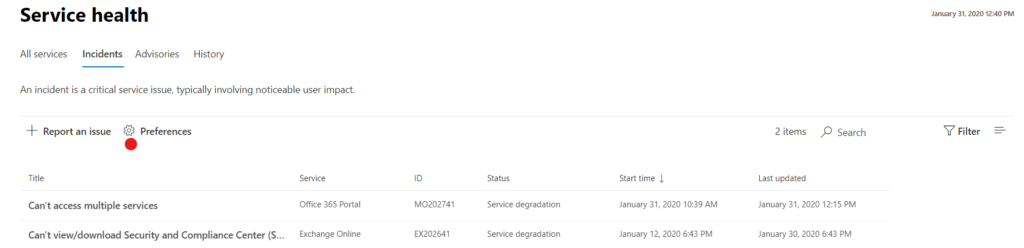
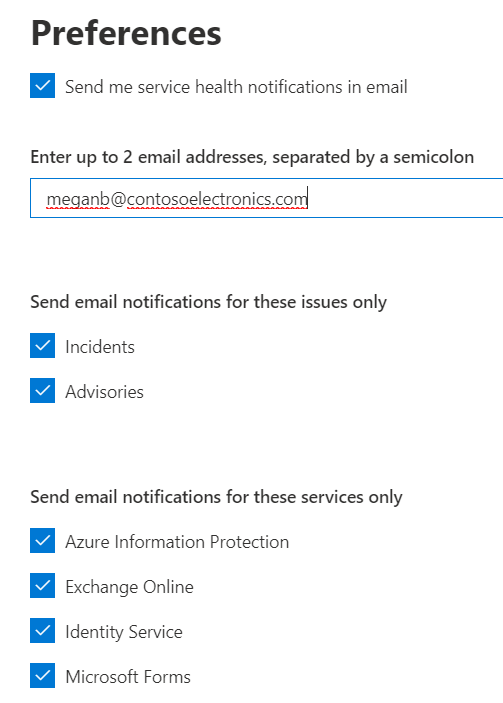
Here we’re going to click on Preferences, which will open the preference blade. This is where you can choose to send health notifications to your email address. By default, every type of health notification is checked. If there are areas that are not under your responsibility, you might want to uncheck those. Save your preferences when you are finished making your selections.
The other way that we can receive notifications is via Twitter. Microsoft has a Twitter account called @MSFT365Status. This account tweets out these same notifications. Twitter has a great feature that allows you to select to be notified when a new tweet occurs on the account. You can have this tweet sent to your phone via text or your computer via a toast notification or even email. The toast notice requires that you install the twitter app on your computer first.
If you haven’t used the alert feature before in Twitter, it’s the bell icon pictured below where I’ve placed the red dot. Select that and all new tweets on this account will be sent to your communication preferences in your Twitter account.

Customize navigation
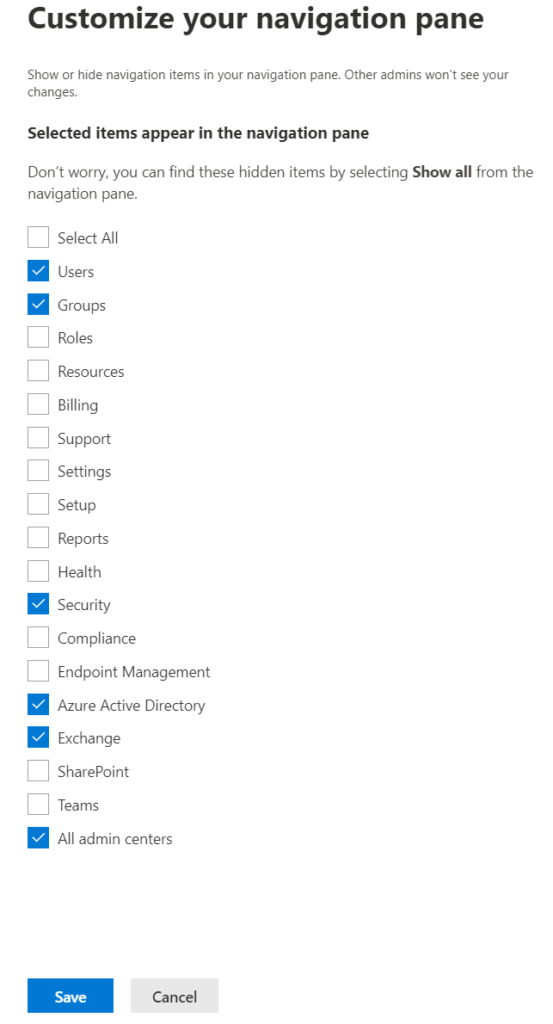
Down at the bottom of the left-column navigation pane, you’ll find the customize navigation option. Click that to edit what is shown on this menu. We want to do this again for the same reasons we customized the main section. We want to see what we need often and hide the things that we don’t often need. Below I’ve selected the areas that I find myself working in the most often. Select yours or start with mine.
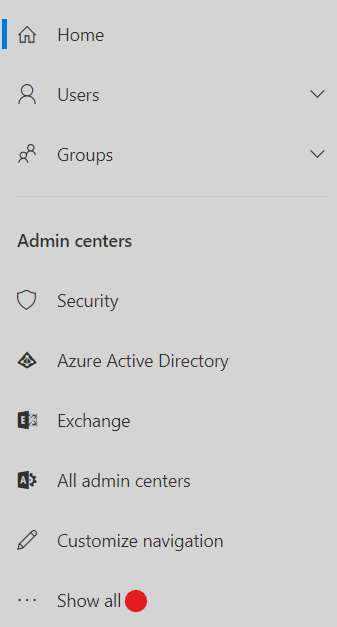
Instead of a big long menu, I now have a short focused one. I find it much easier to manage. You can always click Show more if you need to see the hidden items for a particular task.
Now our portal is customized and we will be kept up to date on new things that are coming down from Microsoft as well as be alerted via email or Twitter push when there’s a problem. In addition, we’ve got at-a-glance cards placed so that we can jump right into our most important work areas. We’ve also pinned the most important URL — the one of the main portal itself. There’s a lot of information and a lot of configuration that can be done in these portals so getting off to a well-organized start is critical.

With our workspace now created, we are ready to begin performing Microsoft 365 administration.
Microsoft 365 administration series: More to come
Each month in this Microsoft 365 administration how-to series, there will be a new entry covering the use of the different aspects of the Microsoft 365 portals.
Featured image: Business vector created by Freepik / TechGenix photo illustration


The platform is really eductive and inspiring. I really like because it has helped me in resolving some technical issues.