In a previous article, you saw how easy it was to set up a trial version of Microsoft 365 and then how to purchase a subscription. To make things even easier, you can manage your Microsoft 365 tenant using remote PowerShell. Yep, you heard it! Advanced IT admins prefer using PowerShell to do pretty much everything, from managing their on-premises Exchange servers to managing Exchange Online.
While you cannot manage the URLs as you could with an on-premises Exchange server, there are many things that you can manage with remote PowerShell. This includes some of the following:
- Creating new user accounts.
- Bulk creating accounts or groups by uploading a CSV file.
- Resetting user passwords.
- Managing organization information.
So, how do you connect to your Exchange tenant using PowerShell? Here is a high-level overview, and we will go through each step:
- Change the execution policy on your machine (Set-ExecutionPolicy RemoteSigned, restricted by default or with GPO).
- If you are connecting using basic auth then there are 2x steps that have to be completed.
- Run the command to get the credentials that you will be using to connect to your tenant.
- Creating a new PSSession.
- Importing the PSSession.
- Removing the remote PSSession.
Just take note that the following operating systems are supported. I have not listed Windows 7 and Windows Server 2008 R2 as they are already at EOL (end of life):
- Windows 10.
- Windows 8.1.
- Windows Server 2019.
- Windows Server 2016.
- Windows Server 2012 or Windows Server 2012 R2.
Connection
Let’s jump into the first step to get connected, and this is to set the execution policy on your machine. The first thing to do is to check the current execution policy, and you can do this by running this command:
Get-ExecutionPolicy

As shown above, it is set to restricted. You can now set it to remote signed using this command:
Set-ExecutionPolicy RemoteSigned
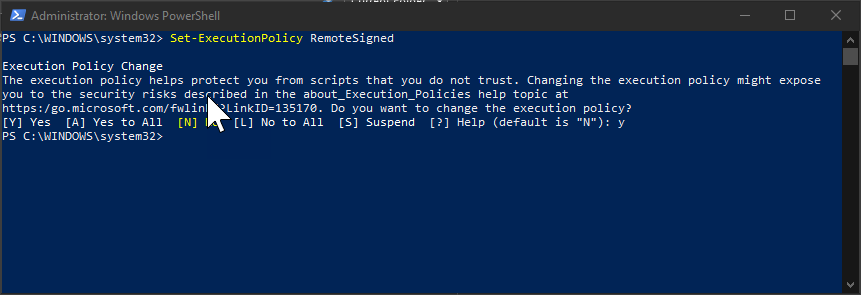
You will need to type in “Y” to accept the change and then press enter.
Now that the first part is complete, we now need to check if WinRM is set to allow basic authentication. If this is the first time you are looking at this, you might need to run the following command to configure and start the service:
WinRM qc or WinRM quickconfig
Once that is done, and the service has started, you can then run the command below to check basic authentication:
winrm get winrm/config/client/auth

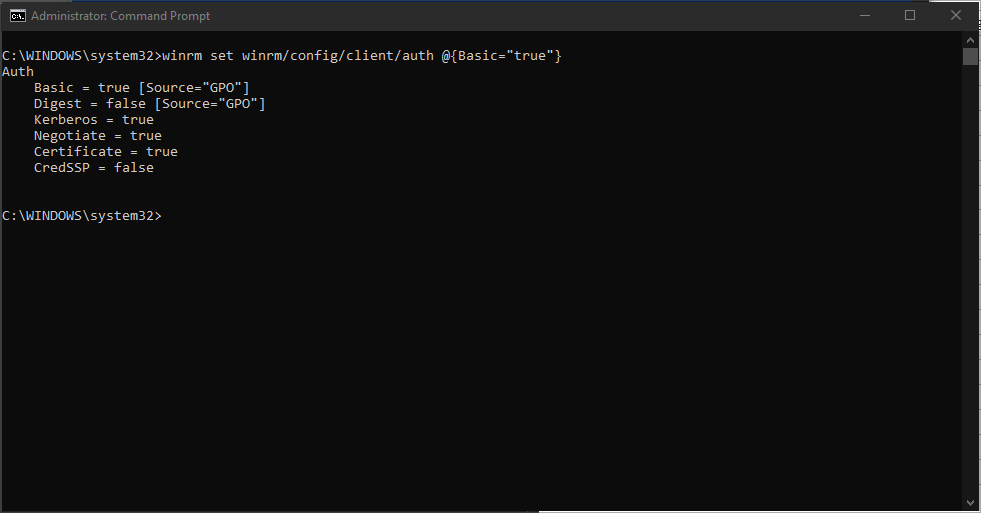
As you can see in this instance, it is disabled or set to false because Group Policy is controlling it so you won’t be able to change it, just so you are aware of this in your environment. To enable basic auth, you need to run the following command:
winrm set winrm/config/client/auth @{Basic="true"}

As you can see, GPO blocks us from changing it, so we need to make a change to the local policies on the machine and then try again.
Open up Regedit and navigate to the key shown in the screenshot below:
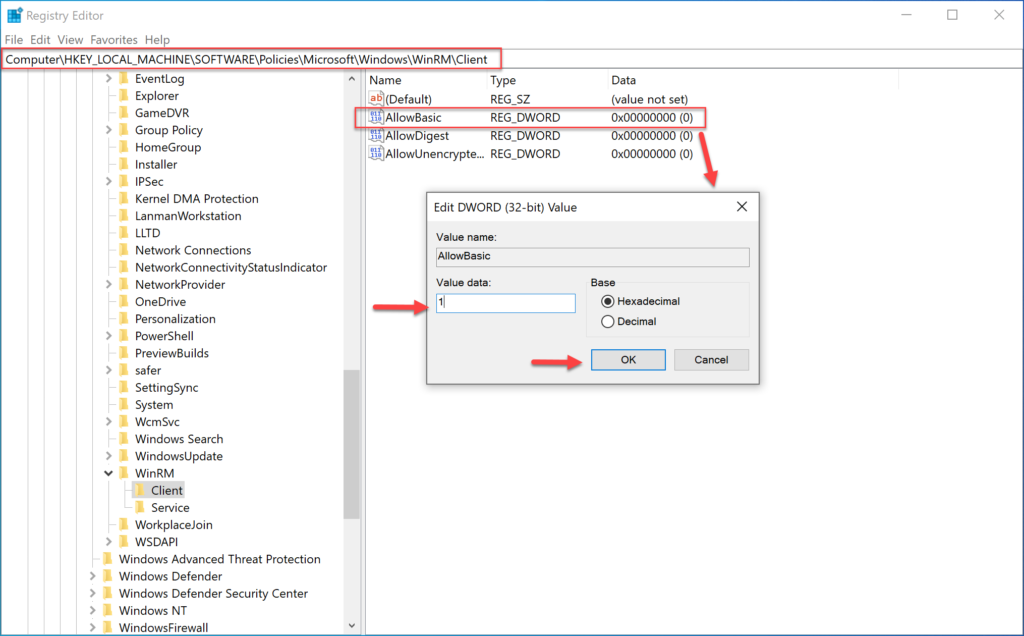
Double click the key “AllowBasic” and change the value to 1. The value of 1 means enabled, a value with zero (0) means disabled. Click OK.
Now head back to the command window and rerun the command, and it should allow you to run the command, but we have enabled it in the registry already.
Now we can connect to our Microsoft Office 365 tenant by running three commands:
$UserCredential = Get-Credential

$Session = New-PSSession -ConfigurationName Microsoft.Exchange -ConnectionUri https://outlook.office365.com/powershell-liveid/ -Credential $UserCredential -Authentication Basic -AllowRedirection

Import-PSSession $Session -DisableNameChecking

As you can see above, once I run the first command to get the credentials, you will see a box asking for the details, enter your Microsoft Office 365 account details. Then press OK.
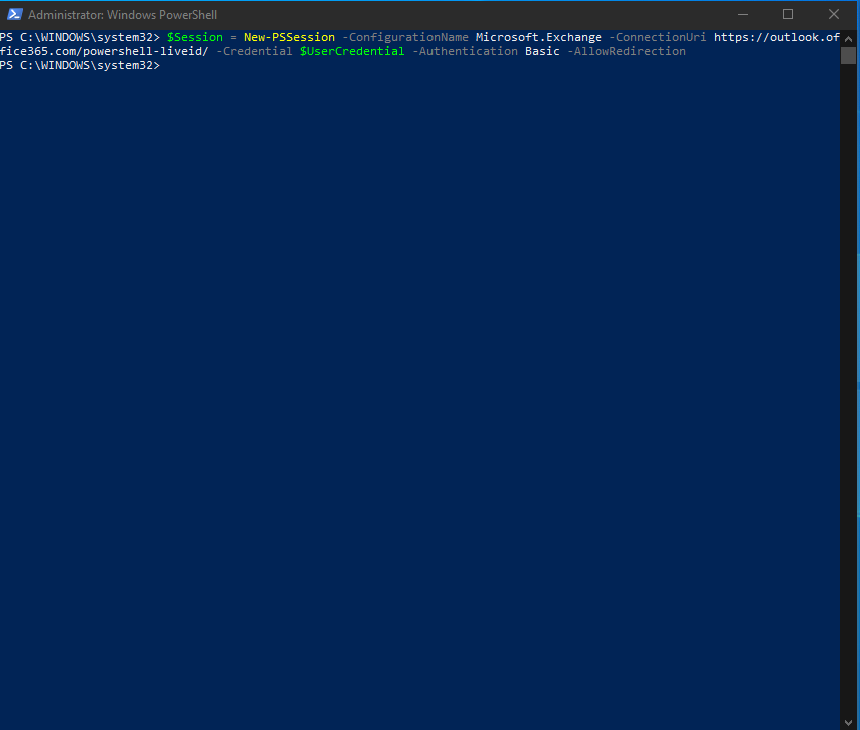
The following command run creates a new-PSSession:
$Session = New-PSSession -ConfigurationName Microsoft.Exchange -ConnectionUri https://outlook.office365.com/powershell-liveid/ -Credential $UserCredential -Authentication Basic -AllowRedirection

Once complete, we can use the next command, as shown above to import the PSSession:
Import-PSSession $Session -DisableNameChecking
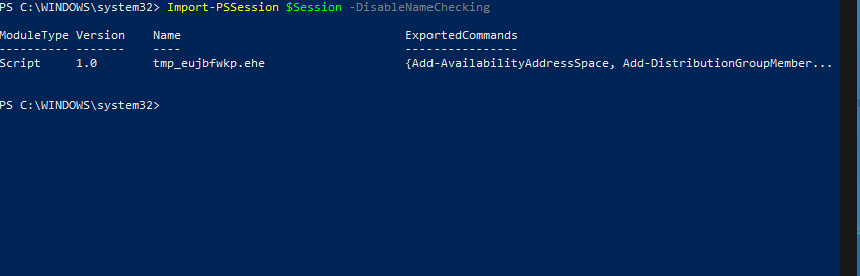
As you can see above, it has imported all the commands, and you can see 2x of them above.
I can now run a simple command, as shown below, to show you that I now have remote connectivity to do so:
Get-mailbox

You can see it returned all the mailboxes I have in my tenant. Let’s move on to another example where we can create a new mailbox in my tenant. Here is the command:
New-Mailbox -Alias User8 -Name User8 -FirstName User -LastName 8 -DisplayName "User8" -MicrosoftOnlineServicesID [email protected] -Password (ConvertTo-SecureString -String 'P@ssw0rd' -AsPlainText -Force) -ResetPasswordOnNextLogon $true
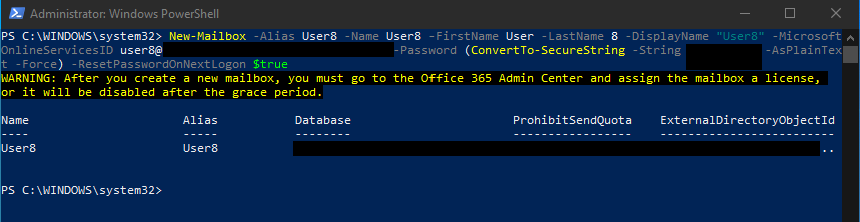
I created a new user called User8, and I created a password for the user, but it will ask them to reset it at the next login. You can see that even though I have created a new mailbox, I still need to login to the portal (portal.office.com) and assign this user a license.
When you are done with everything you need to do using the remote shell, you can then run a simple command to remove the session:
Remove-PSSession $Session

If I didn’t run this command, it would have timed out eventually, but Microsoft advises to remove your session once you are done.
Microsoft 365 and remote PowerShell: Nice and easy
There you have it, as you can see it’s not too difficult to manage your Microsoft 365 tenant using remote PowerShell.
Featured image: Shutterstock