Have you ever used a software application and said: “you know, if only the product could do this, it would be much more useful?” Usually, you have to rely on the application developer to change their product and give you that feature. Microsoft recently announced Flow, a product that promises to help you automate simple processes without the need for programming. In this article, I will discuss how Flow works and walk you through a simple example.
Note: Flow is still in Preview, which is a marketing term for beta. Anything I talk about could change after the product’s release.
First, let’s talk about hooks
Software developers create APIs (application programming interfaces). These APIs allow third-party software developers to add more functionality to an application that already exists. For example, Google uses Uber’s API to let you price and hail a car from directly within Google Maps.
Lately, software developers have been adding hooks to their APIs. A hook lets another application subscribe to an event and then take action. Here are some examples of hooks:
- The hook (an event): A new email comes into your inbox. The action: Some other application (like Microsoft Flow) reads the From line in the email and sends you a text message if the sender is your boss.
- The hook: The Weather Channel updates the forecast, and it is going to go below freezing. The action: Some other application sends a message to your thermostat, so it turns the heat on.
- The hook: You are walking by a store. The action: Some other application reads your phone’s location and sends you a text message with deals going on at stores near you.
That is the basic idea of how hooks work. Web sites, applications, and even device manufacturers are embracing hooks so other websites, applications, and devices can talk to each other. Think of these hooks+actions as little workflows you design.
Introducing Flow (Preview)
Microsoft Flow lets you create these small workflows in a rich, graphical way without any programming. Flow is not a new concept, and you may have heard of similar applications that do the same thing. For example, the two most popular competitors to Flow are IFTTT and Zapier.
All these products come with pre-built templates where someone already did the work for you. For example, you will see templates like “Text me if someone adds a file to my Dropbox” or “email me the weather report every morning at 7 am.” They even include more advanced templates, like “send a document for approval” or “if someone new emails me, automatically put them as a lead in Salesforce.”
The setup
In this article, I am going to walk you through Microsoft Flow to show you how it works. Here are my business requirements:
I have a task list in SharePoint called Tasks. I want to build a hook that reads the New Task action, then runs a Flow:
- Send an email to the person I assign.
- The email will contain two links. One link will email me saying the person is working on the task. The other link will email me saying the work is done.
- When the person clicks the done option, the task will automatically update to 100% complete.
Let’s get started!
Before I can create a flow, I need something to create the flow from. In this case, I am going to create a flow from a task list in SharePoint. Here is a task list I am using to set up a new office:

After you sign up for Flow, you have the option of creating a blank flow or starting from a template:

A list of pre-built flows appear. I will select one that is somewhat close to what I am looking for:
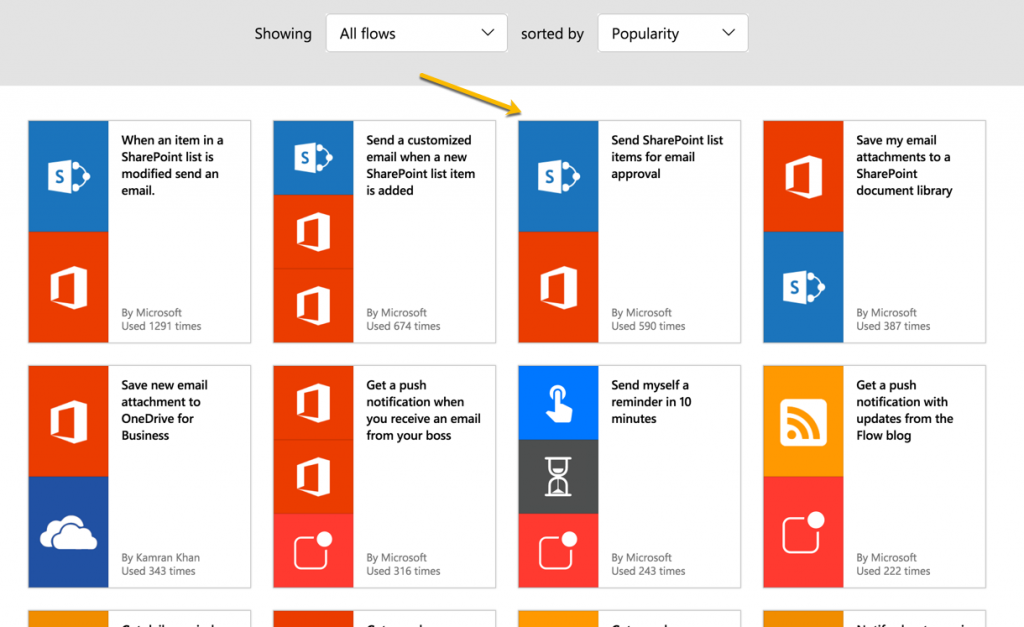
Here is the part where things get interesting from a security standpoint. Just like IFTT, and Zapier, Flow needs your permission to connect to SharePoint and your email. You will have to decide if this is too invasive to your personal data. In my case, I will allow it. The screen looks like this:

As you can see in the figure below, the template already contains most of what I need. I will show you each one of these configurations as this walkthrough progresses.
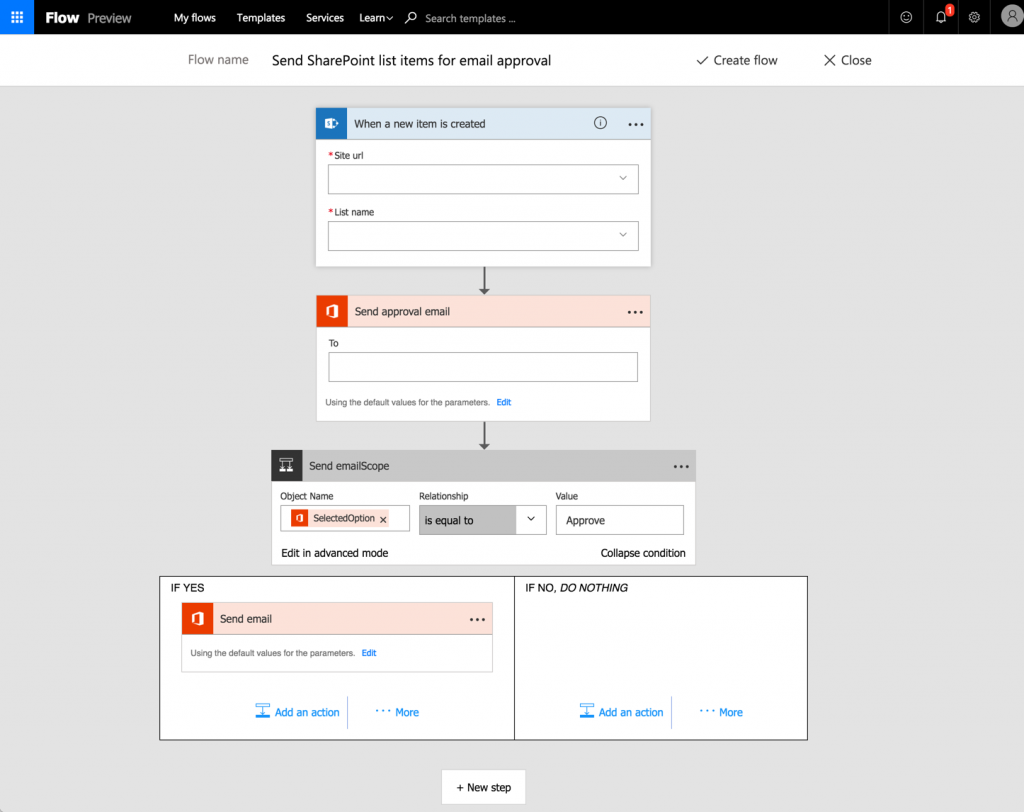
The first step is to inform the flow what SharePoint list and list name I want to use:

The template sets up an action that will send an approval email:

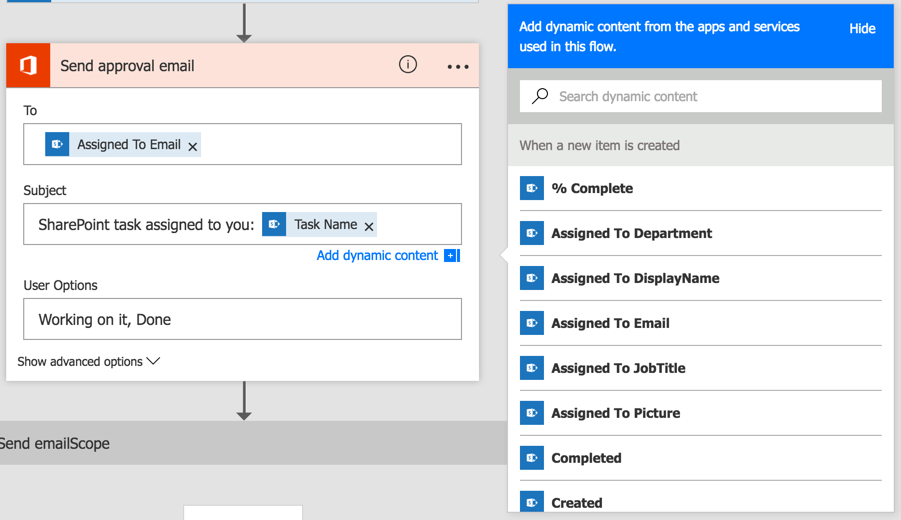
As you may recall, I want the email to inform the person they have a task assigned. That person can (a) tell me they are working on it or (b) tell me they are done. As you can see in the image below, Flow let’s you add dynamic content. For my dynamic content, I add the email address coming from the task list and the name of the task in the subject line. I can also type text, so I put some text in the subject line and modify the Approve, Reject links to Working on it and Done.
Since the email recipient can make multiple choices, you need to create something like what we call an if statement in software programming. With the Send emailScope box below, we are saying: If the email recipient clicks the Done link, then do something. Else, do another thing. Here is how I set up the Done part of the if statement:
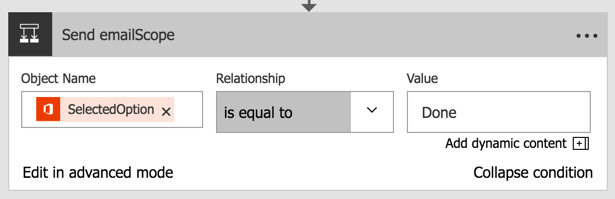
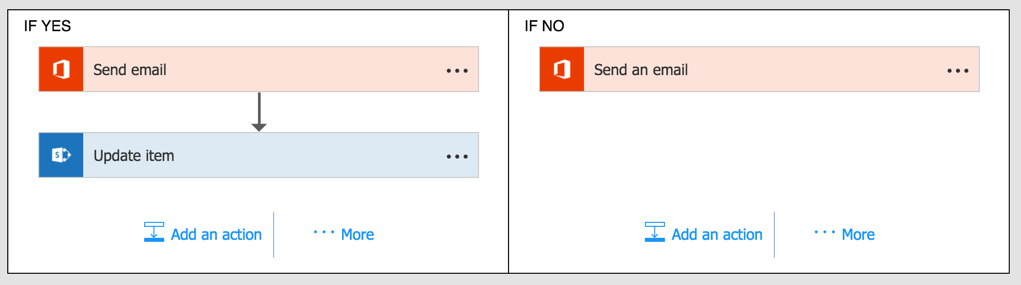
As you can see in the image below, you can create yes actions and no actions. Yes means Done and No means Working on it.
 In the yes section, I want to be notified when the person clicks the Done link in their email:
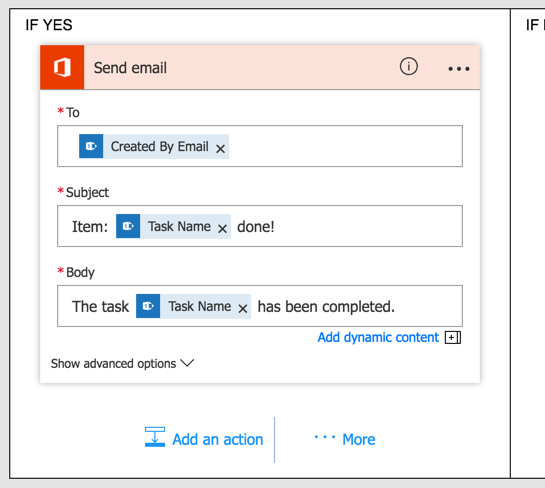
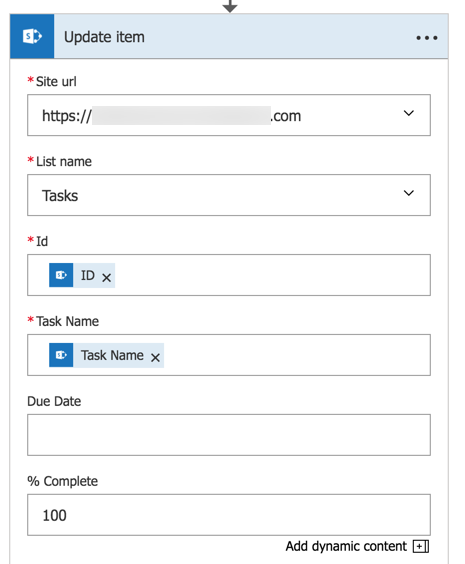
Also in the yes section, I need to create another action that updates the task to 100(%) complete:
In the no section, I create a new action that sends me an informative email letting me know the person assigned to the task is working on it:

Here are my final yes and no actions:
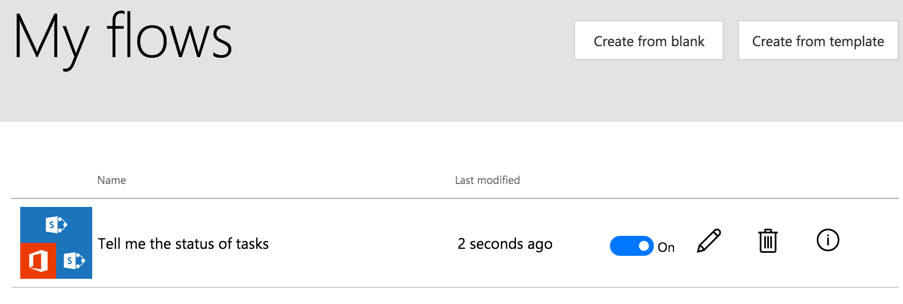
Before updating my flow and saving it, I want to change the name, so it is evident I am looking for task status instead of approval:

The figure below shows what the My flows page looks like now. As you can see, I have the flow turned on. I also have options to edit and delete the flow. The little i will show you running flows and errors (if any).
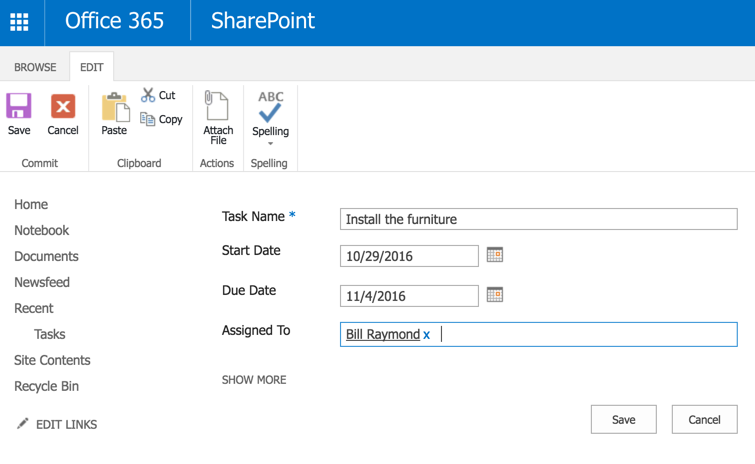
Now it is time to create a task (I’m going to assign the task to me, so I am the task owner and the email recipient):
The email comes in and looks like the figure below. Note: I am just going to say the task is Done.

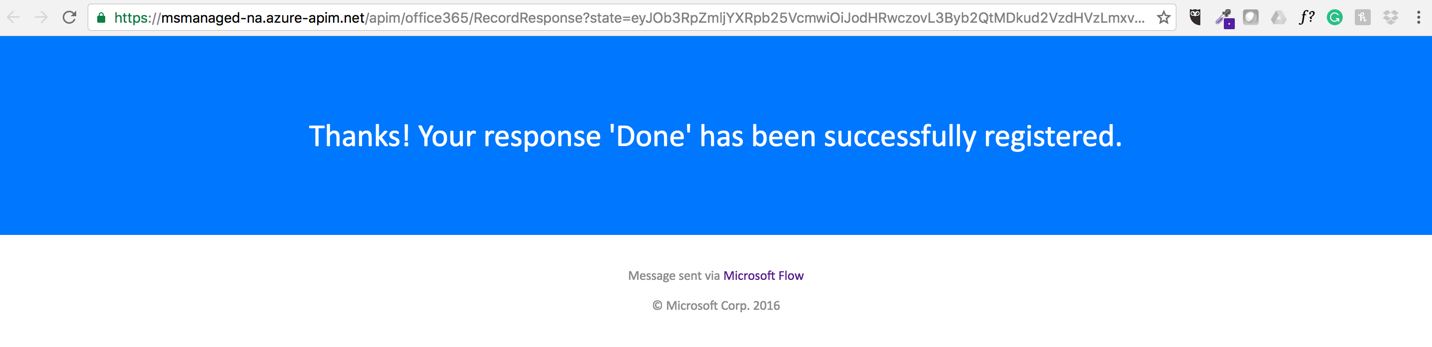
After I click the done link in email, the browser opens and shows me that my response has been registered:
As you can see in the SharePoint task list, the task is now complete:

Flow is still in its early stages. As I built this demonstration, a few of my flows wold not run and the error messages were nearly impossible to decipher. The user interface is a bit clunky, and it is often hard to make small changes, but I am sure Microsoft is aware of these, as it is, after all, still in Preview (beta).
The big question is how Flow will be different from embedded competitors like IFTTT and Zapier. At this point, Microsoft only offers services for about 58 different websites and apps, many of them related to task and project management (SharePoint, Wunderlist, Project Online, Basecamp, Google Tasks, ToDoist, etc.). I am not sure how Microsoft is handling the list of services, but I expect they will open up the service so other companies can build their own flows.
Another open question is whether Flow will be available as a stand-alone website or if it will only be available as part of Office 365. If it is a part of Office 365, I suspect larger corporations will take issue with their users creating flows that share corporate data with other people outside the company.
It will be interesting to see how Microsoft will market and license Flow but those details are still sketchy. For now, if you want to give it a spin, you can download the app or signup on the website.


thanks for sharing! it has been very helpful for me 🙂 Much better than help found in microsoft!
I found Microsoft flow now use “Approvals” and don’t have the option that you suggest to assign task instead of approve.
Any suggestion ?