In this week’s newsletter
Recognizing and dealing with shoulder impingement before it sidelines you. Switching up the game to avoid burnout or work around an injury. Better shoe management for runners. DNA in play. Full body workouts. Your body and the stress response. Choosing your strength training program.
Enjoy this week’s issue of FitITproNews and feel free to send us feedback on any of the topics we’ve covered — we love hearing from our readers!
Cheers!
Mitch Tulloch, Senior Editor
Subscribe to FitITproNews!
Subscribe today to our FitITproNews newsletter and join 200,000 other IT professionals around the world who receive articles, stories, and tips on exercise and nutrition that can help you transform yourself from a fat IT pro to a fit IT pro! Just go to this page and select FitITproNews to receive our monthly newsletter in your inbox! You can also find the latest issues of our newsletter online at fititpronews.com while back issues from our first two years can be found in our old archive.
Disclaimer: I am not a certified fitness professional or nutritionist so take any suggestions made here “as is” with a grain of salt and a heaping supply of your own judgment. Please read our full disclaimer at the bottom of this newsletter.
Mailbag
Last week a reader named John who works in Content Marketing for a software vendor emailed us saying:
Mitch–thanks for the great work you do on the FIT IT pro news. I was just scanning the latest edition. Certainly a lot of great content from a variety of sources.
And another reader named Greg sent us this comment concerning our last issue:
Hi Mitch, I enjoyed reading your newsletter as always, thanks for putting it together! The section from Kris Lall about compensation was very good; it’s always those things that you are doing unconsciously that are important to uncover. I found it was a bit difficult to distinguish what was different between the two pictures of Ben that were included as an illustration, so I put them together as a GIF. I think this makes it much easier to see the compensation error and its correction:

Send us your comments and we’ll include them in the Mailbag of our next issue!
Send us your feedback!
Got feedback about anything in this issue of FitITproNews? Email us at [email protected] today!
Recognizing and dealing with shoulder impingement before it sidelines you (Mitch Tulloch)

Mitch Tulloch is the Senior Editor of FitITproNews and a recovering fat IT pro who lost 50 lbs in midlife and is now on his way to becoming a fit IT pro. Mitch is a widely recognized expert on Windows Server and cloud technologies who has authored or been Series Editor of numerous books/ebooks from Microsoft Press. Mitch is also the Senior Editor of WServerNews and writes frequently for TechGenix.
So the other day I got a little too aggressive with my new toy (my barbell) and decided to forgo any warmup and jump straight into some rapid-tempo deadlifts. About halfway through my routine I suddenly noticed a pain in my right shoulder area.
The pain was about 5 or 6 on a scale of 10 but that was serious enough to immediately get my attention. The pain was focused about here:

That’s odd, I thought. I’ve experienced rotator cuff problems in the past but they’ve usually been associated with the scapular area in my upper back. I wonder what’s wrong?
I paused my routine and picked up a small dumbbell and began doing various rotator cuff exercises.
No pain.
OK maybe it was just something transient.
So I picked up my barbell again (set at 185 lbs) and tried deadlifting and Ouch!
Rats. Did I injure my shoulder area? Will barbells be a no-no for me for the next four to six weeks? Rats.
I put down my barbell again and picked up a slightly heavier dumbbell. Since the pain seemed to be localized in the front part of my shoulder, I decided to see what happened if I tried doing front raises with some dumbbells. As I experimented with this I found I could do front raises pain-free when I held the dumbbells with an overhand grip (palms facing down). But when I performed front raises holding dumbbells palms facing (thumbs up) I noticed a slight pain radiating from the point in the above photo to the middle of my outer arm.
This made me think that perhaps my problem was a slight tear in the upper insertion of my right deltoid and not with one of the underlying rotator cuff muscles in my shoulder area. This realization brought me a sense of relief as the rotator cuff muscles are very sensitive to being damaged while the deltoids are much larger muscles that can stand a bit of a beating.
Knowing this I then wondered whether I could somehow adjust my deadlift in a way that lessened the stress on my deltoid muscles to reduce the amount of pain I experienced and lessen the chance of further injury. Normally when I do deadlifts I keep my feet almost shoulder width apart with my hands gripping the bar at a distance wider than shoulder width like this:
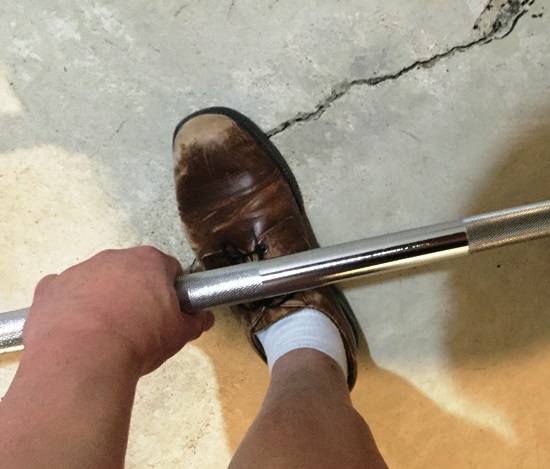
You can see in the above photo that my left foot extends to the knurled portion of the bar and my left hand is several inches into the knurled portion (the right edge of the photo is where the center of the bar is located).
Now the problem is that the wider the grip you use, the more your deltoids are involved in the lift. So what I tried doing is to keep my feet a bit closer together (about hip width) and bring my hands closer together as well (about shoulder width) which looks like this:

Notice that my foot is now under the smooth portion of the bar and my hand is at the near edge of the knurled portion.
The good news is that when I tried doing a deadlift with my hands and feet positioned like this I experienced no pain! The bad news is that you have to be more careful when you do deadlifts like this since the closer your feet and hands are together the less stable you feel vertically (the more prone you are to sway). But that bad news is actually good news because it discouraged me from being too aggressive performing my lifts. So I took my time doing them and continued my workout after dialing the weight back to 135 lbs. I figured that I’d stay at that weight for a couple of days and then slowly increase back up to 185 and see what happened.
In only a week I was back doing 185 lb deadlifts with the wider grip and without any pain.
The moral of the story? Pay attention to your body and don’t be afraid to experiment!
Addendum
This morning I was finally able to lift my bodyweight for 6 reps. My barbell deadlifts followed this progression:
135 lbs (1 set for 12 reps)
165 lbs (1 set for 10 reps)
185 lbs (1 set for 10 reps)
215 lbs (2 sets for 6 reps each)
I was completely wiped after the last two lifts and felt lightheaded immediately afterwards and almost thought I was going to pass out. But after I sat down and bent over and breathed deep breaths repeatedly, the feeling began to mitigate somewhat. And once I gulped down a whey isolate shake and followed up with some cooked spinach with herring and a cup of frozen blackberries — and rested a while in a comfy chair — my body return to normal and I began to feel rejuvenated.
By the way, I mentioned last month that I originally thought it would take a year for me to do even a single pull at 225 lbs after I started working out with barbells back in late November. It turns out however that I’ve basically surpassed that and I expect I’ll be able to do 3 sets of 6 reps of 225 lbs before summer. So I’m progressing faster than I had anticipated — though I don’t expect to catch up with Eddie Hall very soon LOL.
Switching up the game to avoid burnout or work around an injury (Robin Camp)

Robin Camp works as tech support for an Orthodontic Practice Management Software company called New Horizons Software ( www.nhsoftware.com). As a professional photographer on the side, Robin does fashion, glamour weddings and more in his spare time (www.dancingwithlightphoto.com). You can also now find him working out on Instagram at https://www.instagram.com/fitittech/.
“All the darkness in the world cannot extinguish the light of a single candle.” — St. Francis Of Assisi
After sticking with a routine for a while, sometimes the grind gets to you, doing the same exercise over and over until you dread it rather than relish it. So what do you do?
Sometimes burnout comes from making things overly complicated (I know, none of us would ever make anything unnecessarily complicated but this is for those other people) so let’s take it back to the basics.
For example, are you sick of standard squats? Or maybe you have some back issues and you want to reap the benefits of squats without the increased pressure on your back? Voila, wish granted, no magic piece of equipment required. Switch from standard over the shoulder squats to front squats, or Zercher squats. Regardless of what type of squat you are doing remember to check your form. Your toes and heels should always be touching the floor, your back should not be excessively rounded or arched, and you should always be looking straight ahead, never up or down.
- Front squats, instead of placing the barbell across your traps and shoulders, place the barbell across your upper chest, cross your arms over the bar and squat, this takes much of the load off your back (reducing spinal compression) and places more emphasis on your quads and glute’s, allowing you to squat deeper. WARNING: Start with a lighter weight than normal, it takes a bit of getting use too, figure out your form before focusing on the weight.
- Zercher Squat’s- Zercher’s are not often seen because they are incredibly difficult, however they will give you an awesome core workout, hit your traps, your biceps and hit your quads like nothing you have felt before. Adjust the squat rack lower than you would normally. You want to cradle the barbell in the crook of your elbows with your fists at shoulder height. Like the Front squat, you will want to start with a lower weight than your standard squat.
Similar variations can be found with other exercises such as the Bench Press. The bench press is a great standard, hitting shoulders, triceps and chest, however like all exercises it can get boring if you don’t throw in some variety. If you are experiencing shoulder pain, try an alternative (after consulting a doctor of course)
- Incline Bench with barbell or dumbbells- the incline bench targets the upper part of the pectorals more than the standard bench, this is where you see most of the striations in the chest on someone who is ripped.
- Decline Bench with barbell or dumbbells- Do you have the striations, but not the thick slabs of pectorals that you want? The decline activates the lower part of the pectoral more than the standard or incline bench, most people can do a little more weight on the decline than they can on the straight or the incline as the lower pectoral is a larger muscle.
- Flys- For me at least, when my shoulders are bothering me, Fly’s are the go to. Laying on a bench (flat, incline or decline) with a pair of dumbbells you want to get a nice stretch with these, focusing on the muscle group and form, not the weight. Do not go below 90 degrees with your elbows when doing these, you do not want your elbows to dip below your shoulders on this.
- Squeezed Press’s with dumbbells. Squeezed press’s with dumbbells are an exquisite exercise in form. Lay down on the bench of your choosing. Rest the dumbbells on your chest pressed together, palms facing each other. Squeeze them together and press slowly. Focus on keeping the dumbbells squeezed together and lower them slowly. Rest them on your chest for 2-3 seconds and repeat. This really helps break the habit of bouncing the weights off the chest or relying on momentum. Also, provides a great pump.
- Banded Bench Press- You know those stretchy bands people are using for stretching? Put one end over the end of the barbell, run it under the bench and attach the other end to the other end of the barbell. (Please note these bands come in different strengths weighted in pounds, start light). What this does is cause more resistance coming down and going up. Most of a standard bench press effort comes from pressing up, here, you are adding resistance to the lowering of the weight. This is great for a few reasons, it increases resistance, it discourages you from bouncing the weight, and it immediately tells you if you are stronger on one side than the other. Start light.
Deadlifts: I thought of skipping deadlifts here, I mean, who gets sick of deadlifts?
To quote Jon Pall Sigmarsson, “There is no reason to be alive if you can’t do deadlift.”- Anyways, glossing over my own personal obsession, some strange people get bored with standard deadlifts, so without further ado.
- If your gym has a trap bar, try deadlifts with it. The trap bar reduces spine compression, keeps the weight closer to your body, and forces you to focus on form. You can usually lift more with the trap bar.
- Sumo dealifts, the wider foot stance hits your glute’s and hamstrings more than a standard deadlift. As with a standard deadlift, focus on form, keep the barbell close to your body and your feet flat.
- Romanian Deadlifts, focus on hip mobility, the hamstrings and put less pressure on the lower back than standard deadlifts. However the Romanian deadlift requires more hamstring flexibility than the standard. Similar to a standard deadlift you will start out with the weight on the floor, however, while maintain form, you are keeping your legs stiff as you bend over, using your hamstrings, glute’s and hips to pull the weight up with a thrusting hip motion (PLEASE- Review videos of this one, words cannot adequately describe this one as much as a video, can, T-Nation is an excellent source for this (https://www.t-nation.com/training/tip-master-the-romanian-deadlift)
“Fairy tales are more than true: not because they tell us that dragons exist, but because they tell us that dragons can be beaten.” — Neil Gaiman
Better shoe management for runners (Rod Trent)

Professionally, Rod Trent is a PFE/STA for Microsoft, focusing on Azure Identity and Governance and EMS. Privately, Rod is dedicated to fitness through diet, running, and other activities, but also a TV and movie junkie. You can find Rod active on Twitter (http://twitter.com/rodtrent) and LinkedIn (https://www.linkedin.com/in/rodtrent/).
Kicks. Gym boots. Joggers. Runners. Gutties. Whatever you call them, a runner’s shoes are the lifeblood of the sport and hobby. Without a properly fitting and functioning pair, running can become dreadful and even painful.
Over the years, my foot shape and size has changed. My foot is wider and flatter. And because of the subtle changes I’ve had to settle on a certain foot-shaped brand which has a very specific maximum distance.
I fully utilize the Garmin service to set an expiration date on each pair of shoes I obtain. Depending on the manufacturer and model, I set between 350 and 500 miles as the maximum distance. When I reach close to that distance, I’m alerted that its time for a new pair. And I’m thankful for this. After such a long running career I can get a good general sense when its time for a new pair as my feet, back, and hips start aching a bit more each day as I continue to log miles.
I love new shoe day.
Knowing that my current shoes have all but expired and then slipping my foot into the new pair and hitting the road again is elating. It’s pretty awesome to realize that a simple shoe swap can have such a dramatic effect and be so energizing.
But, what about the old pair?
Have you ever considered there’s more you can do with the old pair than just shove them in the back of the closet, turn them into treadmill-only shoes, or pitch them in the trash?
For many runners, we discard shoes with 500 miles on them without thinking about it. It’s the nature of the sport. But I entreat you — take some time to scan those old shoes. They may be worthless to a runner because of a degraded sole, but those shoes could be very valuable to someone else.
This is something that’s really hit me recently. A lot of times the shoes I discard still look great. The sole may need to be replaced, but sometimes not. So, instead of discarding them, I’ve recently began donating them to local causes. There are plenty, even in the area that I live, that a pair of shoes would mean the world.
I know there are more formal shoe donation services available where your shoes can reach more places. If that’s your only option, think about doing that.
Just something to think about.
DNA in play (Kris Lall)

Kris Lall works as a product manager in the tech industry for an enterprise software manufacturer. As a youngster, Kris was consumed with soccer before technology came along. Now he’s consumed with both. You can find him on Twitter at the not-too-surprising handle @krisoccer.
A couple of years ago, I received a gift to submit my DNA to determine from whence my mix of genes hails. Because I have always known my mother’s and father’s ethnic backgrounds, I was pretty certain what the results of a DNA test might show.
Unfortunately, for the sake of making this story more interesting, I didn’t find out that my genes indicate an unexpected ethnic background or that my father is actually the milk man. But then again, what would any of this have to do with fitness?
What is interesting about this topic is that I’ve run across recent sources that suggest our DNA can reveal useful information about the certain foods being a better match for specific genetic profiles. Purportedly, some bodies are more suited for carbohydrates, like pancakes (yum), while others may respond better to high protein and low carbs.
This area of DNA study is fairly new and so is not without controversy and detractors of this notion abound. Supporters appear to be promoting this concept of DNA-influenced eating to make money. Detractors take a legitimately skeptical approach based on historical scenarios where companies made claims that turned out to be untrue.
What I can tell you from personal experience is that DNA testing now provides value beyond getting in touch with our roots. DNA companies continue to gather and aggregate DNA data and discover additional and compelling insights about human health. Some of their conclusions are off the mark (I do in fact have a unibrow), while others are spot on (I do find it difficult to resist salty snacks):

So if you’re eating well and exercising to remain healthy, but not achieving all of the results you’re expecting, you may want to get your DNA tested and see if a diet that’s optimized for your specific genetic profile makes a difference.
As I learn more on this topic, I’ll share more details in a future article.
References:
https://www.health.com/nutrition/dna-diet-plan
Full body workouts (Kris Kane)
Kris Kane is a North Yorkshire based personal trainer, martial arts instructor and general fitness enthusiast. You can find him on Instagram at @koachedbykris and also view him professionally on LinkedIn at www.linkedin.com/in/kris-kane.
When it comes to gym training there are many forms your workout structure can take. Push/pull/legs, Upper/lower, Paired body parts are some common example of how people choose to split sessions over the week. Any of these are great approaches if they suit the number of days you have available to train.
However, sometimes life doesn’t always go to plan so if you can only train once or twice a week then full body training sessions are a great way to still hit all major muscle groups. Also if you are just getting into weight training or are returning from injury then such workouts are beneficial to not overly fatigue body parts in a single session.
Here’s a full body training session for you to have a go at:
Warmup — Agile 8 Mobility Routine
Exercise 1 — Barbell Squat — 3 Sets of 10 Reps
Exercise 2 — Bent Over Barbell Row — 3 Sets of 10 Reps
Exercise 3 — Barbell Bench Press — 3 Sets of 10 Reps
Exercise 4 — Dumbbell Alternating Shoulder Press — 3 Sets of 12 Reps
Exercise 5 — Dumbbell Lateral Raises — 3 Sets of 12 Reps
Exercise 6 — Tricep Bench Dips — 3 Sets of 12 Reps
Exercise 7 — EZ Bar Curls — 3 Sets of 12 Reps
Core Finisher — Stir The Pot Abs — 4 x 1min Rounds
If you are unsure of what any of the exercises are just type them into YouTube for a video demonstration.
Even if you already have a set routine, sometimes just having a change and trying something new can be refreshing. Give this full body workout a try, record your progress then try and improve your lifts next time.
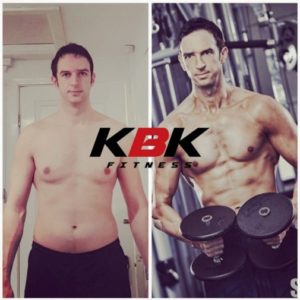
If any of your current training goals involve becoming fitter, leaner, stronger and you want some further support, head over to my new Facebook page where I will be posting useful daily tips on all things training, nutrition and mindset!
http://www.facebook.com/kbkfitness
As always, good luck with your training and let me know if you have any questions.
Kris.
Your body and the stress response (Lana Khazari)
Lana Khazari is a Technical Support Analyst for the Corporation of City of Windsor, Ontario, Canada. She is also a Precision Nutrition Coach, Personal Trainer, Fitness Instructor and a Yoga 200-RYT Instructor. You can find her online at lanakharazi.com.
Ever have those days where that meeting could have been an email and you have a hard deadline by EOD. That day that you wish you could set an out-of-office reply for every coworker that decides to talk to you in person. This might be a random day or feel like every day. It might even be so bad that it feels like “stress” is written into your job description.
Feeling swamped, stressed, or frazzled seems to be the new norm. If you often respond as being “too busy” you might want to stop and think of how that is affecting you. Are you thinking clearly? Are you reactive or proactive? Are your decisions smart? Being stressed constrains our choices and makes our world feel a whole lot smaller.
We know that stress is a problem for our relationships, communication, mental clarity and almost every area of life. Still, some may not realize that it can also affect our body composition. Because fitness and nutrition do not happen in a vacuum, stress, sleep and how you are approaching your goals can affect metabolism. Metabolism is an interplay between the food you eat, digestion, your energy needs, the energy drawn from food and how they make you feel. The build-up of stress hormones affects our physiology and an altered hormonal environment can even affect how food is assimilated into the body and how our body burns fat.
How you feel can also affect energy, satiety and more. When we move our bodies and eat healthy foods this makes a huge impact on our physiology. By extension, our physiology can impact other body systems like the mind. After a workout, we naturally find our mind more focused and less stressed. Conversely, with a clean and clear mind, we can better handle our emotions. Ever notice that when your mood is bad, everything else seems to keep going wrong. Or when your mood is good, more good things happen.
Stress also affects your decisions. So whether you want to be a great employee, great parent, or you just want to stay committed to a healthy diet, it is harder to make smart choices when you are stressed. When you’re stressed you hit up the 3 pm donuts leftover from the last meeting. When you’re relaxed you make smarter choices that help you meet your nutritional goals.
We can aim to consciously and deliberately reshape our daily experiences by starting to taking control of our emotions. To do this we need to develop our mental fitness and learn to RELAX.
Relaxation is a mental skill. The body’s stress response is usually to fight, flight, or freeze. We don’t want to run, or worse, do nothing. The sudden release of hormones can We want to do the opposite of that. The following two techniques can teach you HOW to relax. So when life hands you a lemon, you can respond thoughtfully instead of reacting instinctively.
To derail the stress response, you have a couple of options you can use:
- Calm the sympathetic nervous system using breathe work
- Release the energy
OPTION 1: THE BREATHE
If you tend to lose your cool, get easily overwhelmed with anxiety, or make impulsive decisions, deep breathing is a good habit to get into. It helps to quiet the sympathetic nervous system (fight-or-flight response).
The exhalation is the most important component of any breathing technique. You don’t want to be huffing and puffing because it will just make you feel more anxious. The exhalation should be slow and controlled.
One technique to try is left nostril breathing. It is popularly used in yoga practice and a great one to use in a stressful situation as it relaxes the whole body and calms the mind. When you breathe through the left nostril, you are activating the parasympathetic nervous system. It helps to curb compulsive eating, aids digestion, elimination, sleep, and other metabolic processes.
Steps to try Left Nostril Breathing:
- Sit up straight in a comfortable position
- Block of the right nostril with your thumb or finger
- Breathe in SLOWLY through your left nostril until you can’t anymore
- Exhale SLOWLY through your right nostril (releasing the thumb or finger) making sure you fully exhale all the air
Use slow, controlled, even and deep breathes. You want to fully exhale before breathing in again. Repeat this for 3-10 minutes. You can even try this before bed if you have trouble sleeping. Most people find it difficult to focus on the breath, but with practice, you will get it.
OPTION 2: RELEASE THE ENERGY
When we feel threatened and the flight-or-fight is activated our body releases stress hormones. These stress hormones can make us shake with fear. Animals in the wild who perceive danger will shake and tremble for a few minutes and then go right back to normal. These animals dissipate stress through movement and muscular contraction.
Animals can shake off trauma and so can we, but we don’t use the same response very often. We might get aroused and then get stuck in that state because we don’t dissipate the energy.
Sometimes calming down and breathe work may not be that easiest when you are in heightened states of arousal. Instead, you can discharge the energy. Similar to the shaking/vibrating mechanism you can also practice these tremors to help release tension and return the body to return to a state of balance.
Try this:
- Start in a seated position.
- Clench and open your fists rapidly but keep a good rhythm.
- Contract and release the muscles up the forearm and into the shoulders using that rhythm.
- Next, through the upper body and into the neck and face.
- Then start at the feet. Tap, move and even run (mimics flight-or-fight and you can even imagine running) in place while clenching and releasing the upper body.
- Contract and release the muscles up the legs. The muscles in the legs are big so really go hard.
Once you have the whole body going try to put as much energy into it for 20 seconds. Then, just relax.
If you are worried about privacy, think of how you can add this practice into our life in smaller ways or more discreetly. For example:
- Squeezing and relaxing your leg muscles under a table or desk
- Squeezing or relaxing your leg muscles while waiting in line
- Clenching and releasing your fists or arms while seated
If you often feel immobilized by stress this is something to try. It may sound weird, but this method is used by trauma therapists. Shaking or quick muscular contractions are the easiest and quickest way to release tension. Remember, animals do it. So let go and just shake it, baby, shake it.
Choosing your strength training program (Jimmy Vo)

Jimmy Vo is a cyber security professional in the financial sector. He’s a Jiu Jitsu hobbyist and a purple belt under Lucas Lepri in Charlotte, NC. You can find Jimmy on Twitter: @JimmyVo
My strength journey started in my home gym. I wanted to get stronger in order to be more durable when training Brazilian Jiu Jitsu. Anytime I’ve previously done strength training, I did the typical 4 day split which looked like:
Day 1: Legs
Day 2: Chest and Triceps
Day 3: Rest
Day 4: Back and Biceps
Day 5: Shoulders
Day 6: Rest
Day 7: Rest
This version of the 4-day split was hardly considered real programming. I’d go to the gym and do the big lifts and accessory work at some random rep scheme. Due to the transition to a home gym I had limited access to dumbbells and other machines in a commercial gym. The first program I tried was StrongLifts 5×5. This program was awesome because of its simplicity. It has two workouts:
Workout A: Squat, Bench Press, Barbell Row
Workout B: Squat, Overhead Press, Deadlift
If you do this program 3 days a week, you alternate days. I won’t go into any more details of the what, why, when, and how of the program as you can just read the StrongLifts’ website for more information. This program was great in the first few months since I was progressing nicely due to newbie gains since I did zero strength training for years before starting this program. According to Legion Athletics “Newbie gains refers to the rapid increase in muscle and strength that often occurs when people with little to no previous weightlifting experience start training intensively.” After a few months and plenty of newbie gains, I transitioned to Wendler’s 5/3/1 because of the amount of squatting was a bit much due to my Brazilian Jiu Jitsu (BJJ) training.
After some research, I found Jim Wendler’s 5/3/1 program very interesting. It’s simple but effective. Also, you can utilize 5/3/1 forever. Wendler even wrote a book called 5/3/1 Forever: Simple and Effective Programming for Size, Speed, and Strength. I found some people doing Jim Wendler’s 5/3/1 program for MMA where they lift twice a week. When I implemented this program, it would look like this:
Day 1: Squat / Bench Press
Day 2: Deadlift / OH Press
I also did no accessory work, thinking I was doing enough with my BJJ training. Despite not doing any accessory work, I was getting very strong utilizing 5/3/1. After a couple of years, I wanted to try some new programming. I reached out to a local Certified Strength and Conditioning Coach who developed a strength and conditioning program to specifically compliment my BJJ. I have 4 months of programming, which has 4 days of lifts. I only do 3 lift days due to the amount of BJJ training I do and time constraints. The program essentially looks like this:
Day 1: Squats, Speed Deadlifts, Accessory Work
Day 2: Bench, Push Press, Accessory Work
Day 3: Deadlifts, Speed Squats, Accessory Work
Day 4: OH Press, Speed Bench, Accessory Work
Each month has different rep and set schemes based on a bunch of strength and conditioning concepts I don’t quite understand. Each month also has different accessory work to keep the workouts interesting. It’s only been about 5 months doing this custom program but I’m seeing a lot of good results.
Having a plan is the key to success. I’m not here to say one program is better than the other. They all did a great job on making me stronger. The key take-aways from this journey would be to:
1) Use a program that aligns to your goals
2) Be consistent, stick with the program because success = consistency
3) Do your accessory work
4) Certified Strength and Conditioning Coaches (CSCS) are worth their weight in gold
5) Experiment and see what will work best for you
Send us your feedback!
Got feedback about anything in this issue of FitITproNews? Email us at [email protected] today!
The Toolbox

This ebook is intended to be a guide to help you navigate your data protection and downtime costs better within your organization.
http://www.wservernews.com/go/1f0tqj3t/
Did you know that a backup isn’t enough to preserve your emails? You should consider email archiving, too. We recommend the email archiving solution MailStore Server. Try it free for 30-days:
http://www.wservernews.com/go/ejeo26ml/
Easy Window Switcher lets you switch between application instances, fast:
https://neosmart.net/EasySwitch/
PeaZip is an archiver and file compressor that lets you extract 7Z CAB ISO RAR TAR ZIP archive files:
QTTabBar extends Explorer by tabs and extra folder views: