Most of the time the information used to create a data breach comes from inside of the network, sometimes by mistake. But by using DLP (data loss protection) policies, we can help our end users by blocking the sharing of vital information to internal and external recipients.
Keep in mind that DLP is not the silver bullet that will kill any information leakage from your environment once and for all. If you do have a bad actor in your environment who wants to move information out, then just DLP won’t be enough. We need to have more security controls in place to avoid moving information out of your company — or at least make it harder.
In this article, we are going to protect our Office 365 tenant from sharing unnecessary and precious IT information, which may include IP addresses, Azure secure information, and SQL connection strings. Using Office 365 Security Center, we can use DLP to protect information to be shared internally or externally in several technologies, such as Teams, Exchange, SharePoint, and OneDrive.
Creating the DLP policy
The first step is logged on the Office 365 portal as an administrator in the admin area, click on Admin Center, and then on Security & Compliance.
In the Office 365 Security & Compliance portal, expand Data loss prevention, and click on Policy. On the right side, we will have a couple of charts about DLP currently use in the organization. Click on Create a Policy to start the creation of our new DLP policy.

In the Choose the information to protect page. In this page, we can select by Industry and narrow down per country to find some specific regulation to be applied. In our current article. We are going to choose Custom, Custom Policy and click Next.

In the Name your policy page, label the new DLP policy that we are in the process to create. In our article it is going to be called AllSafe DLP Policy. Click Next.

In the Choose locations page, select let me choose specific locations and click Next. In the new page, select which products you want to enable the current DLP policy, and we are going to start simple with just Exchange email, and click Next.
For every single product, we can select which users/objects we want to include or exclude. That option can be useful if we are targeting a specific group of objects, and for testing purposes as well.

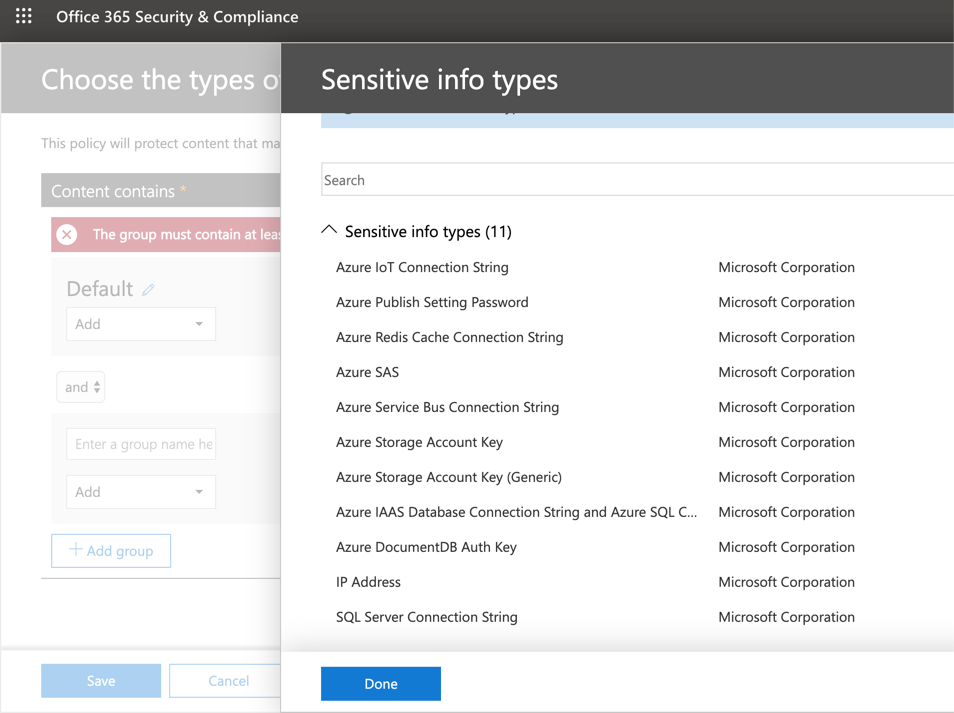
In the Policy settings page, click on Edit located underneath the option Find content that contains. The new Choose the types of content to protect page will be displayed, click on Add and then select Sensitive info type. A new blade will be displayed, click on Add and a list of all sensitive info types available will be listed. Select all entries that start with Azure, IP Address and SQL Server Connection String.
After selecting all required information types, click on Add, Done, and before clicking on Save, we have the option to configure the accuracy by defining the min and max value that we are looking for each information type. Let’s leave default values for now. Click on Save.
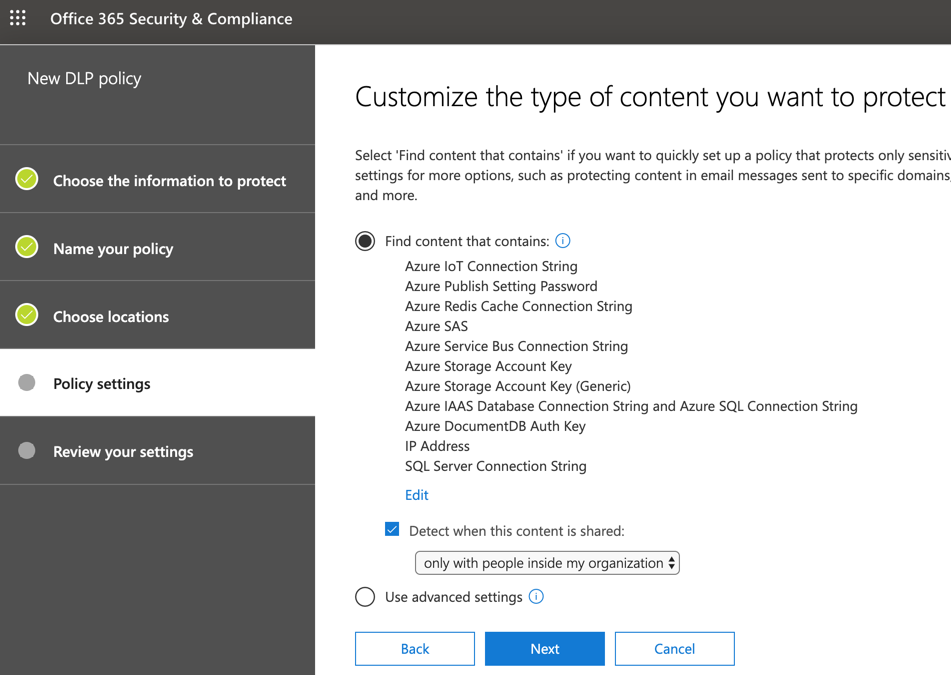
The result of the operations that we have just performed will be a list of all information types that we will be looking as part of this DLP policy, and we need to define the scope of this policy. We are going to select only with people inside my organization. Click Next.
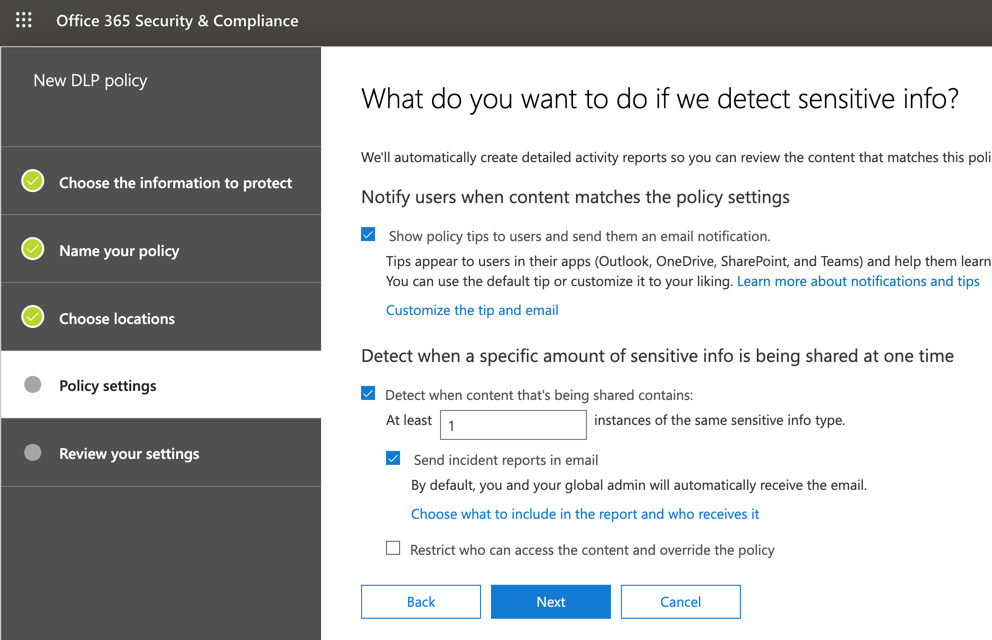
There is a second page within the same tab of the wizard. In the What do you want to do if we detect sensitive info? page, we can define if we are going to send policy tips and emails to users who are sending sensitive information by enabling the option Show policy tips to users and send them an email notification. To customize, we need to click on the link Customize the tip and email. (We are checking this option out in this section, wait a little bit.)
We can also define how many instances of the occurrence will be allowed before triggering an incident. We can also determine if reports are going to be sent by email (by selecting the option Send incident reports in email), and who is going to receive (by clicking on Choose what to include in the report and who receives it). Last but not least, we can protect that information to be shared and viewed by the recipients. Click on Next.
When customizing the DLP policy, the wizard gives a lot of flexibility where we can send a notification to the user who generated/shared/last modified the content, to a specific group of people (by selecting Owner of either SharePoint or OneDrive, or by specifying the email address).
Another cool feature is the ability to change the text that will be sent on the email and the policy tips.

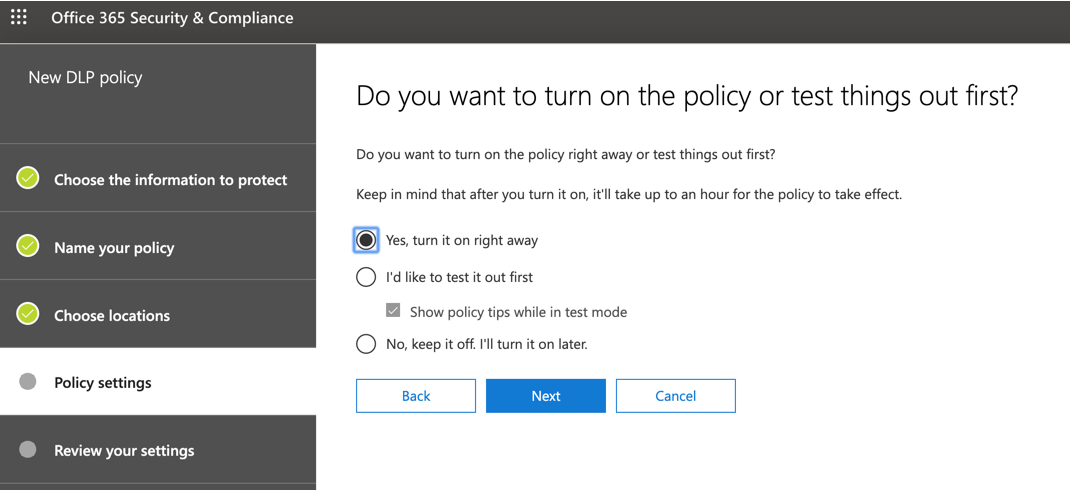
In the do you want to turn on the policy or test things out first? page, we can turn this on or off, and also in test mode where the content will be shared. However, the policy tips will be displayed. Click on Next.
In the Review your settings page, a summary of all the choices that we have been doing is going to be listed. Click on Create. The DLP policy may take up to one hour to take effect, so keep that in mind and go for a coffee before testing your newly created DLP policy.

Changing an existent policy
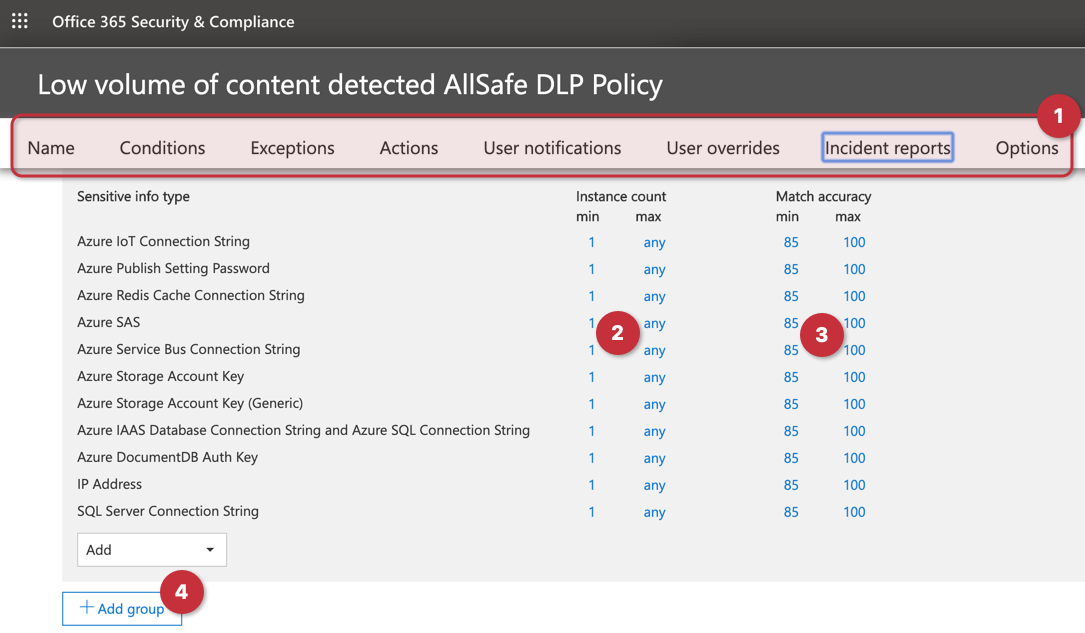
During the creation we can define several settings related to the new policy. However, when editing any given policy, we have even more options available, including the number of instances for Low volume and High volume thresholds of any given policy, and such configuration can be defined per information type.
To edit the policy, select the policy from the list, and on the new blade, click on Edit policy.

Just to give an idea of the flexibility available, in the first line (Item 1) we can go straight to a specific setting that applies only to Low volume of content detected setting. We can define the minimum and maximum instance count for each info type (Item 2), and the accuracy for every single entry (Item 3). We can also add groups, and for each group, we can define if all the info types are required to match or any of them.
Testing the policy
The first step is to get some information that we don’t want to be shared, and we are going to copy one of the Access Key of any given storage account, and we will use that information to test the DLP policy. Or we can just type in an IP address and validate the same way.

The first test is to open an email message and add an IP address and send to your colleague. The report will provide information for all rules that the content matched one of the info types.

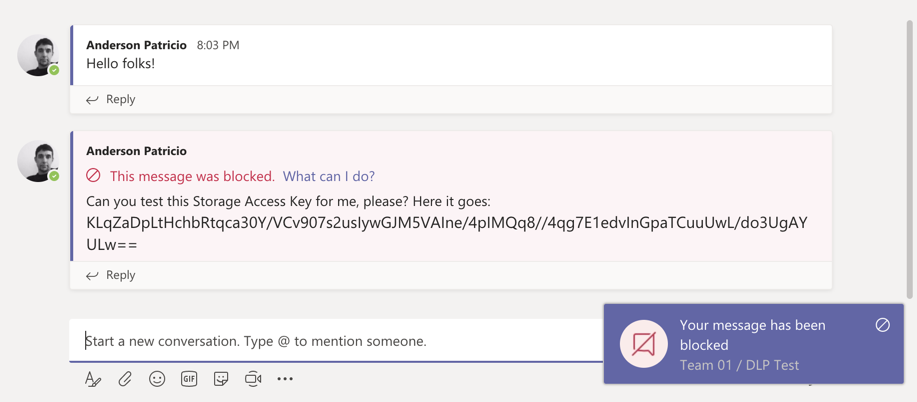
We can edit the DLP policy and enable another location, let’s say Teams, for instance. After a few minutes, we can try to copy and paste a Storage Access Key, and the result should be similar to what is being depicted in the image below.
Featured image: Shutterstock


