When most people think of spam, their minds quite naturally turn toward the relentless stream of unwanted email that we all receive every single day. As important as it is to keep spam out of users’ mailboxes, it is also important to take measures to prevent outbound spam. On the surface, outbound spam would seem to be a nonissue. After all, the users in most organizations probably aren’t sitting around all day, blasting thousands of spam messages to the outside world. I get it. But what happens if a user becomes infected by malware, and that malware covertly turns the user’s device into a bot for sending spam?
The consequences that stem from such an event vary based on any number of factors. Even so, I can’t help but be reminded of something that happened to me quite a few years back. Although there was no evidence to suggest that my PC was compromised, a spammer apparently spoofed my email address. For a few years following the incident, my domain name was listed on some of the anti-spam blacklists. Consequently, there were contacts whom I was unable to email. I had to resort to using a mailbox associated with a different domain to communicate with those people. This, in turn, resulted in fragmented communications in which half of my message threads were associated with one mailbox, and the other half was with another.
The situation that I just described was obviously disruptive, but keep in mind that there are only two mailboxes in my entire organization. Imagine how much worse the situation would have been if hundreds of users were suddenly unable to email half of their contacts.
An outbound spam policy won’t stop someone from spoofing an email address and using it for spam, but it will help you to recognize and put a stop to spam blasts originating inside your organization. Better still, you can create a Microsoft 365 outbound spam policy, without the need for a third-party solution.
Creating an outbound spam policy
Microsoft makes it relatively easy to create an outbound spam policy. To do so, open the Office 365 Security and Compliance Center, expand the Threat Management container, and then click on the Policy option. This will cause the console to display the Templated policies screen, shown in the image below.
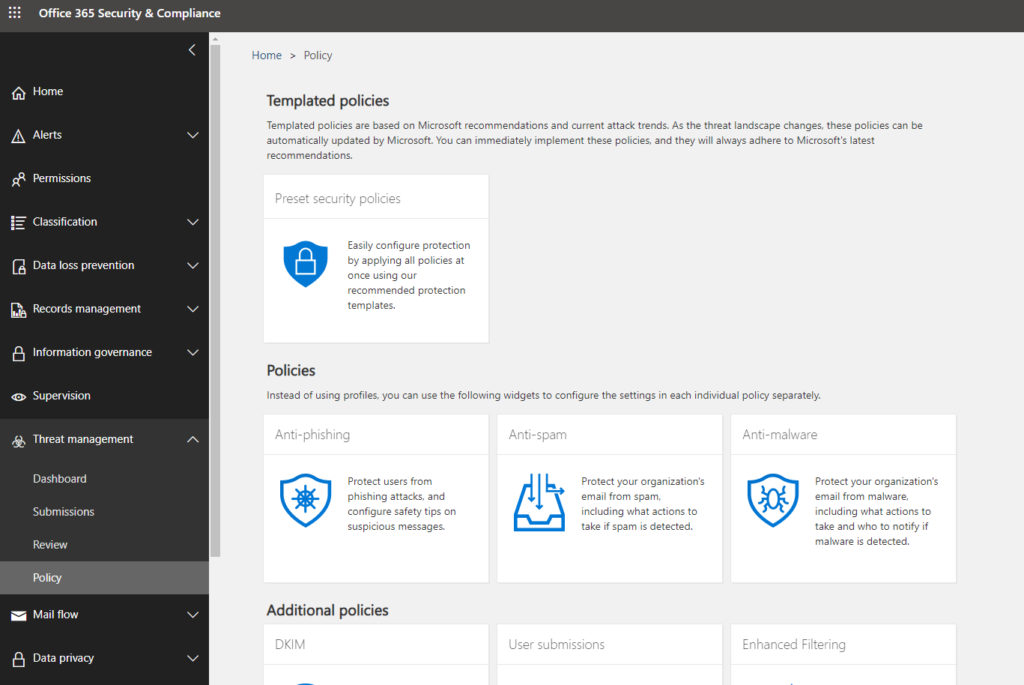
Click on the anti-spam policy template shown in the screenshot above. This will cause the console to display the anti-spam settings shown below.

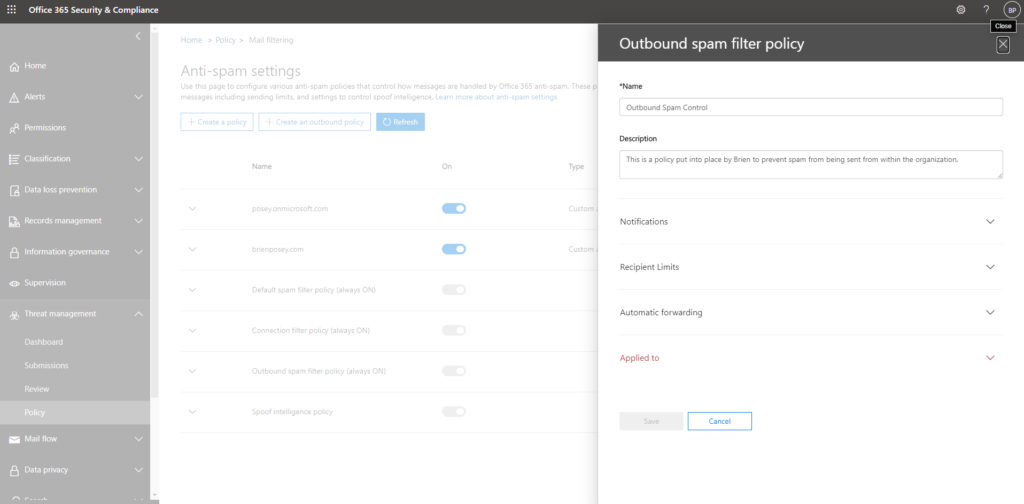
Now, click on the Create an Outbound Policy button. The console will now open the Outbound Spam Filter Policy window. As you can see in the next screen capture, you will have to provide a name for the policy that you are creating. Although not required, it is also a good idea to provide a detailed description that conveys the policy’s purpose.
 Expanding notifications
The next step in the process is to expand the Notifications section. As you can see in the image below, the Notifications section provides two options.

The first of these options allows you to send a copy of suspicious outbound messages to specific people. If, for example, Microsoft 365 suspects that a particular user is sending spam from the Exchange mailbox, then it might forward a copy of the spam to someone in the IT department, or perhaps to someone in human resources. A determination can then be made as to whether the message truly is spam, or if Microsoft 365 incorrectly identified a legitimate message as spam.
The second option allows you to notify specific people if Microsoft 365 blocks a user due to them sending spam. This is the sort of thing that IT will definitely want to know about because the blocked user will probably end up calling the helpdesk to find out why they are suddenly unable to send messages.
When you are done configuring notifications, expand the Recipient Limits section. This section, which you can see in the image below, is the enforcement component. It allows you to set thresholds at which a user is assumed to be acting like a spammer. It also lets you control what happens if a user exceeds these thresholds.

As you can see in the screenshot, you can limit the number of messages that a user sends within an hour. You can set individual limits for internal users and for external users. You can also set a daily limit.
The default action that is taken when a user exceeds a threshold that you have put into place is to stop the user from sending any more mail for the rest of the day. As an alternative, though, you can place an indefinite block on the user’s ability to send mail. You can also opt to simply raise an alert, without taking any punitive action against the user. The choice is yours.
When you finish setting the recipient limits, go ahead and expand the Automatic Forwarding section. This section, which you can see below, lets you control whether or not a user will be allowed to create an inbox rule that automatically forwards their mail to an external mailbox.

Finally, expand the Applied To section. This section allows you to specify who the policy will be applied to. You can also create exceptions to the policy if necessary.
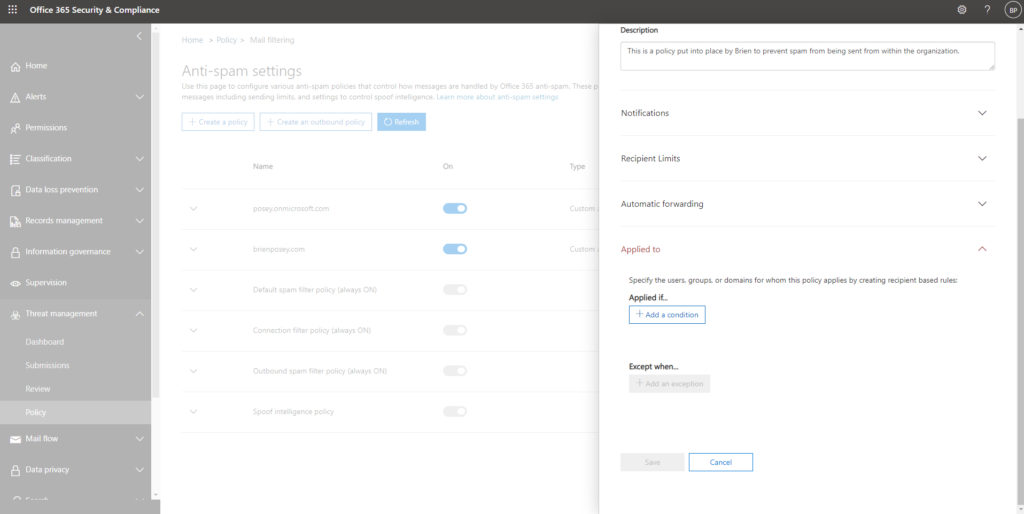
The Applied To section lets you choose who the policy will apply to.
Outbound spam: It can cause big problems
While outbound spam probably isn’t a problem for most organizations, allowing a user to send spam (whether knowingly or unknowingly) can cause big problems for the organization. As such, it’s a good idea to put an outbound spam filter in place as a precaution.
Featured image: Designed by Freepik