When we want to provision VMs in Azure Portal, often we go straight to the point and click Create and get the VM provisioned as fast as we can. However, some cool features can be found and save some time when doing activities in the Azure Portal. I’m always looking for faster ways to improve the overall process by having to do less whenever it is possible. That is the reason that you see a lot of scripts and automation content. However, in some cases, we need to use the Azure Portal. Even using the portal, some shortcuts can be used to save time.
When talking to my customers, I often see people provisioning resources such as VMs and they spend a considerable amount of time doing this type of task. Most of their time is typing the type of VM to find it in the Marketplace, and then deciding between some options during the wizard to create the new VM.
Please, don’t get me wrong. If you do that for a single VM, it is entirely acceptable. But if you want to provision several VMs, I recommend using automation (PowerShell and ARM Templates). However, some cloud administrators like to use the Azure Portal, and there is nothing wrong with it. The goal of this article is to show a few steps that can save some time if you do VM creation regularly.
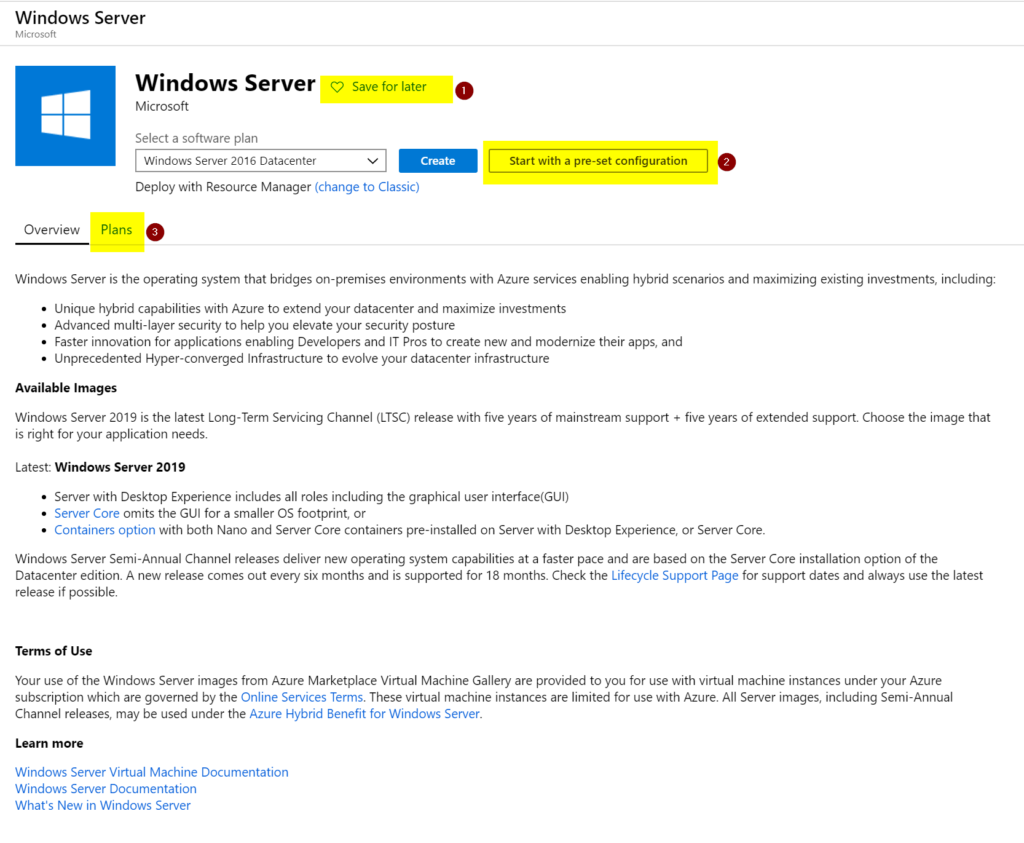
We are going over three cool features that we have available during the provisioning of VM, which are: save for later (Item 1), start with a preset configuration (Item 2), and plans (Item 3).
There is a fourth one, which is the ability to deploy the VMs in the classic mode (that is more related to legacy deployments in Azure, but it is always nice to know that you are using Resource Manager).
When provisioning a new VM, you can always hit Create a resource item on the Azure Portal (located on the upper left corner) and on the new blade, we will have the resources available based on categories and the right side, the Popular resources available. However, that is not the whole Marketplace area, and it is just a summarized view.

The Marketplace is where all the applications and services are available in the Azure Portal. All software that we find here is certified to run in Microsoft Azure. We can access that by clicking on See all on the previous image, by typing marketplace in the search, or by using the Marketplace item on the left side of the Azure Portal (if available)
The Marketplace’s initial page has a slightly different look and feel from the previous one. In this one, we can check filter solutions based on price, operating system, and even publisher. Another cool feature is to check Service Providers in a specific region.
Bear in mind that the search properties will work on both blades, but using the Marketplace, we will have more flexibility on the filtering and additional options.

Saving for later option
Now that we understand the difference between Create a new Resource and going to the Marketplace, we can start exploring a simple but useful option available, which is My saved list.
Any time that we are provisioning an application or service in Microsoft Azure Portal, we will have an option called Save for Later (Item 1 in the first screenshot in this article).

When using Marketplace, we have an item on the left side called My saved list, and that will be the place that all saved applications/services that we configure as a favorite will be stored. If you have your favorites resources to be provisioned, you can use this option to avoid searching every time that you want to deploy using the portal.
Provisioning VMs using preset configuration
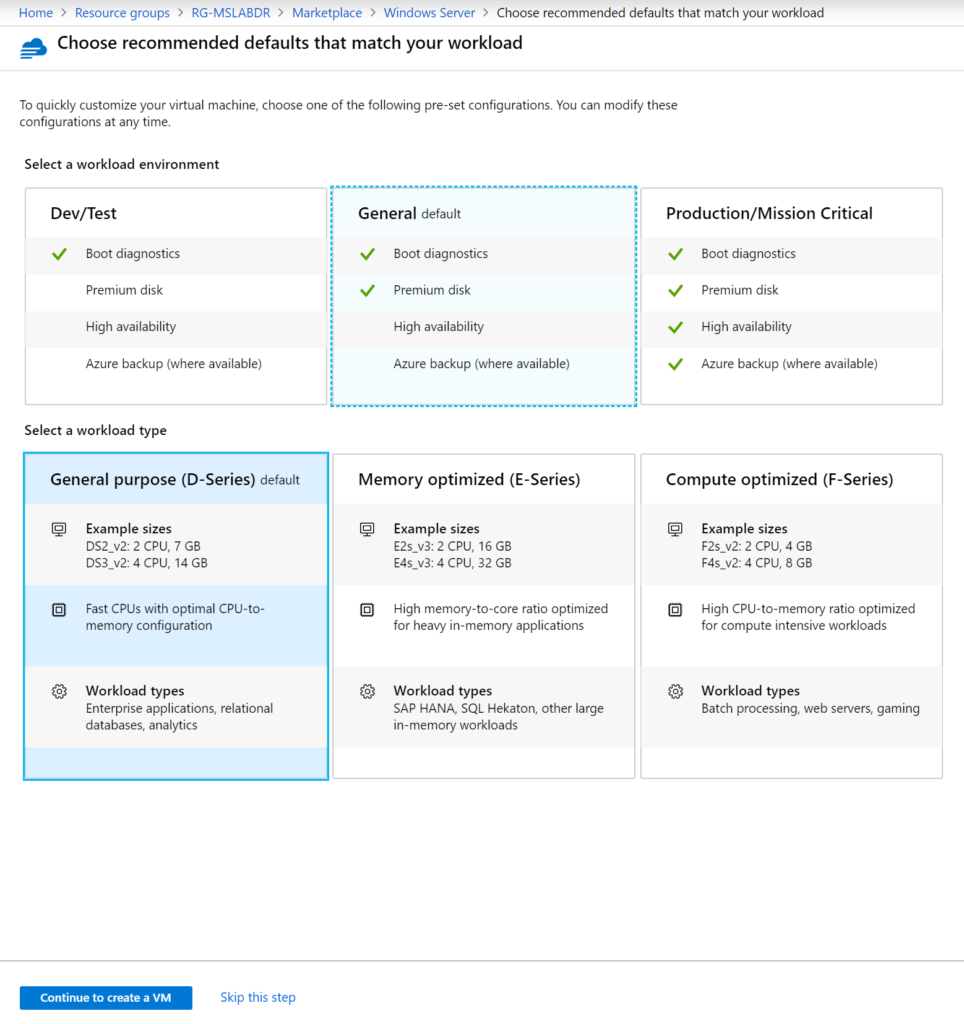
When provisioning a new VM using Marketplace, we have a button called Start with a preset configuration, and the goal of this feature is to speed up the deployment process. We need to make two decisions: workload environment and workload type.
There is a graphical interface that summarizes the features that are going to be enabled when selecting the workload environmentand the type of the VM configuration that will be applied.
Although a couple of options are offered for the VM type, the first one listed is going to be the one pre-selected on the Create a new VM wizard.
Unfortunately, this blade below is not part of the creation wizard, which means no back button is available. If we want to select something different (workload type or workload environment), we need to start from scratch.
All settings in the Create a virtual machine wizard that was configured based on the pre-set configuration that we defined before running this current wizard will be highlighted, as depicted in the image below.

Looking at the plans for a specific VM
This feature is usually overlooked, but it is helpful when you need a fast answer about versions available. When we select an application/service that has plans available, we can click on the Plans tab, and a list of the versions available and descriptions are going to be listed.
Having that information, we can pick and choose the software plan from the list. When using Windows, we have more plans, and they provide a description with versions, updates being applied to the images and disk sizes (when available).

Using all services
Since we are relying on Marketplace, saved items, and pre-set configuration to provision a new VM, we can save a lot of clicks by adding the Marketplace to the left menu in the Azure Portal.
Click on All Services (Item 1) and type marketplace (Item 2). In the items being displayed at the bottom, click on the start (Item 3), and that will make the item to be displayed on the left side.
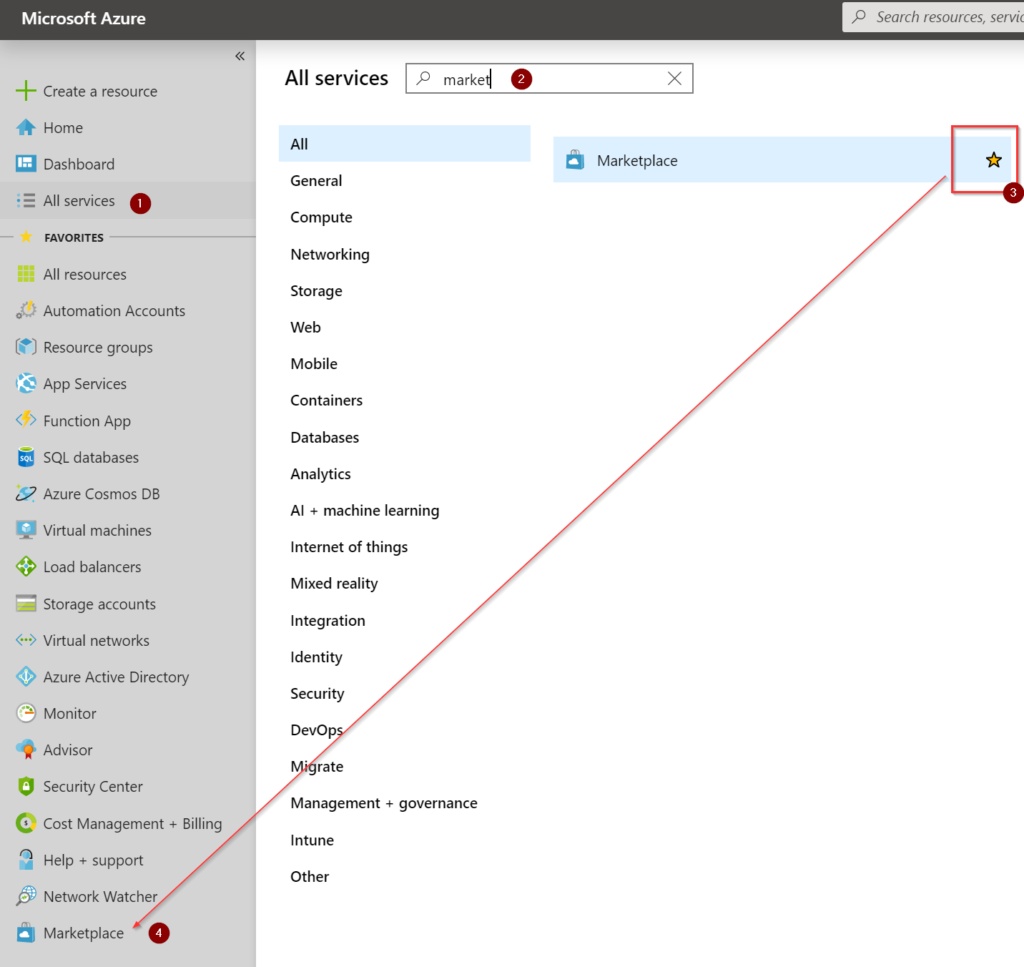
If you want to move it to the top, hover your mouse over Marketplace and drag and drop the item to a position that you can find easily in the Azure Portal.

Now you know: Provision VMs with just a few clicks
Using some of the options available in the Azure Portal, we can provision VMs with a few clicks, and not much to decide. Our focus could be on the VM name, network, and so forth, things that matter from the infrastructure perspective.
Featured image: Shutterstock


Are VM’s voice mail?