Uh-oh. You just realized that you’ve forgotten your MySQL root password on your Amazon Web Services (AWS) EC2 Linux instance, or anywhere for that matter. This guide will help you get started on any system to reset your lost root password for MySQL.
You tried to login to MySQL using what you thought was the right password for the root account and saw this ominous message:
mysqladmin: connect to server at ‘localhost’ failed error: ‘Access denied for user ‘root’@’localhost’ (using password: YES)

You tried again just to be sure that you didn’t get anything wrong and you got the same result.
Since the root account is typically the “supreme” administrator account in any MySQL installation, it quickly sinks in that you have a serious problem on your hands.
Now, you’re ready to bang your head against the desk. Repeatedly.

First of all: relax. All is not lost.
As long as you have rights to your EC2 instance, you can reset your password and get back in business again.
Unfortunately, it can be a bit tedious to sort through all the MySQL documentation to find exactly what you’re looking for. That’s especially true when you want to reset your password in a hurry so you can get your work done.
Don’t worry, though. Here’s your step-by-step guide to resetting your MySQL root password.
Step 1: Log into your Linux server
Start by logging in to your Linux server as you normally do.
You’re going to be starting and stopping a service here so it’s best to do everything as root. Once you’re at a prompt, enter the following command:
sudo -s
Once you do that, you’ll have root access for all your future commands so you won’t have to prefix them with “sudo” every time.
Please note: MySQL root access is totally different than root access in your MySQL instance, despite the fact that they have the same name.
Step 2: Stop the MySQL Daemon
You probably know that there are three executable components to a MySQL installation: the client, the administrative utility, and the server.
The client is run with the “mysql” executable. That gives you command-line access to handle administrative functions in MySQL.
The administrative utility is run with the “mysqladmin” executable. You probably used it to set your password initially when you first installed MySQL.
The server is run with the “mysqld” executable. The “d” at the end of its name means that it runs as a “daemon” – the Unix term for a process that runs as a service in the background.
Before you can reset your MySQL password, you’re going to have to stop that daemon. You can do that easily with the “service” command. Just go to a command prompt and type:
service mysqld stop
If you are logged in as root, you should see a response like this:
Stopping mysqld: [OK]
That means you’ve successfully stopped the service.
![]()
Step 3: Start the MySQL daemon without a password
Now that you’ve stopped the MySQL daemon, it’s time to start it up again.
That seems weird, doesn’t it?
The caveat here is that when you restart the MySQL daemon, you’re starting it so that anyone can have access to the databases. Obviously, this is an extremely dangerous situation and you don’t want to leave it that way for a long time, so it’s best to finish the whole process of resetting your password as quickly as possible.
Here’s the command to start the daemon so that you can login without a password:
mysqld_safe ‐‐skip-grant-tables &
There’s a lot going on there so let’s cover each piece individually.
The mysqld_safe executable is the recommended way to run the MySQL daemon. You’re not using the “service” command here because you need to add some command line parameters.
The ‐‐skip-grant-tables option accomplishes exactly what you’d think. It tells MySQL to not worry about which user has rights and to just to let everybody in without a password.
The ampersand at the end tells your EC2 Linux instance to run the process in the background. That way, you can do other things in the same window while the daemon is running.
You’ll probably need to hit Enter again to see a command prompt, though.

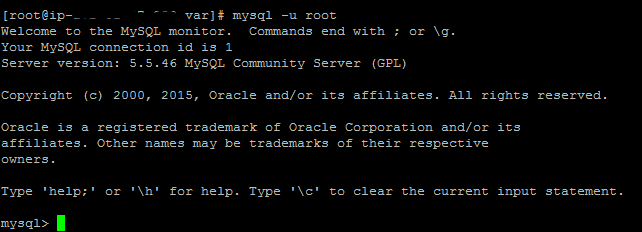
Step 4: Connect to MySQL server with no password
Now, type the following at the command line:
mysql -u root
Normally, you’d follow that command with a -p. In this case, though, you’re not using that parameter because you’re logging in without a password.
You’ll also notice that the MySQL server lets you in right away. You should see this prompt:
mysql>
Congratulations! You’re now in MySQL with full authority even though you didn’t enter a password.
Again: don’t leave your system like this for too long.
Now, enter the following command:
use mysql;
This changes the database you’re using to the MySQL system database.
Next, enter this:
update user set password=PASSWORD(“[NEW PASSWORD]”) where User=’root’;
That sets the new root password. Obviously, you’ll substitute your new password for the [NEW PASSWORD] text that you see above.
Next:
flush privileges;
That command just tells MySQL to put the new changes into effect immediately and not wait for a server restart.
Finally:
quit
That exits you from the mysql client.
Step 5: Stop the MySQL daemon (again)
Next, you’re going to stop the MySQL daemon that you started earlier because it’s currently granting everybody full access with no password.
Enter this familiar command:
service mysqld stop
You’ll see a slightly different output than you did last time. That’s because you started the daemon without using the service command.
The output will look something like this:
[1]+ Done mysqld_safe ‐‐skip-grant-tables

Step 6: Restart and test
Now, you’re ready to restart the MySQL server the normal way and test your new password.
First, start the server:
service mysqld start
You should see the familiar [OK] in response.
Now, test out your new password:
mysql -u root -p
That will force you to enter a password. Be sure to enter the same password you used when you reset it two steps ago.
Once again: congratulations! You’ve just recovered your password.
Wrapping It Up
All is not lost when you’ve forgotten your MySQL root password. With just a bit of effort, you can reset it so that your databases are still secure and you have access to the important MySQL administrative functions.


Saved my life! Thx!
Great walkthrough for AWS Mysql lockout, your explanations were helpful for future use and appreciated. Thanks!
had to use mysqld_safe –skip-grant-tables –skip-networking &
Hello !
For mysql 5.7 i used the folowing query:
update user set authentication_string=password(‘1111′) where user=’root’;
the password column doesn’t exist.
Thanks a lot… it saved my day!
Thank you SO much for this. Saved the day!!
Like bb I also had to use mysqld_safe –skip-grant-tables –skip-networking &
Hi
We try the above option to reset the password but both old and new passwords are working for root. How it is possible ?
[root@ip-999-99-99-99 ec2-user]# service mysqld stop
Redirecting to /bin/systemctl stop mysqld.service
Failed to stop mysqld.service: Unit mysqld.service not loaded.
what if you dont have linux system
Thank you so much, It worked like charm 🙂
I have entered this command:
update user set password=PASSWORD(“[NEW PASSWORD]”) where User=’root’;
But I got the error:
ERROR 1054 (42S22): Unknown column ‘password’ in ‘field list’
Change password with authentication_string
these tips are very helpful. thanks for sharing these tips with us.
HEi. it worked. but it works now only if I use sudo before mysql command. How could I fix that?
Hy..its working very helpful tips
Thanx For Sharing With Us
Failed to stop mysql.service: Unit mysql.service not loaded.
It works on MySQL server running on AWS EC2.
Thanks!
Thanks a lot. This has helped me