Product Homepage: click here
Free Trial: click here
Introduction
Although email has been around for many, many years, some organizations still require faxes to perform their business. However, using fax does not necessarily mean that organizations need to use and support those somewhat cumbersome and antiquated faxing machines. Most have moved away from traditional analog and digital signaling and toward Fax over Internet Protocol (FoIP) without having to rely on physical modems or fax cards. Moving to FoIP can allow companies to leverage their existing phone infrastructure if they have a Voice over Internet Protocol (VoIP) phone network that supports FoIP, but this is not even required.
A solution that helps organizations use fax without all the traditional equipment is GFI FaxMaker. It allows users to send and receive faxes electronically through a web interface or email, even with attachments. GFI FaxMaker is easy and flexible from deployment and administration perspectives, but it still ensures security and compliance with regulations. For example, it addresses the common security issues with misdialed numbers and faxes left out in the open unretrieved.
In this product review, I take an in-depth look at GFI FaxMaker 20.2 (build 20190926). Being such a powerful and complete product means that I can only cover its main features briefly in this review.
GFI Software also provides a cloud version of this software, named GFI FaxMaker Online, which will not be reviewed at this time.
Requirements
As most solutions nowadays, GFI FaxMaker can be virtualized. Still, you need to ensure that the system meets or exceeds certain requirements. In terms of operating system, it supports a wide range of 64-bit Windows OS, from Windows 7 to Windows 10 Pro or Enterprise (please note that faxes and SMS cannot be sent via an SMTP mail server when GFI FaxMaker is installed on Windows 7, 8, or 10), from Windows Server 2008 R2 Standard or Enterprise to Windows Server 2019 Datacenter, Standard, or Essentials.
As for hardware, install GFI FaxMaker on a server with at least an Intel Pentium or compatible 2GHz processor, 1GB RAM dedicated to FaxMaker, and 500MB of storage for FaxMaker installation alone, plus some additional storage if archiving and backup are used (quantity will depend on the amount and size of faxes processed).
Other required components that must be preinstalled include Microsoft .NET Framework 4 or newer, and the IIS SMTP service when installing GFI FaxMaker on a server that is not a Microsoft Exchange server.
IIS WWW service is also required to access the GFI FaxMaker web interface, but it is automatically installed by GFI FaxMaker during installation if it is not already installed.
In terms of mail servers, GFI FaxMaker can be installed in an environment with Microsoft Exchange Server 2010 or newer, hosted mail services like Exchange Online (Office 365) or Gmail, Lotus Notes/Domino, and other SMTP/POP3 services.
The most important requirement is, obviously, fax transmission. GFI FaxMaker requires at least one medium that enables sending and receiving of faxes. This can be:
- A fax device, such as a professional fax modem class 2, 2.0 or 2.1 using either the Microsoft or the GFI fax modem drivers like Brooktrout TR 1034 or Trufax fax board, a Dialogic Diva Pro/Server fax card or an AVM active fax card;
- Fax over IP. You can use a supported FoIP implementation to transmit faxes over the IP network, such as to a VoIP PBX, Media Gateway, or a SIP trunk provider. Supported FoIP implementations include TE-SYSTEMS XCAPI and Dialogic Brooktrout SR140;
- An account with a supported online fax provider.
For this review, I will be using the last option with GFI Online Fax Services.
Installation
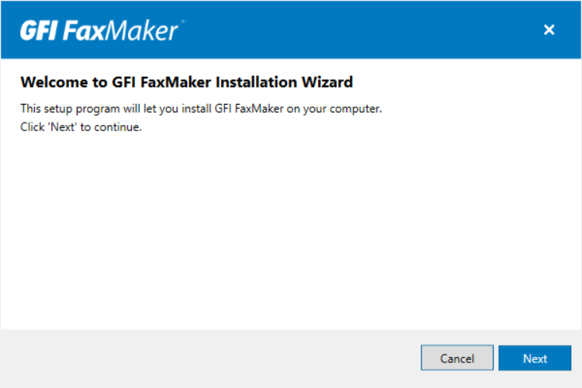
Installing GFI FaxMaker is easy and straightforward. All you have to do is download the GFI FaxMaker installer, and launch the installation wizard (for brevity reasons, I will only mention the most important steps):
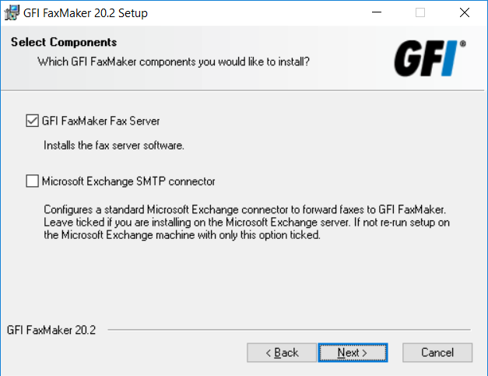
- If you are installing GFI FaxMaker on an Exchange server, install both components. Since I am installing it on a separate server, I select only GFI FaxMaker Fax Server:
- Choose the IIS website where to host the GFI FaxMaker virtual directory and enter a name for the virtual directory, which by default is Faxmaker. Click Next:
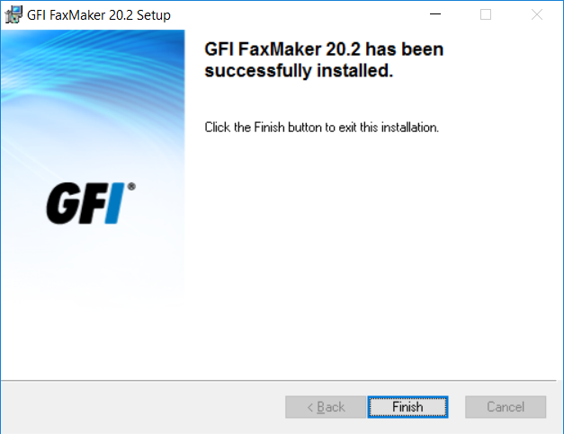
- Click Finish once the installation completes:
Configuration
After the installation completes, the GFI FaxMaker Configuration Wizard is automatically launched to help you configure basic settings (again, for brevity reasons, I will only mention the most important steps):

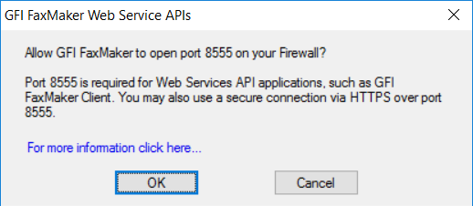
- The GFI FaxMaker Client and other Web Services API applications connect to GFI FaxMaker over HTTP port 8555. If this port is not open, click OK to have GFI FaxMaker automatically open these ports:
- When GFI FaxMaker is not installed on the same machine running Exchange, configure the mail server options. In my case, GFI FaxMaker will integrate with Exchange and GFI Online Fax Services, so I selected the first option:
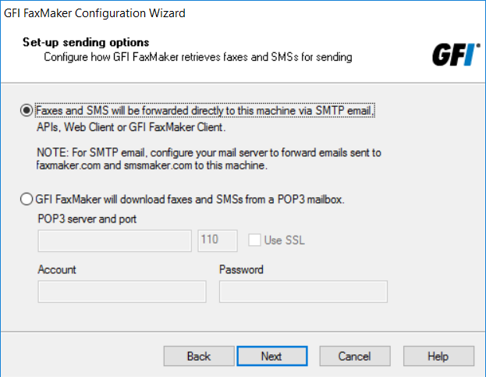
- Specify mail server details where GFI FaxMaker forwards received emails to:

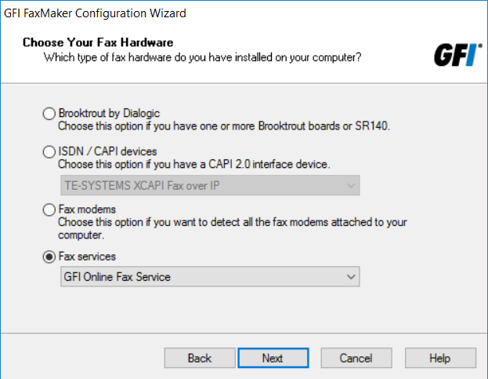
- Next, we select the fax devices to use with GFI FaxMaker:
- Brooktrout by Dialogic: Select when using one or more Brooktrout devices or SR140 fax software.
- ISDN /CAPI devices: TE-SYSTEMS XCAPI Fax over IP instructs GFI FaxMaker to use the TE-SYSTEMS XCAPI Fax over IP solution. Other devices instructs GFI FaxMaker to use a device that is not TE-SYSTEMS XCAPI Fax over IP.
- Fax modems: Select to automatically detect fax modem drivers. GFI FaxMaker attempts to detect Microsoft Fax drivers and other modems already installed on the server.
- Fax services: Select to use an online fax service.
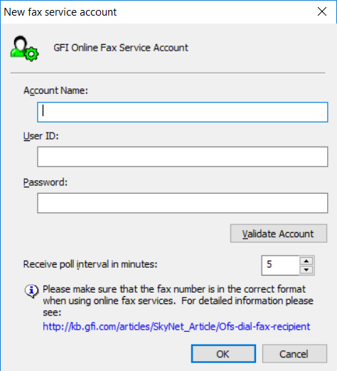
- Since I am integrating with GFI Online Fax Services, I enter my account details so the wizard configures the integration for me:
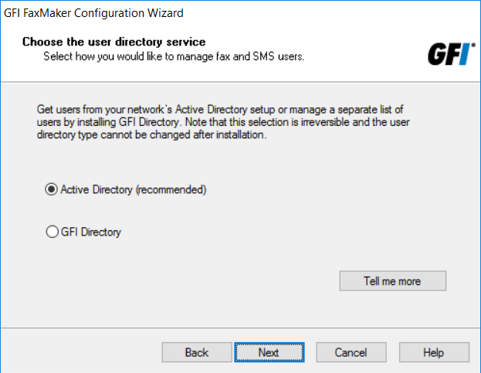
- Next, choose Active Directory to add users from AD, or GFI Directory to install and manage users in GFI Directory:
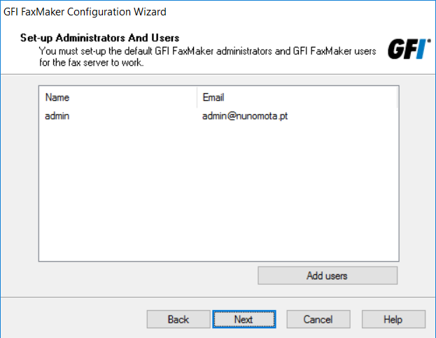
- Specify the GFI FaxMaker users and administrators. Since I selected AD, FaxMaker connects to AD to enable me to choose users. After adding administrators, you may click Add users to add fax users, or click Next to proceed:
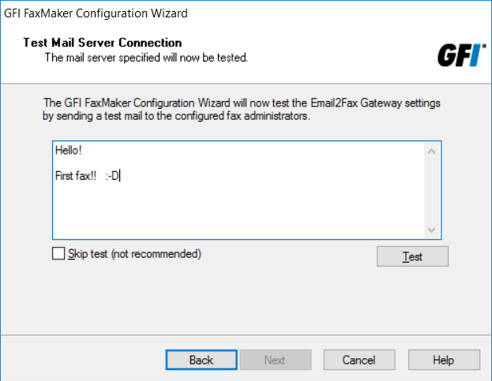
- The Wizard can test the mail server settings at this stage. Click Test to send a test email to the configured fax administrators, or Next to continue:
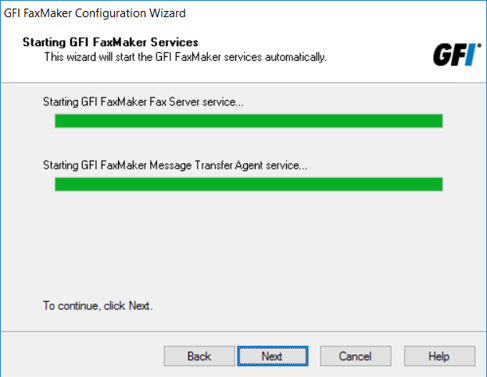
- GFI FaxMaker then starts all the required services:
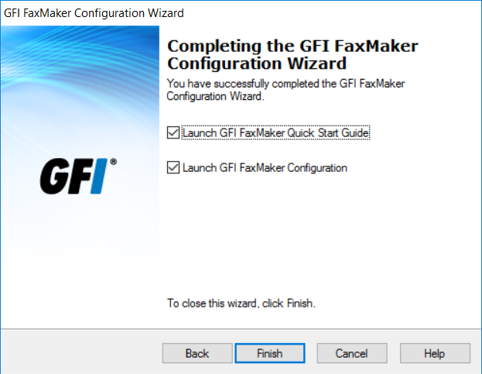
- Finally, click Finish to complete the configuration of GFI FaxMaker:
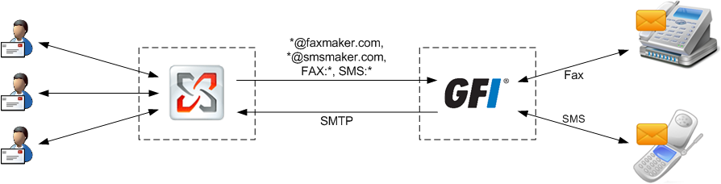
When users send fax or SMS by sending an email to [email protected], the mail server must route this email to GFI FaxMaker. To enable this functionality, we must configure routing connectors on Exchange (or whatever mail server we are using) that route all emails addressed to *@faxmaker.com and *@smsmaker.com to GFI FaxMaker. As I didn’t install GFI FaxMaker directly on the Exchange server, I must perform this additional step to configure mail connectors to route fax and SMS to GFI FaxMaker:
When installing GFI FaxMaker directly on an Exchange server, Exchange is automatically configured to allow processing of faxes and SMS. The setup creates a Foreign Connector and a Receive Connector named GFIFaxMaker, and no further configuration is required post-installation.
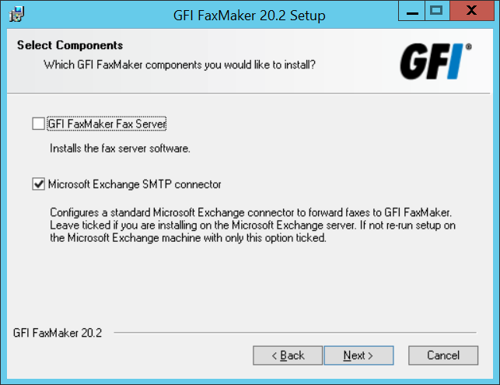
To configure connectors manually when installing GFI FaxMaker on a separate server, we can either configure them using the PowerShell commands provided in the GFI FaxMaker online manual or we can run the GFI FaxMaker setup on the Exchange server. When choosing the components to install, disable GFI FaxMaker Fax Server and select Microsoft Exchange SMTP connector:
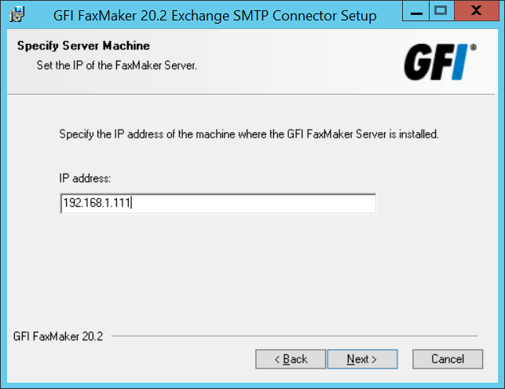
In the next screen, specify the IP address or server name of the GFI FaxMaker server:
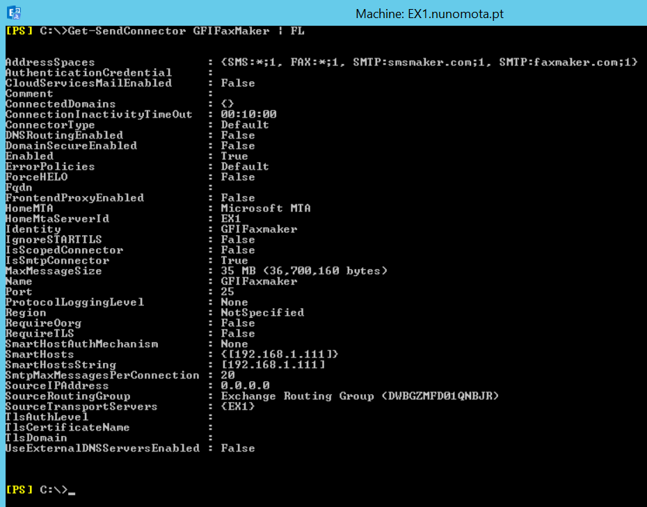
Click Next to proceed with the installation. The setup creates a Receive Connector and a Send Connector (shown in the next screenshot) named GFIFaxMaker:
Integrating GFI FaxMaker with Office 365 is very similar.
As mentioned earlier, I could have used the Configuration Wizard to configure my fax line, but I decided not to. So, let’s see how we can do that without using the wizard. The first step is to open GFI FaxMaker Configuration console:
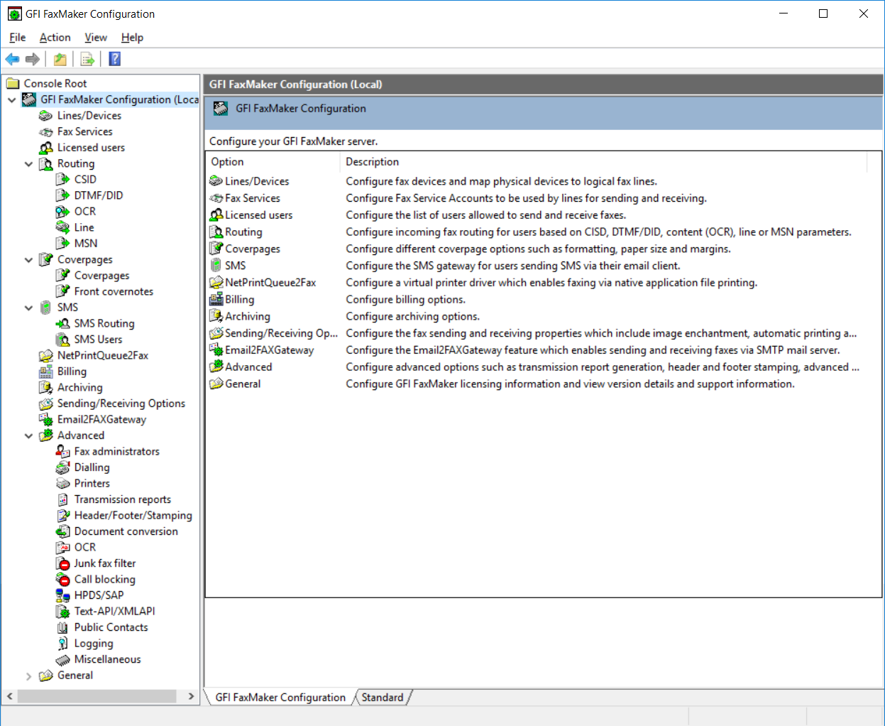
The first impression is that it looks a bit outdated, with a kind of Windows Server 2003 feel. However, this is because it uses Microsoft Management Console (MMC), which hasn’t changed much throughout the years. Nonetheless, everything we need is in this well-organized console. As we can see from all the configurable settings, GFI FaxMaker is a very capable and powerful solution that should meet the requirements of most, if not all, organizations in terms of faxing.
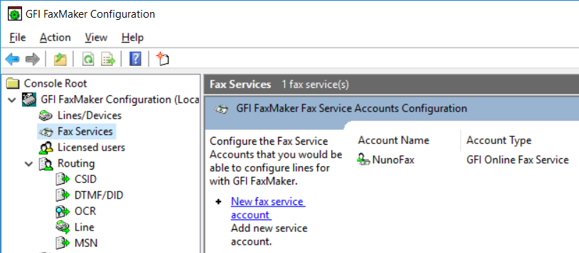
I already configured GFI Online Fax Service using the wizard, so there’s nothing else for me to do under Fax Services:
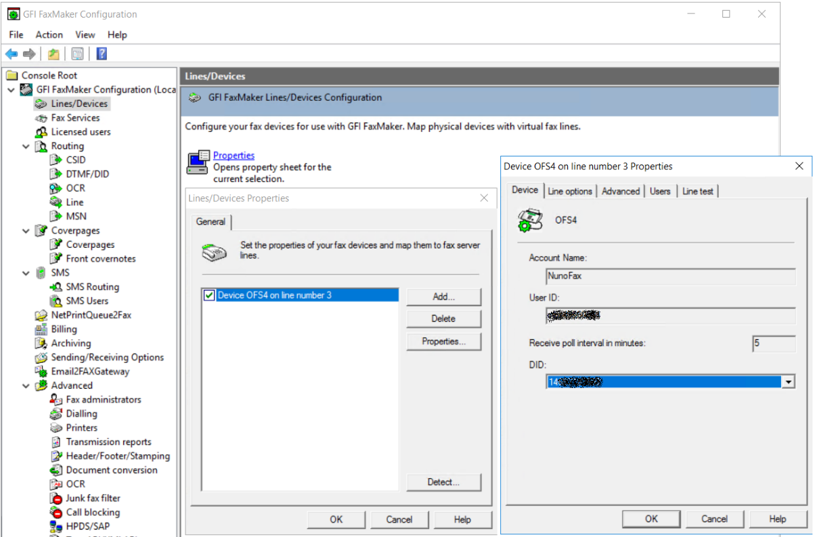
However, I still need to add my fax line provided by GFI Online Fax Service. We do so under Lines/Devices. If you are familiar with faxing solutions, this should be very straightforward.
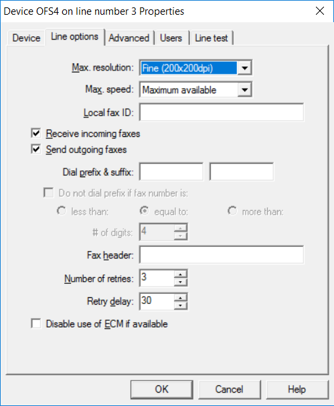
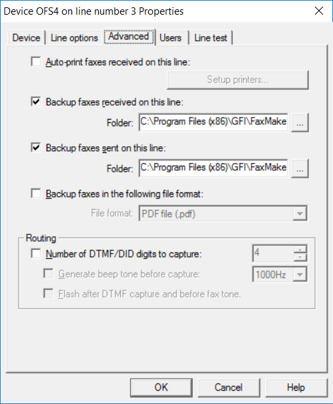
In this section we can configure a multitude of options such as the fax resolution, if we want to accept incoming and/or outgoing faxes, and retry operations:
We can also configure a location to backup received and/or sent faxes (and in which format, like PDF):
Under Users, we specify which users are allowed to use this particular line to send faxes:
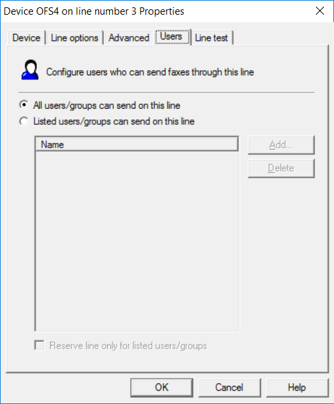
In Licensed users we stipulate which users or groups can send faxes using GFI FaxMaker. Users that can also send and receive SMS can be added through the SMS Users screen.

The last step, for a basic setup that is, is to configure what happens to incoming faxes. For example, when a fax is received on a particular DID (number), who should it be sent to? This is done under Routing options and, here, I am specifying that any incoming taxes to the line I configured previously, should be delivered to the users Admin and Nuno:

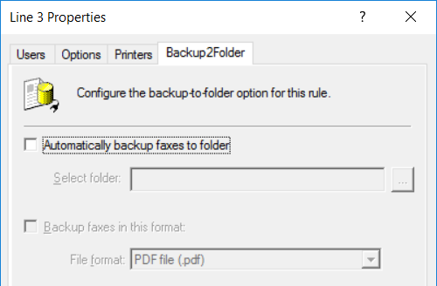
We can also have incoming faxes printed automatically or configure another folder to back up our incoming faxes:
Sending and receiving faxes
There are various ways for users to send faxes using GFI FaxMaker:
- Via email.
- Through the GFI FaxMaker web-based client.
- Through the GFI FaxMaker client (which is being phased out in favor of the web client).
- Using the NetPrintQueue2Fax printer driver.
- Using APIs through third-party tools.
- Via multi-function devices.
Sending faxes by email couldn’t be easier as licensed users can send faxes directly from their email client. This method is available for all email users (present in the Licensed Users list discussed above), with no installation of other software or custom configurations required. The first page of the fax contains the recipient’s name, sender’s name, email subject, and email body. If the email includes attachments, these are included in subsequent pages of the fax. Typically, users will send the email to address the email to faxnumber@faxmaker.com, where faxnumber is replaced by the recipient’s fax number. For example: [email protected]. The same fax can also be sent to multiple fax numbers, using the same format for each and separated with a semicolon.
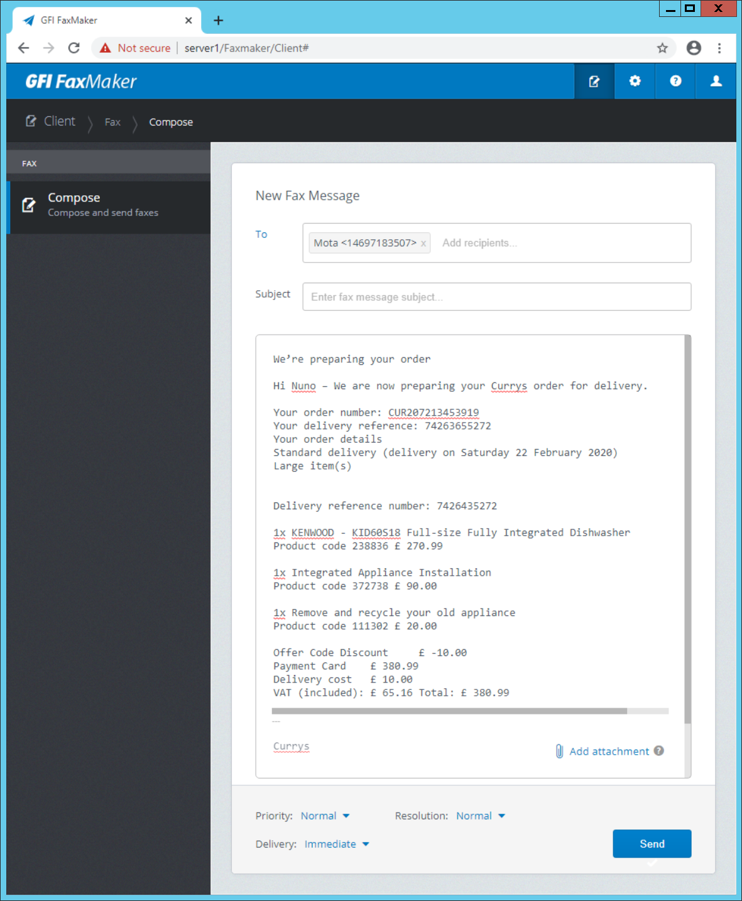
Sending a fax using the browser couldn’t be easier either. GFI FaxMaker users can log in to the web interface to access the web client to send faxes and SMS. This method is available for all GFI FaxMaker users, with no additional software on users’ machines. AD users and administrators can log in to the web console using their AD credentials. To load the GFI FaxMaker web console, simply navigate to HTTP://<GFI FaxMaker server name or IP>/FaxMaker.
All that users have to do is fill in the recipient (either by manually typing the fax number or by picking the recipient from the address book), enter a subject and the main body of the fax, add any attachments and configure settings such as priority, resolution and whether to deliver the fax immediately or to send it at a particular date and time.
Once sent, users receive a confirmation by email that the fax was successfully sent:
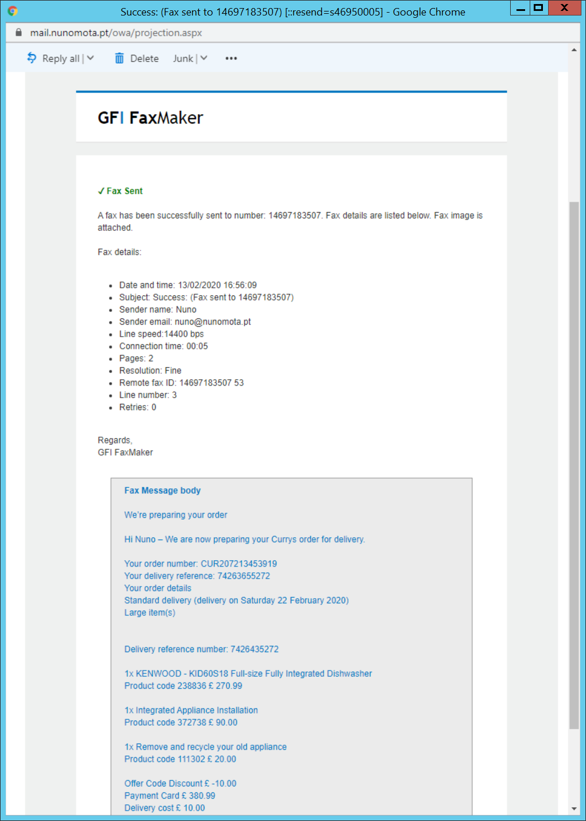
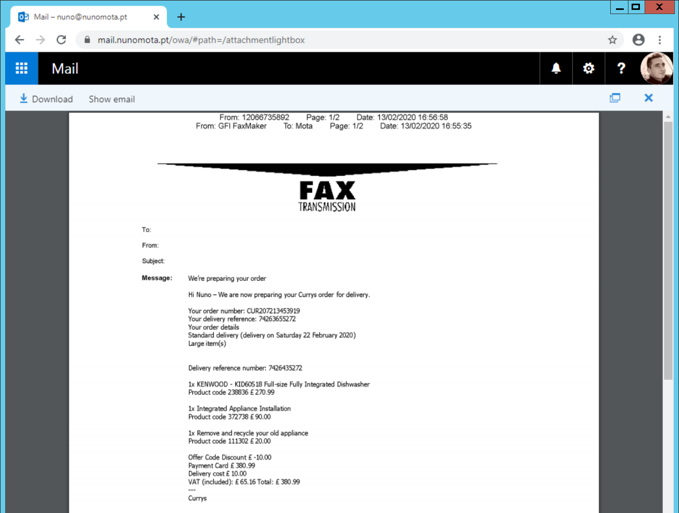
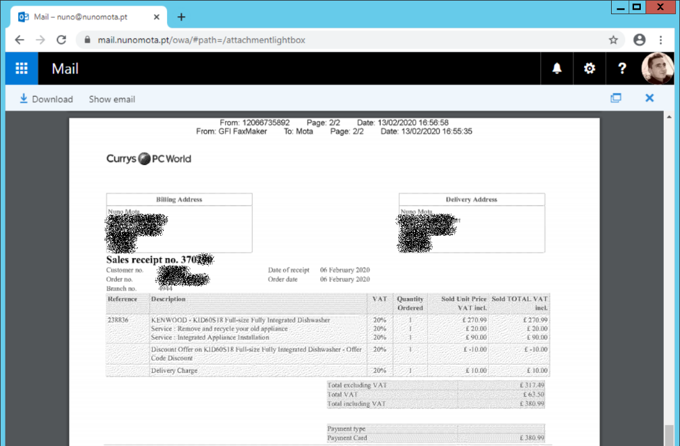
The email includes a fax report as well as the fax itself (plus any attachments also sent):
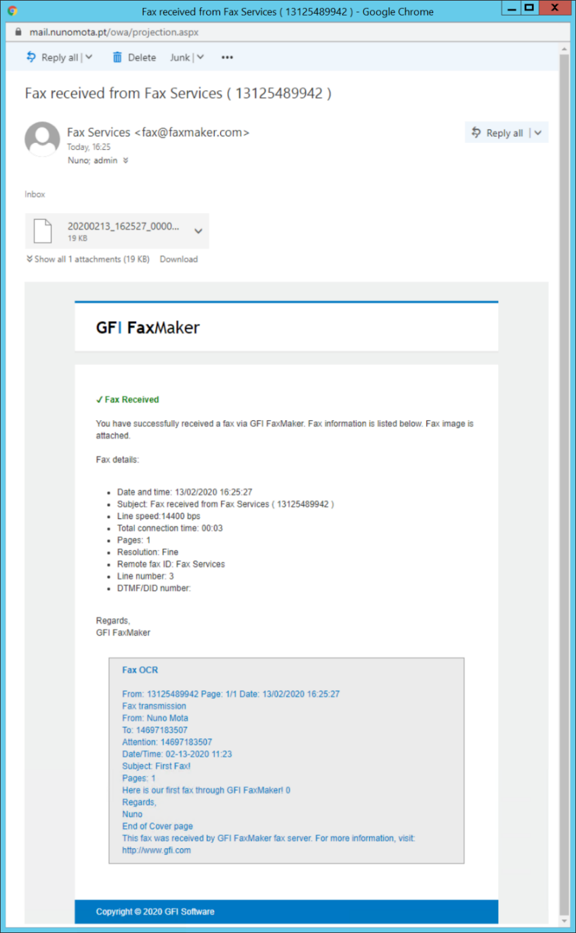
On the receiving end, users will receive faxes in a format dependent on the configuration admins chose. For example, users might receive an email with an OCR (optical character recognition) of the fax in the email body:
Or admins can change the settings so that incoming faxes are received in a different format, such as PDF, for example:
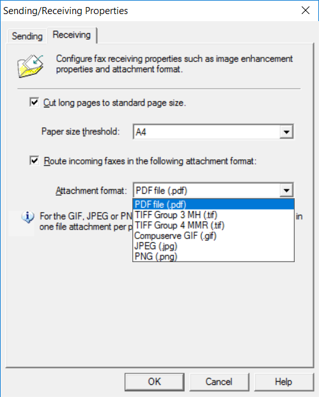
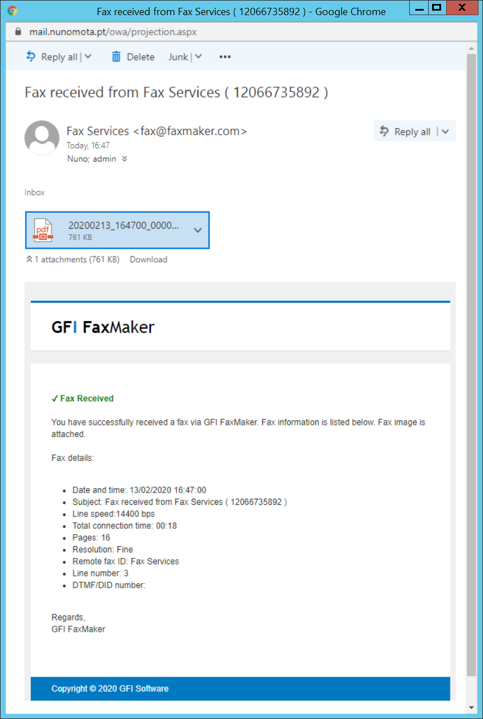
In this case, users receive an email notification, with the fax itself attached in PDF format:
Admin web interface
We already had a brief look at FaxMaker’s web interface from a user perspective, which provides an easy method of sending faxes and SMS. Administrators can use GFI FaxMaker Monitor to track and manage fax and SMS usage, transmission, and queue operations. To access the Monitor, login to FaxMaker web console and click the required dashboard from the Monitor tab in the top menu bar. Only fax administrators have access to Monitor.
Monitoring fax lines
GFI FaxMaker Monitor can be used to track the activity of fax lines and devices in real-time. The Fax Lines dashboard displays all the configured fax devices and their current transmission state, plus information regarding the number of faxes still pending to be processed and added in the queue for transmission, the current activity of email to fax converter, and the latest attachment processed by the fax service:
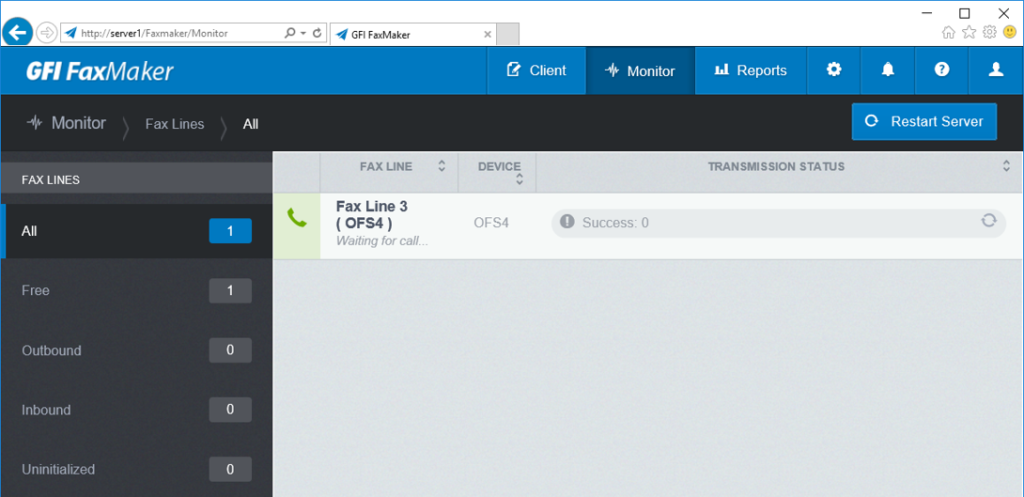
From this console, administrators can also take various actions to manage fax lines, such as setting the time interval to refresh the data, restarting the GFI FaxMaker Fax Server service, initialize a fax line, or terminate a fax transmission.
Monitoring faxes in queue
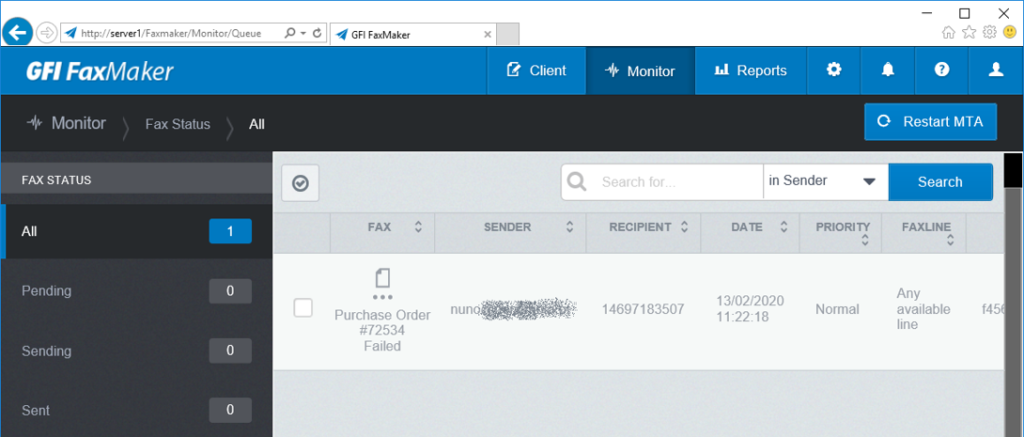
The Queued Faxes dashboard allows administrators to track faxes that are queued ready to be transmitted. It can be used to search faxes in the queue, view fax information, remove a fax from the queue, or restart the GFI FaxMaker Message Transfer Agent (MRA) service.
Monitoring SMS devices and queue
The last dashboard is SMS, which is used to track the activity of SMS devices and SMS transmission.
Reports
GFI FaxMaker enables administrators to access and generate reports that provide useful insight on fax and SMS usage. To access these reports, log in to the GFI FaxMaker web console and click the Reports tab from the top menu bar:
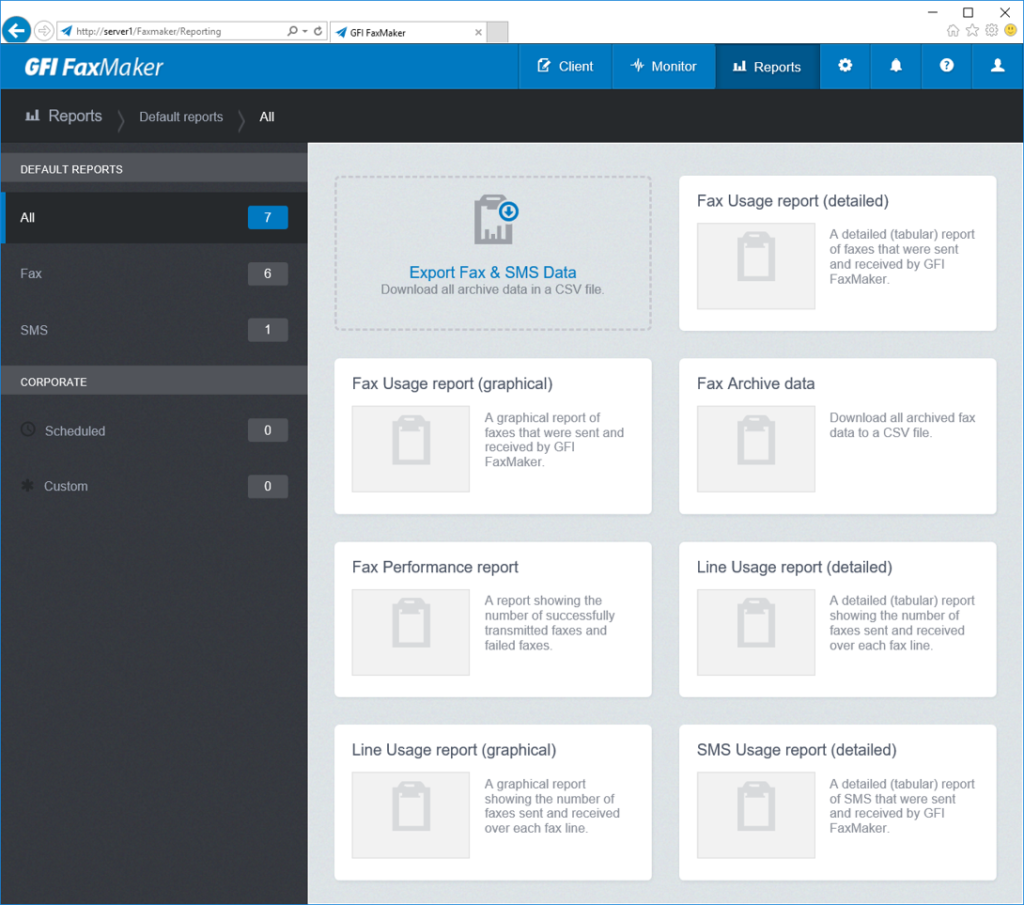
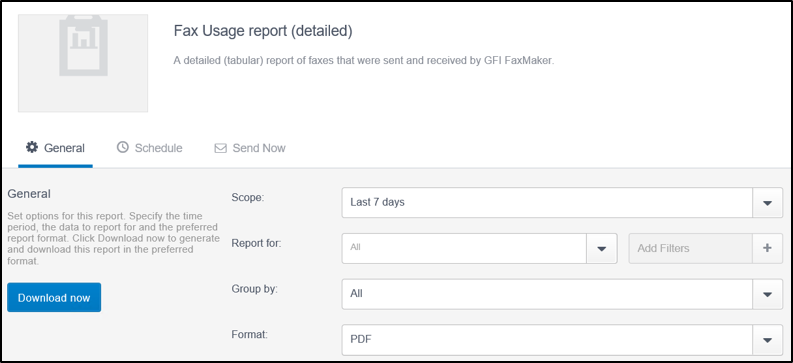
Beyond the seven out-of-the-box reports, admins can customize these reports into preconfigured reports with custom data filters:
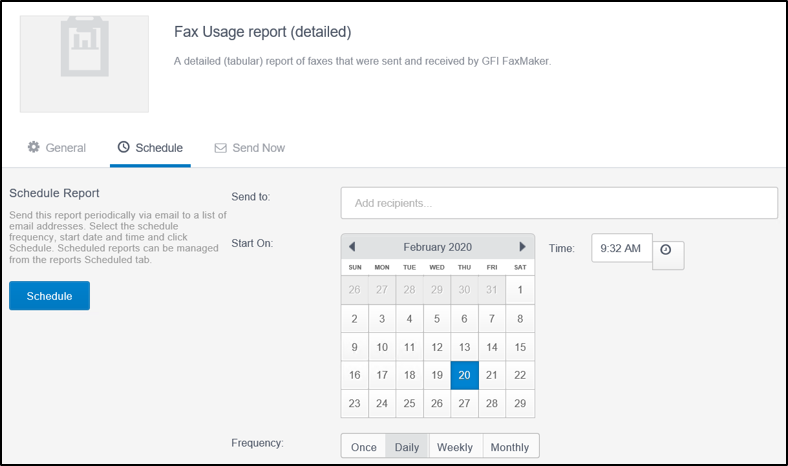
It is also possible to generate reports on a predefined schedule to automate their generation on a regular basis. Scheduled reports are sent via email to a custom list of email addresses at a defined frequency:
Fax and SMS activity can also be exported to a CSV file. This is useful to track fax and SMS usage in a separate tool like Excel or Power BI.
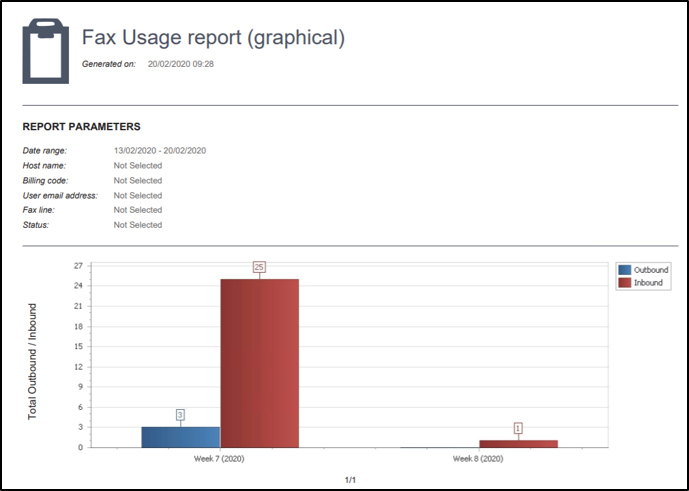
Reports typically come in a graphical summary format:
Or in a detailed table format:

The verdict
GFI FaxMaker is a very capable and powerful solution that should meet the requirements of virtually all organizations in terms of faxing. There is no reason to still rely on fax machines with physical modems or fax cards. FaxMaker makes it so easy to move toward Fax over IP without losing the features that traditional fax deployments provide. Quite the contrary, you will most likely be able to make use of new features! We give it 4.5 stars, which is a Gold Star award.

Rating 4.5/5