Product Homepage: click here
Free Trial: click here

There’s a vigorous debate over whether you need to back up Office 365, with some organizations deeming it essential while others feeling confident in Microsoft’s capabilities to keep their data safe. The fact is, though, it’s not possible to back up all of Office 365 and certainly not restore it all either. Therefore, if you use Office 365 then you have to put your trust in Microsoft.
Most organizations that don’t use backup products have E3 or higher licensing, which allows long-term retention settings to be configured to store data for as long as required. However, smaller businesses that use Office 365 Business Premium don’t have this type of functionality built into the service and look to third-party products to meet their needs.
Another reason why organizations back up is to meet internal Service Level Agreements or contractual requirements. While they might trust that data is safe in Office 365, and it could be recovered in the event of deletion — or Microsoft will recover from a short outage — they don’t think they will be able to recover data quickly enough.
Files restore for SharePoint and Microsoft Teams, and related OneDrive for Business functionality has solved one of the biggest worries of many organizations — that ransomware will encrypt and overwrite files stored in Office 365. Thankfully this has never yet happened with Exchange Online, but in theory it could and for some time this too has been a concern of many security teams whose job it is to think about what if? While it will be possible to restore mailboxes in the event of such an attack — given the right configuration is in place — the time to perform a restore is unlikely to meet the demands of the business.
So, for some businesses that consider it important to be able to restore mailboxes in Exchange Online using a third-party solution, tools like NETsec Mailbox Archiver have a place.
In this review, we’ll take a look at NETsec Mailbox Archiver to see how it performs.
Getting started with NETsec Mailbox Archiver
We’ll run through the installation and configuration of NETsec Mailbox Archiver. The product is delivered as a standard server-based installation rather than a SaaS (software-as-a-service) style offering. This means you’ll need to build a server to install the product on. This can run on Windows 7 or Windows 2008 R2 or higher.
For our review, we opted to install the product on a Windows Server within Microsoft Azure. It’s also relatively common for organizations that do perform backups of Office 365 to utilize Azure as the storage costs are relatively inexpensive and the backup and restore speeds have the potential to be higher than on-premises.
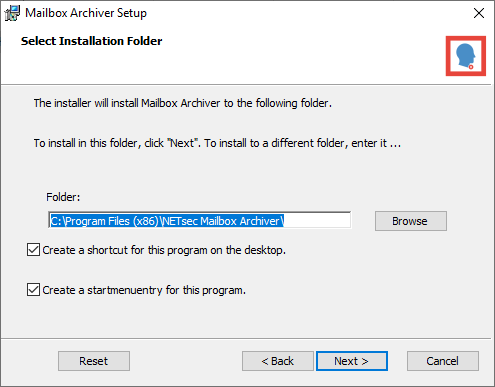
After installation of prerequisites, including .NET Framework 4.7.1 and the Microsoft CDO 1.2.1, we install Mailbox Archiver like standard server application install:
Once the installation wizard completes, it’s over to the Exchange Admin Center in Office 365 to configure permissions for our backup account.
This account will be used by NETsec Mailbox Archiver both for backups and to use when connecting to the service using PowerShell to perform actions such as selecting mailboxes to backup.
Although not stated in the documentation, it appears the backup account is not using Modern Authentication to connect in Mailbox Archiver, therefore if you enforce MFA and Modern Authentication in your Office 365 tenant, you may need to create an exception rule for this account. In our demo tenant, we’ve allowed a bypass from the IP address the server is connecting from.
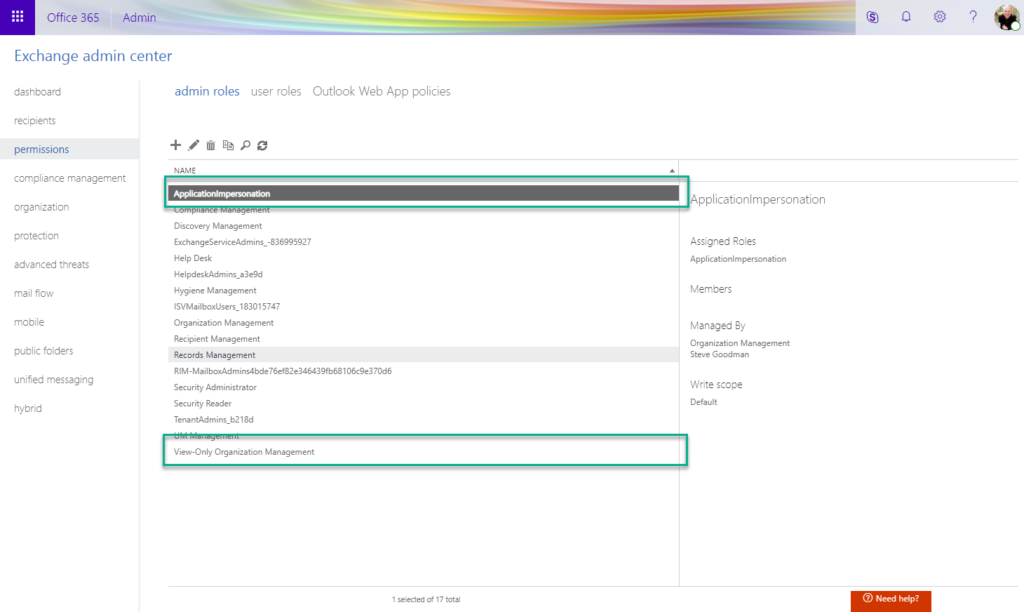
As a minimum, we’ll need to grant the ApplicationImpersonation and View-Only Organization Management rights to our backup account. These are granted within the Permissions tab under Admin Roles, as shown below:
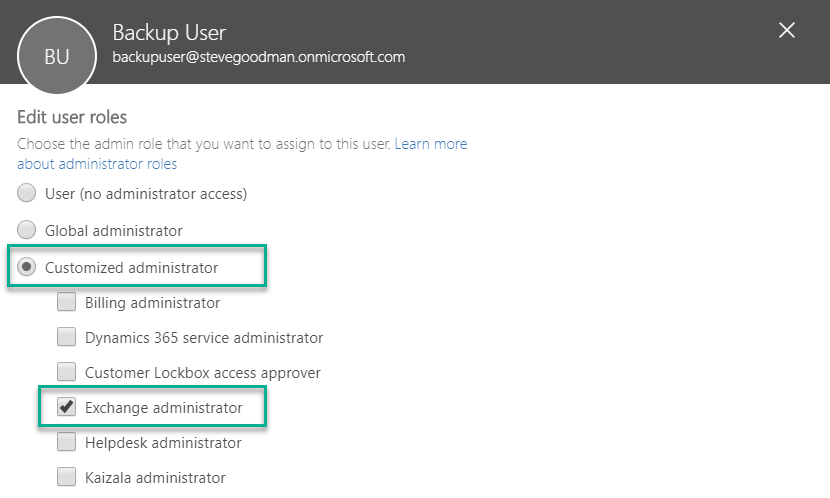
NETsec does recommend where possible to grant Exchange Online administrator rights to this account. This can be performed in the Office 365 admin portal, under Users by assigning a User Role to the backup account. In the example below, we’ve chosen a Customized Administrator role and granted Exchange administrator:
Once we’ve installed the software and granted the required rights to our backup account, we’re ready to start NETsec Mailbox Archiver and begin the configuration.
The core configuration for performing a backup using NETsec archiver consists of a template — which includes the basic configuration for how backups will be performed against an Office 365 tenant, and datasets — which contain details about what will be backed up.
In addition to our template and dataset sections, we also have the ability to view backup logs (stored as XML files) and schedule backups to run automatically.
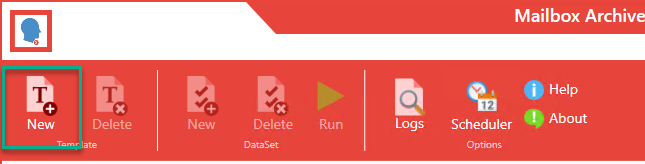
We’ll begin by creating a new template:
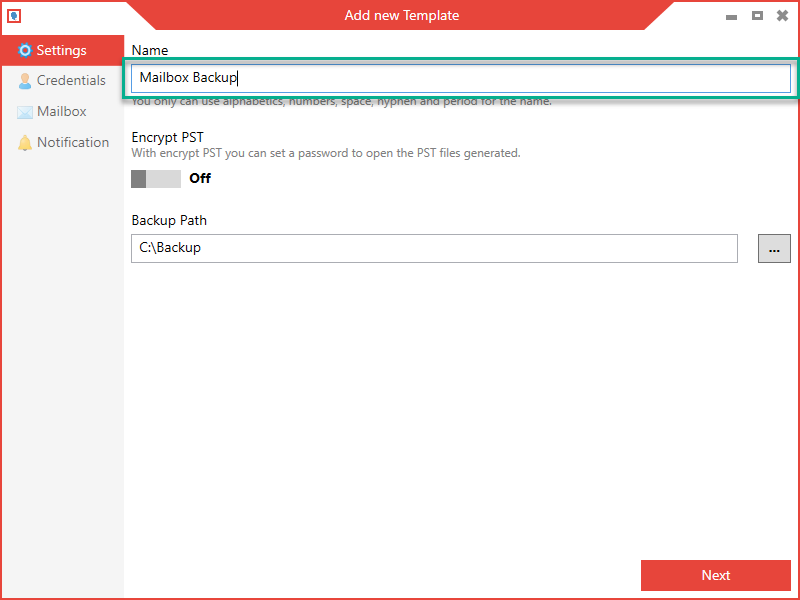
Creating new templates and datasets is wizard-driven in the interface. Our first step is to define the name for the template with basic options, including the path for storing backups, whether PSTs will be password protected and the name for the template itself:
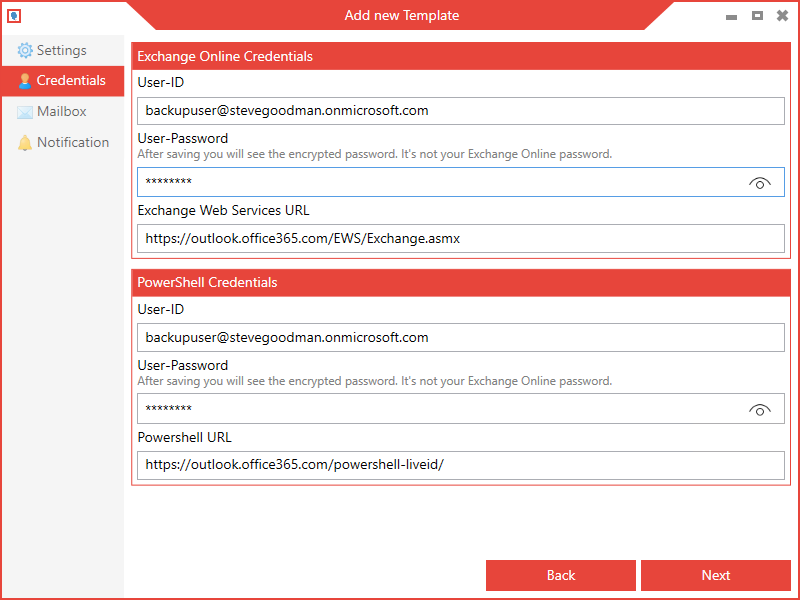
Next, we’ll add the credentials used to perform backups:
On the Mailbox page of the wizard, we can configure options to export the personal archive, the mailbox, resolve groups, and export all folders or selectively choose which folders (from the well-known folder list) to export:

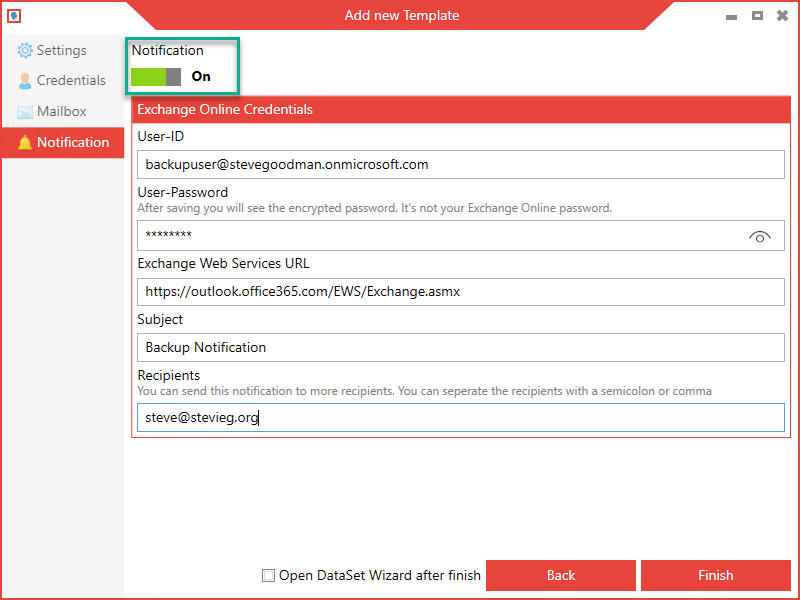
Finally, we’ll configure notification settings for the template. These are for emails that are sent after the backup job to inform the administrator (or administrators) of the job status. In the example below, we’ve used our Office 365 mailbox-enabled and licensed backup user account to send the notifications:
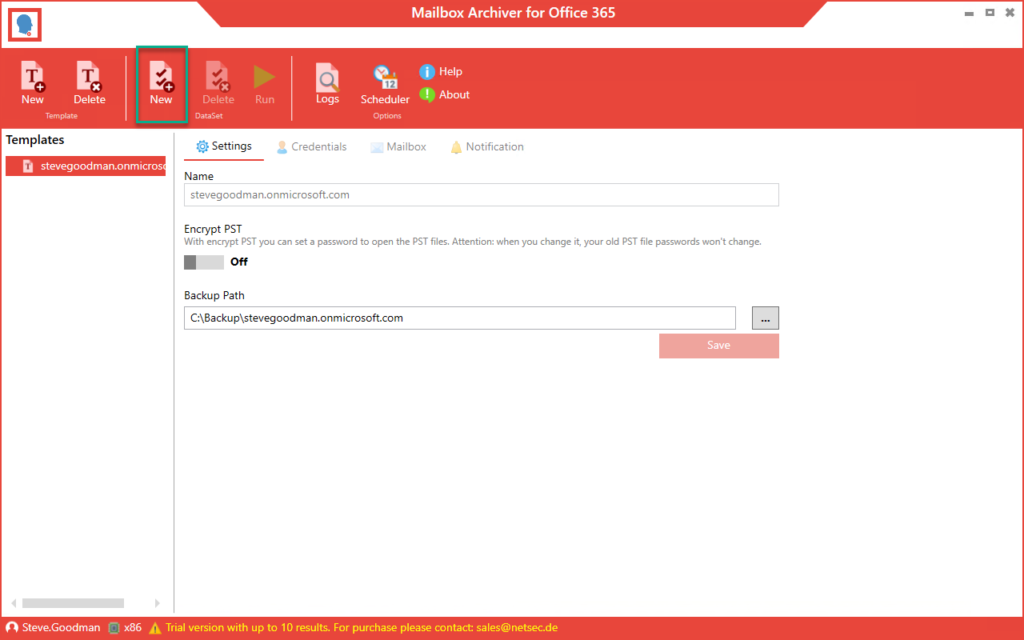
Upon successfully creating a template, we’ll see the template listed in the user interface. We can examine and change the settings for the template here, and create a new dataset:
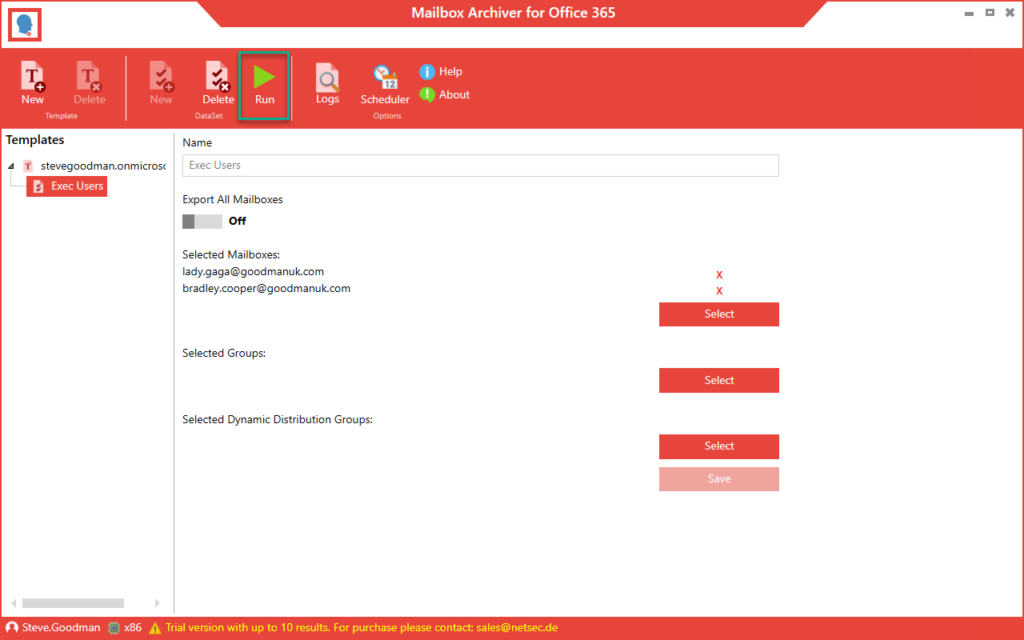
In the new dataset wizard, we need to configure fewer options. We can choose to backup all mailboxes, select individual mailboxes, or select a group or dynamic distribution group to use to find mailboxes to backup. In the example below, we’ve chosen to protect several defined key mailboxes:

After creating a dataset we can begin the backup by choosing Run:
In addition to manually starting a backup job in the UI, we can schedule backup jobs and also use the command line to specify datasets to run. This provides an additional element of automation and flexibility.
After successfully exporting mailboxes, the PST export files are organized into data and named folders, as shown below:

Example scenarios
We’ve explored how we can use NETsec Mailbox Archiver to export or backup mailboxes, and the key reason why some organizations choose to perform backups. A few additional key scenarios for Mailbox Archiver include:
- Full mailbox restore to a particular date.
- Offline access to a mailbox state on a particular date or time by auditors or compliance teams.
- PST files for emergency access to Exchange Online in the event of it being temporarily inaccessible.
- Exports of former or inactive employees’ mailboxes for organizations not wishing to use Inactive Mailboxes (or not licensed with Exchange Online Plan 2 or E3 licenses for those workers).
- Exports of mailboxes in the event of a divestiture, especially if a tenant-to-tenant migration isn’t desired.
While it’s true to say that you could use NETsec Mailbox Archiver as a migration tool, it’s not a scenario we’d recommend it for. There are migration tools on the market that are dedicated to that purpose and they work well. And in the same way, although migration tools can be used for backups, they aren’t designed for performing simple exports, either.
Overall functionality
NETsec Mailbox Archiver is at its core an export or backup tool. It is dedicated to the export of mailboxes from Exchange Online and doesn’t claim to be an end-to-end solution for managing long-term backup and restore for an on-premises Exchange Server or Exchange Online. Nor does it claim to be a fully-featured Office 365 backup tool.
Considering it in that context, it is capable of doing what it says it will. If you want a simple to set up and manage Exchange Online export solution that will keep a library of PST files for your most critical mailboxes, then it works well and it is not overcomplicated.
What it doesn’t do is manage the library of exports or the restore process. For example, if you need to find a message sent to your CEO from a particular sender sometime in the last six months that’s gone missing and restore it quickly, then you will need to be good at searching through lots of PST files in Microsoft Outlook and hope you can find when it arrived in the message trace portal in the Office 365 admin portal. In such cases, you would be better having had configured retention policies or litigation hold on Office 365 and using eDiscovery capabilities to search and export.
But in the case that you need to restore a full version of a person’s mailbox as it was six months ago, NETsec Mailbox Archiver has good functionality and assuming you’ve been performing regular exports, you will have this data on hand quickly.
The verdict
Simple-to-use tools like NETsec Mailbox Archivers are great for smaller organizations that need to solve business problems quickly. Cloud-based products that claim to provide similar functionality, like email journaling and protection products, struggle with mass exports and, despite their claims, also struggle with restores. And products on the market aimed at enterprise backup and restore of Office 365 are often both unnecessary for enterprises — and overly complex. NETsec Mailbox Archiver fits a need in the market.
However, it would be great to see a view of exported data within the UI and search and restore capabilities within the product as well. Additionally, a wizard to set up permissions would be a welcome addition for smaller businesses.
TechGenix Rating
4.4 / 5