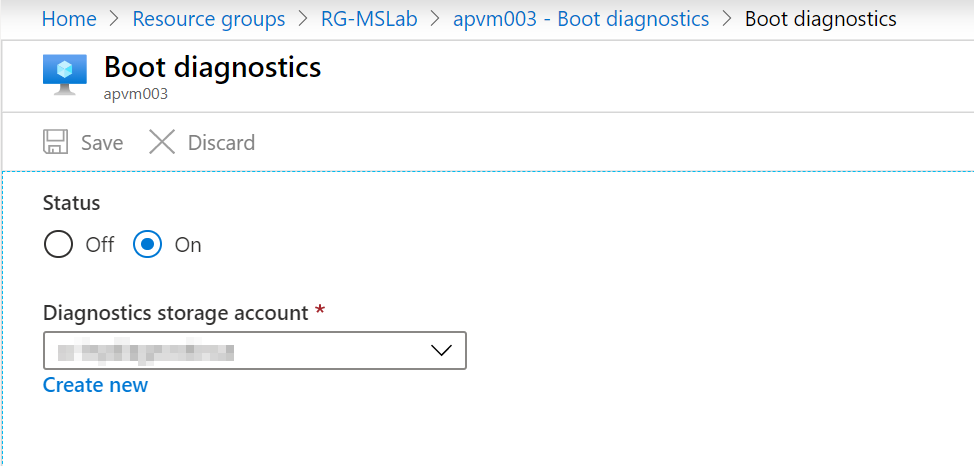
In this Quick Tip, we are going to show you how to use the Serial Console in virtual machines. The first step is to make sure that you have boot diagnostics enabled at the VM level. In the VM blade properties, click on Boot Diagnostics and then Settings. We should see On and an existing Storage Account associated with it, similar to the image depicted below.
You can always try to use the console. However, if your current image is older than February 2018, then you most likely have to perform an additional step.
There are a couple of ways to enable it, and we can run the following code logged on the VM.
bcdedit /ems '{current}' on
bcdedit /emssettings EMSPORT:1 EMSBAUDRATE:115200
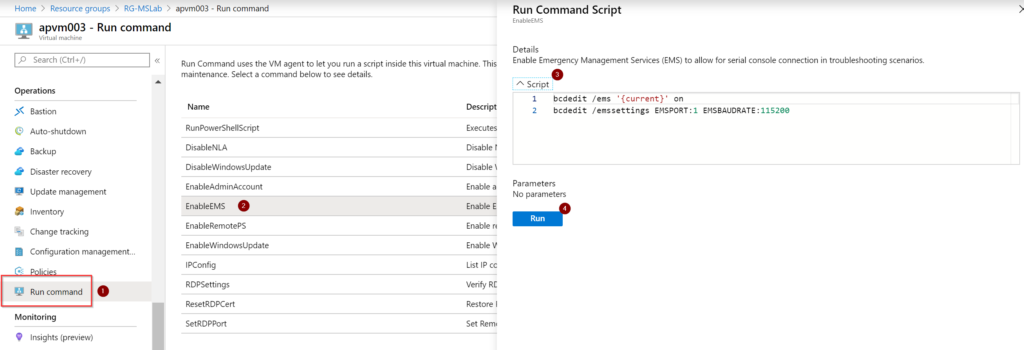
Another option is using Run Command and selecting EnableEMS from the Azure Portal.
To access the serial console, click on Serial Console within the VM’s blade properties. A prompt requesting your credentials will be presented. After entering your credentials, you will access to a command prompt.
From there, you can execute the same commands that you would run from a command prompt when logged on the server through an RDP. In the example below, we are checking the VM name and if the port 3389 (RDP) is listening.
If you want to use PowerShell, type powershell and you are ready to start typing your cmdlets.


