Even though most virtual machines receive IP addresses that are dynamically assigned IP addresses by DHCP servers, there are situations in which static IP addresses are needed. For example, DNS servers typically receive static IP addresses. Thankfully, there is a way to set up a pool of static IP addresses within System Center Virtual Machine Manager (VMM). In this article, I will show you how it’s done.
Before I begin
Before I get started, there are two really important things that you need to know. First, the complexity of your virtual network environment will determine whether you will be able to get away with assigning a static IP address pool to a logical network only or if you will have to also create a pool on your VM network. As a general rule, if you are using a VLAN or are not using isolation, you can create a static IP pool at the logical network level. If you have configured your logical network for network virtualization, you will have to create address pools on both the logical network and the VM network.
The other important thing that you need to know is that if a virtual machine will be acquiring its IP address from a static IP address pool, then that VM is also going to require a static MAC address. You can either use a static MAC address pool (which is provided by default) or manually configure a MAC address during the virtual machine creation process.
Static IP pools for logical networks
So, with that said, let’s look at how you would create a static IP address pool for a logical network. To get started, open the Virtual Machine Manager console and go to the fabric workspace. Upon doing so, navigate through the console tree to Networking \ Logical Networks. Now, right-click on your logical network and choose the “Create IP Pool” command from the shortcut menu, as shown below. This will cause VMM to launch the Create Static IP Address Pool wizard.

The wizard’s initial screen requires you to enter a name for the static IP address pool. The screen also contains a field for entering a description. Even though the description is optional, I strongly recommend that you go ahead and enter a description because there is a good chance that over time you will accumulate multiple address pools, and it is important to be able to differentiate between them. Once you enter the name and description, take a second to verify that the correct logical network is selected, and then click on the Next button.
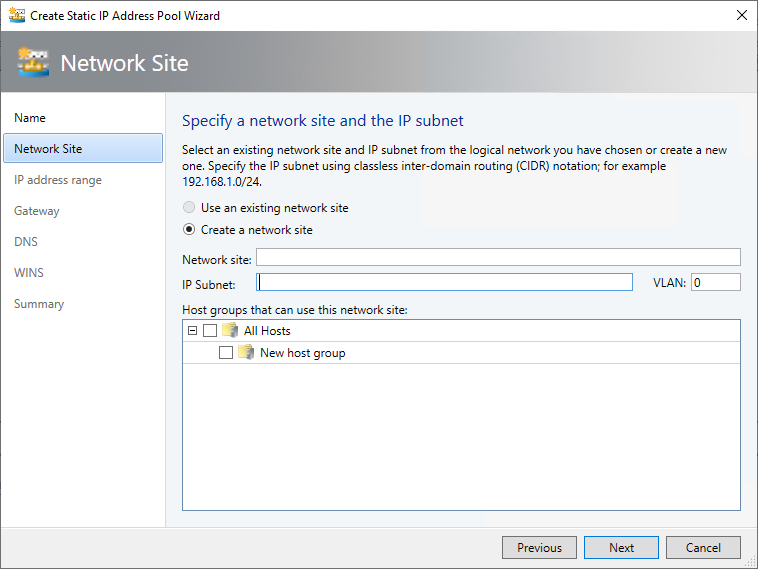
At this point, you will be taken to the screen shown in the image below. This screen asks you to either create a network site or to choose an existing network site. If you find yourself needing to create a network site, you will need to enter a name for the network site and the IP subnet you want to associate with the site. There is also a place where you can enter a VLAN number. One last thing that you’ll have to do on this screen is to choose the host groups allowed to use the network site you are creating.
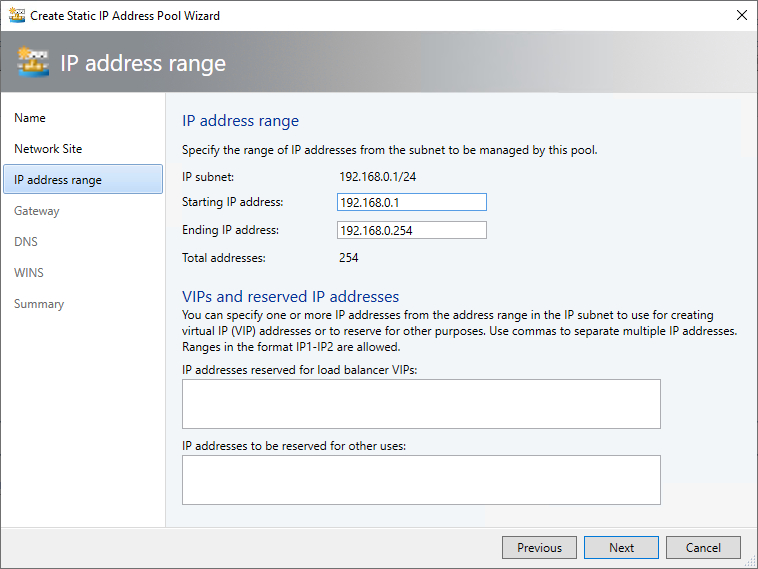
Click Next, and you will be taken to a screen that asks you to specify the starting and ending IP addresses for the IP address range you are creating. You can see what this looks like in the image below. The nice thing about the screen is that the starting and ending IP addresses are populated automatically. You can, of course, make adjustments as necessary. The screen also gives you the option of specifying IP addresses to be reserved for use with load balancers or to be reserved for other purposes.
The wizard’s next screen asks you to enter network routes or a default gateway address. The one thing that is really worth paying attention to on this screen is that the default gateway address you enter here might not be the same as the address used elsewhere on your network. This is because the default gateway address has to fall within the IP address range that you configured on the previous screen. In fact, you may need to reserve an IP address from that range and assign it to a gateway device.
Once you have entered the gateway address, click Next, and you will be taken to a screen that asks you to enter your DNS server addresses. This screen also allows you to provide a DNS suffix if necessary.
Click Next after entering your DNS information, and you will be taken to a screen where you can provide a WINS server address. WINS is a relic from the days of Windows NT. Almost nobody uses WINS anymore, so you can typically skip this screen.
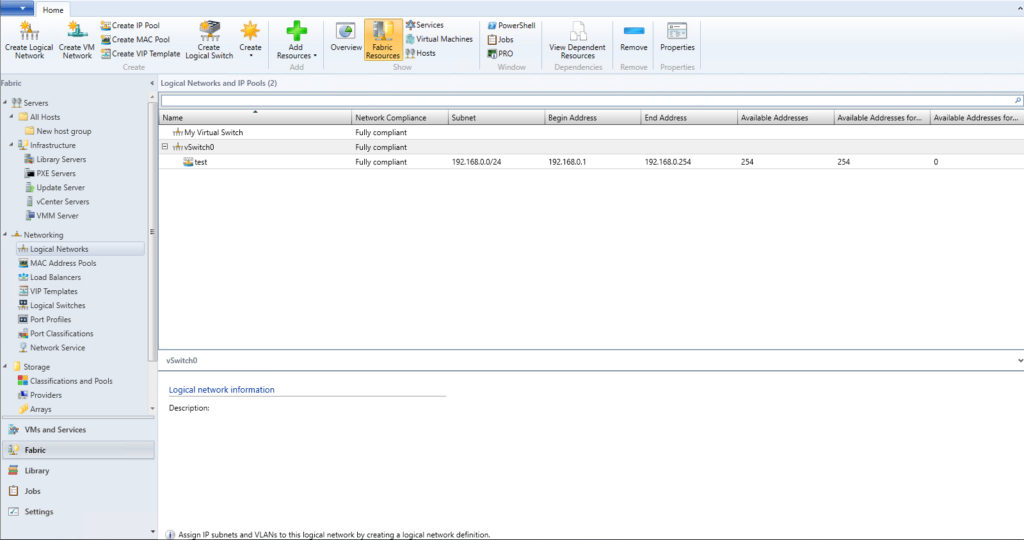
Click Next one more time, and you will be taken to a summary screen. Take a second to make sure that all of the information shown on the summary screen is correct. Assuming that everything looks good, click Finish to complete the IP address pool creation process. The newly created pool should appear just below your virtual switch, as shown in the figure below.
Creating a static IP address: Other circumstances
As you can see, the process of creating a static IP address pool for a logical network is relatively straightforward. As mentioned earlier, however, there are circumstances in which you may be forced to create a pool on your VM network as well. If you find yourself needing to do that, you can find the instructions for setting up an IP address pool on a VM network here.
Featured image: Shutterstock


