If you would like to read the other parts of this article series please go to:
- Testing SCR in a Production Environment (Part 1)
- Testing SCR in a Production Environment (Part 2)
- Testing SCR in a Production Environment (Part 4)
Introduction
This is part three of an article series on how to recover a Clustered Mailbox Server (CMS) onto a Standby Continuous Replication (SCR) standby cluster for testing purposes, without destroying the SCR source copy. In this article, the SCR source is a two-node Cluster Continuous Replication (CCR) environment.
If you have been following this article series so far you will know that we are nearly at the point where we can recover the CMS onto the SCR standby cluster. We left part two of this article series having completed one of the two important steps required before running the /RecoverCMS portion of the Exchange 2007 setup.com program. Let us get going with the second of these two steps.
Step 7 – Alter Computer Account Permissions
The second important step you need to take before recovering the CMS relates to the CMS computer account permissions. Specifically, on Windows 2008 you need to ensure that the Cluster Name Object (CNO) has full control against the CMS computer account. If you are running Windows 2003, replace the CNO with the cluster service account. Since I am using Windows 2008 in my test lab, I am going to detail the process that I used. I found that without doing this step I received the following error when trying to perform the /RecoverCMS command that I detail next:
“Cluster Common Failure Exception: Failed to bring cluster resource Network name (<NAME>) in cluster group <NAME> online. The group or resource is not in the correct state to perform the requested operation. (Exception from HRESULT:0x8007139f)”
Tim McMichael from Microsoft has documented why this is on an extremely useful blog post of his here. Here are the steps I followed to set the permissions correctly:
- In Active Directory Users and Computers, locate the CMS computer account.
- Before you do anything else, choose Advanced Features from the View menu so that you see the Security tab on the computer account properties in a moment.
- Right-click the CMS computer account and choose Properties from the context menu.
- Click the Security tab and then click the Add button.
- In the resulting window called Select Users, Computers, or Groups, click the Object Types button and ensure that the Computers option is selected. This is shown in Figure 9.
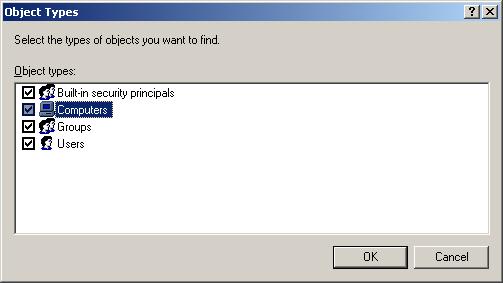
Figure 9: Selecting Computer Object Types
- Back at the Select Users, Computers, or Groups window, enter the name of the Cluster Name Object that corresponds to the standby cluster and then click the Check Names button. In my lab environment, the CNO for the standby cluster is CLUSTER-S, whilst the CNO for the CCR environment is CLUSTER-P.
- Back on the Security tab of the CMS computer account, ensure that the CNO has full control permissions. You can see this in Figure 10.

Figure 10: Setting Full Control for the CNO
Step 8 – Recover the CMS
The next thing to do is to recover the CMS onto the SCR target server by using the Exchange 2007 setup.com program. The setup.com program includes the /RecoverCMS switch that is used to recover the CMS onto a new server. The /RecoverCMS switch has two main parameters that you need to supply, namely the /CMSName and /CMSIPAddress parameters. These parameter names should be self explanatory in that they are used to provide the CMS name and CMS IP address. Obviously the CMS name will not change as this is the name that Outlook clients connect to and in this case the same CMS is being recovered to a new physical server. However, bear in mind that in many deployments the CMS is likely to be recovered to an alternative datacenter that has a different IP address range, so it is quite likely that the /CMSIPAddress switch will contain a brand new IP address for your CMS. This is normal and expected in many cases. In my example below a new IP address for the CMS is specified but this is in the same subnet. This is purely because the lab environment that I am using is all located on the same subnet. The full syntax of the setup.com command that I am using is:
setup.com /RecoverCMS /CMSName:E2K7 /CMSIPAddress:192.168.50.57
The results of running this program are shown in Figure 11. You will see that a successful completion of this step results in a COMPLETED action listed against both the prerequisite checks and the configuration of the CMS object. Also, I check DNS afterwards to make sure that a new DNS A record exists for the CMS, with the correct IP address of course.

Figure 11: The Setup /RecoverCMS Process
Interestingly, it can be worth checking the Failover Cluster Management program after the /RecoverCMS process to see the state of the various cluster resources. My example is shown below in Figure 12 where you will notice that the two database resources are not yet online. This is because these databases are currently dismounted, so we will fix that in the next step.

Figure 12: Failover Cluster Management After /RecoverCMS
The setup.com /RecoverCMS process also updates DNS such that the CMS A record now resolves to the new IP address.
Step 9 – Mount the Databases
Once the CMS has been successfully recovered to the SCR standby cluster it will then be possible to mount the databases. To do this you can use the Mount-Database cmdlet although it is also possible to use the Exchange Management Console of course. You will remember that in my example there is a single mailbox database and a single public folder database to mount so I need to run the Mount-Database cmdlet twice:
Mount-Database –Identity “E2K7\First Storage Group\Mailbox Database”
Mount-Database –Identity “E2K7\Second Storage Group\Public Folder Database”
You can see from Figure 13 that a successful mounting of the databases via the Exchange Management Shell does not result in a success message being generated as output. You can use the Exchange Management Console to confirm that the databases are mounted.

Figure 13: Mounting the Databases
If you have a single mailbox server with lots of mailbox databases, you can quickly mount them all via the following cmdlet:
Get-MailboxDatabase | Mount-Database
The first Get-MailboxDatabase cmdlet will retrieve all mailbox databases and pipe the result into the Mount-Database cmdlet.
Step 10 – Test Mailbox Access
Although you may well have used the Exchange Management Console to prove that the databases are mounted, there really is only one way to prove that the CMS can be accessed by the users and that’s to access the mailboxes. After all, there is not much point in implementing SCR if you are not going to have a working system in the event of a disaster. At this point, then, you need to access a mailbox from the CMS using Outlook or Outlook Web Access of course. Satisfy yourself that you can see the latest information that may have been added to the mailboxes. Additionally, you may want to prove that the CMS can talk to the Hub Transport server in the disaster recovery site successfully, so you can always send test messages between two mailboxes on the same CMS. Remember, though, that in this particular scenario we are going to be bringing the original CCR environment back online so any messages that are sent will not exist back in the CCR environment; this is why it is important to ensure that users are not using the system whilst the test is being performed.
Summary
That completes part three of this four-part article series. In this part we have covered the steps required to prove that the SCR copy of the data is accurate and that we can successfully activate the SCR standby server. In the final part of this series we’ll look at the steps required to bring back the original CCR environment.
If you would like to read the other parts of this article series please go to:
- Testing SCR in a Production Environment (Part 1)
- Testing SCR in a Production Environment (Part 2)
- Testing SCR in a Production Environment (Part 4)


