On May 10, 2017, Microsoft announced the preview release of Visual Studio Tools for Azure Functions. In this article and the accompanying video, I describe the process for creating and publishing Azure Functions to Azure.
[tg_youtube video_id=”MqpAiazVMQ4″]
What are Azure Functions?
This article assume you already have a working knowledge of Visual Studio and Azure Functions. If you do not have a working knowledge of Azure functions, read this great article from Twain Taylor on Serverless Computing. Check back here when you are done 🙂
Install the Visual Studio Tools for Azure Functions
Before you can use Visual Studio to publish your Azure Functions, you will need to install the tooling required. If you have not already done so, please read my article here, or watch the video below:
[tg_youtube video_id=”bv1x4QR6FX8″]
Prepare your Azure Portal
The Visual Studio Tools for Azure Functions is supposed to automatically create all the things you need in Azure and then publish your project. Unfortunately, the preview version is not so good at doing that, so I recommend you configure everything you need ahead of time. I cover these steps in the video, but here are the basic things you need to create:
- A storage account
- A web app
- A web app plan
Create a project in Visual Studio
Microsoft seems to treat each Azure Function as if it is a class. When you create a new function, Microsoft automatically builds some sample code so you can run a manual test to be sure it works.
In my example, I perform the following steps:
- Create a brand new Azure Function project (Microsoft calls them Apps).
- Add a new item, and create a new Azure Function, using the HttpTrigger option. I append the number 1 to the end.
- Follow Step 2 above but this time append the number 2 to the end of the trigger name.
- In each function, change the BadRequest strings to include the text Function1: and Function2: .
- In the second function, change the OK response, change the Hello text to What’s up.
When done, you should have an Azure Project (app) and two functions. When you call each function using an http request, you will get a unique response from each.
Test the project
To make sure your classes work, run the application and wait for the Azure CLI to display two different URLs. Test each URL to make sure they provide a unique response.
For example, if the first URL will look something like this:
- http://localhost:7000/function1
Copy and paste that to the browser. The response you receive should respond with:
- Function 1: Please pass a name on the query string or in the request body.
To Make sure the function runs, you can type:
- http://localhost:7000/function1?name=Bill
And the response should be:
- Hello Bill
Try the same with Function 2. When you do that, you should receive different responses and then you can exit the Azure Functions CLI and return to Visual Studio.
Publish your Function App to Azure
Armed with the knowledge your Function App is running properly, you can now publish it to Azure. To do this, you must publish the entire project, not just individual functions.
- Right-click the project and select the Publish option.
- In the dialog that appears, make sure you select all the items you previously created in Azure and then select the Create button.
Debugging
After you publish your project, there are three things that could possibly happen:
- The project publishes with the Azure Function App along with the individual functions.
- The project appears to have published but when you minimize Visual Studio (and other apps), you find a little error dialog hanging out on your desktop.
- The project looks like it never published, bringing you back to the same exact Publish page you were using before.
I am not going to cover all the debugging steps here, so please watch the video that accompanies this article for more detail.
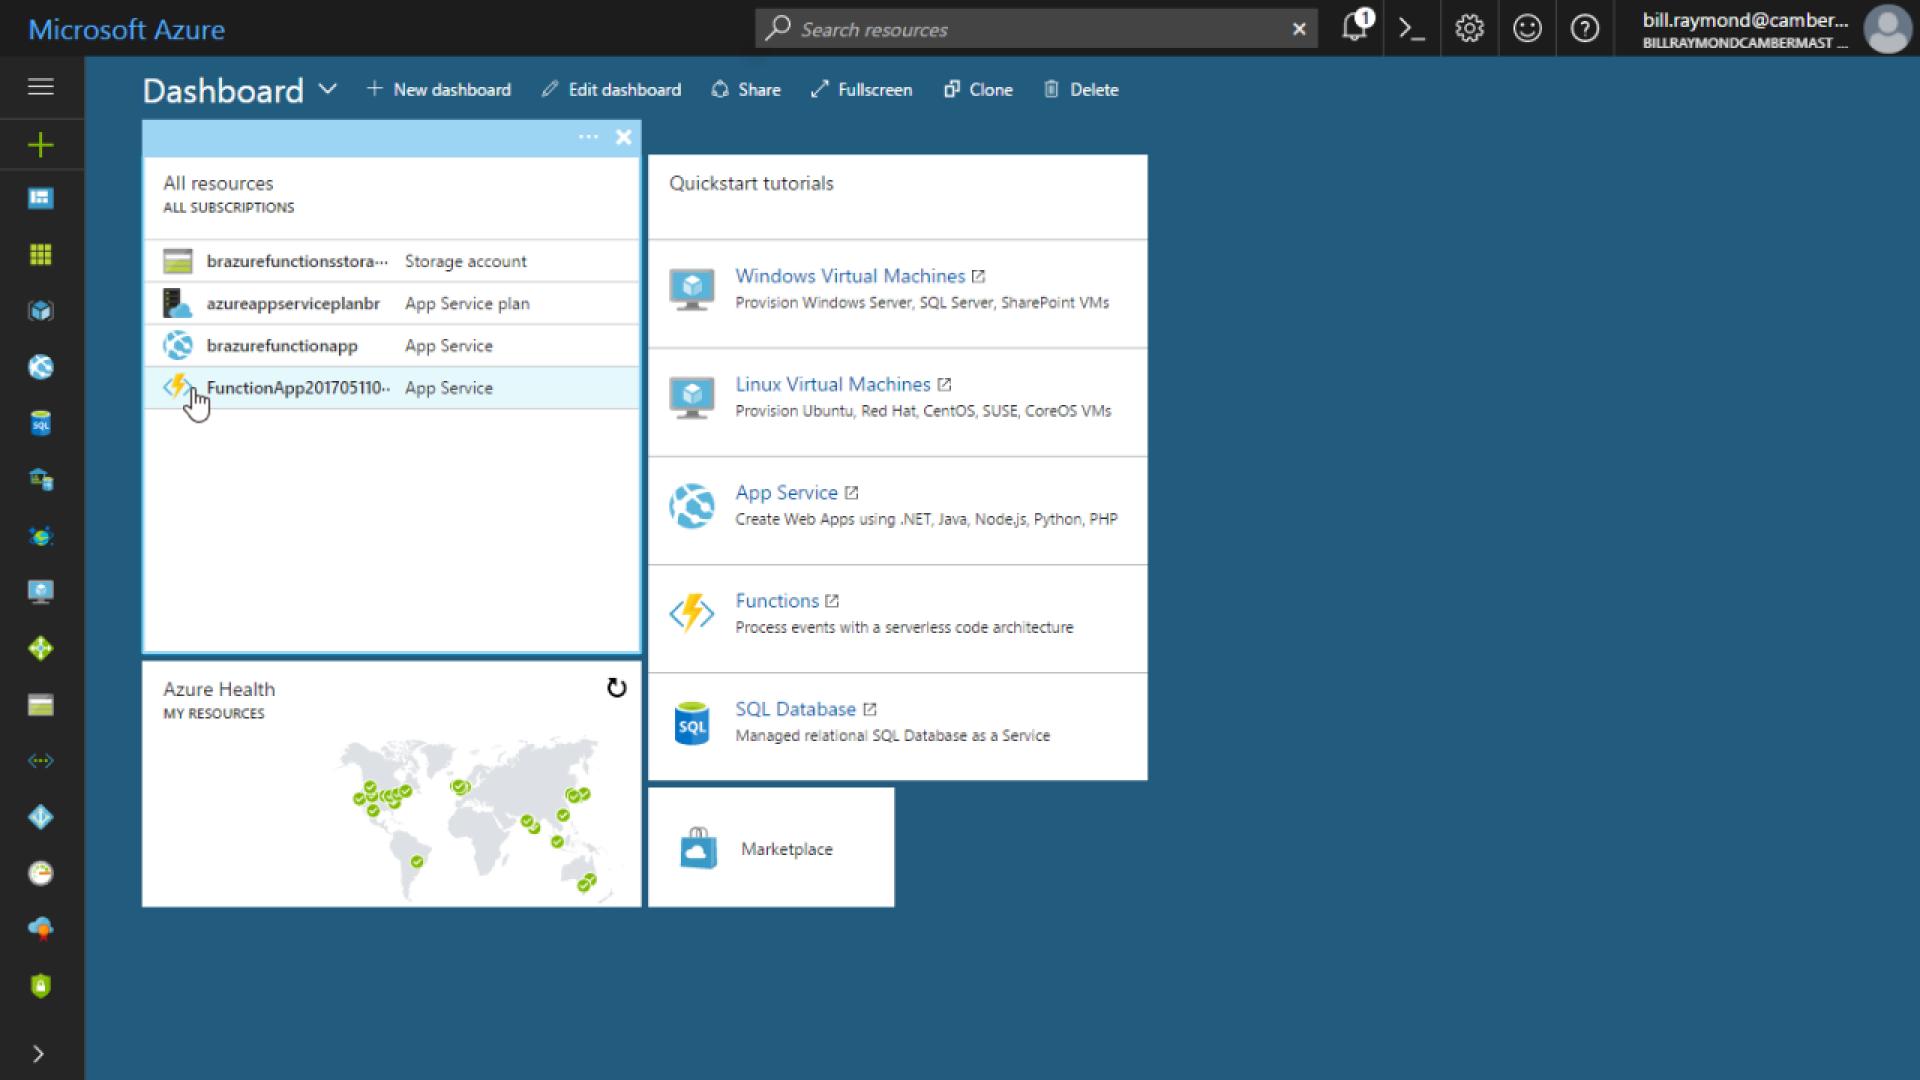
Use your Functions
To use the functions, go to the Azure Portal. If all went well with the publish operation, you should see the Function App on your dashboard as shown in the following image.
When you select the Function App, you will see all the associated Functions listed as shown in the figure below. You can use the Run command to test out your functions.
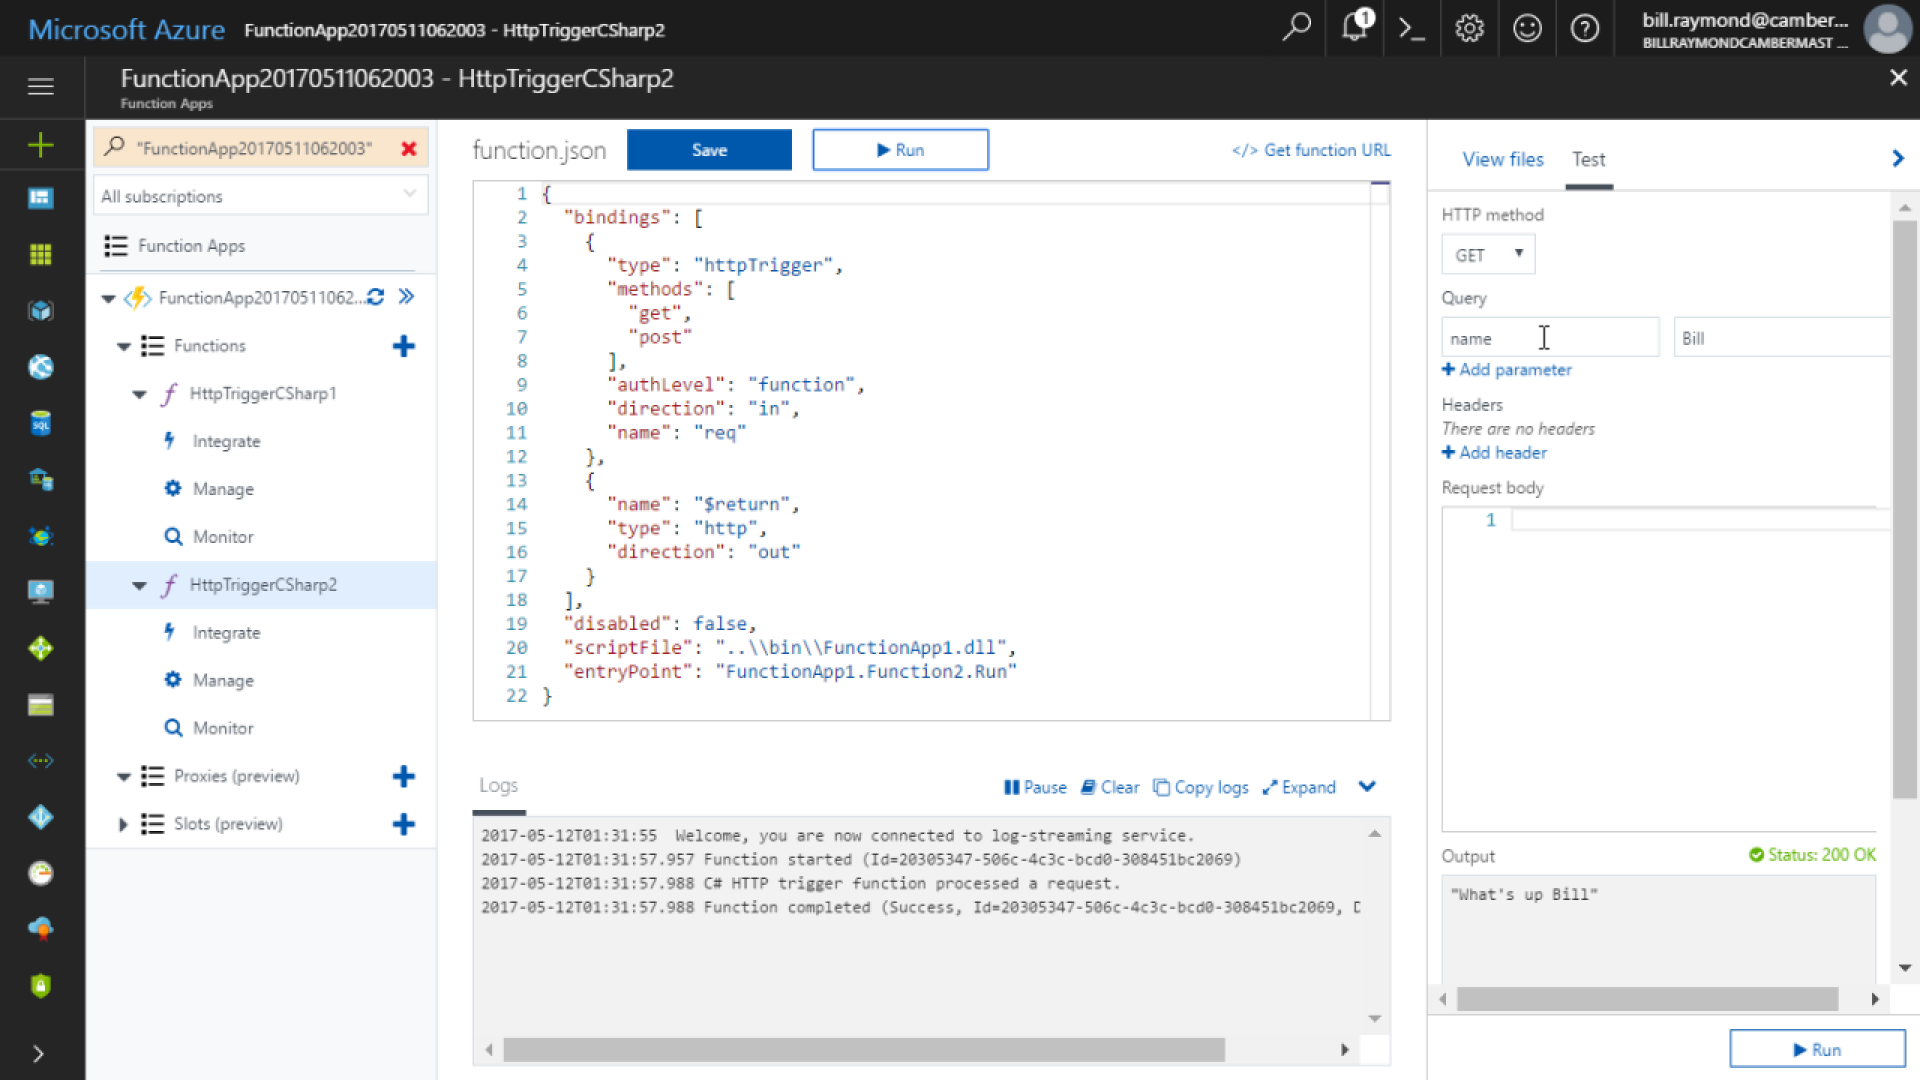
At the top of the page, you will find a link that reads something like </> Get function URL. Click that link and you will get a URL to test using your browser.
Publish new changes
After you test your functions, you will probably want to make changes. After you modify your code, follow these steps:
- Build your project. This is something you must do or the publish will not work.
- Right-click the project name (app) and choose the publish… option.
- Click the publish button.
- Re-test your functions up on Azure. They should be updated in just a few seconds.
That is the basic lifecycle process you follow to create and publish your Azure Functions from Visual Studio to Azure. If you like the video, please press the Like button and Subscribe to our YouTube page.
Logo images courtesy Microsoft.


