I have long believed that IT documentation, especially Windows server documentation, is something of a lost art. At one time, it was normal for organizations to document their servers in case a server suffered a catastrophic failure and had to be reconfigured. Over time though, the old-school documentation methods became impractical. Organizations often have far too many Windows servers to document all of them manually, and servers are constantly being patched and updated, which causes documentation to quickly become outdated. Besides, there are countless management and monitoring tools that create various degrees of documentation.
Despite this, I’m a big believer in the idea that thorough documentation still has its place, even if it does not necessarily make sense to document every system. For example, I have created documentation for the system that I am using right now to write this article. At the very least, the documentation is helpful because it contains a list of all of the software installed on my PC, along with any required product keys. Perhaps more importantly, however, the documentation is an exhaustive description of the way that my system is configured, which could be invaluable if in-depth troubleshooting of a problem is ever required.
Windows documentation: What’s the best way?
Of course, the real question is how best to document a PC or server’s configuration? My approach to Windows documentation has changed considerably over the years. At one time, I would start by documenting a machine’s initial configuration. Any time that I installed a piece of software or made a configuration change, I appended that to the documentation. As such, the documentation might best be described as an initial configuration and a changelog.
Sydi Server: A good choice
Today, of course, things are far different than they once were, and there are countless tools that can be used to document Windows systems. One of the best that I have discovered is a free, open-source tool called Sydi Server. You can download Sydi Server here.
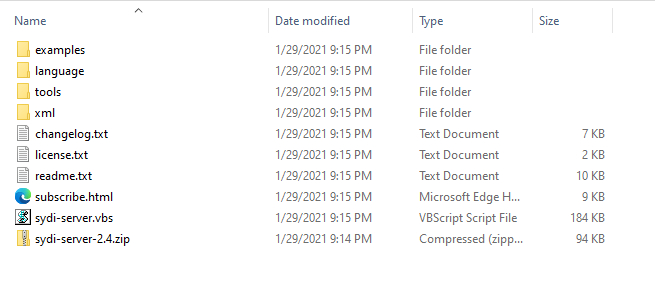
The download consists of a ZIP file you will need to extract a Windows machine’s hard disk. As you can see in the screenshot below, Sydi Server consists of a VBS script and several supporting files.
You can run the Sydi Server tool from either a Windows client device or directly on a Windows server. Even so, there are a couple of things that you will need to consider before you set out to create any documentation.
The first such consideration is that the machine on which you run the Sydi Server tool needs to have Microsoft Word installed. Since Microsoft Word is not generally installed directly on Windows Server machines, you will most likely end up running Sydi Server from a Windows workstation.
The other thing to consider is that Sydi Server is a command-line utility, and depending on how your environment is configured, it’s possible that you may need to enter some command-line switches to make the script work properly. For example, if the account you are using does not have access to the machine you want to document, you will need to use the -u (username) and the -p (password) switches to force the use of an alternate set of credentials. To see all of the command line switches that are available, open a command prompt window and enter the following command in the folder containing the VBS file:
Cscript.exe sydi-server.vbs -h
You can see some of the available switches in the screenshot below.

The good news is that even though the Sydi Server tool supports a huge number of command-line switches, it’s entirely possible that you won’t need to use any of them. Most of the switches are used to specify the individual elements to be included in the documentation and the format of the resulting Word document, but you don’t actually have to use any of these switches.
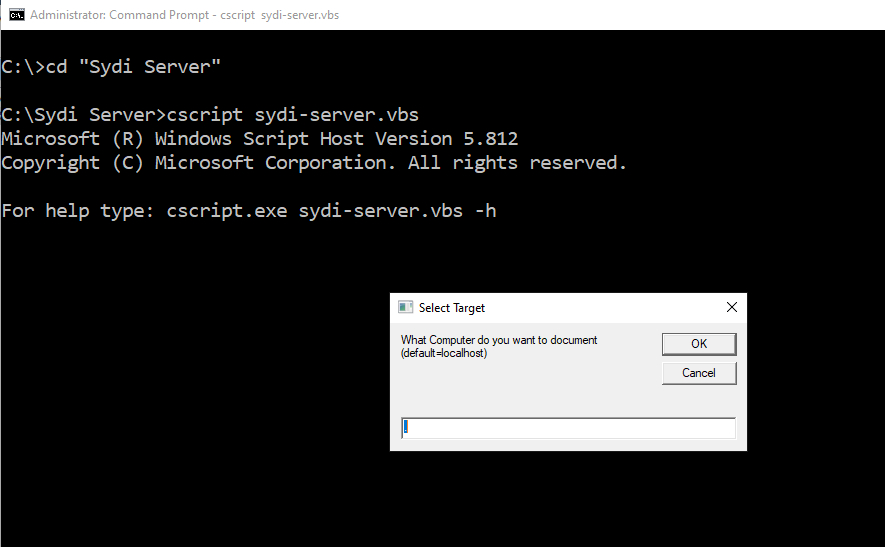
To run the Sydi Server tool, open an elevated Windows Command Prompt window and then navigate to the folder where you have extracted the Sydi Server ZIP file. Next, launch the tool by entering the following command:
Cscript sydi-server.vbs
At this point, you will see a dialog box like the one shown in the screenshot below, prompting you to specify the name of the computer that you want to document. If your goal is to document a remote server, then enter the computer’s name or its IP address. If, on the other hand, you want to document the machine on which the script is running, then just click OK without entering anything.
As the tool runs, the Command Prompt window will display status messages similar to those shown in the screenshot below. These messages are meant to keep you up to date on the tool’s progress (the tool can take a long time to run). Additionally, if you run the tool using the default settings, Microsoft Word will open. You will see documentation items being added to a word document as the tool runs.
 What should be in your documentation?
The one thing that I haven’t really talked about yet is what is included in the Windows Server documentation that is produced. The documentation’s contents vary based on whether you are documenting a server or documenting a workstation. In either case, however, the documentation is extremely thorough. I ran the Sydi Server tool against my primary desktop PC, and the resulting documentation was 93 pages (9,590 words) in length. You can see the first two pages of the documentation, including the table of contents, in the screenshot below.

If you do decide to use the Sydi Server tool to document one or more of your machines, you will need to personalize the report once the tool is finished. If you look at the screenshot above, you can see that the tool contains a summary section based on template information. You will want to edit the Word document (or the application’s template) so that the summary information is relevant to your own environment.
Featured image: Shutterstock


Awesome!
Thanks! I’m glad you like it.
Fantastic! Many thanks.