Software developers and IT organizations continue to adopt Agile methods to develop and maintain software projects (click here to learn more about Agile, and here to learn how to not let Agile ruin your culture). Working in an Agile environment means you may not have a single plan that assumes everyone on the team knows exactly what tasks to perform, how long they will take, or even who will do them. Instead, you have a semblance of a plan, with a high-level roadmap, and then the team iteratively works on elements to complete a set of deliverables. Not all projects can afford to work this way, but more and more businesses are adopting Agile planning for small and medium-size projects. That is where Microsoft Planner comes in.
[tg_youtube video_id=”KEkFh8Jzdig”]
What is Microsoft Planner?
Microsoft Planner is part of certain Office 365 plans. Planner works very hard at providing a simple, uncluttered, user interface. You start by creating a plan. The plan is where you will add tasks. Microsoft created the user interface to require little or no training. Indeed, this article and associated videos will likely be more helpful to people evaluating the product rather than those who are regular users.
[tg_youtube video_id=”1tpRm5Fsv6o”]
The user interface
In the following image, you can see I create a New Product Launch plan, but you don’t have to use Planner just for individual projects. For example, you may just create a department-level plan and call it, say, Marketing or Sales.
 The primary user interface is made up of the following elements:
- The board is a page that lists all the tasks.
- Buckets are ways to categorize the current state of a task. You can create more buckets, but the defaults are Not Started, In Progress, and Completed.
- Tasks are defined deliverables that people will complete.
Tasks
If you are familiar with traditional, so-called waterfall project management, you define tasks that must have a start and finish date (to learn more about waterfall, click here). You will likely store a baseline for those tasks, assign resources, add costs, and define a critical path. You will not find many of these advanced features in Microsoft Planner, and for a good reason: It is a designed to be a lightweight task management application, not an advanced project management tool.
To allay any concerns, you can still set a start date or a due date for a task. You can also assign one or more team members to a task, but none of that is a requirement. You can simply add a task to the board and complete it without ever tracking the individual team members doing the work.
Naturally, it makes sense to assign a person to a task and to define the start and due date for each, but you might do that as the task moves from Not Started to In Progress. The whole idea with Agile is you are selecting the right person to do the task at the right time, rather than plan out every little detail at the beginning.
Checklists
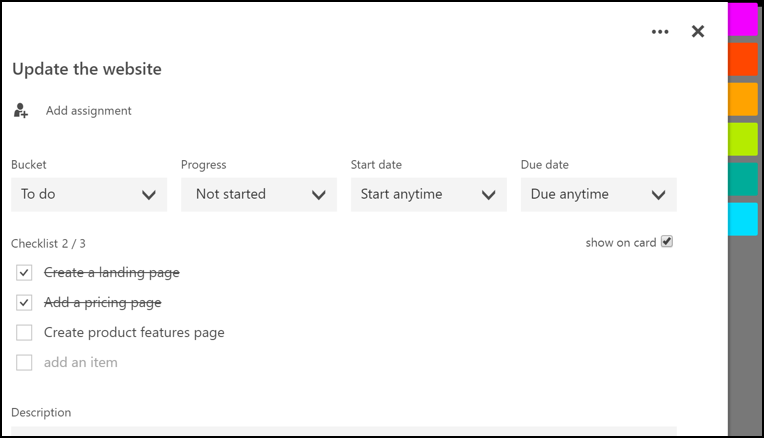
Since you want to keep tasks high level and avoid getting too detailed, team members can add checklists to their tasks. As you can see in the following image, the Update the website task has three checklist items. Those checklist items help team members share their task’s progress with some additional detail.
Task attachments and links
You can add links to tasks. These links may be internal (a user story or specification) or external (a competitor’s website or video). You can add multiple links to any task, but if a task has a real popular link that most people will want to see, you can display it on the task’s card, as shown in the following image.

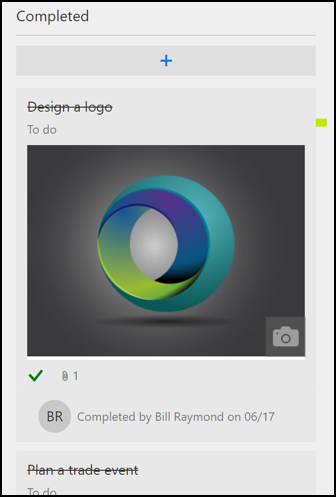
Sometimes a picture can tell a story better than a bunch of text on the screen. Any task can contain images and a preview will display directly on the card. As you can see in the following image, the Design a logo task is completed, but team members can still see what that logo looks like.
Task labels
Another way to help tasks stick out from the crowd is to add labels.
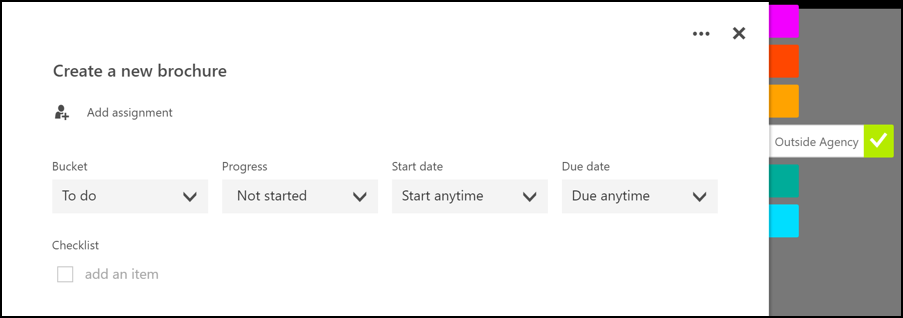
You cannot add more labels than Microsoft Planner provides and you cannot change the colors, so if you and your teams become heavy Planner users, you should consider setting some standards for each label. For example, in the following image, I use the color green to inform team members that an Outside Agency is performing the task. As a team member, I would prefer that green always represents some outside firm, rather than green meaning 10 different things on 10 different plans.
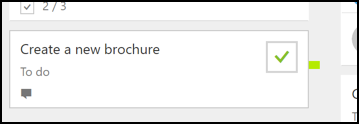
As you can see in the following image, the task’s card displays with a colored tick mark next to it. Of course, had I selected multiple labels, those colors would show as well.
Task comments
When you work on a task, you might want to add notes for others to see. As you can see in the following image, the task has a running list of comments that others can see.

When people make a comment, the plan’s leader and anyone assigned to the task will receive an email notification. I recommend you use the task comments sparingly to avoid turning Planner into a spam system.
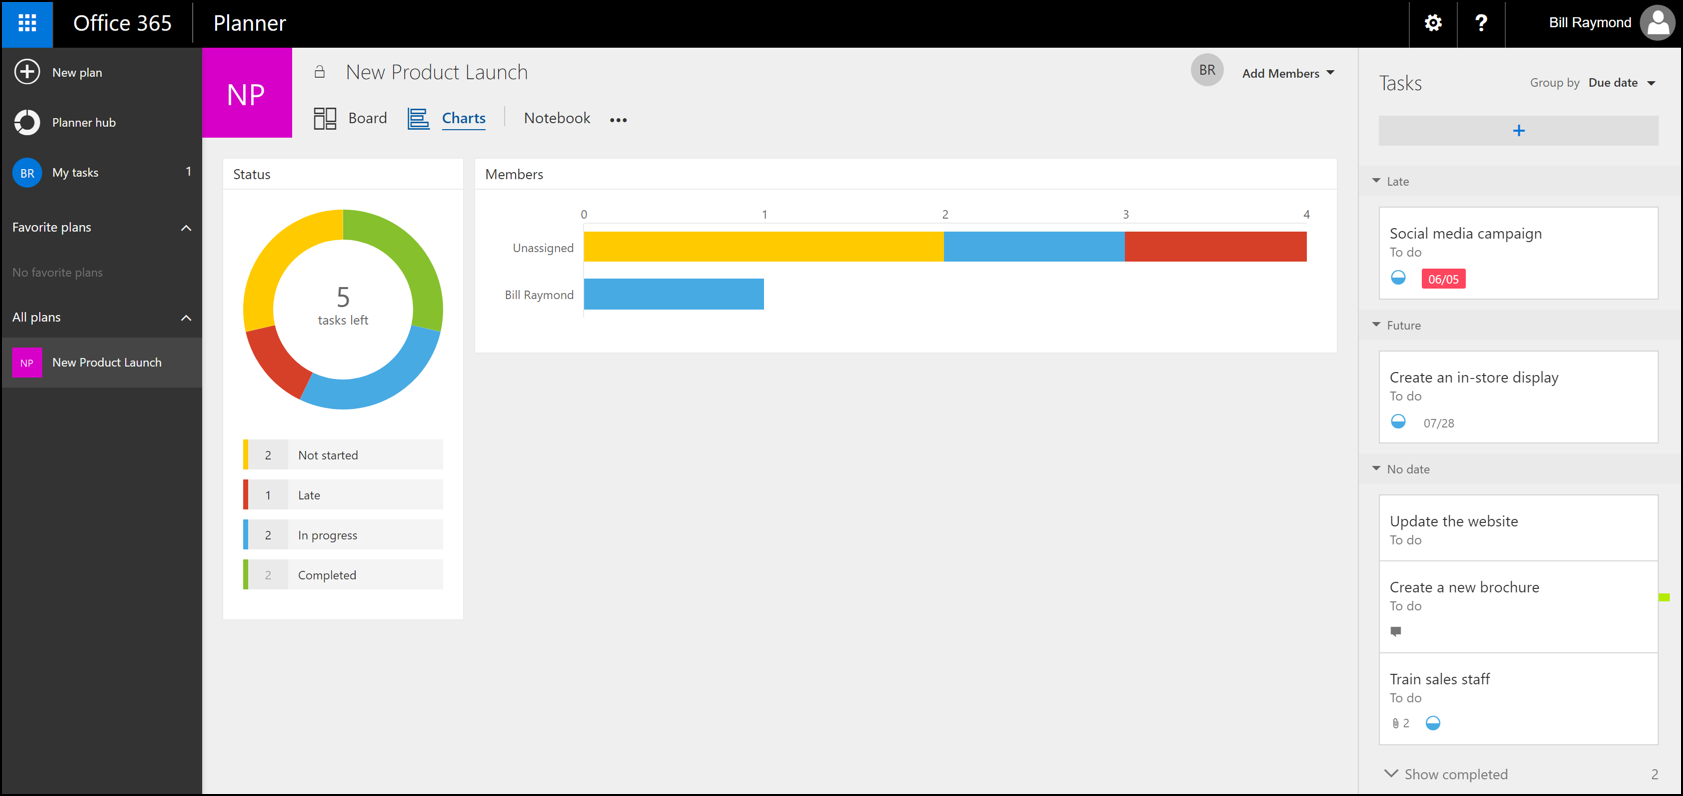
Charts
If you are familiar with traditional project management software, you know that building reports can take a lot of time and a lot of people. Planner provides one, clean, page that it labels Charts. The charts page gives teams immediate access to relevant information as it relates to the current state of the plan.
As you can see in the following image, there is a status area that summarizes all of the tasks into four categories: Not started, Late, In progress, and completed. In the following image, I clicked the red Late portion of the chart on the left, causing list of tasks on the far right to filter Late tasks.
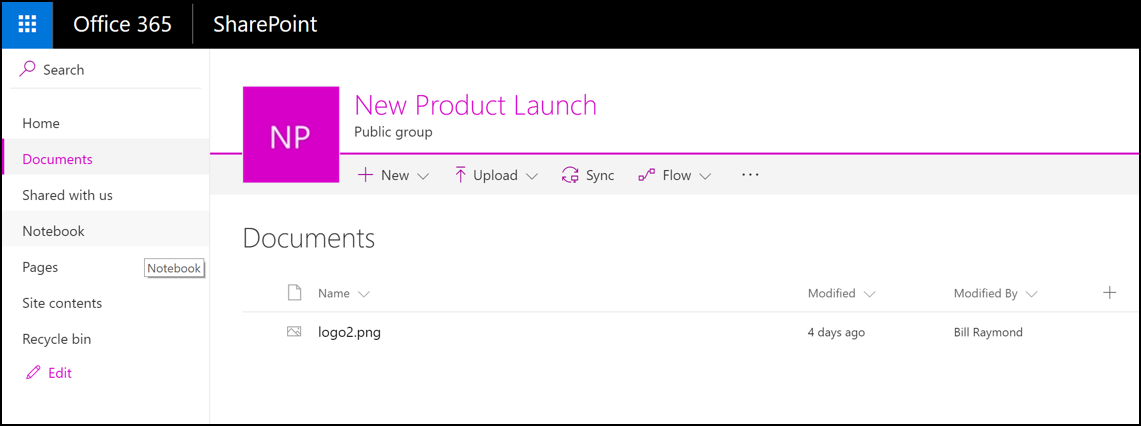
SharePoint under the hood
When you create a plan, Microsoft Planner creates a SharePoint collaboration site. By default, Planner has links to the SharePoint site by way of links to taking notes with OneNote Online, and manages files. In the following image, you can see the logo image that is attached to a Planner task.
Note: If you are not familiar with SharePoint, you can check out my video tutorials on the TechGenix Youtube channel.
Edit the plan
As you can see in the following image, you can rename the plan at any time. You can also prevent other people from within your organization from seeing the plan (public means it is visible to anyone in your Office 365 plan, not the world). You can also set notifications, and even delete the plan.

There are more details and walkthroughs in the videos that accompany this article. For now, if you are interested in trying Planner, visit the Microsoft website here.


Your article was well-done and made me want to know more about Planner. I could not find any reference to the software using the link provided in the last paragraph. It infuriates me to follow a hyperlink and find that it links to general information, not the specific topic or item referenced. Bad design and a real let-down after the good article.
I tested the link and it worked. The first time I clicked, it went elsewhere but the second time worked. I’ll notify the developers of the site about this issue.
Here is the link in full:
https://products.office.com/en-us/business/task-management-software
Thanks a lot for your article! In my organizationwe don’t have an Agile standar tool, so I have to use MS Planner. It has been a nice experience, enough to have a simple Scrum Board and, by using some standard office docs (i.e. Excel, Word), to keep an updated backlog
Good article, thanks Bill.
I look forward to Planner developing to allow more agile features to be included such as sizing and sprints (not just Kanban style).