If you would like to read the other parts in this article series please go to:
- Advanced Group Policy Management (Part 1) – Introduction
- Advanced Group Policy Management (Part 2) – Initial Configuration
- Advanced Group Policy Management (Part 4) – Editing Controlled GPOs
- Advanced Group Policy Management (Part 5) – Managing GPOs
- Advanced Group Policy Management (Part 6) – Templates and Migration
Introduction
In the previous two articles of this series we learned how to install the client and server components of AGPM and perform initial configuration of your AGPM environment by taking control of existing GPOs, delegating AGPM roles, and performing other configuration tasks. In the next few articles of this series, beginning with this article, we’ll learn how to work with controlled GPOs and deploy them to your production environment. We’ll begin by learning how to create a new controlled GPO and deploy it to production.

As described earlier in Part 2 of this series, the different AGPM roles have been assigned to different CONTOSO users as follows:
- Tony Allen ([email protected]) will hold the AGPM Administrator (Full Control) role
- Karen Berg ([email protected]) will hold the Approver role
- Jacky Chen ([email protected]) will hold the Editor role
- Sara Davis ([email protected]) will hold the Reviewer role
Because the permissions for the Reviewer role are also included in the Approval role, for simplicity Karen Berg will act as both Reviewer and Approver for GPO changes proposed by Jacky Chen.
Creating a New Controlled GPO
To begin, Jacky Chen (who holds the Editor role) logs on to his administrator workstation:
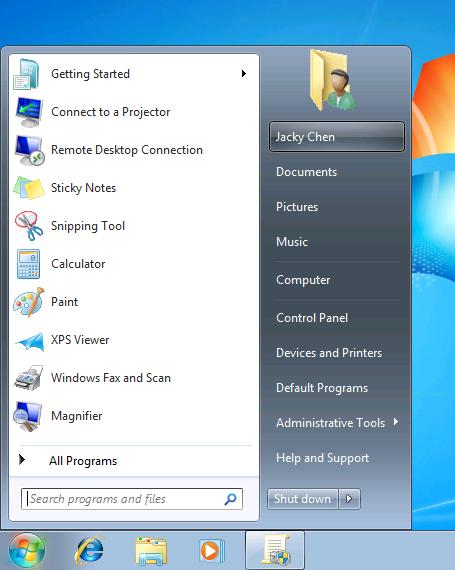
Figure 1: Jacky Chen (AGPM Editor) logs on.
To create a new controlled Group Policy Object (GPO) using AGPM, Jacky launches the Group Policy Management Console (GPMC) from Administrative Tools in the Start menu, and selects the Change Control node for the contoso.com domain:
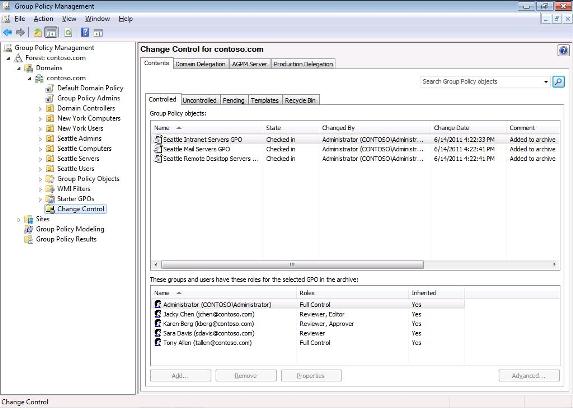
Figure 2: Step 1 of creating a new controlled GPO.
Jacky right-clicks on the Change Control node and selects New Controlled GPO from the context menu:
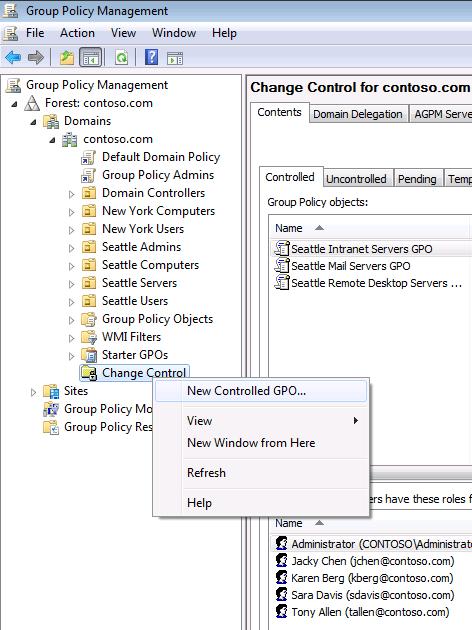
Figure 3: Step 2 of creating a new controlled GPO.
In the Submit New Controlled GPO Request dialog that is displayed, Jacky enters a name for the new GPO and, optionally, a descriptive comment (see Figure 4 below). By default, the new GPO is created in both the AGPM archive and in the production environment (SYSVOL) but Jacky decides to create the new GPO only in the AGPM archive in case Karen makes the decision not to deploy the new GPO into the CONTOSO production environment.
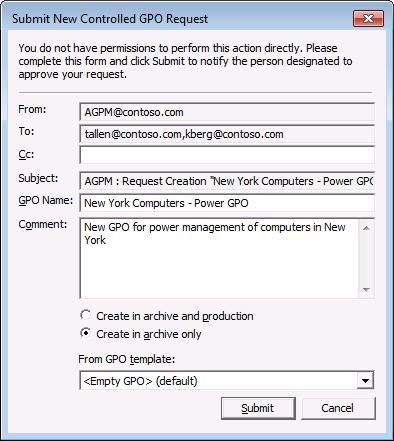
Figure 4: Step 3 of creating a new controlled GPO.
After Jacky clicks Submit in the dialog above, the newly created GPO is displayed in the Group Policy Objects area of the Contents tab as shown here:
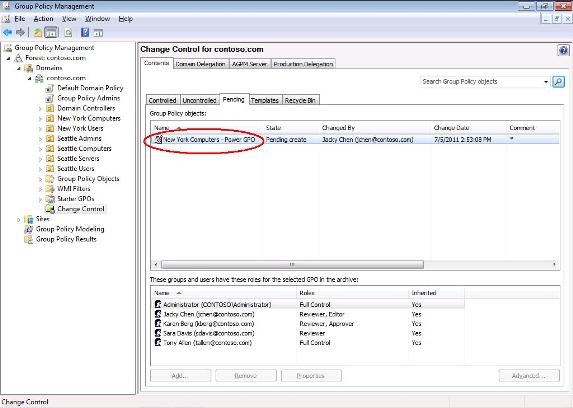
Figure 5: The new controlled GPO has been created in the AGPM archive.
What if Jacky changes his mind after creating the new controlled GPO and decides that the new GPO isn’t needed? In that case, Jacky can withdraw his request for the new GPO by right-clicking on it and selecting Withdraw as shown here:
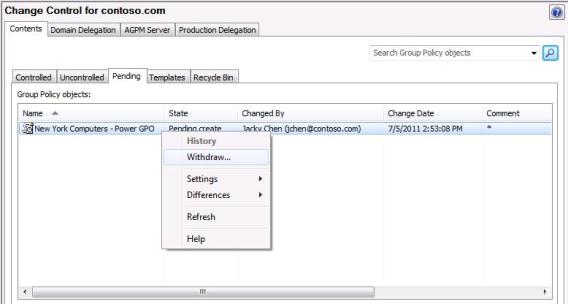
Figure 6: If needed Jacky can withdraw his request to create the new controlled GPO.
Doing this displays the Submit Withdraw dialog shown below. If desired Jacky can add a comment explaining to the recipients why he is withdrawing his request for the new GPO.
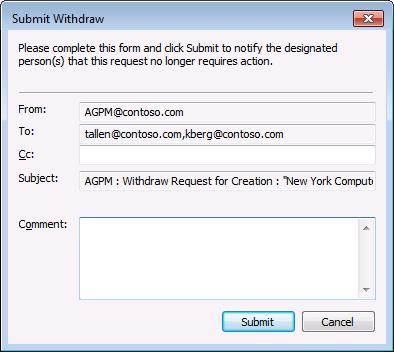
Figure 7: Submitting a request to withdraw an earlier request for creating a new controlled GPO.
But for this walkthrough we’ll assume that Jacky does not withdraw his request, so Jacky’s earlier Submit New Controlled GPO Request has been sent to Karen (AGPM Editor) for review and approval.
Approving a Request to Create a New Controlled GPO
Karen Berg, who holds the AGPM Editor role which also includes the AGPM Reviewer role, is logged on to her administrator workstation:

Figure 8: Karen Berg (AGPM Approver and Reviewer) logs on.
Karen has received an email from Jacky via AGPM that indicates she needs to review and approve/disapprove Jacky’s request to create a new controlled GPO. After reviewing Jacky’s email, Karen decides to approve Jacky’s request and deploy the new controlled GPO into the CONTOSO production environment. To begin doing this, Karen opens the GPMC and selects the Change Control node for the contoso.com domain. She then selects the Pending tab and notices that the New York Computers – Power GPO is listed as being in a Pending Create state:
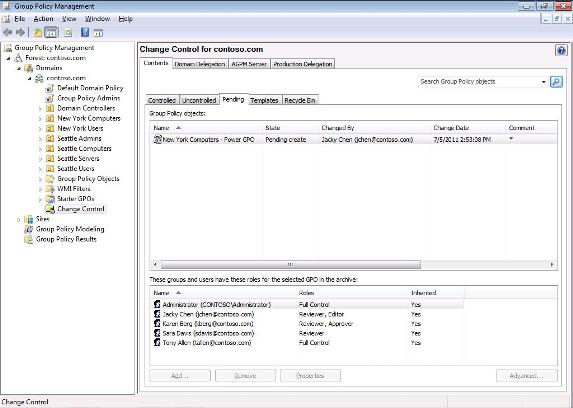
Figure 9: Step 1 of approving a request to create a new controlled GPO.
To approve the pending GPO, Karen right-clicks on it and selects Approve from the context menu:
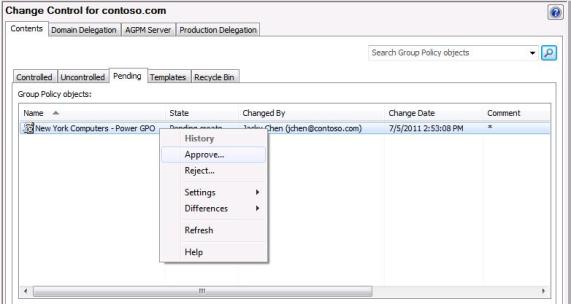
Figure 10: Step 2 of approving a request to create a new controlled GPO.
Doing this opens the Approve Pending Operation dialog where Karen can enter a comment if desired to explain her decision:
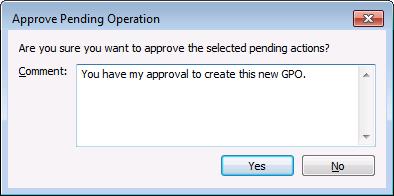
Figure 11: Step 3 of approving a request to create a new controlled GPO.
After clicking Yes, a progress bar indicates the successful creation of the new controlled GPO:

Figure 12: Step 4 of approving a request to create a new controlled GPO.
The new GPO is now no longer listed on the Pending tab:
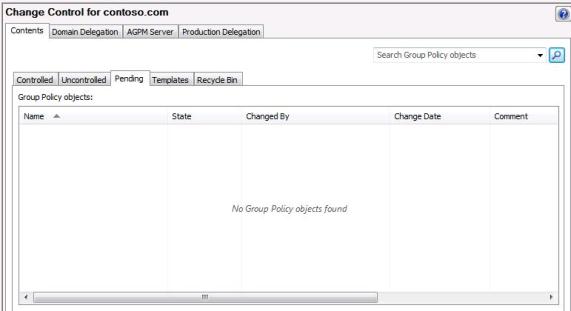
Figure 13: The new GPO is no longer listed on the Pending tab.
Instead, the new GPO is now listed on the Controlled tab indicating that the new controlled GPO has been successfully created in the AGPM archive:
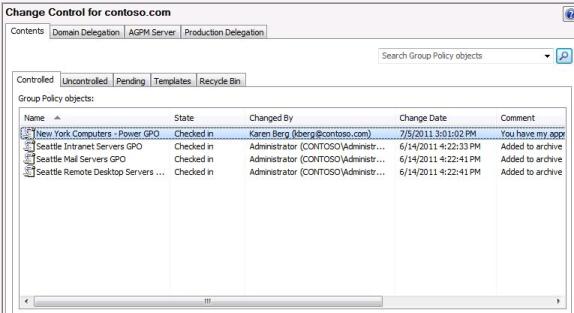
Figure 14: The new controlled GPO has been created and is now listed on the Controlled tab.
At this point, the new controlled GPO has been created but it has not yet been deployed into the CONTOSO production environment, so that will be Karen’s next task described below.
Deploying a Controlled GPO to Production
Once Karen has approved Jacky’s request for creating a new controlled GPO, Karen’s next task is to deploy the new GPO to production. To begin doing this, Karen right-clicks on the controlled GPO and selects Deploy from the context menu:
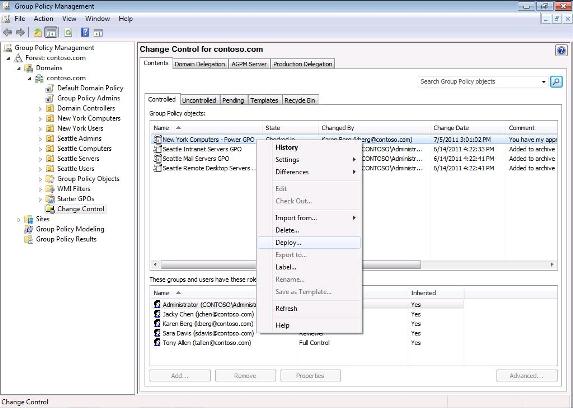
Figure 15: Step 1 of deploying a controlled GPO to production.
Doing this displays the Deploy GPO dialog as shown here:

Figure 16: Step 2 of deploying a controlled GPO to production.
Karen clicks Yes to deploy the GPO and a progress dialog indicates when this has been done successfully:
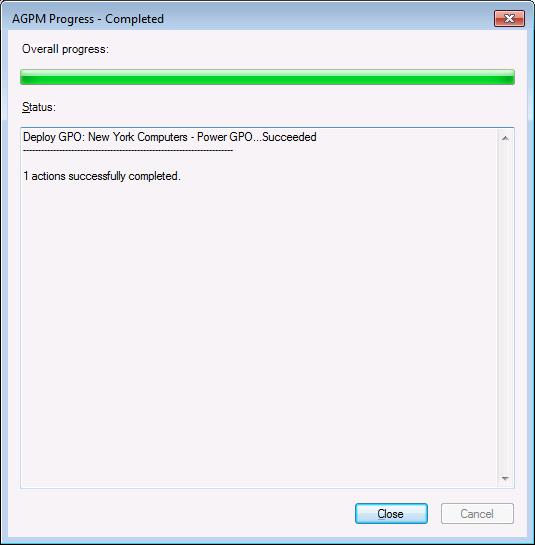
Figure 17: Step 3 of deploying a controlled GPO to production.
To confirm that the controlled GPO has been deployed from the AGPM archive into the CONTOSO production environment, Karen expands the Group Policy Objects node for the contoso.com domain in the GPMC. Because the New York Computers – Power GPO is displayed under this node, a copy of this controlled GPO is now present in SYSVOL:

Figure 18: Step 4 of deploying a controlled GPO to production.
While the controlled GPO is now present in the production environment, it is not yet being applied to any target computers because it has not yet been linked to an organizational unit (OU). To link the New York Computers – Power GPO to the New York Computers OU, Karen begins by expanding the New York Computers OU:
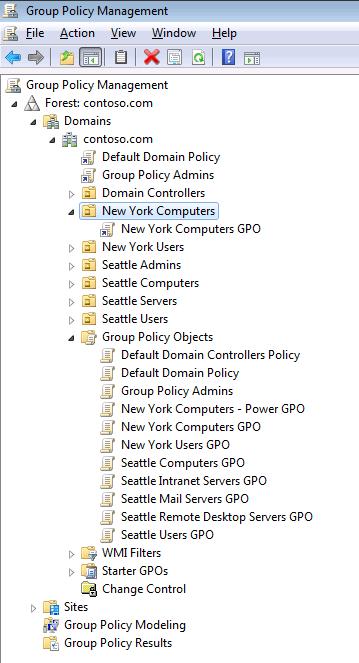
Figure 19: Step 5 of deploying a controlled GPO to production.
Karen then right-clicks on the New York Computers OU and selects Link An Existing GPO from the context menu:
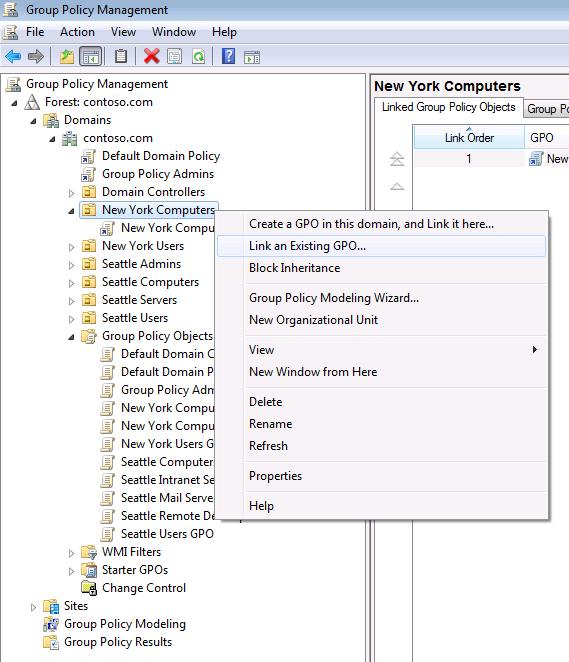
Figure 20: Step 6 of deploying a controlled GPO to production.
In the Select GPO dialog that is displayed next, Karen selects the New York Computers – Power GPO as shown here:
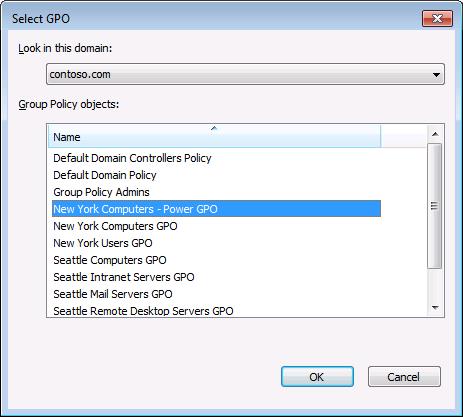
Figure 21: Step 7 of deploying a controlled GPO to production.
After clicking OK, the New York Computers – Power GPO is now linked to the New York Computers OU:
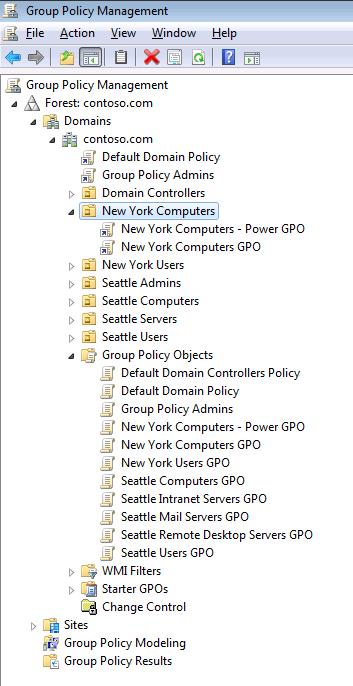
Figure 22: The controlled GPO has been deployed to production.
The controlled GPO that Jacky proposed creating has now been fully deployed by Karen into the CONTOSO production environment.
Conclusion
In this article we saw how an AGPM Editor could propose creating a new controlled GPO after which an AGPM Approver could approve creation of the GPO and deploy it to production. In the next article of this series we’ll examine other tasks that AGPM role holders can perform.
If you would like to read the other parts in this article series please go to:
- Advanced Group Policy Management (Part 1) – Introduction
- Advanced Group Policy Management (Part 2) – Initial Configuration
- Advanced Group Policy Management (Part 4) – Editing Controlled GPOs
- Advanced Group Policy Management (Part 5) – Managing GPOs
- Advanced Group Policy Management (Part 6) – Templates and Migration


