If you would like to read the other parts in this article series please go to:
- Configuring TMG Beta 3 for SSTP VPN Connections (Part 1)
- Configuring TMG Beta 3 for SSTP VPN Connections – Part 3: Configure TMG VPN Settings and Making the Connection

Introduction
In part 1 of this series I went over the advantages of SSTP and the example lab network that I am working with. If you missed that article, check the following link out in order to understand the basic SSTP concepts and the lab network setup.
Let us now get to the job of putting together a working SSTP setup on TMG Beta 3. Keep in mind that this setup is for beta 3, and things might change by the time the product goes RTM. In this example I am using TMG Enterprise Edition in a one-member array. The procedures will be slightly different if you deploy a TMG VPN solution using an Enterprise array, since you need to do things like define the connection owner, and also you can not use DHCP for IP addressing information.
The steps required to make the solution work on our lab network included:
-
Create the SSTP Web Listener Certificate
-
Install the SSTP Web Listener Certificate
-
Address the CRL Issue
-
Configure the VPN Configuration on the TMG Firewall
-
Export the CA Certificate
-
Import the CA Certificate into the VPN Client’s Machine Certificate Store
-
Make the VPN Connection and Confirm an SSTP Link
Here we go!
Create the SSTP Web Listener Certificate
TMG uses a Web Listener to accept SSTP VPN client connections. This has some important implications. The SSTP Web Listener requires that you bind a certificate to the Listener. This means that you need to dedicate an IP address to the SSTP Web Listener in most cases. The reason for this is that the SSTP Web Listener does not require authentication. Not only does it not require authentication, you can’t enforce authentication on the Web Listener. Because of this, it is unlikely that you are going to use the same Web Listener for a Web Publishing Rule. Thus, plan on dedicating an IP address on the external interface of the TMG firewall to the SSTP Listener.
The next problem we need to deal with is actually obtaining the certificate. Back in the days of Windows 2003, it was a relatively simple affair to obtain a certificate from the Web enrollment site. However, the world changed with Windows Server 2008 and if you think you are going to use the Web enrollment site to obtain a Web site certificate for the SSTP Listener, you will be sorely disappointed. Go ahead and try it. But do not spend too much time on this, since it is not going to work.
You are going to have to use alternate methods to obtain your certificate. First, you will need to decide what kind of certificate to use:
-
Commercial Certificate – A commercial certificate is one you purchase from a commercial certificate authority. The advantage of the commercial certificate is that you do not have to worry (as much) that the client has the CA certificate installed in its Trusted Root Certification Authorities machine certificate store. The disadvantage is that you have to pay for it, and sometimes there are stupefying issues regarding intermediate certificates that are hard to troubleshoot.
-
Private Certificate – A private certificate is one that you create using your own PKI. In most cases, you will use your established PKI that you have in your Windows domain. The advantage of using a private certificate is that you do not have to pay for it (except for the time it takes to create a PKI, which can be substantial). The disadvantage is that if your clients are not domain members, you are going to need to find a way to get your CA certificate installed on the clients’ Trust Root Certification Authority machine certificate stores.
In this example I am using a private certificate. This means that I am going to have to do two things later to make things work right:
-
Publishing my internal Certificate Revocation List – The SSTP client by default does a CRL check. Because of this requirement, I am going to need to publish my CRL.
-
Place the CA certificate on the VPN client – We will need to do this because client needs to trust the Web site certificate the Web Listener is going to present to it during the connection process
What about the details? How do you request a Web site certificate? Well, my doctor said that I need to keep my blood pressure down, so I decided to use the Windows Server 2003 IIS Web Site Certificate Request Wizard to obtain the certificate. However, that is just one way to do it. There are many other ways. If you do not have blood pressure or some other medical problem that prevents you from using the command line, then I highly recommend that you use the procedure described by Jason Jones.
The certificate I created for the SSTP Web Listener appears in the figure below. The common name on the certificate is vpn.msfirewall.org and the Enhanced Key Usage is for Server Authentication.

Figure 1
Obtain the Web site certificate using the method of your choice and copy it to the desktop on the TMG firewall.
Install the SSTP Web Listener Certificate
The next step is to install the Web site certificate on the TMG firewall. This is the easy part. Perform the following steps on the TMG firewall to install the certificate:
-
Click Start and then click Run. In the Open text box enter MMC and click OK.
-
In the Console1 window, click the File menu and then click Add / Remove Snap-in.
-
In the Add or Remove Snap-ins dialog box, click the Certificates entry in the Available snap-ins section and click Add.
-
In the Certificates snap-in dialog box, select the Computer account option and click Next.
-
In the Select Computer dialog box, select the Local computer option and click Finish.
-
Click OK in the Add or Remove Snap-ins dialog box.
-
In the left pane of the console, expand the Certificates (Local Computer) node and then click on the Personal node. Now right click on the Personal node and point to All Tasks and click Import.
-
Click Next on the Welcome to the Certificate Import Wizard page.
-
On the File to Import page, click the Browse button and find the certificate you copied to your desktop. The file name will appear in the File name text box after you select the certificate. Click Next.
-
On the Password page, enter the password you assigned to the certificate (assuming that you assigned the certificate a password). Put a checkmark in the Mark this key as exportable checkbox if you want to easily export the certificate in the future. This is a bit less secure, but long experience tells me that if you do not select this option, you are going to be sorry. This security hit is nominal if you pay attention to security best practices when configuring and managing the firewall. Click Next.
-
Select the Place all certificates in the following store option on the Certificate Store page. The Personal store should have been automatically selected for you. Click Next.
-
Click Finish on the Completing the Certificate Import wizard.
-
Click OK on the The import was successful dialog box.
The imported certificate will appear in the console window, similar to what appears in the figure below.

Figure 2
Make sure that the CA certificate is installed in the TMG firewall’s Trusted Root Certificate Authorities machine certificate store. The TMG firewall used in the lab setup was configured as a domain member prior to installation of the TMG firewall software, so with auto enrollment automatically installed the certificate because I was using a Windows Server 2003 Enterprise CA. If you do not use a similar setup, then you will need to make sure the CA certificate is installed on the firewall. The figure below shows the CA certificate installed in the correct location.

Figure 3
Address the CRL Issue
I mentioned the CRL issue earlier. When the SSTP VPN client makes the connection, it will check the CRL to see if the Web site certificate has been revoked. The CRL location is included in the certificate, as shown in the figure below.

Figure 4
In the figure you will see that the CRL is accessible over an HTTP connection. This means that I need to publish my CRL Web site. Note that this is the default name included on the certificate. There are things you can to with the private CA configuration to change the URL used to publish the CRL, and you might want to do this in a production environment. For more information on how to make those changes, click here.
I will tell you now, and will demonstrate it to you later, that the CRL Distribution Point is not actually accessed using that URL. So, if you plan on publishing your CRL and think that you can use the URL included in the certificate, you are going to be surprised that it does not work. Well go over this issue in detail later.
If you are using a commercial certificate, you do not have to worry about publishing your CRL site. The commercial CRL should be accessible from any Internet connected location.
Now let us get back to the task of publishing the CRL site. This requires that we create a Web Publishing Rule:
-
In the left pane of the TMG firewall console, click the Firewall Policy node. Click the Tasks tab in the Task Pane and click Publish Web Sites.

Figure 5
-
On the Welcome to the New Web Publishing Rule Wizard page, enter a name for the Web Publishing Rule. In this example we enter CRL Site and click Next.
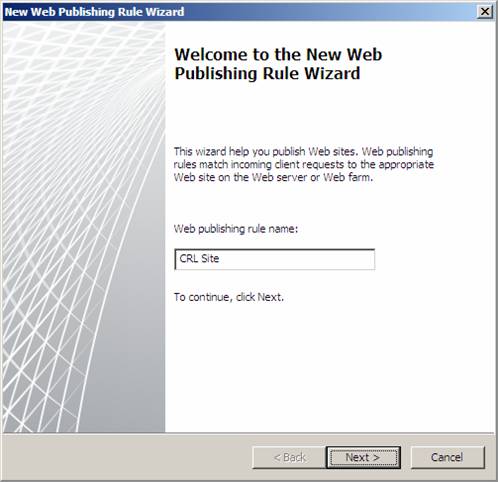
Figure 6
-
On the Select Rule Action page, select the Allow option and click Next.
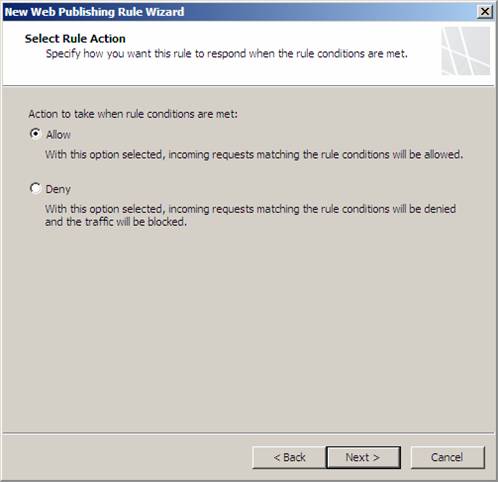
Figure 7
-
On the Publishing Type page, select the Publish a single Web site or load balancer option and click Next.
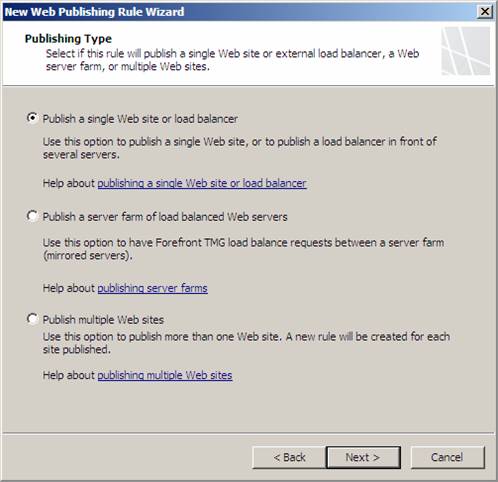
Figure 8
-
On the Server Connection Security page, select the Use non-secured connection to connect the published Web server or server farm option and click Next.

Figure 9
-
On the Internal Publishing Details page, enter the fully qualified name of the CRL Web site server in the Internal site name text box. Make sure the TMG firewall can resolve this name correctly. Or, in order to get around the name resolution problem, you can enter another name or IP address for the CRL Web server in the Computer name or IP address text box after checking the Use a computer name or IP address to connect to the published server checkbox. Click Next.
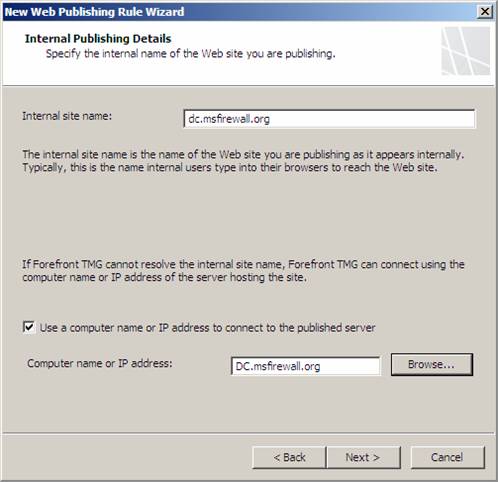
Figure 10
-
On the Internal Publishing Details page, enter the path to the CRL. If you look at the details of the Web site certificate, you can see the path is /CertEnroll/DC.crl, so we will enter that into the Path text box. This allows access only to the .crl file and no other location on the Web server, which enforces some degree of least privilege. However, as well see later, this isn’t going to work. Click Next.

Figure 11
-
On the Public Name Details page, select the This domain name (type below) option in the Accept requests for drop down list box. In the Public name text box, enter the public name that the SSTP client will use to access the CRL. In this example, the name is dc.msfirewall.org. The path will be entered for you automatically based on your configuration on the previous page. Click Next.
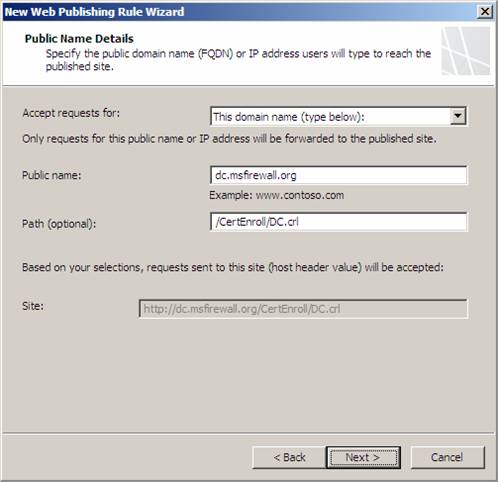
Figure 12
-
On the Select Web Listener page, click New to create an HTTP Web Listener for this Web Publishing Rule to use.

Figure 13
-
On the Welcome to the New Web Listener Wizard page, enter a name for the Web Listener. In this example we’ll name the Web Listener HTTP Listener. Click Next.

Figure 14
-
On the Client Connection Security page, select the Do not require SSL secured connections with clients option and click Next.
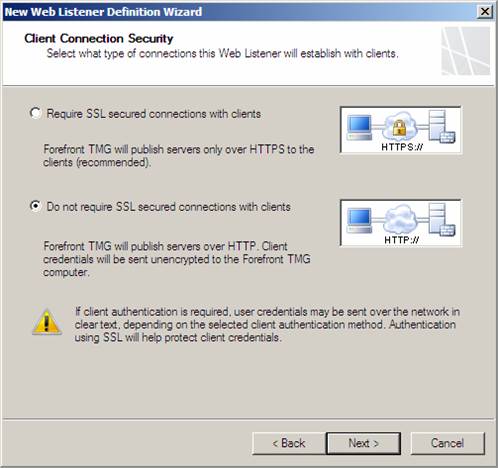
Figure 15
-
On the Web Listener IP Addresses page, put a checkmark in the External checkbox. I am using that option in this scenario because I have a single IP address bound to the external interface of the firewall. If I had several IP addresses bound to the external interface, I might have select the Select IP Addresses button and picked a particular IP address on the firewall’s external interface. Since that’s not an issue in this scenario, I can just select the External Network. Click Next.
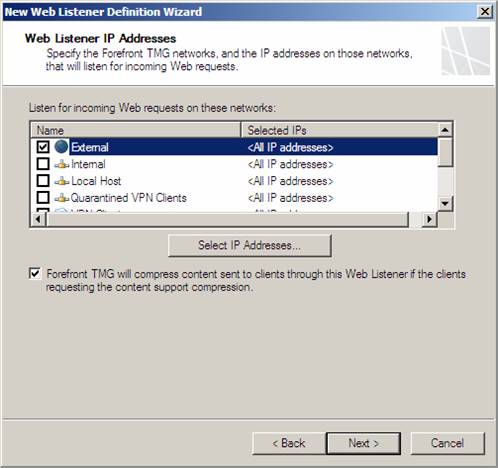
Figure 16
-
On the Authentication Settings page, select the No Authentication option from the Select how clients will provide credentials to Forefront TMG drop down list. Since the SSTP client does not have an interface that allows you to set credentials for the CRL check, we have to enable anonymous connections to the CRL. Click Next.

Figure 17
-
Click Next on the Single Sign On Settings page.

Figure 18
-
Click Finish on the Completing the New Web Listener Wizard page.
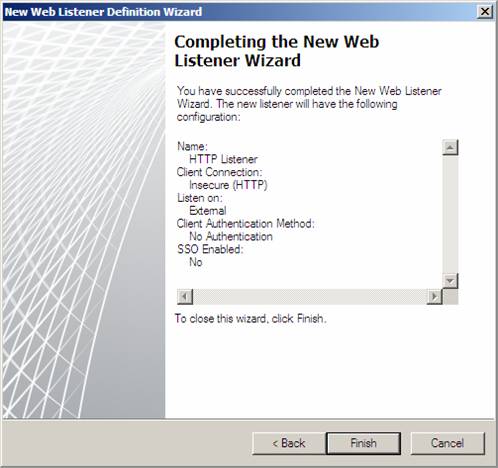
Figure 19
-
Click Next on the Select Web Listener page.

Figure 20
-
Select the No delegation, and client cannot authenticate directly option from the Select the method used by Forefront TMG to authenticate to the published Web server drop down list. Click Next.

Figure 21
-
On the User Sets page, accept the All Users setting and click Next.

Figure 22
-
Click Finish on the Completing the New Web Publishing Rule Wizard page.
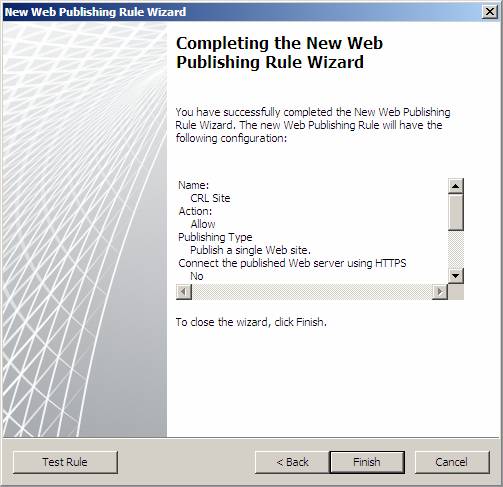
Figure 23
-
Click the Test Rule button to confirm that the rule works. The figure below confirms that the Web site is online and that the rule is able to enable the connection to the site.
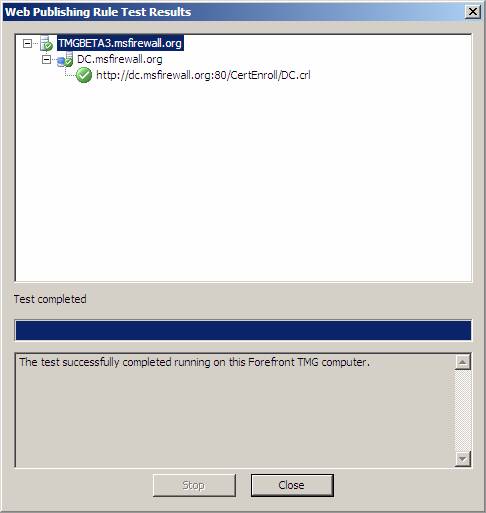
Figure 24
-
Click Finish on the Completing the New Web Publishing Rule Wizard page.
-
Click Apply to save the changes to the firewall configuration.
-
Enter a description for the change in the Configuration Change Description dialog box if you like and then click Apply.
Now to go a client and try to access the site. On my test Windows 7 client, I’ll enter http://dc.msfirewall.org/CertEnroll/dc.crl and press enter. You should see the following dialog box appear.
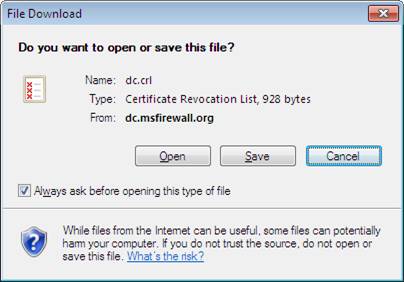
Figure 25
If you open the CRL, you will see something like the figure below.
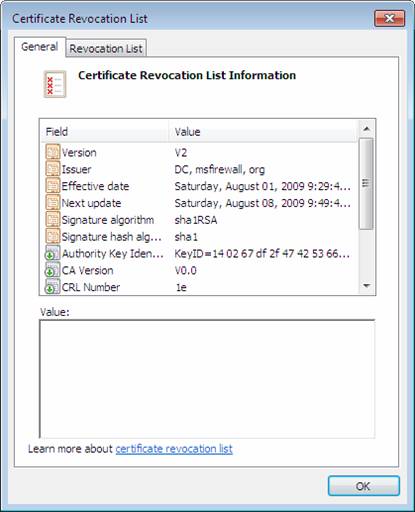
Figure 26
At this point we know that the rule works. However, we do not know if the SSTP client is actually going to use the path stipulated in the rule. I will give you a hint: the SSTP client does not use that path. That means we will need to revisit this rule later. But I want to show you the SSTP connection process before giving you those details, which I’ll share with you in the next article.
Summary
In this second part of our three part series on configuring the TMG firewall to accept SSTP VPN client connections, we discussed certificate related issues and then installed the Web site certificate onto the TMG firewall. We then created a Web Publishing Rule to publishes the CRL site of our private CA. Note that you do not need to go through this step if you are using a commercial CA. In the third and last part of this series we will go through the configuration steps for the VPN server component and then establish a VPN connection using SSTP. See you then! –Tom.
If you would like to read the other parts in this article series please go to:
- Configuring TMG Beta 3 for SSTP VPN Connections (Part 1)
- Configuring TMG Beta 3 for SSTP VPN Connections – Part 3: Configure TMG VPN Settings and Making the Connection


