If you would like to read the first part in this article series please go to:
- Controlling Internet Access: A Short Primer on TMG Access Rules (Part 1)
- Controlling Internet Access: A Short Primer on TMG Access Rules (Part 2)
- Controlling Internet Access: A Short Primer on TMG Access Rules – Part 3: TMG Firewall Web Publishing Rule Basics
Introduction
In our series covering TMG firewall basics, we’ve already addressed access rules and web publishing rules. This time, we’re going to look at TMG networks and network rules. Overall, the TMG firewall is probably one of the more intuitive firewalls to work with. You don’t have to memorize any command line type language and the user interface is a model of professional software interface design. In fact, it would not be far from the truth to say that the ISA/TMG software interface design model is probably the most sophisticated of all the software that Microsoft has in its portfolio today.
But enough of my homage to the ISA/TMG firewalls. Let’s get to today’s lesson, which is about a subject that new TMG firewall admins often miss – TMG Networks and Network Rules. I think the reason that new TMG firewall admins sometimes overlook TMG firewall Networks and TMG firewall Network Rules is that unlike Firewall Policy, which is right there in the left pane of the TMG firewall console, the Networks node is toward the bottom, and it’s a pretty generic term so it doesn’t catch your eye.
Perhaps another reason that new TMG firewall admins don’t notice the Networks node is that unless you have more than two NICs in the TMG firewall, there will probably no reason for you to drop into the Networks node in the left pane of the TMG firewall console.
However, if you decide to take your TMG firewall to the next level, and add more NICs so that you can control and record all traffic moving through the TMG firewall, then you’ll want to know about TMG firewall Networks and TMG firewall Network Rules. Knowing about these subjects will enable to you get the most out of the TMG firewall’s multi-networking capabilities.
Create a TMG Firewall Network
The TMG firewall networking model is based on the concept of the TMG firewall “Network”, with a capital “N”. A TMG firewall Network represents a collection of IPv4 addresses that do not belong to any other TMG firewall Network. The NIC that connects the TMG firewall itself to those IP addresses is considered the “root” of the TMG firewall Network.
Suppose you have a simple two-NIC TMG firewall. One interface is connected to the Internet and that is the default External interface, and it is connected to the default External Network. The other NIC is connected to a simple, single subnet network, which is your default Internal Network. If your single subnet is 10.0.0.0.-10.0.0.255, then your default Internal Network is defined by those addresses, and the NIC that connects to that subnet is the “root” of the default Internal Network.
In Figure 1 below, you can see the Networks tab in the Network node in the left pane of the TMG firewall console. There are five default TMG firewall Networks:
- External. The default External Network includes all IP addresses that aren’t part of another TMG firewall Network.
- Internal. The default Internal Network is defined when you install the TMG firewall. The default Internal Network is typically the one that contains domain controllers or DNS servers that the TMG firewall needs to carry out basic operations.
- Local Host. The Local Host Network is defined by the IP addresses that are bound to all interfaces on the TMG firewall’s NICs.
- Quarantined VPN Clients. The Quarantined VPN Clients Network is a dynamically created Network that includes all the IP addresses of VPN clients that are currently in quarantine.
- VPN Clients. The VPN Clients Network is another dynamically created Network that includes the IP addresses of all VPN clients that aren’t currently in quarantine.
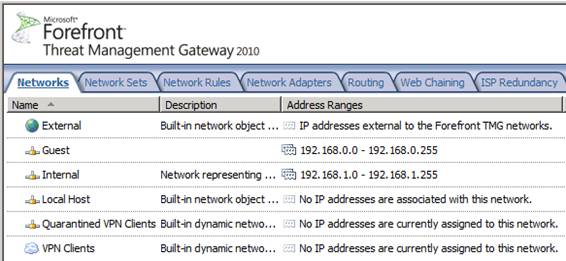
Figure 1
If you want to have more than two NICs in the TMG firewall, then you’re going to want to create new Networks to support those NICs.
Note:
You can have more than one NIC on the same TMG firewall Network, but we won’t cover that scenario in this article.
To create a new TMG firewall Network, click the Create a New Network link in the right pane of the TMG firewall console.This brings up the Welcome to the New Network Wizard, as seen in Figure 2 below. On this page, you will assign a name to the new Network. In this example, we’ll name the Network DMZ and click Next.
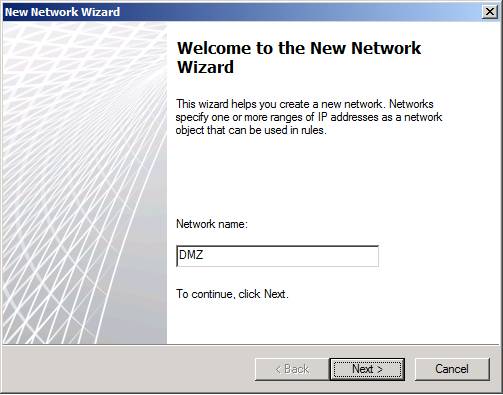
Figure 2
On the Network Type page, you must tell the wizard what kind of Network you want to create. Here are your choices:
- Internal Network – An Internal Network is a TMG Protected Network. When you create an Internal Network, you will have a number of configuration options available to you that are specific to that network, such as the web proxy settings that clients on the Network should use. We’ll talk about those later.
- Perimeter Network – A Perimeter Network is similar to an Internal Network, in terms of the options that are available to you after the Network is completed. In fact, there is no practical difference between a Perimeter Network and an Internal Network, other than the “type” designation to make it easier to see which Networks you consider to be internal and which ones you consider to be DMZs.
- VPN Site-to-Site Network – This is a special type of Network that TMG uses to connect two Networks over the Internet, using VPN routers.
- External Network – An External Network is one that doesn’t have the options that are available with Internal and Perimeter Networks, and isn’t considered a TMG Protected Network; it allows you to connect to external resources outside of your organization, but not reachable through the default gateway on the default External Network.
In this example we want to create a DMZ Network, so we’ll select the Perimeter Network option, as shown in Figure 3, and click Next.
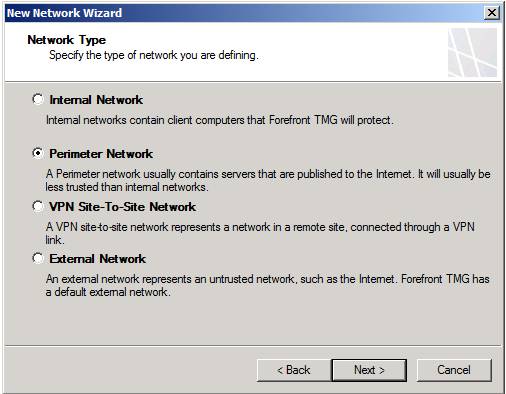
Figure 3
On the Network Addresses page, you configure the IP addresses that are used to define the Network. These are the addresses that are directly reachable by the NIC connected to the Network you’re creating. There are three ways you can add addresses to define your Network:
- Add Adapter – This is the best way to add addresses. If you have configured the routing table on the TMG firewall before creating the Network, this option will automatically include all the addresses reachable by the NIC on the Network you’re defining.
- Add Private. This option makes it easy to add a collection of private IP addresses to define your new Network.
- Add Range. This option allows you to specify a range of IP addresses to define your Network. You’ll most often use this one if you haven’t already configured the routing table on the TMG firewall; in that case, all the addresses directly reachable by the NIC might not be included when you use the Add Adapter option.
In this example, we’ll select the Guest NIC (I’ve renamed the NICs to make them easier to identify) to be the root of the DMZ Network I’m creating. This is shown in Figure 4.

Figure 4
Review your choices on the Completing the New Network Wizard page, which you see in Figure 5, and click Finish.
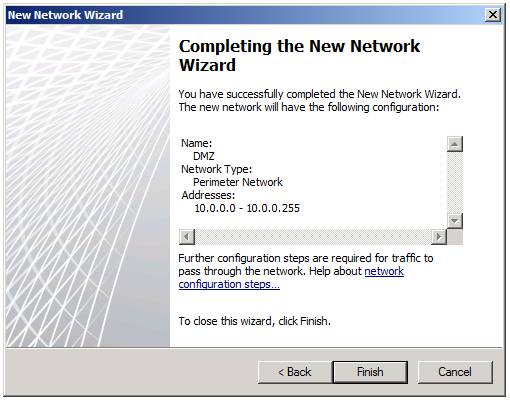
Figure 5
At this point, the new Network has been created. However, there’s not much you can do with it until you create a Network Rule.
Create a TMG Firewall Network Rule
Networks are connected to other Networks using Network Rules. If there isn’t a Network Rule to connect a Network to another Network, no traffic will move between the Networks. When you connect a Network to another Network, you also define the routing relationship between those Networks. The routing relationship can be either NAT or Route. A route relationship means that packets from the source to the destination Network are routed, like any other routed connection. If you choose a NAT relationship, then connections from the source Network will be NATed to the destination Network, with the primary IP address on the NIC closest to the destination Network replacing the original source IP address of the host on the source Network.
To create a new Network Rule, click on the Network Rules tab when in the Networks node in the TMG firewall console. Then click the Create a Network Rule link in the right pane of the console. The first page you see is the Welcome to the New Network Rule Wizard page, as seen in Figure 6 below. First you need to assign the rule a name in the Network rule name text box. In this example, we’ll name the rule Internal to DMZ, which will connect the default Internal Network to the new DMZ Network. Click Next.
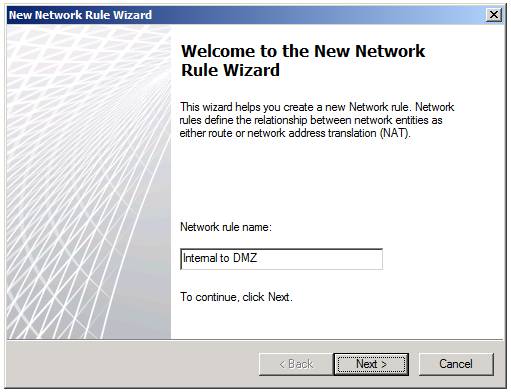
Figure 6
In the Network Traffic Sources dialog box, you set the source Network for the Network Rule. In this example, we’ll select the default Internal Network as the source Network. Click Add and then in the Add Network Entities dialog box, double click on Internal, as shown in Figure 7. Click Close and then click Next.
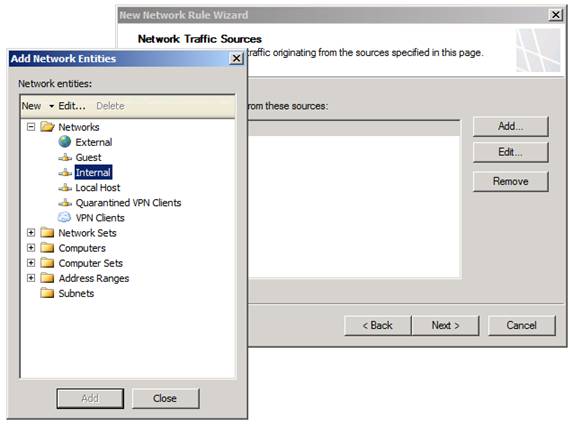
Figure 7
On the Network Traffic Destinations page, you set the destination side of the Network Rule. In this example, we’ll choose the Guest Network (which is a DMZ Network) as the destination side of the Network Rule. Click the Add button and select the DMZ Network from the Networks list in the Add Network Entities dialog box, shown in Figure 8, and then click Next.
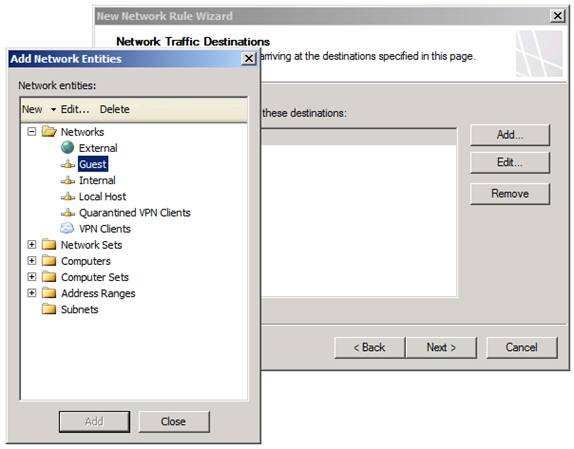
Figure 8
On the Network Relationship page, shown in Figure 9, select the route relationship between the source and destination Network. In this example, we’ll select the Route option. Click Next.
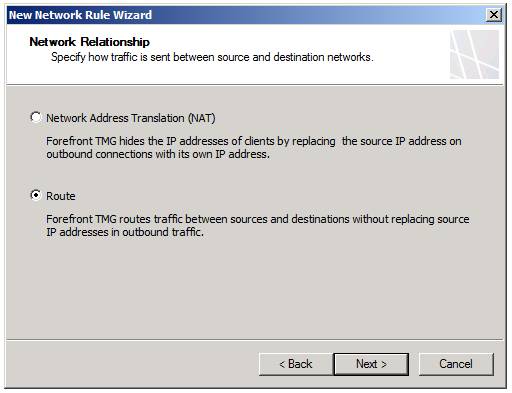
Figure 9
The last page of the wizard is the Completing the New Network Rule Wizard shown in Figure 10. Check your settings and click Finish.
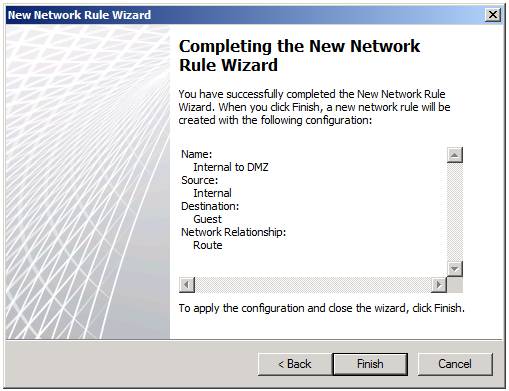
Figure 10
You can see the new Network Rule in the list of Network Rules in the Network Rules page, as you can see in Figure 11. Network Rules are evaluated in order – so if you notice some overlap in the rules, you can move the rule that you want to be evaluated first higher in the list by right clicking it and clicking the Move Up command. After the rule is where you want it, click the Apply button to save the configuration to firewall policy.

Figure 11
Summary
In this article, we went over some of the basic concepts used in TMG firewall networking – TMG firewall Networks and TMG firewall Network Rules. If you never put more than two NICs in your TMG firewall, you’ll probably never have to think about this subject. But if you decide that you want to take your TMG firewall to the next level, then you can install multiple NICs in the firewall and create new TMG firewall Networks. However, it’s important to remember that you can’t use those Networks until you create a TMG firewall Network Rule to connect those Networks. Once the Networks are connected with a TMG firewall Network Rule, communications can pass between those Networks. However, nothing will pass until you create a firewall rule (either an Access Rule or a publishing rule) to allow traffic you want to move between them.
In the next article in this “back to basics” series, I’ll go over the defaults of the options available in a Network configuration when you create an Internal or Perimeter Network. I hope you enjoyed this article and if you have any questions about it, let me know! Send me a note at [email protected] and your question might appear in next month’s newsletter. See you then! –Deb.


