There are some things in life that will always be the same. Taxes will be due April 15 (in the US). The United States of America will always celebrate Independence Day on July 4th. Grant will always be buried in Grant’s Tomb. And, Microsoft will continue to make decisions and provide solutions that make us all shake our heads. If you run Windows Vista, you were shaking your head and in many cases, very upset about the situation of not having the proper tools to perform administration of your Windows Server 2003 or Windows Server 2008 network and Active Directory environment. Now, with the recent release of the Remote Server Administrative Tools (RSAT), the wait is over. This article describes some idiosyncrasies, installation steps, and tools that are available in the new RSAT for Windows Vista.
Why do I need RSAT?
If you are running Windows Vista as your “administrative desktop”, you will need to obtain RSAT to run the tools that administer Active Directory, network services, Group Policy, etc. The reason is that none of these tools come with Windows Vista out of the box.
Well, that is not 100% true. Microsoft made a decision to include Group Policy Management Console (GPMC) with Windows Vista. If this is the case, you might be wondering why you do not see the GPMC on your Windows Vista SP1 box now!? The reason is that the GPMC is removed when you install Windows Vista SP1. This was a decision that was made by the Group Policy team, in order to get all Vista computers to a common playing field so the NEW GPMC could be installed, which comes with RSAT.
Other tools that come along for the ride when you install RSAT include:
- Active Directory Domain Services (AD DS) Tools
- Active Directory Lightweight Directory Services (AD LDS) Tools
- Active Directory Certification Authority Tools
- DHCP Server Tools
- DNS Server Tools
- Terminal Services tools
- Universal Description, Discovery, and Integration (UDDI) Services Tools
- Group Policy Management Tools
- Network Load Balancing Tools
As you can see, if you want to administer your Windows domain with a client, you will need to install RSAT on Windows Vista.
Obtaining and Installing RSAT
First, you need to obtain RSAT. It is not that it is that hard to obtain, you just need to know you must go and get it. You can download it from Microsoft’s download center.
Note:
There is a 32-bit and 64-bit installation version, so just make sure you download the correct one based on the version of Vista you are running.
Once you download RSAT, first make sure that you have installed Windows Vista SP1. You can download and install SP1 from here.
The installation of RSAT does take a while, so make sure you leave yourself enough time. Figure 1 shows you what you can expect to see while the installation occurs (not very interesting!).
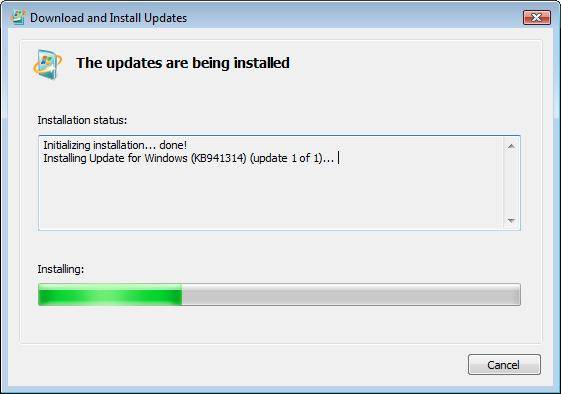
Figure 1: RSAT installing on Windows Vista
If you are running Windows XP, you will not be able to install RSAT on that OS. RSAT is only for Vista, as Vista can take advantage of the new tools and their features. If you want to administer your domain with Windows XP, you will need to install the Admin Pack, which can be downloaded from here.
It is noted that RSAT will install and function on the following versions of Windows Vista, which have SP1 installed:
- Windows Vista Business
- Windows Vista Enterprise
- Windows Vista Ultimate
- Windows Vista Business 64-bit Edition
- Windows Vista Enterprise 64-bit Edition
- Windows Vista Ultimate 64-bit Edition
Getting to the RSAT Tools
After RSAT has been installed, you will need to get to the tools. As a result of trying to obscure access to tools that can cause damage, Microsoft has hidden some of the tools from your view by default. Follow these steps in order to access all of the tools within RSAT:
- Open up Control Panel, then click the Programs option, and finally under the Programs and Features area, click Turn Windows features on or off, as shown in Figure 2.
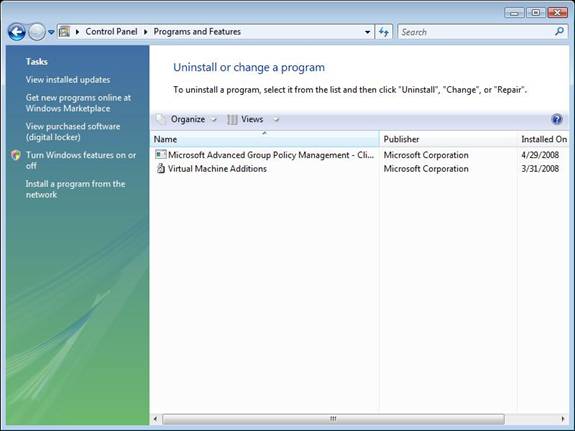
Figure 2: Turning on or off Windows Features
- In the Windows Features dialog box, select the remote administration snap-ins and tools that you want to install.
- After you have selected all of your tools that you want to see, you will just click on the OK button.
Keep in mind that you have two different sections under the Remote Server Administrative Tools that you can toggle. The first set is labeled Feature Administration Tools and consists of the following tools, shown in Figure 3 as well:
- BitLocker Drive Encryption Toools
- Failover Clustering Tools
- Group Policy Management Tools
- Network Load Balancing Tools
- Network Load Balancing Tools
- SMTP Server Tools
- Storage Manager for SANs Tools
- Windows System Resource Manager Tools

Figure 3: Feature Administration Tools available after RSAT installation
The second section is labeled Role Administration Tools and consists of the following options, also shown in Figure 4.
- Active Directory Certificate Services Tools
- (Certificate Authority Tools and Online Responder Tools)
- Active Directory Domain Services Tools
- (Active Directory Domain Controller Tools and Server for NIS Tools)
- Active Directory Lightweight Directory Services Tools
- DHCP Server Tools
- DNS Server Tools
- File Services Tools
- (Distributed File System Tools, File Server Resource Manager Tools, and Share and Storage Management Tools)
- Terminal Services Tools
- UDDI Services Tools
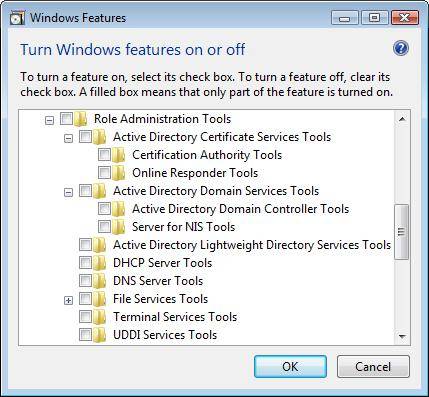
Figure 4: Role Administration Tools available after RSAT installation
Note:
It can take quite a long time to get these features configured on your system. So, plan for it… do not just think you will be able to click and go!
If you want to flood your Start menu with the Administrative Tools shortcuts, you will need to follow a different set of steps. Here they are:
- Right-click Start, and then click Properties.
- On the Start Menu tab, click Customize.
- In the Customize Start Menu dialog box, scroll down to System administrative tools, and then select Display on the All Programs menu and the Start menu.
- Click OK.
Now, you will have all of the Administrative Tools that you have enabled showing up on your Start Menu, similar to what is shown in Figure 5.
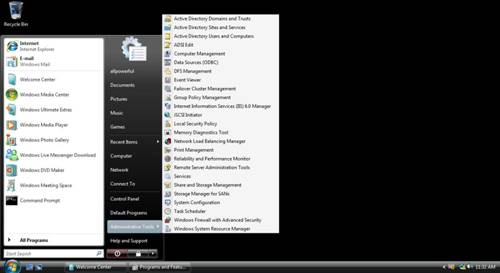
Figure 5: Administrative Tools can be enabled to display on the Start Menu
Summary
If you have a Windows Server 2008 Active Directory based domain, it is in your best interest to utilize the tools that come with Windows Vista SP1 and RSAT. Heck, for that matter, if you are still using a Windows Server 2003 Active Directory domain, you will still benefit greatly from the tools that come with SP1 and RSAT. You will need to get your ducks in a row, installing the correct service packs, obtaining the RSAT, and then making sure you have access to the RSAT tools. However, once you get all of this completed, you will be set to start performing the administration on the network and within Active Directory.