Restricting Users from Sending and Receiving Email Via The Internet
It maybe necessary for you at some point in your administrative lifetime to block users from being able to send and receive emails via the Internet, what we will look at in this article is how you can achieve this goal.
Restricting Users from Sending Internet Based Email
In order to restrict users from sending Internet based mail, we will need to create an SMTP connector, you cannot place this restriction on the SMTP Virtual Server.
1. Create a Mail-Enabled Group and give it a meaningful name, I am going to call ours “No Internet Mail”, make sure you Mail-Enable this group.
2. Add the users who will not have the ability to send Internet based mail into this group.
IMPORTANT: If you are going to use a group for the restrictions you must also edit the Registry to enable this feature, look at http://support.microsoft.com/default.aspx?scid=kb;en-us;Q277872 for the necessary Registry changes you must make.
Now we need to create an SMTP Connector.
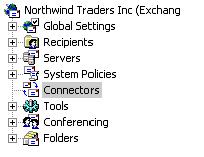
1. Open the Exchange System Manager and locate the “Connectors” container.
2. Right-click over the “Connectors” container and select New > SMTP Connector, the Properties dialogue box for the new connector will now be displayed, give your SMTP Connector a name, I have called ours “Default SMTP Connector”.

3. We must now associate our SMTP Connector with our SMTP Virtual Server, to do this click on the “Add” button, you will now be presented with a list of SMTP Virtual Server, in our environment we only have one SMTP Virtual Server, select the SMTP Virtual Server and click OK.

4. The next step is to associate an “Address Space” with this connector, the Address Space is simply a list of addresses that this connector can send mail to, go to the “Address Space” tab and click on Add, you will now be presented with the “Add Address Space” dialogue box, select SMTP.
5. The “Internet Address Space Properties” dialogue box will now appear as shown in the figure below, notice the * in the “E-mail Domain” field, this indicates that this connector is capable of sending mail to any SMTP domain, click OK.

We must now setup the restriction so that the group we created cannot send mail out via the Internet.
6. Click on the “Delivery Restrictions” tab, and add your group to the “Reject messages from” section, as shown in the figure below:

7. Click OK to exit out of the SMTP Connector properties.
So, when someone in the “No Internet Mail” group tries to send a message out, this is the response they will get back:
Your message did not reach some or all of the intended recipients.
Subject:
Sent: 7/9/2002 10:29 PM
The following recipient(s) could not be reached:
‘[email protected]’ on 7/9/2002 10:29 PM
You do not have permission to send to this recipient. For assistance, contact your system administrator.
So if we need to restrict someone from sending mail out over the Internet all we need to do is place them inside of the “No Internet Mail” group.
Restricting Users From Receiving Mail From the Internet
Now we are going to look at how we can stop users from receiving mail from the Internet, this is a little more complex that stopping them from sending Internet based mail.
We are going to continue working with the “No Internet Mail” group, so if you belong to the “No Internet Mail” group you will not be able to send or receive Internet based mail.
In order to stop a user from receiving Internet mail, we need to give them a fake SMTP address, so when mail come in via SMTP it does not know what mailbox to deliver it to and the message will be returned to the sender.
We have two options, we can either do this manually or we can use a Recipient Policy to apply the SMTP address for us, we are going to use the later option.
When you create a Recipient Policy based on group membership the Recipient Policy Filter expects to have the Distinguished Name (DN) attribute of the group entered in the filter, so the first thing we are going to do is find out what the DN attribute is for our “No Internet Mail” group.
We are going to use a utility called ADSIEDIT to locate the DN of our “No Internet Mail” group, ADSIEDIT is part of the Windows 2000 Support Tools that can be found on your Windows 2000 CD.
IMPORTANT: Please be VERY careful when using ADSIEDIT as you can cause serious damage.
1. Open ADSIEDIT
2. Navigate to the Organizational Unit that the group is in, in our case it is in the Users OU, as shown in the figure below:

3. Locate the Group on the right-hand pane of the screen and right-click and select Properties.
4. In the Properties dialogue box select “distinguishedName” from the “Select a property to view” drop down list, in the “Value(s)” field you will the DN for this group, notice it is grayed out, you cannot and do not want to edit this.
5. Make a note of everything that is in the “Value(s)” field, make sure you write it down exactly as it is, the other option is to highlight the contents of the “Value(s)” field and copy it.
6. Close out of ADSIEDIT
Now, we are ready to create our Recipient Policy based on Group Membership, this policy is going to apply the SMTP address of fakedomain.local to the users who we do not want to receive Internet based mail.
1. Open Exchange System Manager
2. Navigate to the “Recipient Policy” container.

3. Right click over Recipient Policies and select New > Recipient Policy
4. On the “New Policy” dialogue box select just the “E-Mail Addresses” checkbox
5. Name your policy, we shall call our “No Internet Mail”
6. We must now specify the filter, to only apply this policy to users who belong to the “No Internet Mail” group, so click on the “Modify” button
7. On the “General” tab of the “Find Exchange Recipients” clear all the checkboxes, except for “Users with Exchange Mailboxes”.

8. Select the “Advanced” tab, click on the “Fields” button go to Users and then select the “Group Membership” field, this should now be displayed in the “Find Exchange Recipients” dialogue box.

9. In the “Condition” drop down list, select “Is (exactly)”
10. In the “Value” field, type or paste the DN of the group, we got this earlier using ADSIEDIT, click on “Add”

11. You could now click on the “Find Now” button to test that the correct users are displayed, if everything looks OK, click on OK to exit the “Find Exchange Recipients” dialogue box.
12. Select the “E-Mail Addresses (Policy)” tab.
13. Click on “New” and select “SMTP Address” from the list provided.
14. The “SMTP Address Properties” dialogue box will now be displayed, in the “Address” field, enter the fake Domain name you wish to use including the @ sign, in our case we choose fakedomain.local

15. Click OK to accept the new address, this will return you to the Properties dialogue box.
16. In the Properties dialogue box, check the box next to the fake SMTP address we just created, and also click on the “Make Primary” button, the fake SMTP address should now be displayed in bold.
17. Click on the remaining SMTP address and then click on the “Remove” button.
IMPORTANT: Do NOT remove the X.400 address

18. Click OK to exit out of the Recipient Policy, you will be prompted to apply this policy, click on Yes.
I recommend you now force the policy to be applied, right click over the policy we just created and select “Apply this policy now”
Now, if you already have users this policy will be added to any existing SMTP address they already had, so we have a user called “Mark Fugatt” who belongs to the “No Internet Mail” group, but because his account existed before the policy was created he will still have a valid SMTP address, as shown in the figure below.

So in Active Directory Users and Computers, you will need to remove all the SMTP addresses except the @fakedomain.local, for this users, this will not apply to users you create and place into the “No Internet Mail” straight away.
This document has explained the steps necessary for you to block users from sending and/or receiving Internet based mail.
