If you would like to read the other parts in this article series please go to:
- Microsoft System Center Service Manager – Part 1: Introduction and Planning
- Microsoft System Center Service Manager – Part 2: Installation
- Microsoft System Center Service Manager – Part 4: Initial use of the product
Introduction
Microsoft continually improves the System Center line in their quest to provide IT organizations with one-stop shopping for their service and management needs. As the newest entry to the System Center line, Service Desk fills the end-user void in the company’s management line. In this article, you will learn how to install Service Desk’s base services as well as the product’s data warehouse components.
As a brand new product in Microsoft’s System Center line, Service Manager rounds out Microsoft’s ITIL/MOF-focused architecture by bringing centralized, accessible incident and problem management capabilities to bear. In Part 1 of this series, I discussed in detail the requirements that must be in place before you can install Service Manager. In Part 2, you learned how to install the various Service Manager components. In this part, you will learn how to initially use and configure Service Manager to most effectively meet the needs of your organization.
A First Look
At the end of Part 2 of this series, we left Service Manager in a fully installed, ready to be run state. Now, it’s time to run the software to discover how it operates and to learn how to unlock its capabilities. To start Service Manager, from any machine to which you’ve installed the Service Manager Console, go to Start >All Programs > Microsoft System Center > Service Manager 2010 > Service Manager Console.
The first time you run Service Manager on a new system, you’ll be presented with the dialog box that you see below in Figure 1. You need to specify the name of your Service Manager server and click the Connect button in order to proceed. Once you do so, the system is initialized, a process that can take a few moments to complete.
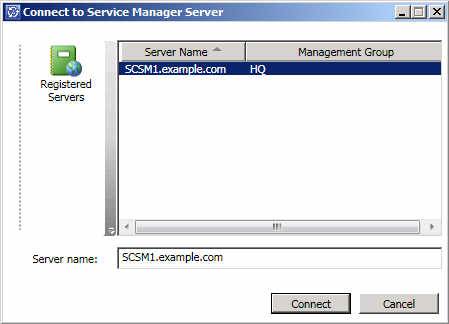
Figure 1: Connect to a Service Manager system
Once the initialization process is complete, you get your first look at the Service Manager console itself, which you can also see below in Figure 2.
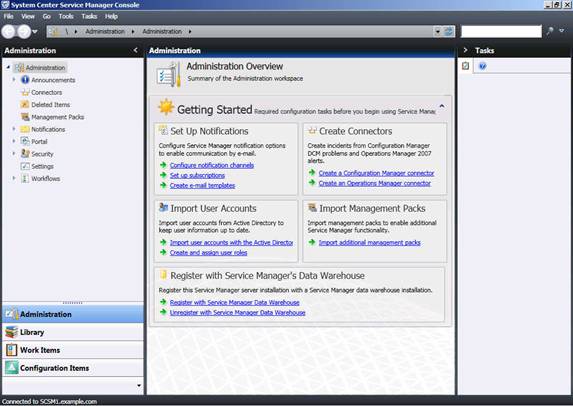
Figure 2: The Service Manager console
As you can see, there are a number of “first steps” that you need to take in order to make your Service Manager system usable. However, the first step you need to perform is to register your Service Manager system with the Data Warehouse component. This is the step that enables reporting in your Service Manager environment.
Register with the data warehouse
The registration process is run via a wizard that you initiate by clicking the link entitled Register with Service Manager Data Warehouse. The first screen of the registration wizard is shown in Figure 3. This is an information screen that outlines the purpose of the wizard. Click the Next button to continue.

Figure 3: Start the Data Warehouse Registration Wizard
The first screen of significance (Figure 4) asks you to specify the name of your warehouse management server. Type the server name and to make sure that the connection works, click the Test Connection button.

Figure 4: Choose the DW server name
Tip:
If the connection doesn’t succeed, verify that the Windows firewall on your data warehouse server is configured to allow communication from your Service Manager Management server. In Figure 5, I’ve provided a communications diagram to help you configure the Windows firewall for each of your Service Manager components. For example, if you intend to eventually import information from your Active Directory, you need to allow incoming traffic from your Service Manager system on port 389.
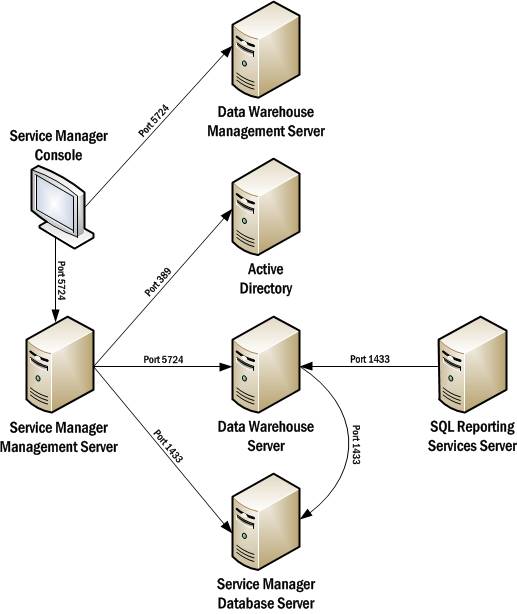
Figure 5: A Service Manager Communications diagram
Once you’ve verified that communications with your Data Warehouse server work correctly, move on to configuring the credentials that you plan to use to access the data warehouse server. In Figure 6 you will see that I’ve chosen the default account of DW_EXAMPLE SecureReference. This account name will be different for you… unless you’ve named your environment EXAMPLE! Whatever account you choose needs to be a member of the local Administrators group on the data warehouse server.
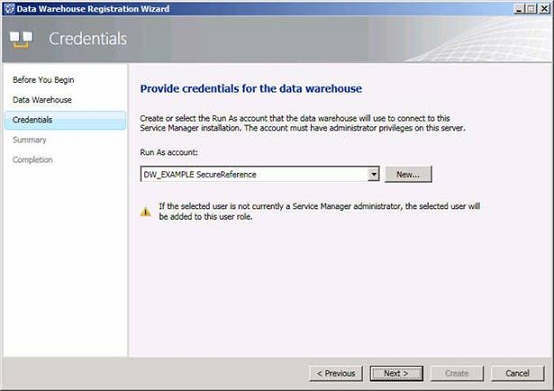
Figure 6: Provide credentials to use for the DW
Before you click the Create button to initiate the process, review your options to make sure that they will work in your installation.
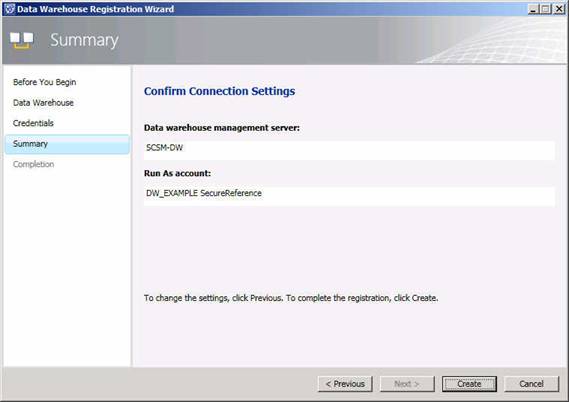
Figure 7: Review your selections
After the registration is complete, you will receive a notice indicating that the data warehouse registration was complete. Click the Close button to finish.
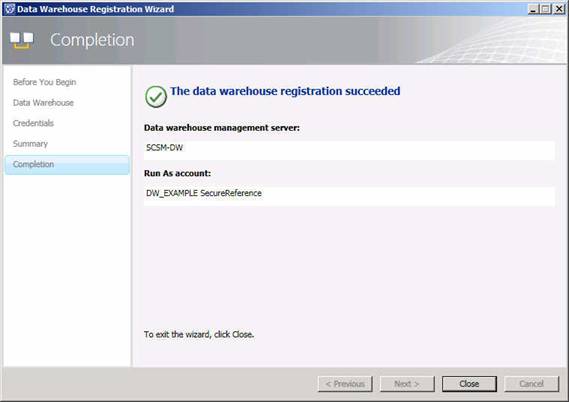
Figure 8: DW registration was successful
It can take quite some time (read: hours) for the full deployment process to take place and for your console to be able to access all of the information stored in the data warehouse. You’ll get a message like the one shown in Figure 9. You can safely ignore this message as it’s for information purposes only. Just understand that you’ll need to wait to get to your information.
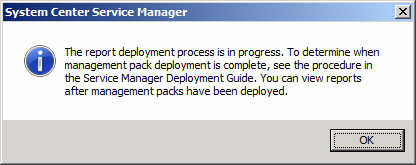
Figure 9: Notification message regarding report availability
Even if the process has not yet completed, you’ll see a couple of new options in the navigation area. Specifically, as shown in Figure 10, there are now Data Warehouse and Reporting items on the menu. Select the Data Warehouse option and then click Data Warehouse Jobs to get a list of the jobs related to the Service Manager Data warehouse component. This figure also shows you a list of some of Service Manager’s default jobs.

Figure 10: A new navigation option is available
Configure the Data Warehouse jobs
By default, not all of the schedules for these jobs are enabled, but you can fix that.
To enable the jobs necessary for the Data Warehouse component, you need to start PowerShell as an administrator. Once you’ve done so, execute the commands that you see in the table below.
|
Command |
Command description |
|
Add-PSSnapIn SMCmdletSnapIn |
This adds a snap-in to PowerShell that enables the Service Manager commands. |
|
Enable-SCDWJobSchedule -JobName Extract_DW_Example |
Enable the job schedule that handles data warehouse synchronization. Replace “DW_Example” with the name of your Data Warehouse management group. |
|
Enable-SCDWJobSchedule -JobName Extract_HQ |
Enable the job schedule that handles extraction of data from the Service Manager database. Replace “HQ” with the name of your Service Manager management group. |
|
Enable-SCDWJobSchedule -JobName Transform.Common |
Enables the job that takes raw data and cleanses, reformats, and aggregates it in order to get it into a final format for reporting. |
|
Enable-SCDWJobSchedule -JobName Load.Common |
This command enables the job that queries the data from the data warehouse. |
As a side note, once you’ve enabled a job and it’s running, you can get a look at the specifics by double-clicking the job name in the Service Manager console. For example, if I double-clicked on Extract_DW_Example as shown in Figure 10, I’d see a screen much like the one shown in Figure 11. This tells you exactly which modules have completed. For now, don’t worry too much about the modules. Just understand that you can see status.
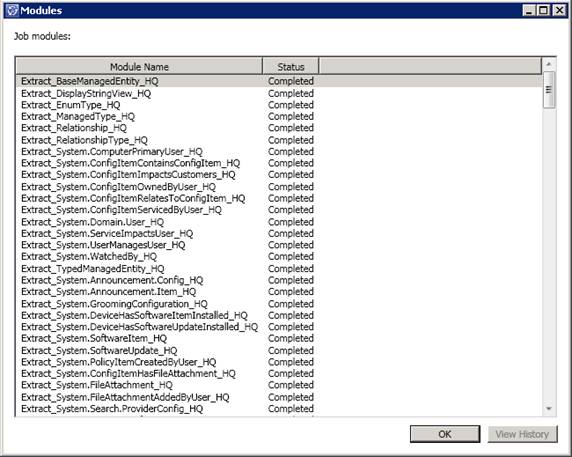
Figure 11: Job status
Connecting to Active Directory
With your data warehouse connected to your Service Manager system, turn your attention to connecting to Active Directory. Service Manager’s Active Directory connector allows you to import users, groups, printers, and computers from Active Directory as configuration items in the Service Manager database. You’re able to import items from the whole domain or from a single organizational unit.
Create the connector by clicking the Import user accounts with the Active Directory connector option on the Administration Overview screen you saw in Figure 2. This starts the Active Directory Connector, the details screen for which is shown in Figure 12.

Figure 12: Start up the Active Directory connector wizard
You need to provide a name for your new Active Directory connector. If you like, you can also provide a description, but this is optional. Figure 13 gives you a look at the screen on which you provide this information.

Figure 13: Provide a name for the connector
The next step of the wizard (Figure 14) is one of the two most important parts of the wizard. In this step, you need to decide on a scope for the Active Directory connector; do you want to allow the connector an unfettered look at the current Active Directory domain (Use the domain: example.com) or would you rather choose a different domain or limit the connector’s scope to an organizational unit (Let me choose the domain or OU).
In the Run As account box, provide credentials for a user account that has read rights to Active Directory. I’ve chosen to use the Operational System Account. This is the same account you specified at the time that you installed Service Manager. In my case, the Operational System Account is linked to example.com\sm. Once you’ve clicked the Next button to move on, the Credentials dialog box will open asking you to provide the password for the account.
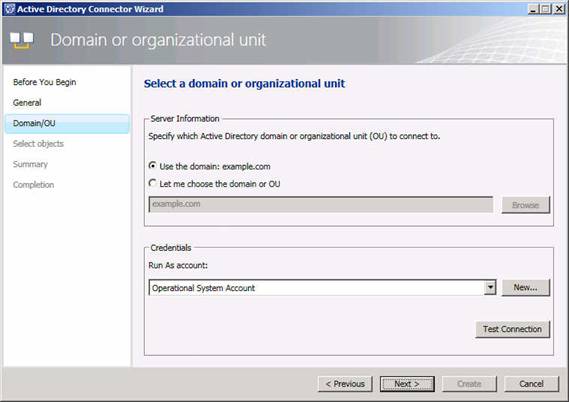
Figure 14: Determine the connector scope
Once you’ve decided on a scope, move on to object selection. This is the second major part of this wizard. You can choose to import everything by choosing the All computers, printers, users and user groups option or you can import specific items by selecting Select individual computers, printers, users and user groups option. If you choose to select individual objects, click the Add button, choose the object type and then choose the individual objects. In Figure 16, I’ve chosen to add individual computers to Service Manager.

Figure 15: Decide which objects should be included

Figure 16: Object selection
As always, Microsoft’s wizards are most helpful when it comes to helping you to avoid errors by providing you with a summary screen outlining the decisions you made during the process. Click the Create button to create the new Active Directory connector.
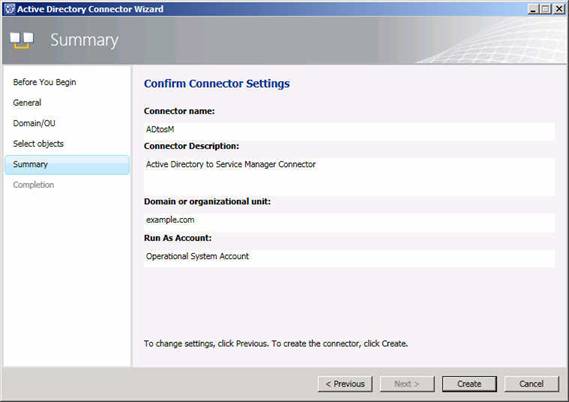
Figure 17: Confirm your selections
Success means a green arrow is in your future! If you see a green arrow like the one in Figure 18, you’ve done well. To verify that the connector actually exists in your Service Manager environment, go to Administration > Connectors. Figure 19 shows you the new ADtoSM connector that I just created. If the synchronization has yet to commence, select the connector and click the Synchronize Now button. To view the status of the synchronization, you might need to move the Task Pane out of the way (click the > symbol to the left of the word Tasks). Figure 20 shows you more.
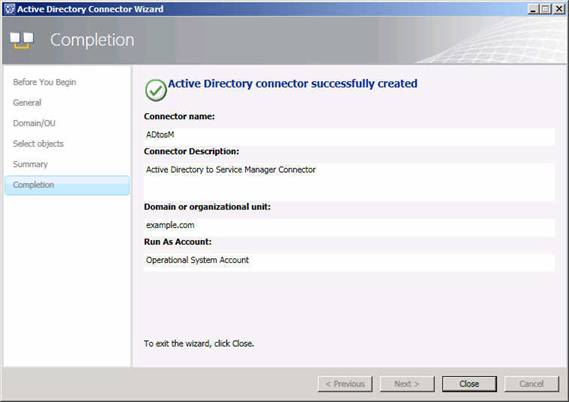
Figure 18: The connector was created

Figure 19: The new connector has been created

Figure 20: Connector synchronization status
At the end of the synchronization process, you can get a look at a number of the objects that were imported from Active Directory – such as the list of computer objects – by going to the Configuration Items navigation area and choose Configuration Items > Computers > All Windows Computers. In Figure 21, you’ll see that three computer objects have been imported from Active Directory. These are the Service Manager systems (plus the domain controller) in my example domain. In Figure 22, I’ve selected the Users option under Configuration Items to give you a look at the users that were imported.
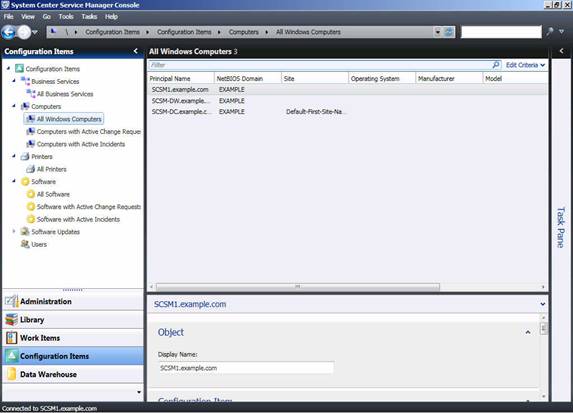
Figure 21: Three computer objects were imported
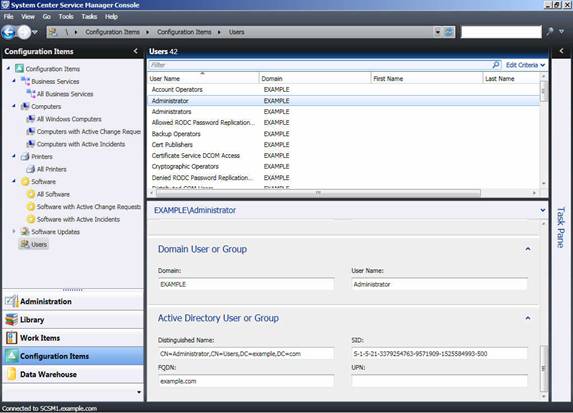
Figure 22: A list of the users imported into Service Manager
Summary
At the conclusion of part three of this series, your new Service Manager system’s installation is complete and the Service Manager and data warehouse components are talking nicely to one another. In part 4, you’ll learn about configuration steps that you need to take to start using your Service Manager system, including settings options related to problems, incidents, activities, change requests and data retention.
If you would like to read the other parts in this article series please go to:


Configuring the Data Warehouse jobs fail with powershell errors.
The first one says: No snap-ins have been registered for Windows Powershell version 5.
The subsequent commands also fails with errors I assume occur because the first error?
Any suggestions? Thanks.