If you would like to read the other parts in this article series please go to:
- The New Philosophy for Server Management in Windows Server 8 (Part 1)
- The New Philosophy for Server Management in Windows Server 8 (Part 2)
- The New Philosophy for Server Management in Windows Server 8 (Part 3)
Throughout this article series, I have shown you things that Microsoft has done in Windows Server 8 to make server management easier – particularly with regard to managing multiple servers. In this article I want to wrap things up by talking about how Microsoft has simplified PowerShell in Windows Server 8.
In the previous article I mentioned that Microsoft had expanded the PowerShell cmdlet library from 200 cmdlets (in Windows Server 2008 and 2008 R2) to roughly about 2300 cmdlets in Windows Server 8. Simple logic would tell you that such a vast expansion of the cmdlet library is going to complicate PowerShell scripting. Even so, Microsoft has taken some steps to make using PowerShell a lot easier than it would otherwise be. One of the best things that they have done is to simplify the command syntax.
One of the more confusing aspects of previous versions of PowerShell involved the use of braces {} and the use of a variable that was designated as $_. In PowerShell 3.0, the syntax has been simplified to reduce or eliminate the need for the braces and the dollar sign variable.
Before I show you how the new syntax works, I want to address a big question that I’m sure many of you have. If you have already got scripts that are written for previous versions of PowerShell, you might be wondering if those scripts will continue to work in PowerShell 3.0 in light of its new syntax. The answer is yes. Although PowerShell 3.0 does take measures to simplify the command syntax, the older style commands will still work. Microsoft retained this functionality for backward compatibility purposes and for the benefit of anyone who might have become comfortable using the older style commands.
To give you a more concrete example of what I am talking about, suppose that we wanted to close Notepad by using PowerShell commands. Assuming that we didn’t know the process name for Notepad we would have to start out by using the following command to retrieve a list of processes:
Get-Process | ForEach {$_.name}
Once we verified that the process used by Notepad was called Notepad, we could shut down the process by entering this command:
Get-Process Notepad | ForEach {$_.kill()}
As you can see in Figure A, this process works, but it is not exactly intuitive.

Figure A: PowerShell commands are sometimes non-intuitive.
So with that in mind, let’s take a look at how these commands have changed in Windows Server 8. The commands that I just discussed still work in Windows 8. In fact, the previous screen capture was taken from the Windows Server 8 beta. However, with PowerShell syntax simplification, the two commands can now be expressed as:
Get-Process | ForEach Name
Get-Process Notepad | ForEach Kill
You can see these commands in action in Figure B.
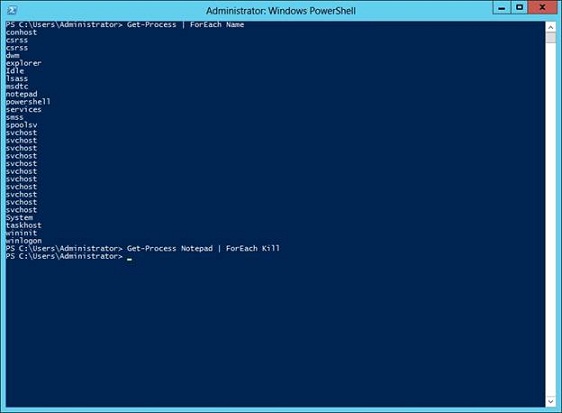
Figure B: Microsoft has simplified the PowerShell command syntax in Windows Server 8.
If you want to try this on your own then there is one more thing that you will have to do. The current Windows Server 8 beta does not seem to have an icon or a menu option for launching Notepad (although it may be hidden somewhere). That being the case, if you need to launch Notepad in order to try this demonstration then the easiest way to do so is to simply type Notepad from within a PowerShell window.
Before I move on, I just want to quickly point out that Get-Process is not the only PowerShell cmdlet that has been simplified. It is merely the cmdlet that I chose to use for demonstration purposes. In Windows Server 8, none of the PowerShell cmdlets will require the use of braces or $_. variable expressions (unless you are specifically needing to assign a variable).
The Integrated Scripting Environment
Microsoft has also made a number of changes to the PowerShell Integrated Scripting Environment (PowerShell ISE). In case you are not familiar with PowerShell ISE, it isn’t new to Windows Server 8. You can see what the Windows Server 2008 R2 version of PowerShell ISE looked like in Figure C.
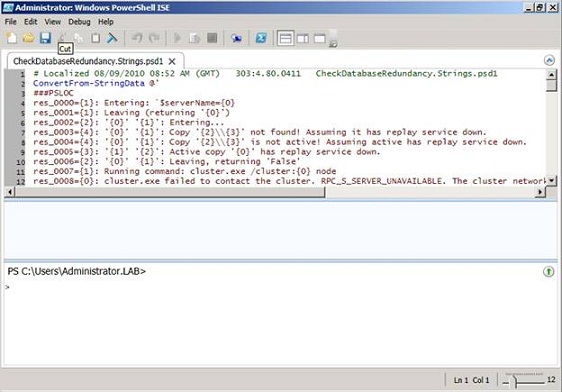
Figure C: This is the Windows Server 2008 R2 version of PowerShell ISE.
You can see the Windows Server 8 version of PowerShell ISE in Figure D. At first the two versions look very similar, but there are some significant differences.

Figure D: This is the Windows Server 8 version of PowerShell ISE.
One of the big differences is the inclusion of IntelliSense. IntelliSense is designed to make typing PowerShell cmdlets easier by acting as an auto complete mechanism. IntelliSense engages when you type certain characters (a dash, a period, double colons, a backslash, or a space after a parameter).
If you look at Figure E, you can see that I typed Get-. As soon as I typed the dash, IntelliSense engaged and began offering suggestions. If I continued to type, the list would be narrowed down based on what I had typed.

Figure E: IntelliSense engages automatically as you type.
Another new feature is that script code is expandable and collapsible. If you look at Figure F, you will notice that the code skips from Line 2 to Line 91. The reason for this is that I have collapsed a block of code. To reveal this block of code, I would simply click on the plus sign icon after the number 2. Collapsing blocks of code can make large scripts easier to work with because you can choose to view only the portions of the code that you need at the given moment.

Figure F: PowerShell ISE allows you to expand and collapse blocks of code.
You might have noticed the Commands window that was shown in Figure D. The Commands window is designed to make it easier for you to run a specific PowerShell cmdlet. All you have to do is find the cmdlet that you want to use, fill in any parameters, and then click the Run button. The cmdlet runs within the PowerShell pane at the bottom of the window, as shown in Figure G.
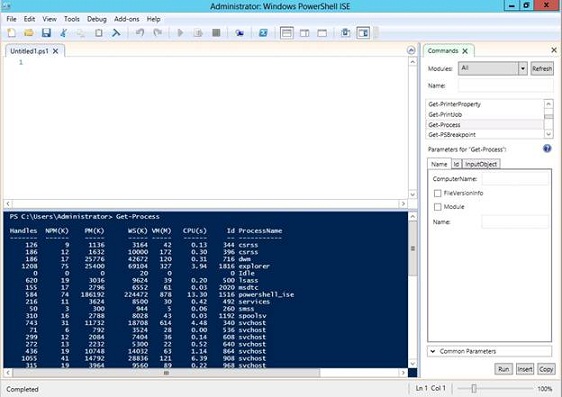
Figure G: The Commands window makes it easy to run PowerShell cmdlets.
You might also have noticed the Insert button shown in the figure above. If you click the Insert button, the cmdlet (and any specified parameters) is inserted into the PowerShell pane, but it is not executed. That way, you can pipeline the cmdlet with other cmdlets, and your command string will not execute until you press Enter.
There is also a Copy button. The Copy button copies the cmdlet (and any specified parameters) to the clipboard so that the cmdlet can be inserted into a PowerShell script.
Conclusion
Throughout this article series, I have tried to stress the idea that server management has changed dramatically in Windows Server 8. If you are experienced with Windows Server 2008 R2 then you will probably be able to find your way around the Windows Server 8 operating system. Even so, there is no denying that the new Server Manager and the new version of PowerShell take some getting used to.
If you would like to read the other parts in this article series please go to:


